
I’ve been searching for a statement piece that truly captures the drama of monarch butterfly wings, and this cape is my absolute favourite find. The way those orange and amber cells fan out from the shoulders, separated by bold black veins, creates a wearable work of art. If you’ve been wanting to try intarsia colorwork or just need a showstopping project for your next craft fair or costume event, this is the one I keep coming back to.
Get the Ad-Free PDF Pattern
You can find the free pattern below, or you can purchase the ad-free printable PDF from my shop.
Get the Printable PDF →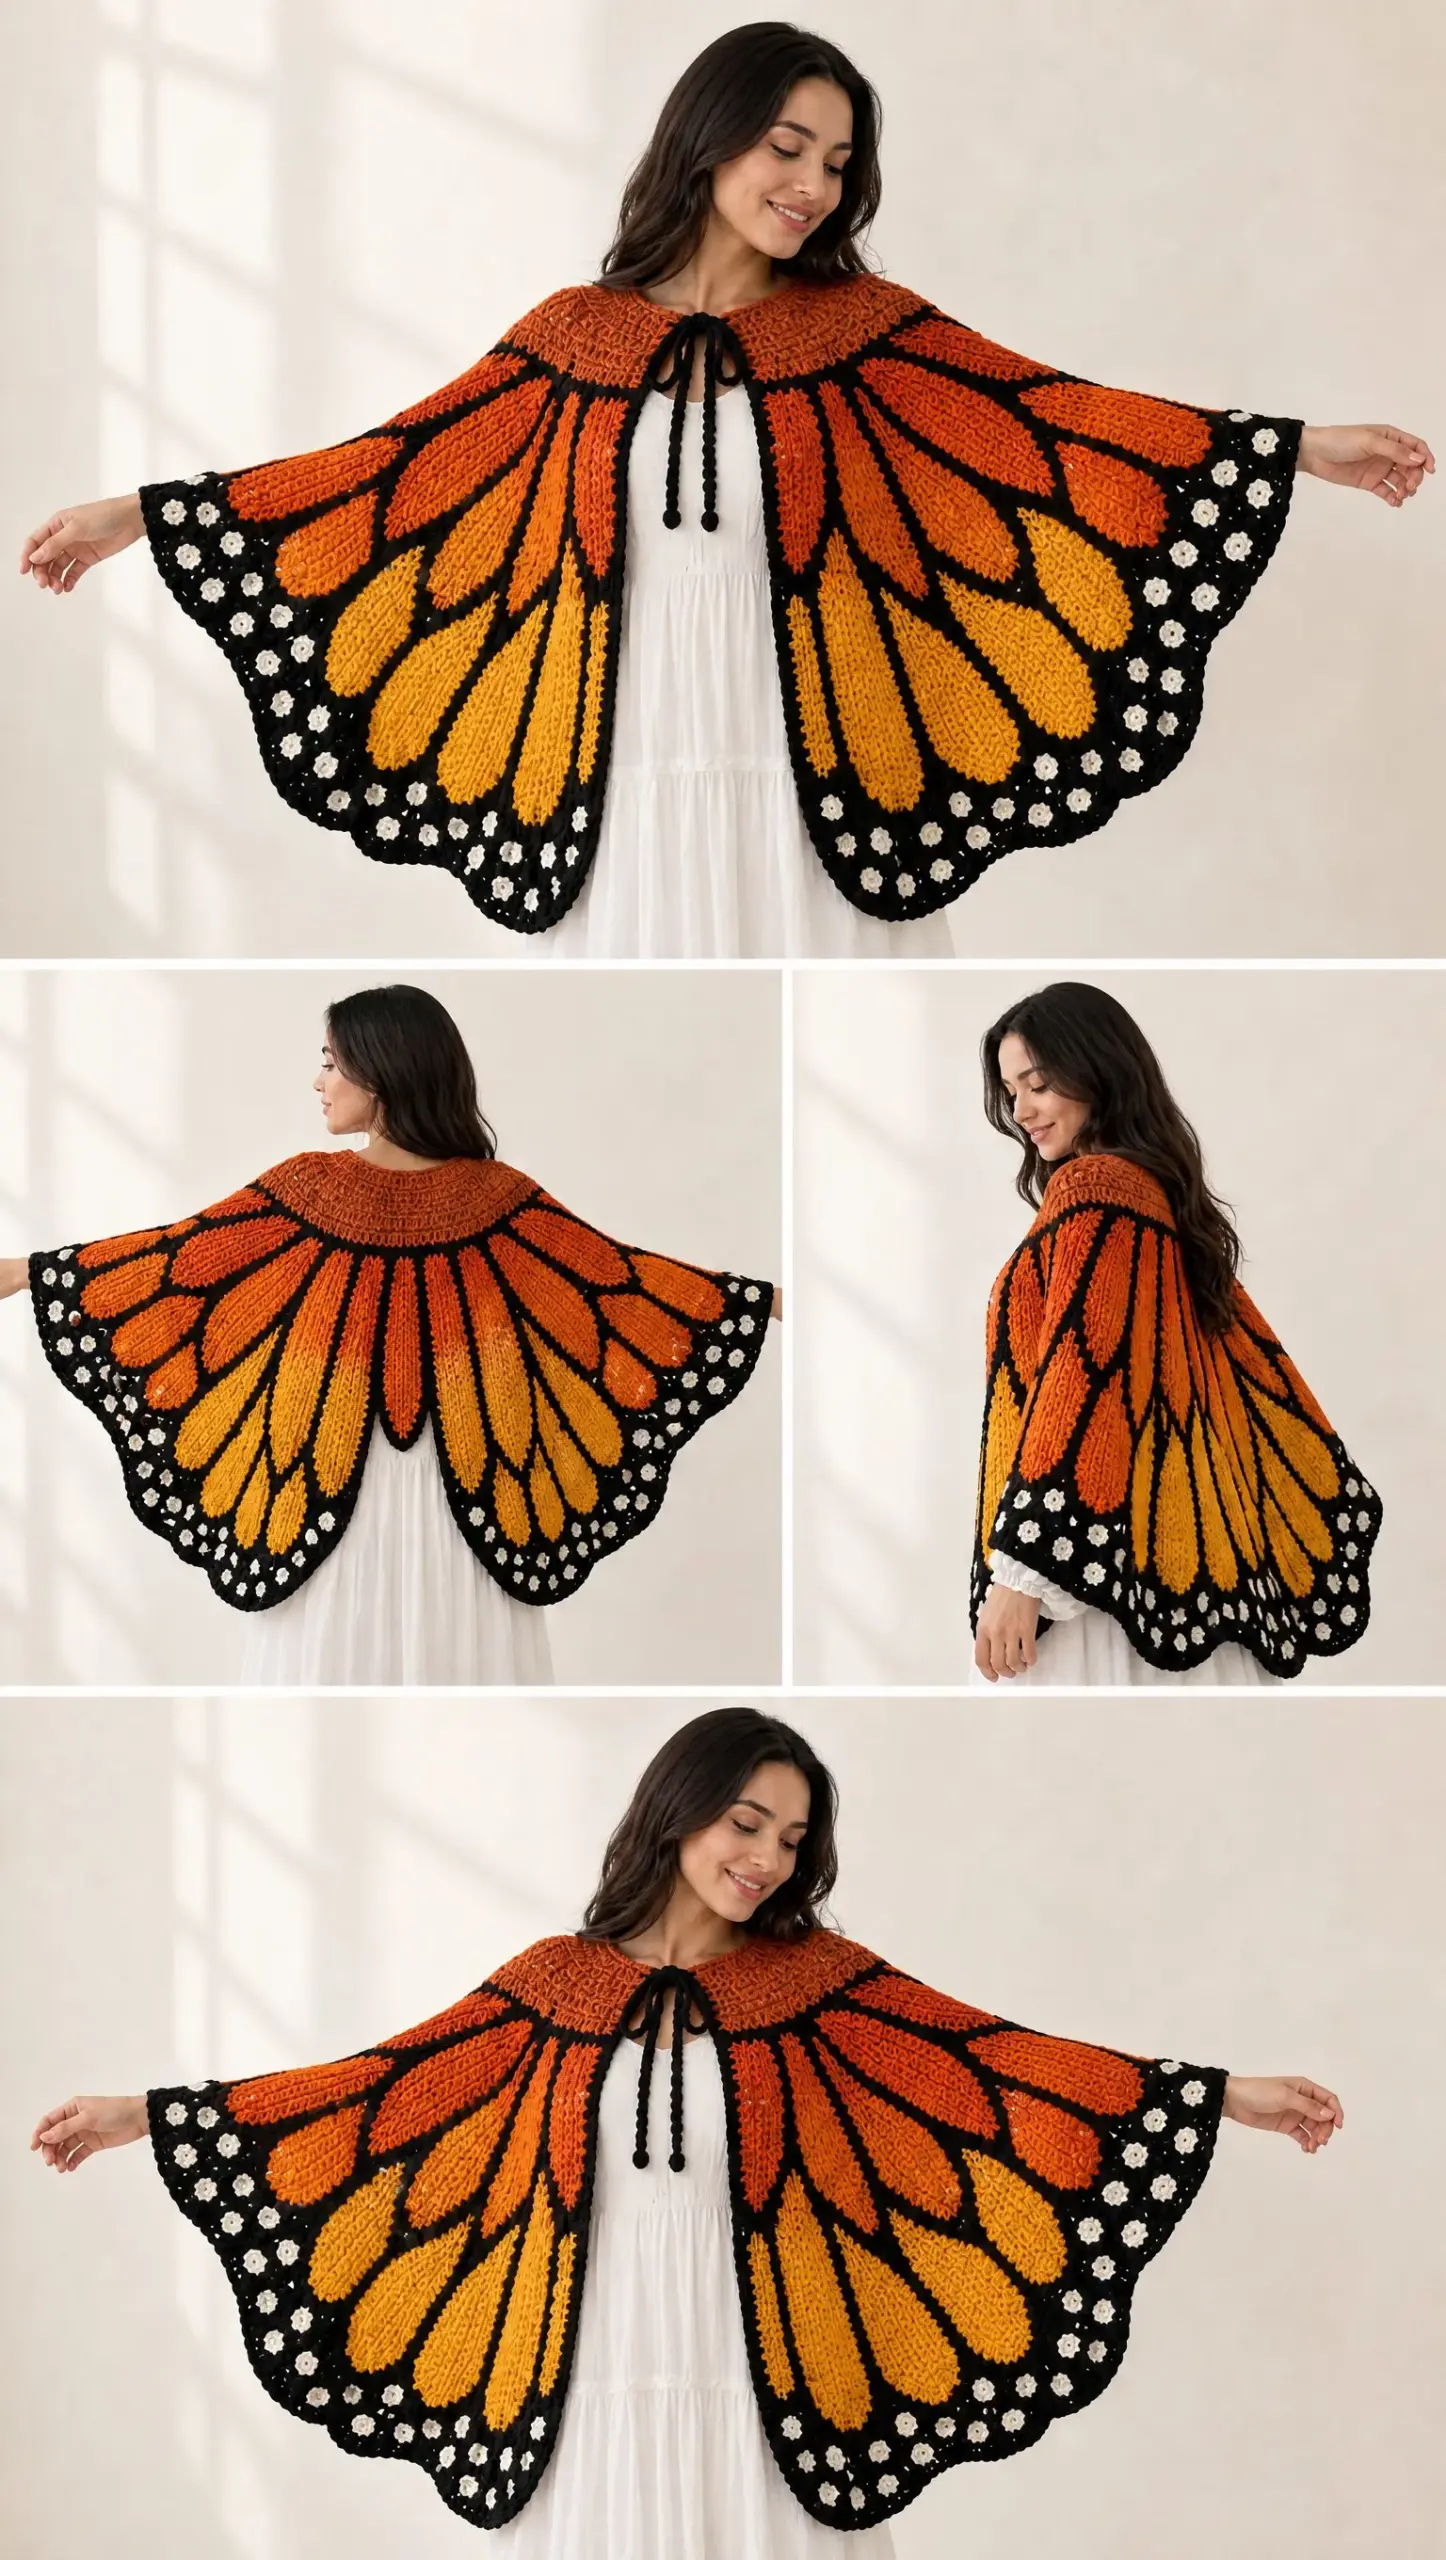
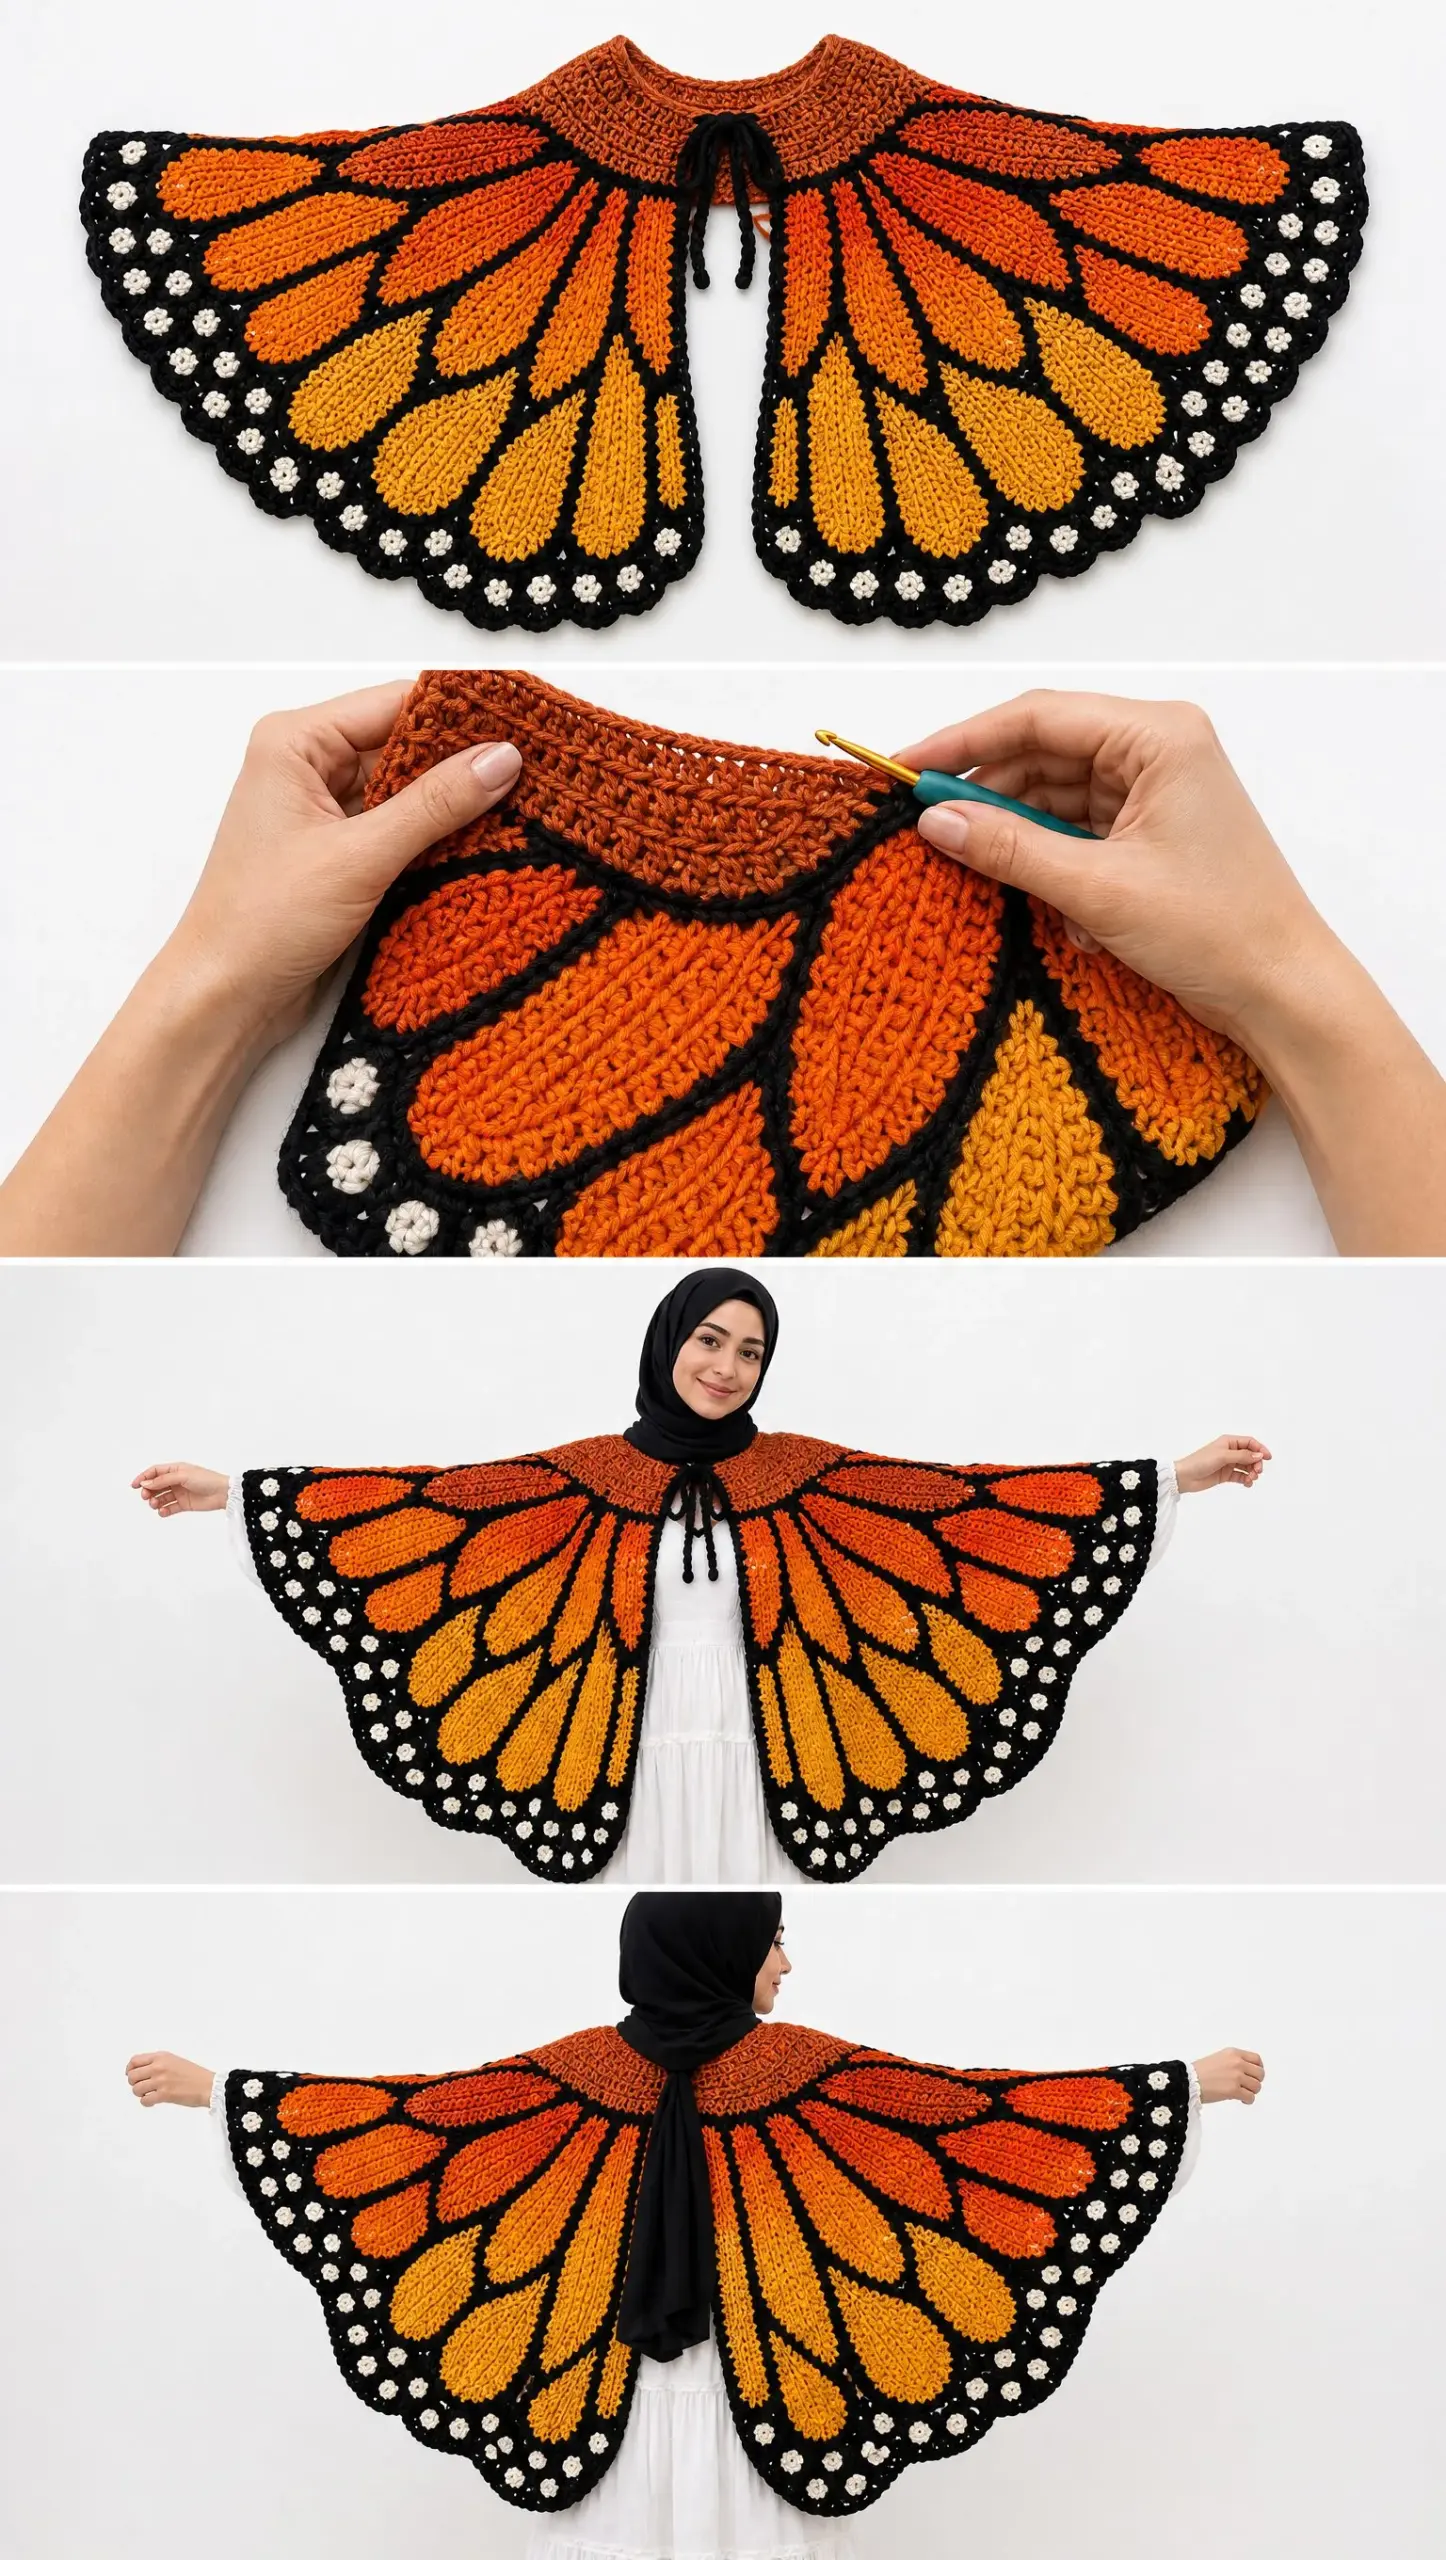
The Amber Monarch Butterfly Cape uses dense single crochet throughout, which means the fabric is sturdy and the color blocks stay crisp. You will work from the top down, starting with a burnt orange shoulder yoke and then building out two mirrored wing panels with those gorgeous tapered cells. The ivory spots along the black border are worked directly into the edging, so there is no sewing required at the end.
This is an intermediate to advanced project, but please do not let that scare you off. If you can single crochet confidently and are willing to manage a few yarn bobbins, you can absolutely do this. I will walk you through every section, from the yoke shaping to the scalloped lower lobes.
Why This Monarch Butterfly Cape Pattern Works
The construction is smart. Instead of crocheting separate pieces and seaming them together, you work the entire cape as one continuous flat piece. The shoulder yoke creates a natural rounded neckline, and the wing panels expand outward with strategic increases. This means less finishing work and a cleaner final look.
The colorwork technique is intarsia single crochet. Each orange or amber cell has its own small yarn bobbin, and you switch colors by completing the final yarn over of a stitch with the new color. The black veins are not embroidered on top. They are built right into the fabric as you go, which gives them that flat, graphic quality you see in the photos.
Materials You Will Need
For the M/L size, gather these supplies before you start. The pattern includes five sizes from XS/S through 5X, so adjust your yarn quantities accordingly.
Yarn A, Black: 850 to 950 meters (930 to 1040 yards) of medium weight smooth cotton or cotton acrylic blend, category 4
Yarn B, Pumpkin Orange: 550 to 650 meters (600 to 710 yards) of the same base yarn
Yarn C, Honey Amber: 350 to 450 meters (380 to 490 yards)
Yarn D, Burnt Orange: 220 to 300 meters (240 to 330 yards)
Yarn E, Ivory: 80 to 110 meters (90 to 120 yards)
Hook: 4.0 mm (US G/6), or the size needed to achieve gauge
Other supplies: Locking stitch markers, tapestry needle, scissors, row counter, blocking mats and pins
A smooth plied yarn gives you the cleanest vein edges. Avoid fuzzy halo yarns or very stretchy yarns because they will soften the sharp graphic geometry of the monarch cells.
Gauge
18 single crochet stitches by 20 rows equals 10 cm by 10 cm (4 inches by 4 inches) after wet blocking, worked flat in single crochet through both loops.
Make a colorwork swatch with at least three vertical black lines before you begin. If your swatch pulls inward at the color changes, leave slightly more slack on the carried edge or use separate bobbins for each cell.
Sizing Information
Choose your size based on upper back and shoulder breadth plus your desired wingspan, not bust circumference. The front remains open, so there is no fitted ease requirement.
| Size | Yoke Neck Width | Center Back Length | Full Wingspan |
|---|---|---|---|
| XS/S | 44 cm / 17.3 in | 67 cm / 26.4 in | 142 cm / 56 in |
| M/L | 48 cm / 18.9 in | 72 cm / 28.3 in | 154 cm / 60.6 in |
| XL/2X | 52 cm / 20.5 in | 77 cm / 30.3 in | 168 cm / 66.1 in |
| 3X/4X | 56 cm / 22.0 in | 82 cm / 32.3 in | 182 cm / 71.7 in |
| 5X | 60 cm / 23.6 in | 86 cm / 33.9 in | 192 cm / 75.6 in |
The photographed cape is closest to M/L proportions.
Abbreviations and Definitions
ch = chain: wrap yarn over hook and pull through the loop on your hook
sc = single crochet: insert hook into stitch, yarn over, pull up a loop (2 loops on hook), yarn over, pull through both loops
sl st = slip stitch: insert hook, yarn over, pull through stitch and loop on hook in one motion
st(s) = stitch or stitches
inc = increase: work 2 single crochet stitches into the same stitch
dec = decrease: single crochet two together by inserting hook into first stitch, pulling up a loop, inserting into second stitch, pulling up a loop, then yarn over and pull through all three loops
RS / WS = right side / wrong side
pm / sm = place marker / slip marker
FO = fasten off
Understanding the Construction
The cape has three integrated parts: the shoulder yoke, two mirrored wing panels, and the black finishing border.
The shoulder yoke is a shallow semicircle worked in burnt orange with a black neckline. You start with a foundation chain, work a few rows of black for the neck band, then switch to burnt orange and increase gradually to create that rounded shoulder shape.
The wing panels are divided into five zones: left upper wing, left lower wing, center back, right lower wing, and right upper wing. The upper wings get pumpkin orange cells, while the lower wings use honey amber and golden amber tones. Black veins separate each cell, starting 4 to 6 stitches wide near the shoulder and tapering to 2 stitches at the outer edge.
The scalloped lower lobes are shaped with staggered decreases and stepped sections. You do not need to learn short rows. Simply finish a row before the previous edge, turn, and work back. The black edging smooths everything into beautiful rounded lobes.
Step by Step Instructions
Part 1: The Shoulder Yoke
Foundation: With black yarn, chain 79 (87, 95, 103, 111) for size XS/S (M/L, XL/2X, 3X/4X, 5X). This becomes your rounded neckline edge.
Row 1 (WS): Single crochet in the second chain from hook and in each chain across. Turn. You now have 78 (86, 94, 102, 110) sc.
Rows 2 through 4: Chain 1, single crochet across. Turn. This creates the black neck band.
Row 5: Change to burnt orange. Chain 1, sc 5, increase in the next stitch. Repeat this pattern across as evenly as possible. Add 13 (14, 15, 17, 18) stitches total. Turn.
Rows 6 through 10: Single crochet across, increasing 8 (9, 10, 11, 12) stitches evenly on every right side row only. Move your increase points from row to row so no visible spokes form.
Rows 11 through 20: Continue in burnt orange, adding 6 stitches evenly every right side row. Stop early or add 2 rows if your yoke depth reaches 13 (14, 15, 16, 17) cm before or after Row 20.
Your final yoke target is approximately 143 (157, 171, 185, 199) stitches across the lower edge. A difference of 2 to 4 stitches is fine. Distribute any differences in the upper wing zones.
Part 2: Marking the Wing Zones
With the right side of your yoke facing you, place markers across the final yoke row. For M/L size, use this exact division:
For other sizes, use these approximate percentages: upper wings 27% each, lower wings 20% each, center back 6%. Visual symmetry matters more than a one stitch difference between sides.
Part 3: Main Wing Body Shaping
Before placing detailed color cells, establish the expanding butterfly silhouette. Work all shaping rows in the color indicated by your color plan.
Rows 1 through 6: Increase 1 stitch at each outer edge every row. Additionally, increase 1 stitch immediately before and after each upper/lower wing boundary marker on right side rows.
Rows 7 through 18: Increase 1 stitch at each outer edge every right side row. Increase at the four wing boundary points every 4th row.
Rows 19 through 34: Work even at center. Continue outer edge increases every 3rd row. Begin broad upper wing flare by adding 1 stitch inside each upper wing zone every 6th row.
Rows 35 through 48: Work even across center and upper wings. Begin lower lobe flare by adding 1 stitch on each side of both lower wing zones every 5th row.
Rows 49 through 60: Work even except at the outer edge, where you increase every 4th row. This is the widest spread.
Measurement checkpoint: At Row 48, the vertical distance from the lower yoke edge should be about 32 to 36 cm. At Row 60, the total cape width should be about 86 to 90 percent of your target full wingspan.
Row 61 onward: Begin stepped decreases for the lower scallops and outer tips as described in Part 5.
Part 4: Monarch Colorwork Layout
Treat each half wing as a set of elongated cells. Mirror every left side instruction on the right. Cell numbers begin nearest the center back and move outward.
Upper Wing Cells:
Lower Wing Cells:
Color Sequence by Row Band:
Rows 1 through 12: Mostly burnt orange foundation with black branching separators beginning 2 to 3 stitches wide from the yoke. Introduce U1 and L1 shapes.
Rows 13 through 28: Expand U1 through U3 in pumpkin and L1 through L2 in amber. Keep black veins 2 to 4 stitches wide. Begin U4 near the outer third of each half wing.
Rows 29 through 44: Widen U3 and U4, add U5 at the tip, and develop L2 through L4. Shift color boundaries one stitch at a time every 2 to 4 rows to create tapered oval cells.
Rows 45 through 60: Close the lower ends of upper cells gradually by replacing 1 to 2 orange stitches with black every 2 rows. Continue the lower amber cells farther downward.
Rows 61 to end: Lower cells taper to points as the scalloped lobes are shaped. The last 4 to 6 body rows before edging should be mostly black around the perimeter.
Part 5: Shaping the Lower Wing Lobes
Begin when your center back length is approximately 8 to 10 cm shorter than the finished measurement.
Lobe A, outer upper tip: At the beginning of the next 6 right side rows, stop 3 stitches before the previous outer edge, turn, and work back. This rounds the upper tip rather than leaving a sharp triangle.
Lobe B, outer lower scallop: On the next 8 right side rows, stop 2 stitches earlier at the outer edge each time. Then work 4 rows even across the shortened section.
Lobe C, center lower scallop: Mark the center of each lower wing zone. Over 10 rows, decrease 1 stitch at each side of the lower wing zone every other row, while keeping the middle 10 to 16 stitches nearly full length. This produces a rounded drop lobe.
Center back: Keep the center 9 stitches 3 to 5 rows longer than the adjacent lower wing edges, then decrease 1 stitch at each side for 3 rows to make a gentle center point.
Repeat all shaping in mirror image for the opposite wing. When the silhouette looks balanced and reaches target length, fasten off all cell colors, leaving black attached if convenient for the border.
Part 6: Black Outer Border
Border Round 1: With right side facing and black yarn, join at the right neck edge. Work single crochet evenly around the entire outer edge, placing approximately 2 sc in every 3 row ends along vertical or diagonal sections and 1 sc in each stitch along horizontal sections. At each lower lobe tip, work 3 sc in one point stitch.
Border Rounds 2 through 5: Single crochet around. Work 3 sc in each lobe tip stitch on Rounds 2 and 3 only, then work even on Rounds 4 and 5. This creates a broad clean black frame approximately 2.5 to 3.5 cm wide.
Border Round 6: Single crochet around. At the bottom of each lower lobe, work [sc, ch 1, sc] in the tip stitch to define a soft scallop without lace.
Part 7: Ivory Monarch Spots
The spots are worked as tiny intarsia dots inside the black border during Rounds 3 through 5.
Large spot: On Round 3, work 2 ivory sc in black. On Round 4, work 3 ivory sc centered over them. On Round 5, work 2 ivory sc centered over the 3. Return to black.
Small spot: Work 1 ivory sc on one round, 2 ivory sc centered on the next, then 1 ivory sc on the third round.
Alternate large and small spots every 4 to 7 stitches around the outer upper wing and every 5 to 8 stitches around the lower lobes. Stagger the second row of spots so they do not form rigid vertical columns.
Part 8: Neckline and Ties
Neck edging: With black and right side facing, join at one front neck corner. Work 1 row of sc evenly across the neckline. Work a second row of sc, placing a decrease at each rear neck corner if the band flares.
Left tie: At the left front neck corner, chain 42 to 48. Slip stitch in the second chain from hook and each chain back to the neckline. Slip stitch into the neckline and fasten off.
Right tie: Repeat on the opposite side. For a thicker cord, work 2 rows of sc over a 35 to 40 chain instead of slip stitches.
Optional: add one small black crochet ball or knot at each cord end.
Finishing Your Monarch Butterfly Cape
Weave in ends: Weave each color into matching stitches for at least 4 to 5 cm, reverse direction once, and trim only after blocking.
Close intarsia gaps: If a join shows daylight, use the matching yarn tail to make one discreet duplicate stitch on the wrong side.
Wet block: Soak in cool water with a small amount of wool wash or mild detergent. Press out water in a towel without wringing.
Pin: Spread the upper wings widely, shape the lower lobes symmetrically, and pin the black border flat. Measure from center back to both outer tips to keep them equal.
Dry fully: Leave pinned until completely dry. Steam only if your yarn fiber safely tolerates heat.
Fit Adjustments
More wingspan: Add 1 outer edge increase every 4 rows for 8 to 12 additional rows before lobe shaping.
Less wingspan: Stop outer edge increases 6 to 10 rows earlier.
Longer cape: Add rows mainly to L1 through L4 lower cells. Do not extend upper tips equally or the wings become rectangular.
Shorter cape: Begin lower lobe shaping 6 to 12 rows sooner.
Broader shoulders: Add 8 to 16 foundation chains and distribute the added stitches into the two upper wing zones.
Narrower neck: Work one extra black neck row with 4 to 8 evenly spaced decreases.
More dramatic scallops: Add 2 extra shortening steps to each lower lobe before edging.
Troubleshooting Common Issues
Wing edges curl inward: Your border is too tight. Rework Border Round 1 with more stitches along row ends.
Veins look wavy: Color change tension is inconsistent. Loosen the new color slightly for the first stitch after each change.
Cape feels too heavy: Use a lighter cotton blend while maintaining gauge, or reduce black border from 6 rounds to 4.
Upper wings droop: Block firmly and add one extra black sc round to the outer upper edge only.
Cells look too square: Shift one color boundary stitch every 2 to 3 rows to create longer, more tapered ovals.
Remember that monarch wings are naturally irregular. Small differences between the left and right cells can look beautiful as long as the overall wing outline, black vein rhythm, and border width remain balanced.
Final Thoughts
This Amber Monarch Butterfly Cape crochet pattern is a true labor of love, but the results are absolutely worth every bobbin change and color shift. When you spread those wings for the first time after blocking, you will understand why this project has captured so many crafters’ hearts.
Thank you so much for choosing this pattern for your next project. I would love to see your finished cape, so please share your photos with me on Instagram or in our Facebook group. Save this pattern to your Pinterest boards so you can find it when you are ready to start, and leave a comment below if you make one. I cannot wait to see your monarch wings take flight.
Want a Quick & Easy Printable Version?
Get a clean, beautifully formatted PDF of this pattern — easy to follow step by step, ready to print or save on any device. No scrolling, no distractions, just the pattern.
Get the Printable PDF →