
This is hands down one of the MOST stunning table projects I have ever made. We are talking about a gorgeous round placemat that looks like it belongs in a fancy home decor magazine, but I promise you it is totally doable for anyone comfortable with basic crochet stitches.
Get the Ad-Free PDF Pattern
You can find the free pattern below, or you can purchase the ad-free printable PDF from my shop.
Get the Printable PDF →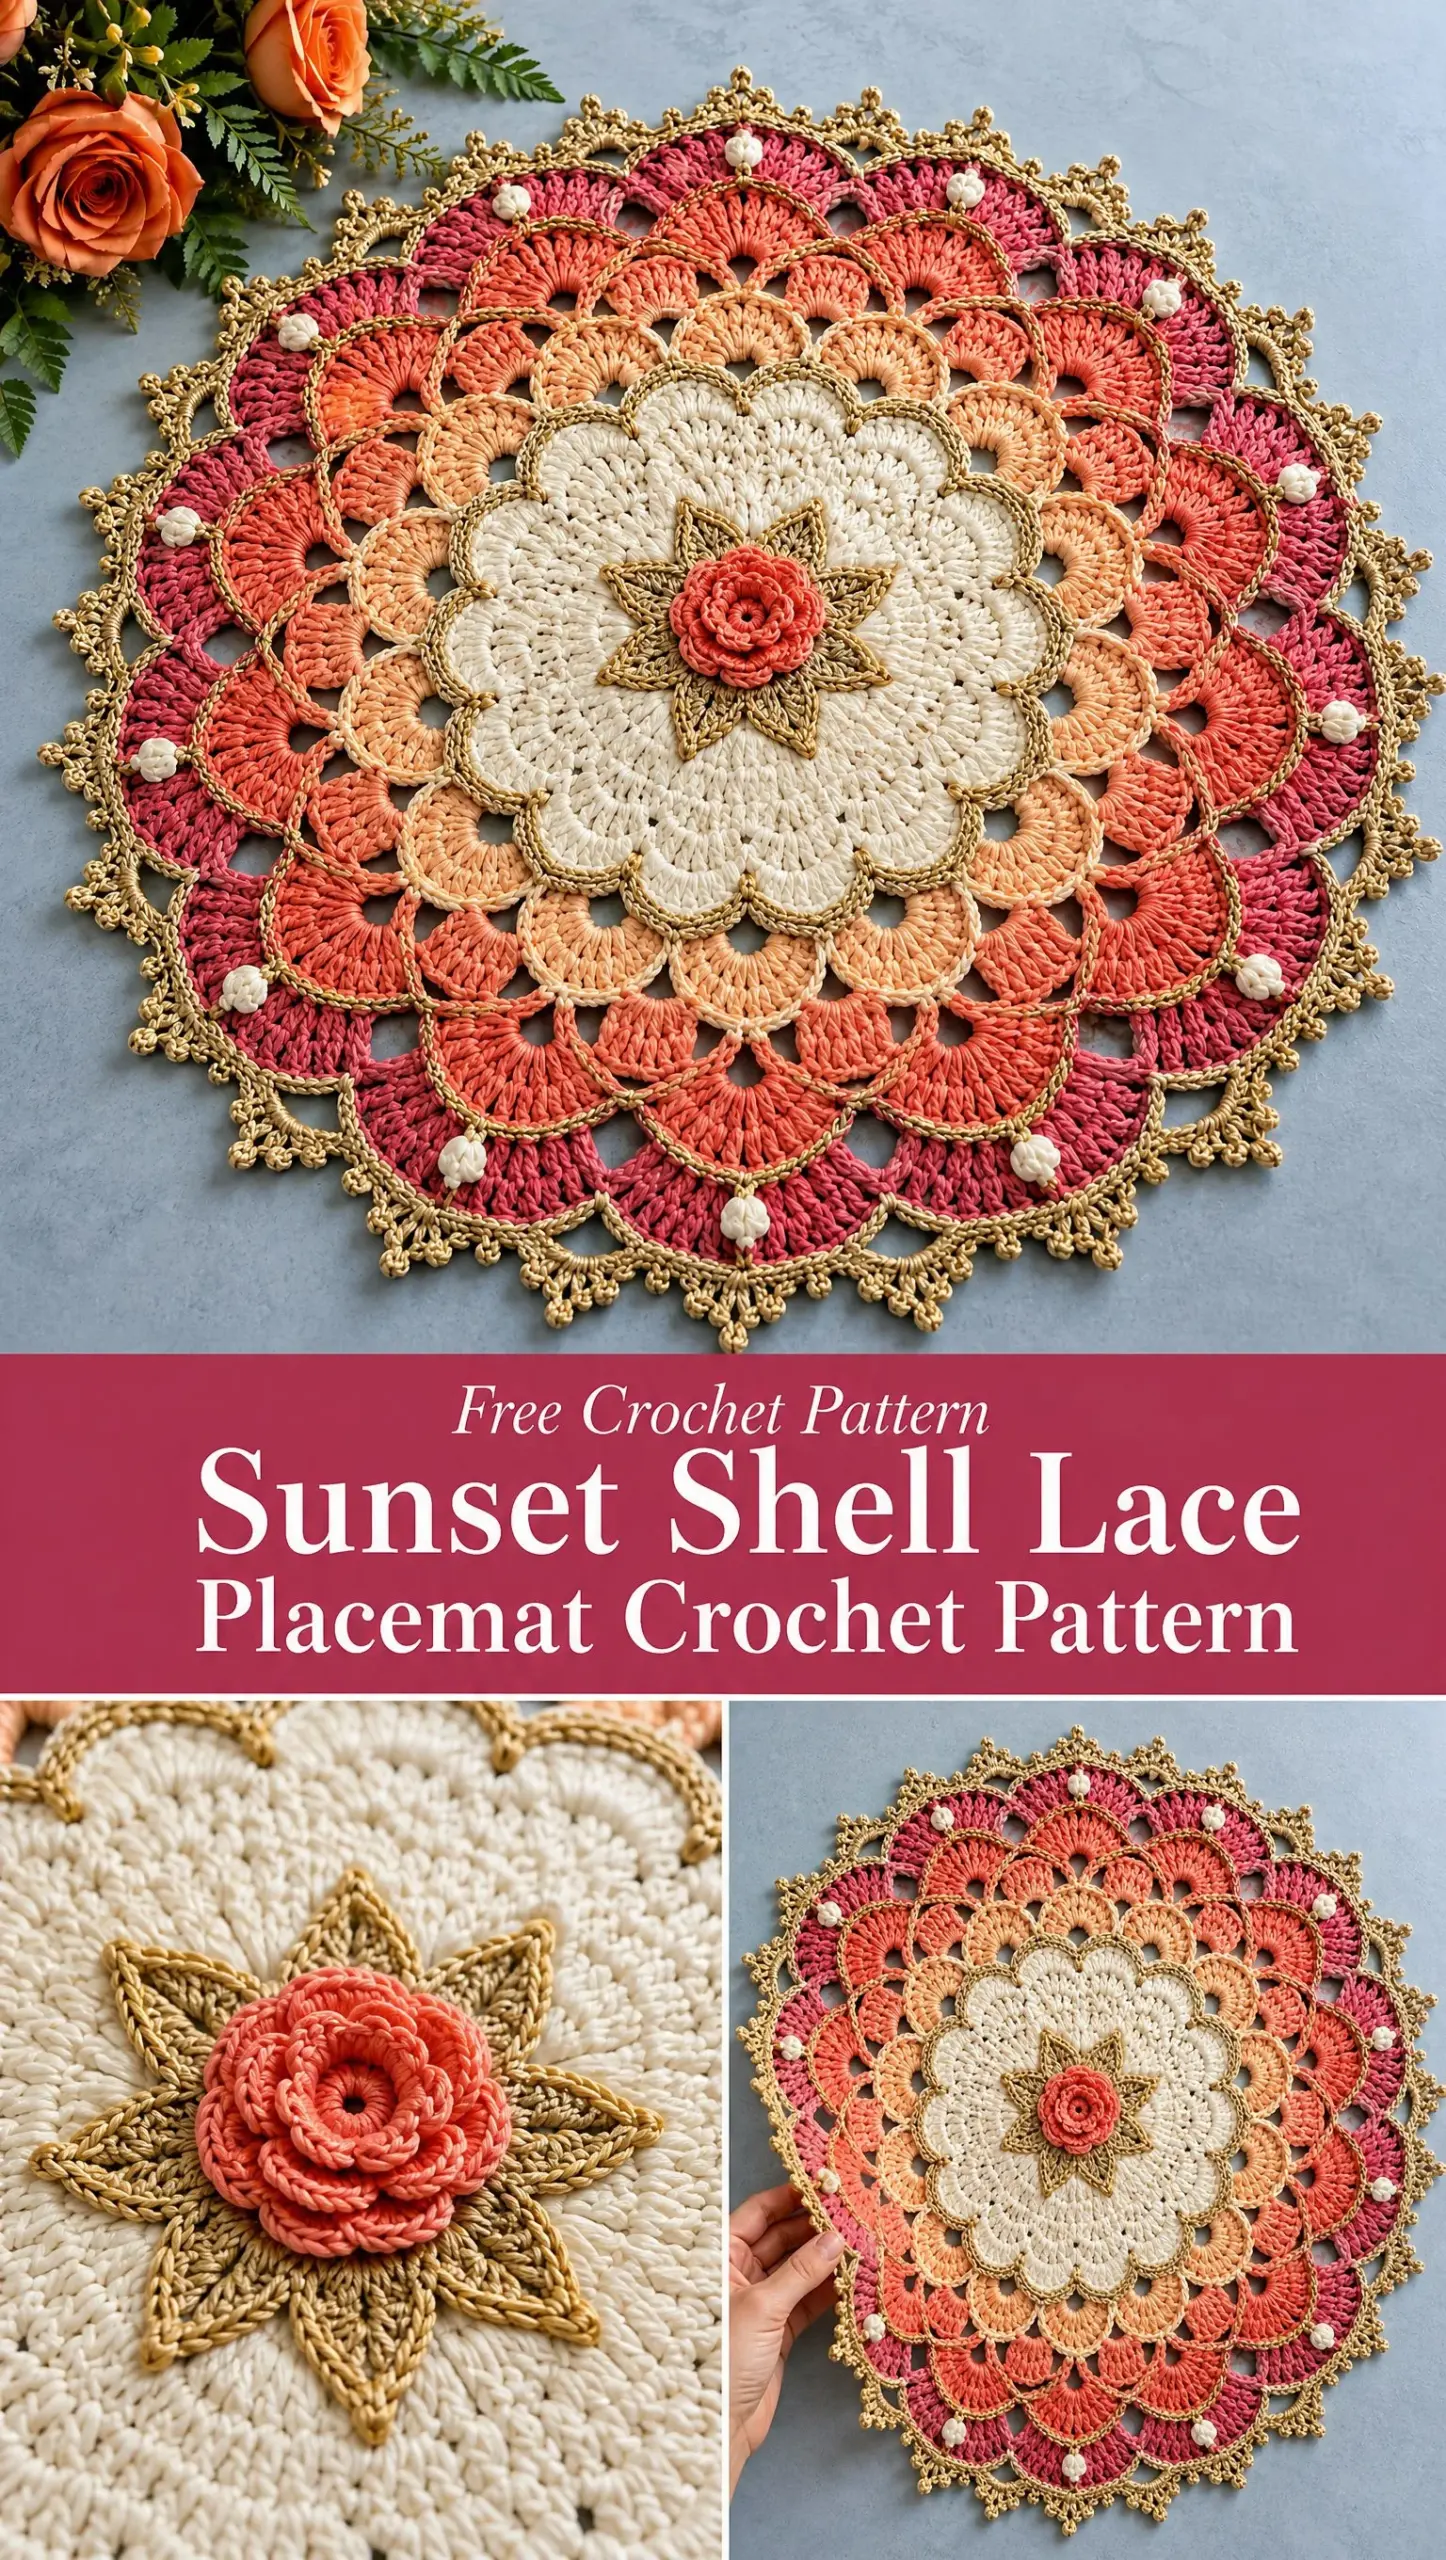
The Sunset Shell Lace Placemat uses a beautiful gradient of sunset colors, from coral and peach to berry pink, all framed with champagne gold accents. It works up in joined rounds from the center out, which means you get to watch this beauty bloom right before your eyes. The finished piece measures about 39 to 42 cm (15.5 to 16.5 inches) across, making it the perfect size for a charger plate or a decorative centerpiece.
Whether you want to dress up your dining table or create a stunning handmade gift, this placemat delivers serious wow factor. Let me walk you through everything you need to bring this sunset inspired project to life.
About This Crochet Pattern
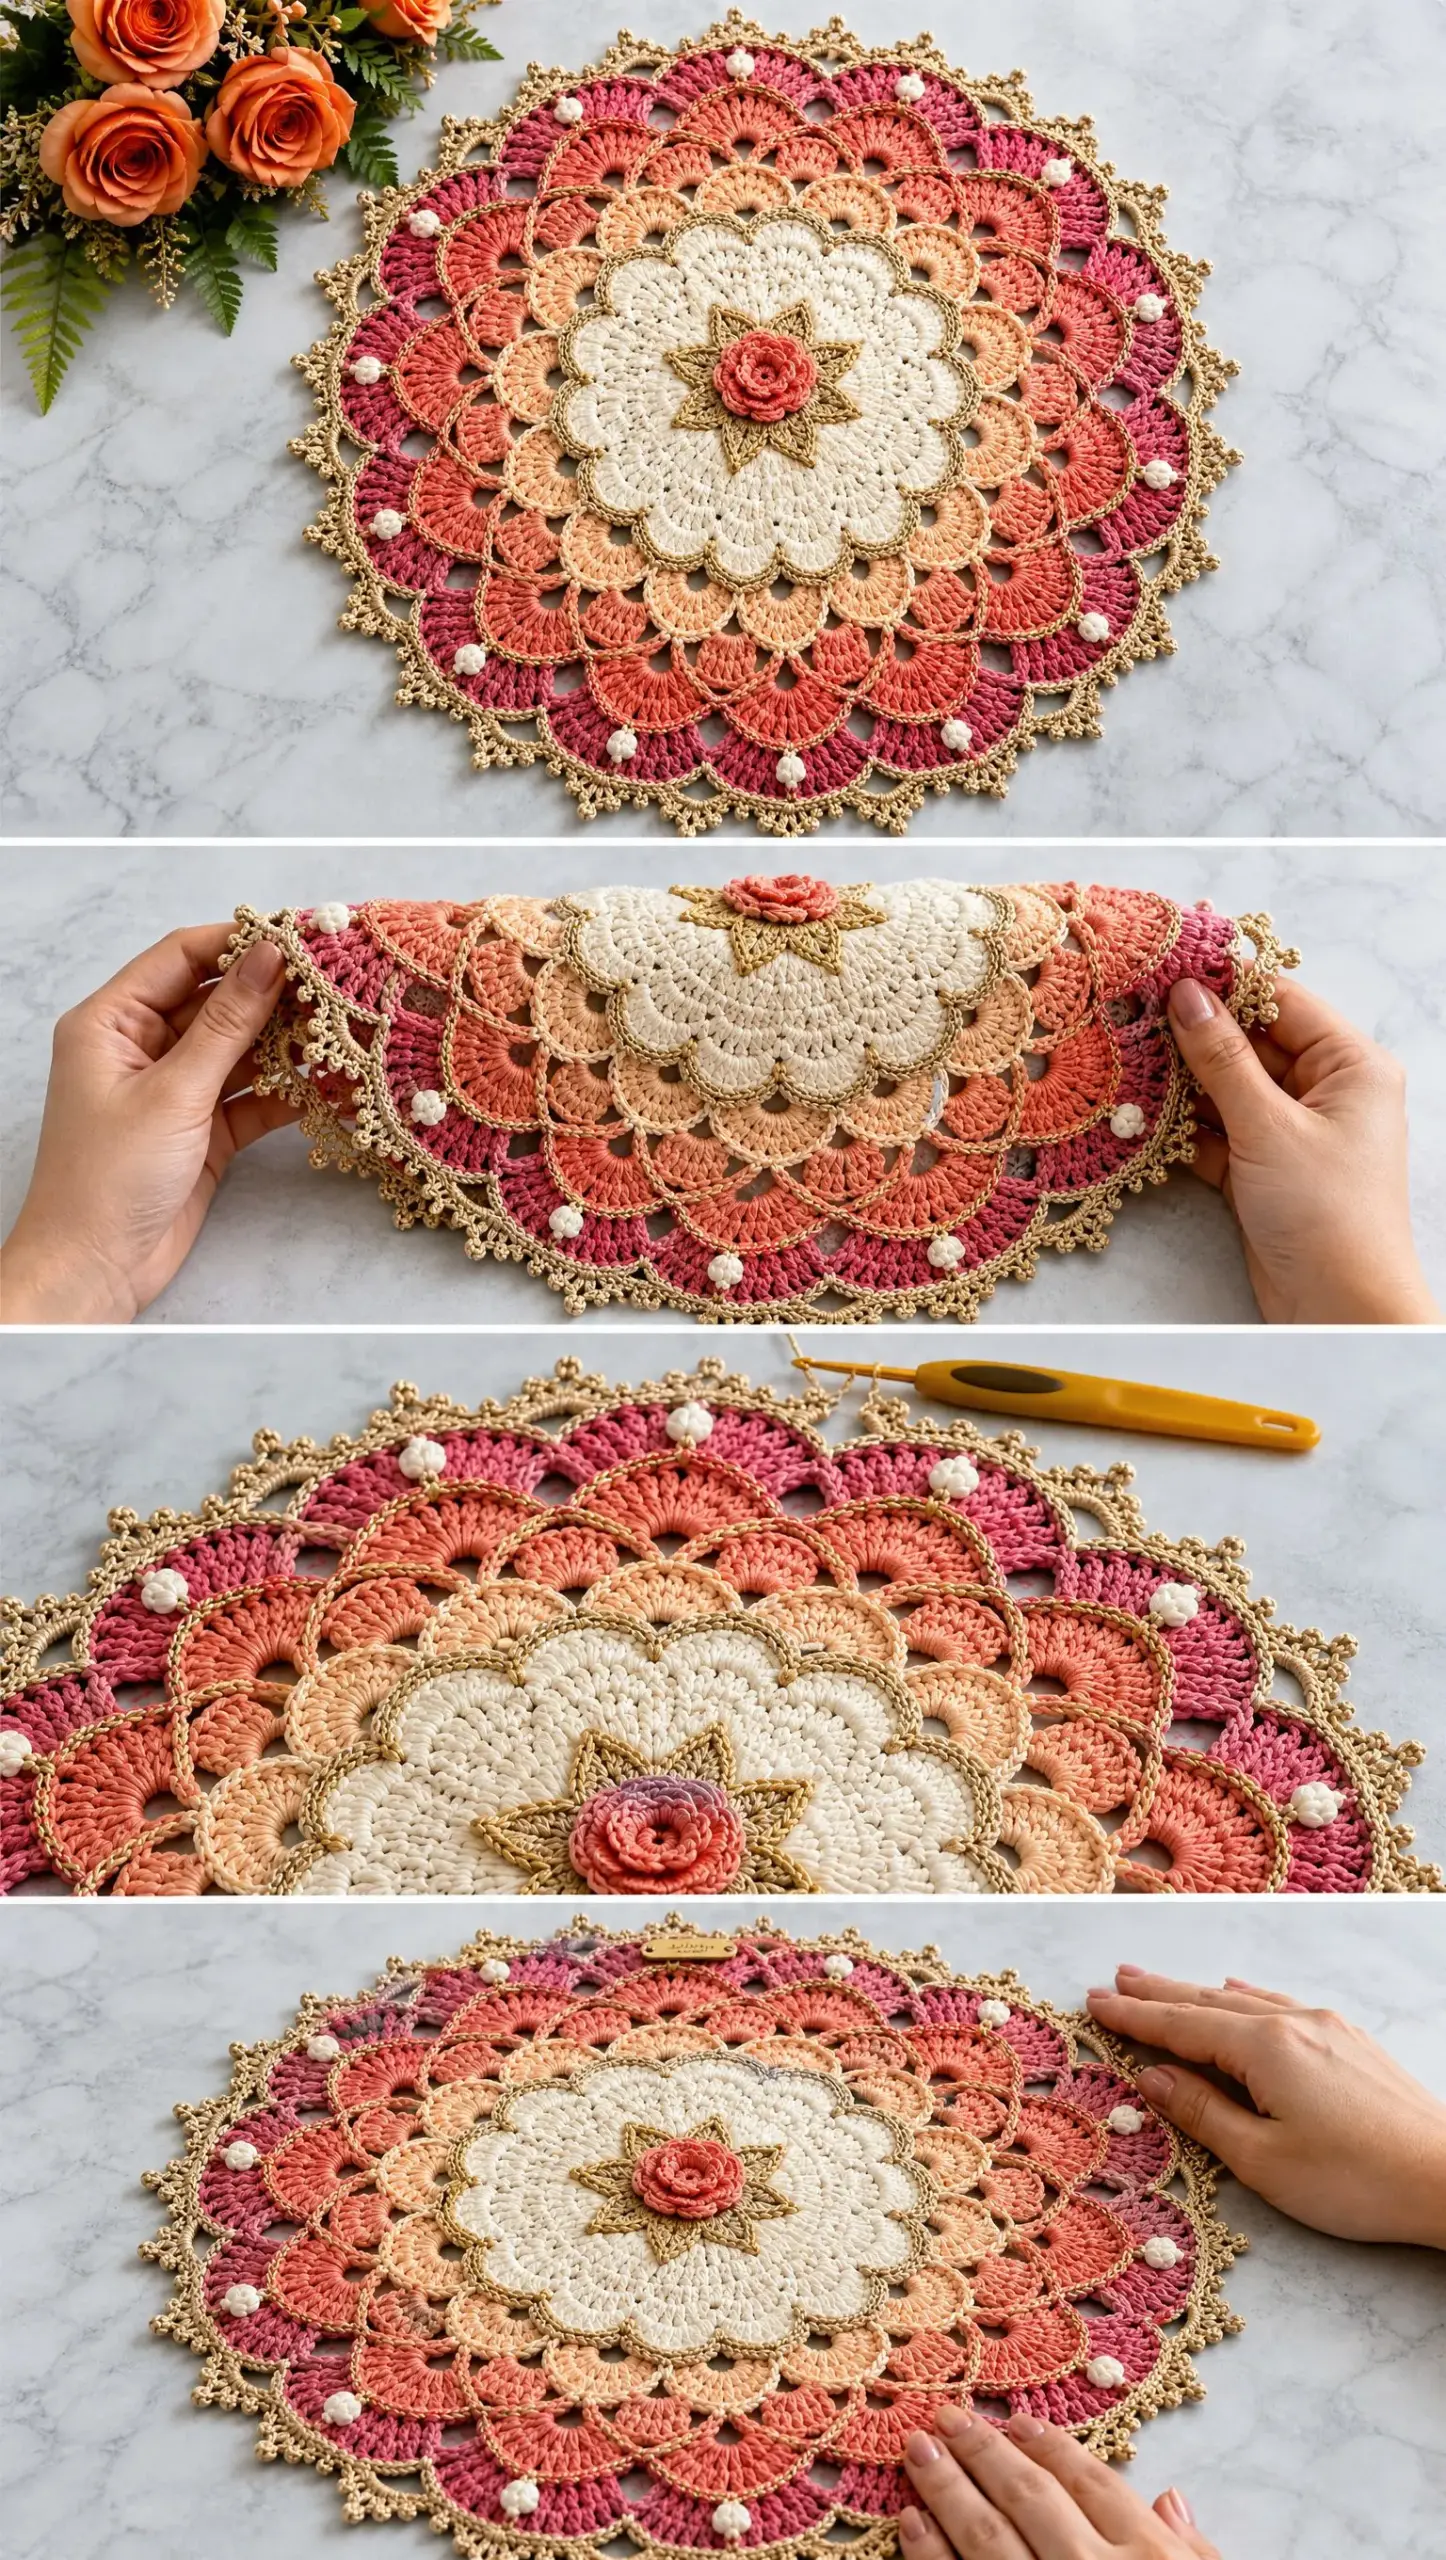
The design begins with a tiny dimensional coral rosette nestled inside a champagne gold eight point star. From there, a broad warm ivory scalloped medallion forms a flat, plate friendly center. Four staggered open shell rings then move outward through pale apricot, peach, vivid coral, and berry pink. Fine gold surface lines trace the scallops, ivory bobbles mark every second outer junction, and a lacy gold picot border finishes the edge beautifully.
This is rated as an intermediate level pattern because it involves color changes, surface crochet, and some textured stitches. However, if you are comfortable reading patterns and have made a few projects in the round, you can absolutely tackle this.
Materials You Will Need
Gathering your supplies before you start makes the whole process smoother. Here is what you need for this project:
Yarn:
Hook:
Notions:
Gauge and Finished Size
Gauge after light blocking: 20 double crochet (dc) stitches equals 10 cm / 4 inches, and 10 dc rows equals 10 cm / 4 inches in a flat swatch.
Here is the good news: exact gauge is less important than achieving a flat fabric. The ivory center after Round 12 should measure approximately 22 to 23 cm (8.75 to 9 inches) across. The completed placemat should measure about 39 to 42 cm (15.5 to 16.5 inches).
Troubleshooting tip: If your work is cupping, loosen your tension or add a chain to the next open arch. If it is ruffling, tighten your tension or remove a chain from the next arch. Make any changes evenly around the round.
Abbreviations and Stitch Definitions
Before we dive into the pattern, let me explain all the abbreviations you will encounter. I always define these first because nothing is more frustrating than getting stuck on unfamiliar terms.
Special Stitches Explained
These special techniques give the placemat its unique dimensional texture. Do not worry if they sound complicated. I will explain each one clearly.
Magic ring: Form an adjustable loop, work the required stitches into it, then pull the tail to close. This creates a tight center with no hole.
3-dc cluster (3-dc cl): [Yo, insert hook in indicated sp, yo and pull up a loop, yo and draw through 2 loops] 3 times, yo and draw through all 4 loops on hook. This creates a textured bump.
5-dc shell: Work 5 dc in the same ch-sp. Shells create those beautiful scalloped edges.
7-tr fan: Work 7 tr in the same ch-sp. Fans are taller and more dramatic than shells.
Ivory bobble: With ivory, work a 3-dc cl in the indicated junction, ch 1 tightly to close. Carry no ivory between bobbles. Join and cut for each bobble or use small butterfly bobbins.
Gold surface trace: Hold yarn under the work. Insert hook from front to back and back to front around the top edge of a scallop and make loose surface slip stitches following the curve. Keep these stitches decorative and relaxed so they do not draw in the fabric.
Pointed fan: (sc, ch 3, dc, picot, dc, ch 3, sc) in the same ch-sp.
Color Sequence Overview
Understanding where each color goes helps you plan your yarn changes. Here is the breakdown:
| Section | Color | Purpose |
|---|---|---|
| Center rosette | Vivid coral | Tiny dimensional flower |
| Star | Champagne gold | Eight point frame around rosette |
| Main medallion | Warm ivory | Flat, broad scalloped plate center |
| Fan ring 1 | Pale apricot | Softest transition |
| Fan ring 2 | Peach | Warm mid tone |
| Fan ring 3 | Vivid coral | Strong sunset band |
| Fan ring 4 | Berry pink | Rich outer band |
| Tracing + edging | Champagne gold | Fine outlines and airy border |
| Bobbles | Warm ivory | Every second outer junction |
Before You Begin
A few quick notes that will make your crocheting easier:
Step by Step Pattern Instructions
Section A: Coral Rosette and Gold Star
Round 1: With vivid coral, make a magic ring. Ch 1, work 8 sc into ring; join to first sc. Pull ring closed. 8 sc.
Round 2: Ch 1, work 2 sc in each st around; join. 16 sc.
Round 3: [Ch 3, skip 1 st, sl st in next st] 8 times. 8 petal loops.
Round 4: Working in each ch-3 loop: (sc, hdc, 3 dc, hdc, sc). Repeat around. Fasten off coral. Gently lift petals toward the front.
Round 5: Join champagne gold in any skipped stitch from Round 3, working behind the coral petals. Ch 5, sl st in next skipped stitch; repeat from around. 8 gold loops.
Round 6: In each ch-5 loop work (sc, hdc, dc, tr, picot, tr, dc, hdc, sc). This forms 8 star points. Join and fasten off.
Section B: Warm Ivory Scalloped Medallion
Round 7: Join warm ivory in the valley between any 2 gold points. Ch 3, 2 dc in same valley, ch 2, 3 dc in next valley, ch 2; repeat from around; join. 8 groups of 3 dc.
Round 8: Sl st to first ch-2 sp. Ch 3, 4 dc in same sp, ch 1; 5 dc in next ch-2 sp, ch 1; repeat from around; join. 8 shells.
Round 9: Ch 3, dc in same st, dc in each of next 3 dc, 2 dc in next dc, ch 1; repeat the same shaping across each 5-dc shell. 56 dc total, 8 ch-1 sps.
Round 10: Ch 3, dc in same st, dc in each dc to last dc before ch-1 sp, 2 dc in that dc, ch 2; repeat around. The ch-2 spaces mark the 8 major scallop valleys. 72 dc total.
Round 11: Sl st to next ch-2 sp. Ch 3, work 8 dc in same sp, sc in center dc of next solid section, 9 dc in next ch-2 sp, sc in center dc of next solid section; repeat from around; join. 8 broad scallops.
Round 12: Ch 1, sc in first dc, *ch 1, sc in next dc; repeat across scallop, ch 2 at valley sc; continue around. Join and fasten off. This round stabilizes the medallion edge and creates attachment points.
Checkpoint: Lay the work flat. The ivory medallion should be a little over half of the intended finished diameter. Lightly steam or mist block now if needed before adding the open rings.
Section C: Four Staggered Open Fan Rings
The next rounds deliberately alternate fan placement. Each fan sits over the gap between fans in the previous color, creating that stunning staggered shell lace effect.
Ring 1: Pale Apricot
Round 13: Join pale apricot in any ch-2 valley from Round 12. Ch 1, sc in same sp, ch 7, sc in next valley; repeat from around; join. 8 ch-7 arches.
Round 14: Sl st into first ch-7 sp. Ch 3, 6 dc in same sp, ch 3; 7 dc in next ch-7 sp, ch 3; repeat from around; join. 8 fans.
Round 15: Sl st to center (4th) dc of fan, sc in that st, ch 6, sc in center dc of next fan, ch 6, sc in next ch-3 sp; repeat from around. Join. 16 arches. Fasten off.
Ring 2: Peach
Round 16: Join peach in any arch that lies between two apricot fans. Ch 4, work 6 tr in same arch, ch 3, sc in next arch, ch 3; 7 tr in next alternate arch, ch 3, sc in next arch, ch 3; repeat from around; join. 8 peach fans, staggered.
Round 17: Sl st to center tr of first fan, sc in center tr, ch 7, sc in center tr of next fan, ch 5, sc in the intervening sc from Round 16; repeat from around; join. 16 arches. Fasten off.
Ring 3: Vivid Coral
Round 18: Join vivid coral in any ch-5 arch centered between two peach fans. Ch 4, 6 tr in same arch, ch 4, sc in next ch-7 arch, ch 4; 7 tr in next ch-5 arch, ch 4, sc in next ch-7 arch, ch 4; repeat from around; join.
Round 19: Sl st to center tr of first fan, sc in center tr, ch 8, sc in center tr of next fan, ch 5, sc in the intervening sc; repeat from around; join. Fasten off.
Ring 4: Berry Pink
Round 20: Join berry pink in any ch-5 arch centered between two coral fans. Ch 4, 8 tr in same arch, ch 4, sc in next ch-8 arch, ch 4; 9 tr in next ch-5 arch, ch 4, sc in next ch-8 arch, ch 4; repeat from around; join. 8 large berry fans.
Round 21: Ch 1, sc in first tr, ch 1, *sc in next tr, ch 1 across each fan; at each fan to arch junction work ch 4 to preserve openness. Continue around; join. Fasten off.
Optional fit adjustment: If your placemat is smaller than 38 cm (15 inches) after Round 21, add one spacing round in berry: join at any ch-4 junction, *ch 6, sc in the center of the next fan, ch 6, sc in next junction; repeat around. Then work the gold border into these new arches. If the placemat already measures 39 to 42 cm, skip this extra round.
Section D: Gold Tracing, Ivory Bobbles, and Final Border
Gold Scallop Tracing
Using champagne gold and the smaller hook if desired, surface slip stitch along the top ridge of each major scallop and fan. Trace: (1) the 8 ivory medallion scallops, (2) each apricot fan, (3) each peach fan, (4) each coral fan, and (5) the upper curve of each berry fan. Keep the gold line narrow and relaxed. Fasten off each section cleanly and bury tails on the wrong side.
Ivory Bobbles
Identify the 16 outer junctions around the berry ring. Add an ivory bobble at every second junction only, giving 8 evenly spaced bobbles. For each bobble, join ivory, work one 3-dc cl in the junction, ch 1 tightly, fasten off, and weave in both ends. The bobbles should be small accents rather than large pompoms.
Final Champagne Gold Border
Round 22: Join champagne gold at any outer junction. Ch 1, sc in same point. *Ch 5, sc in the next available outer arch or fan top attachment point; repeat around. Adjust only if necessary so the arches lie evenly and do not pull. Join.
Round 23: Sl st into first ch-5 sp. In each ch-5 sp work one pointed fan: (sc, ch 3, dc, picot, dc, ch 3, sc). Continue around; join with sl st to first sc. Fasten off neatly.
Round 24 (Optional): For micro picot reinforcement, join gold at any valley sc, *sl st to next pointed fan tip, picot, sl st down to next valley; repeat around. Use this round only if you want a more ornate edge. Fasten off and weave in securely.
Round Summary Quick Reference
| Rounds | Color | Structure |
|---|---|---|
| 1-4 | Coral | Tiny rosette |
| 5-6 | Gold | Eight point star |
| 7-12 | Ivory | Flat scalloped center medallion |
| 13-15 | Pale apricot | First open fan ring |
| 16-17 | Peach | Second staggered fan ring |
| 18-19 | Coral | Third staggered fan ring |
| 20-21 | Berry pink | Fourth / outer fan ring |
| Surface work | Gold | Scallop tracing |
| After R21 | Ivory | 8 bobbles at every second junction |
| 22-23 (24 optional) | Gold | Airy pointed fan picot border |
Finishing and Blocking Your Placemat
Proper finishing makes all the difference in how professional your placemat looks.
1. Weave in every remaining end by passing the yarn back and forth through at least 2.5 cm (1 inch) of matching color stitches. Avoid carrying dark colors behind ivory sections.
2. Soak the placemat in cool to lukewarm water for 10 to 15 minutes with a small amount of wool or cotton safe wash if desired. Do not agitate metallic yarn.
3. Press water out gently in a towel. Do not wring.
4. Pin the center first, then the 8 primary medallion points, then the outer fans. Measure from center to edge at several points so the circle stays symmetrical.
5. Open every chain window with your fingertips and shape each gold pointed fan. Keep the center perfectly flat.
6. Allow to dry completely before removing pins. Steam only if your yarn label permits it, and keep direct heat away from metallic fibers.
Troubleshooting Common Issues
Center is cupping: Your tension is too tight or there are too few increases. Relax the next round and, if necessary, add 1 extra dc in each major repeat.
Outer lace is ruffling: The arches are too long for your tension. Shorten each arch by 1 ch on the next round.
Gold surface line puckers: Remove it and redo with looser surface slip stitches or a 0.25 to 0.5 mm larger hook.
Metallic border twists: Let the gold yarn unwind frequently and avoid over tightening picots.
Placemat is not perfectly round: Correct the shape during wet blocking by pinning opposite points in pairs.
Care Instructions
Hand wash or use a delicate machine cycle in a mesh bag if your yarn label allows. Dry flat and reshape while damp. Store flat or loosely rolled. Do not iron directly over metallic yarn.
Make It Your Own
For a smaller charger, stop after the coral ring and add the gold border there. For a larger centerpiece, repeat the staggered arch and fan logic once more in berry or deep rose before edging. Keep the center color light and the outer colors progressively richer to preserve that beautiful sunset gradient effect.
Final Thoughts on the Sunset Shell Lace Placemat Crochet Pattern
Thank you so much for choosing this pattern for your next project. I truly hope you enjoy creating this stunning piece as much as I enjoyed designing it. The combination of warm sunset colors and delicate gold accents creates something truly special for your home or as a heartfelt gift.
If you make this Sunset Shell Lace Placemat, I would absolutely love to see your finished work. Tag me on Instagram or share a photo in my Facebook group. Seeing your creations brings me so much joy.
Save this pattern to your Pinterest boards so you can find it whenever you are ready to start. And please drop a comment below if you make one. I would love to hear how it turned out for you and see which color combinations you choose.
Want a Quick & Easy Printable Version?
Get a clean, beautifully formatted PDF of this pattern — easy to follow step by step, ready to print or save on any device. No scrolling, no distractions, just the pattern.
Get the Printable PDF →