
This triangular headscarf combines openwork lace, dimensional sunflower motifs, a leafy edging, wooden beads, and cream-and-gold tassels. The construction uses basic stitches with a few special techniques like bobbles and join-as-you-go. You will need fingering weight cotton, a 3.25 mm hook, and about 450 to 520 yards total.
Get the Ad-Free PDF Pattern
You can find the free pattern below, or you can purchase the ad-free printable PDF from my shop.
Get the Printable PDF →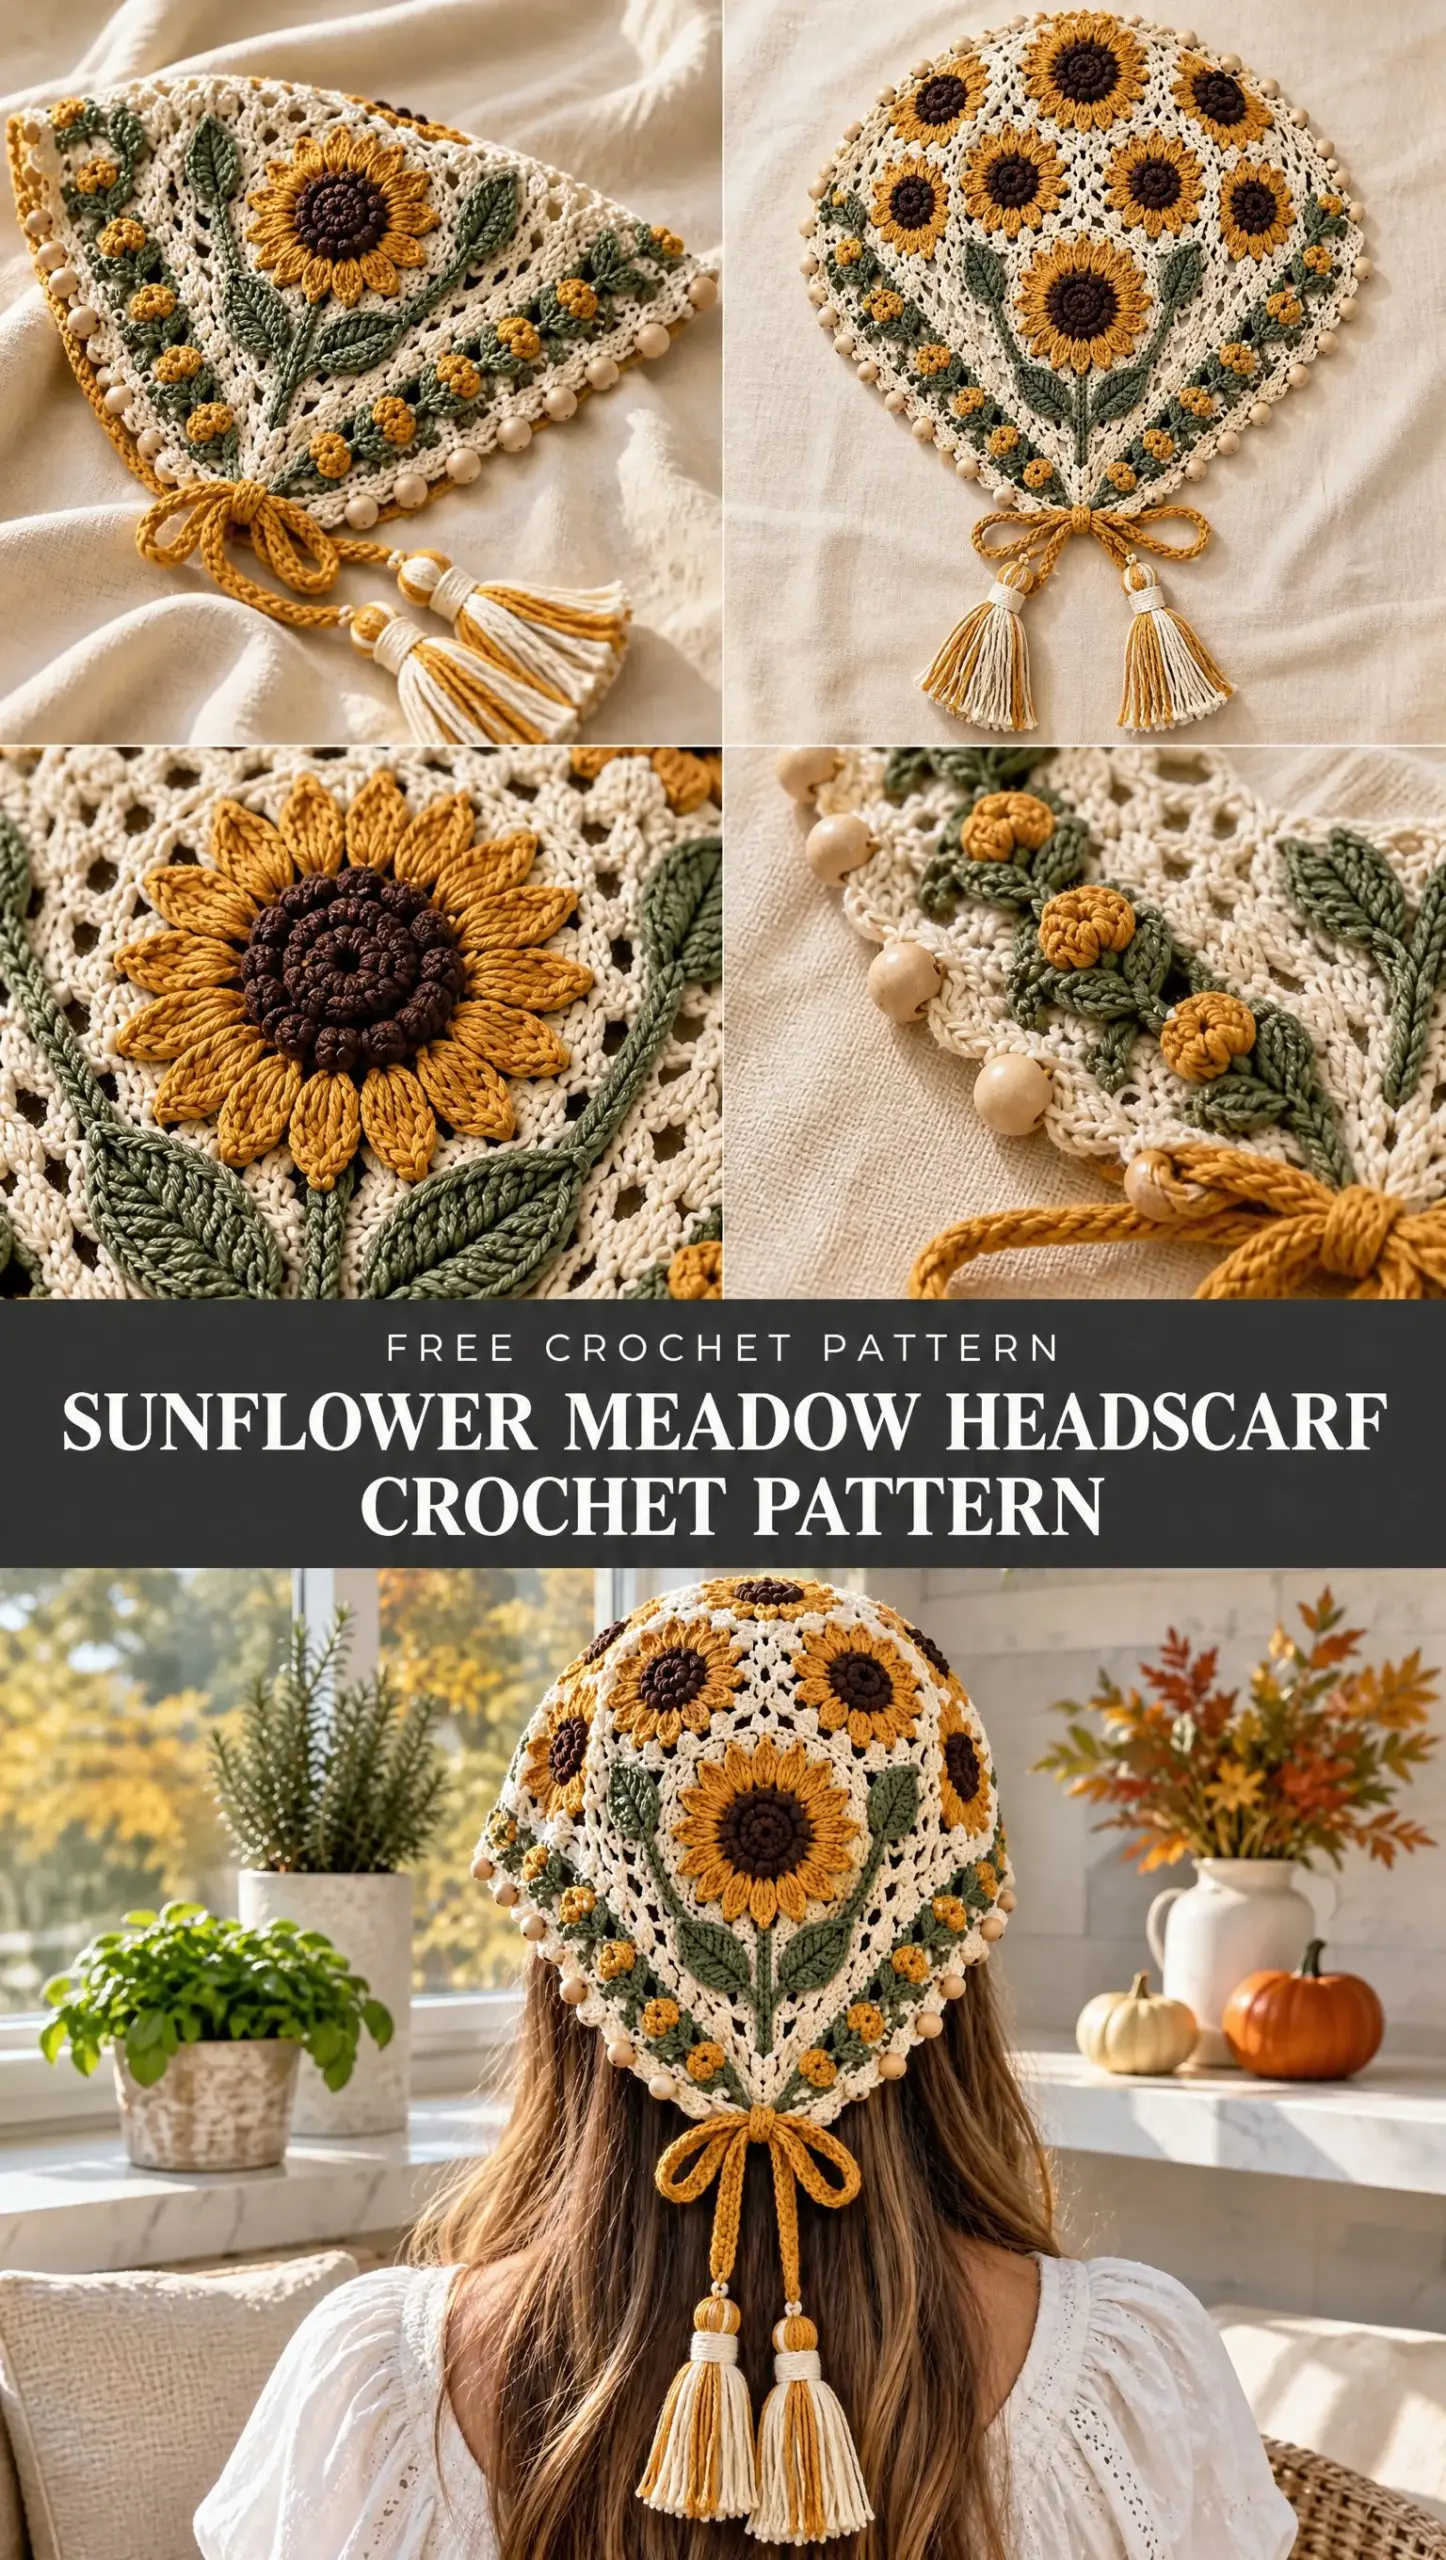
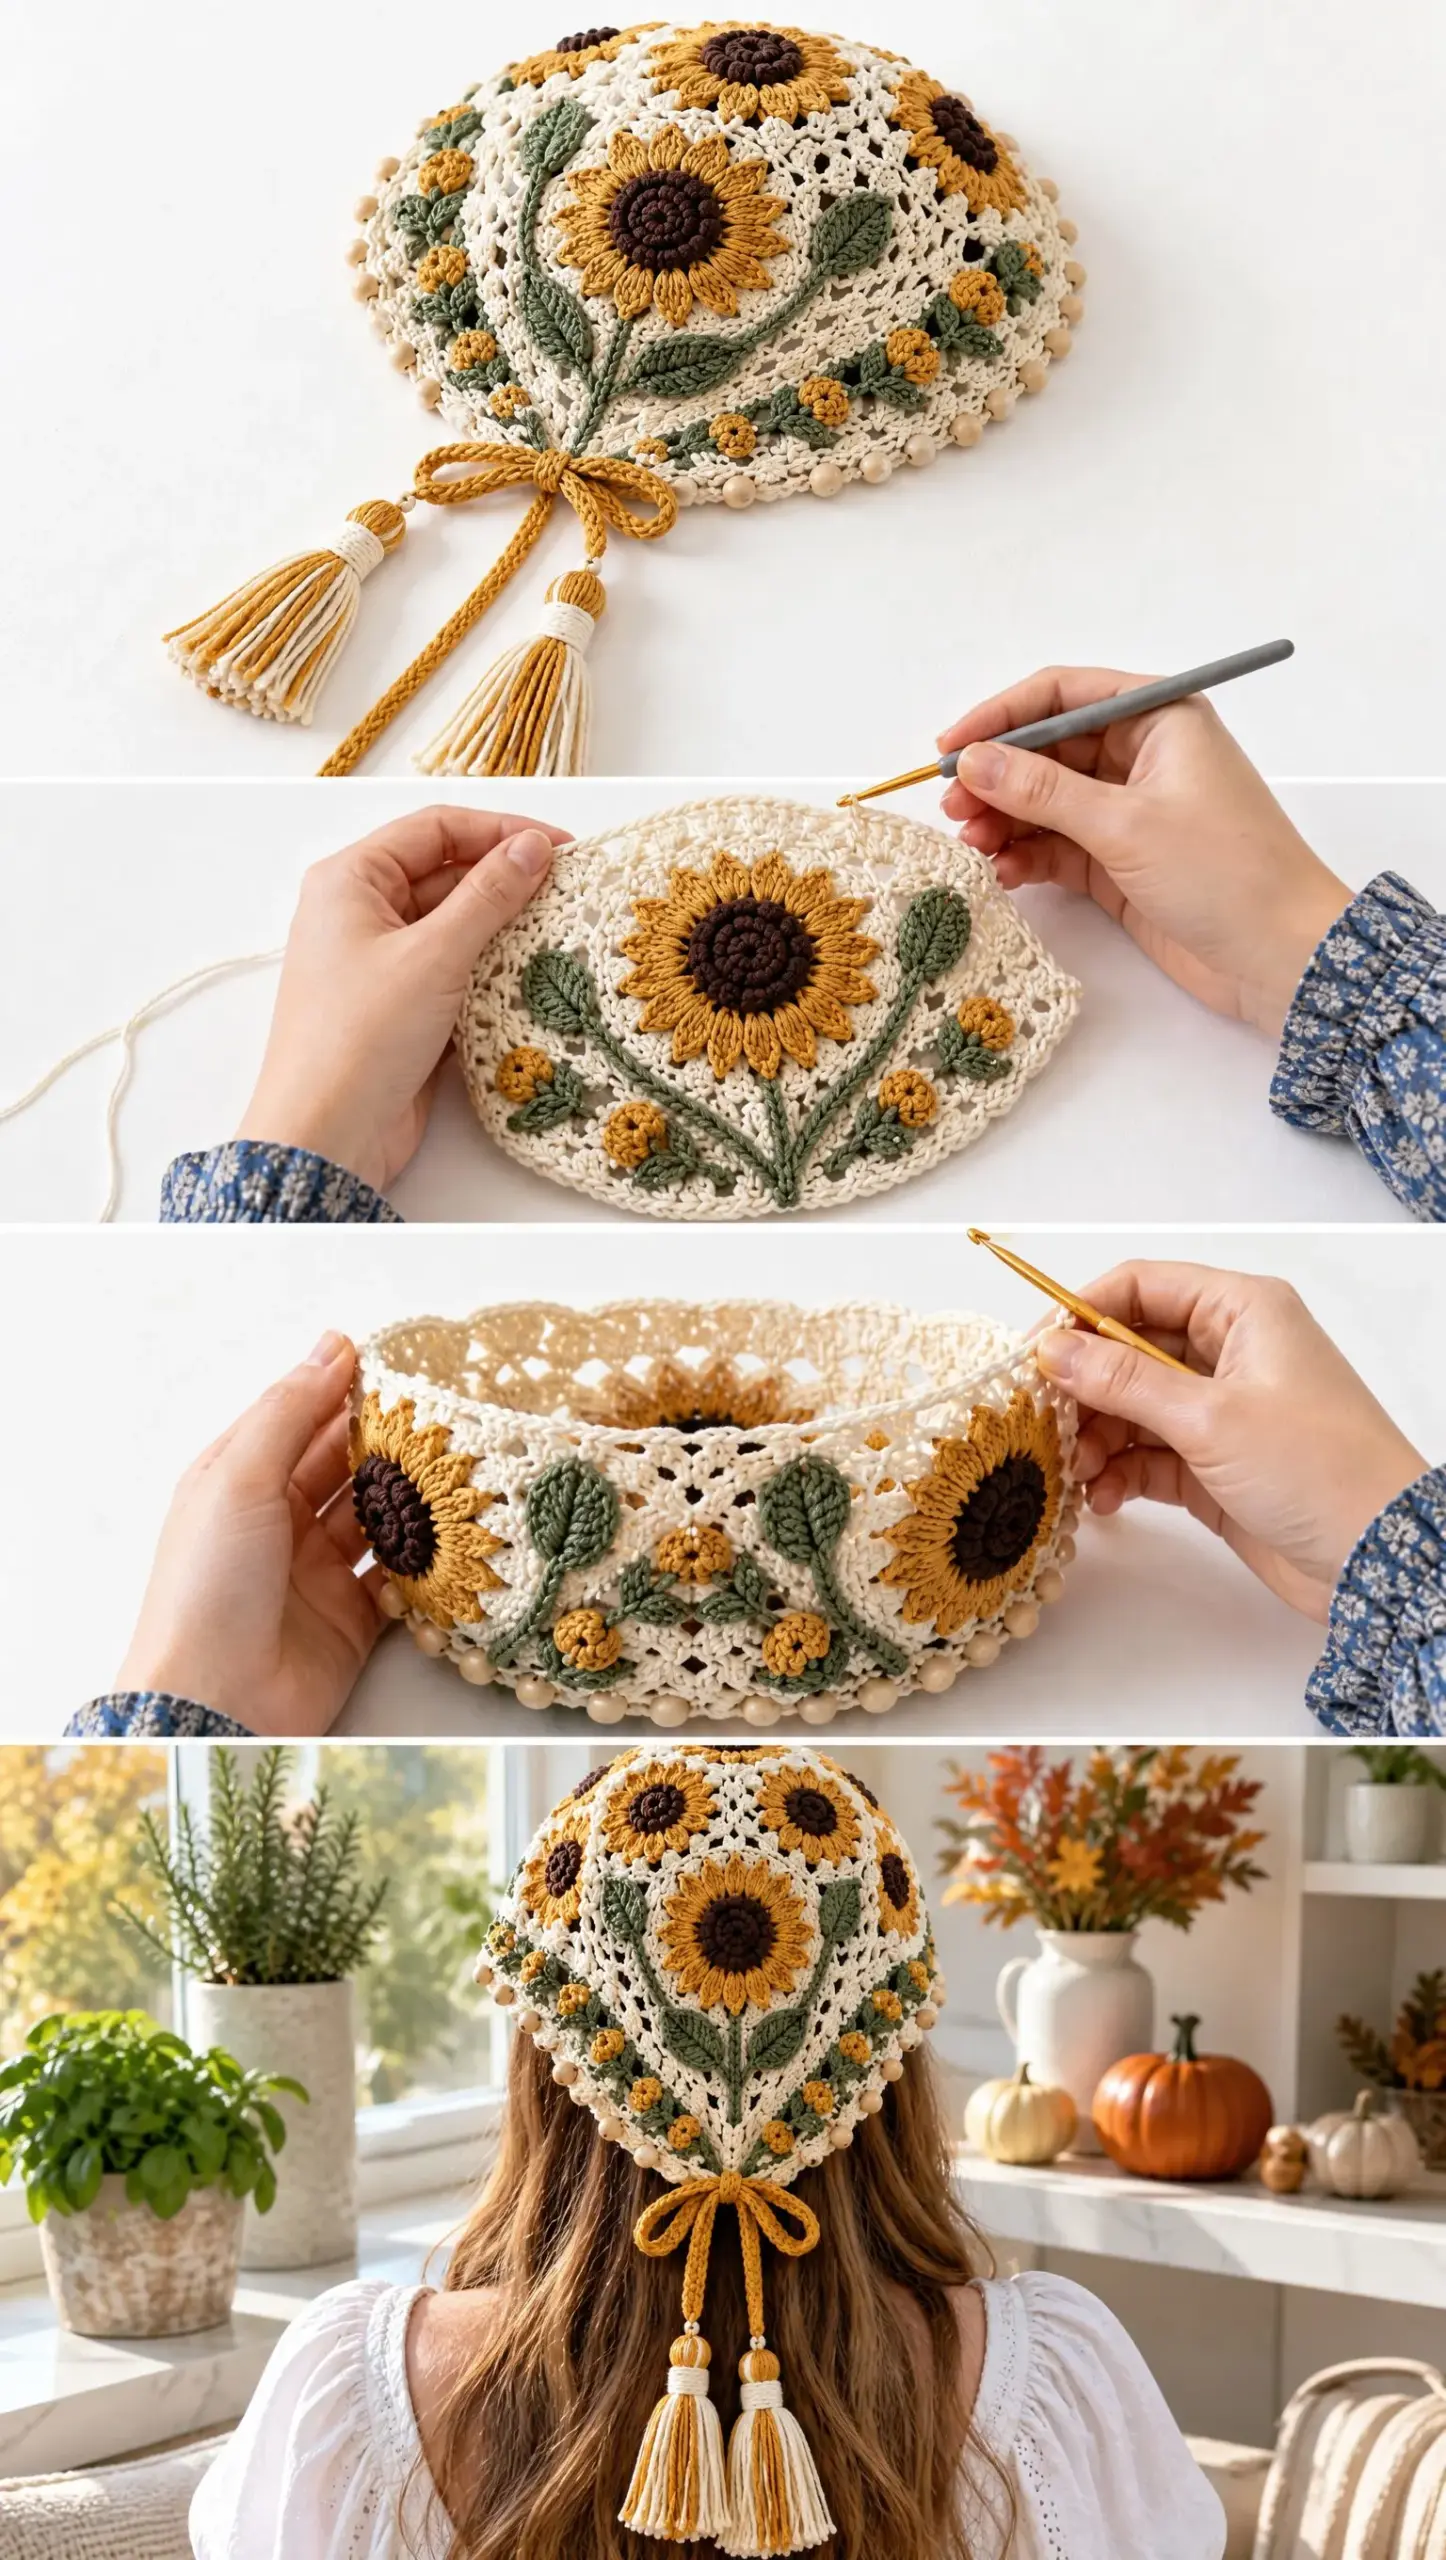
The pattern builds in three main sections. First you crochet sunflower motifs and join them into a crown panel. Then you work a lacy triangle downward to a point. Finally you add the decorative border, stems, leaves, buds, beads, tie cords, and tassels.
If you can work double crochet, treble crochet, and simple decreases, you can make this headscarf. The skill level is confident beginner to intermediate. Take your time with the motifs and the rest flows smoothly.
Why You Will Love This Pattern
The Sunflower Meadow Headscarf looks intricate but breaks down into manageable pieces. Each small sunflower takes about 20 minutes once you get the rhythm. The openwork triangle uses a simple chain lattice that decreases on each side until you reach the point. No complicated shaping math required.
The finished scarf has real presence. Those raised brown bobble centers give the flowers depth without bulk. The sage leaves lift slightly off the fabric. The wooden beads catch the light. When you tie the mustard bow at the back and let those tassels hang, you have something genuinely beautiful.
This is a great project for using up partial skeins of cotton in coordinating colors. The cream takes the most yardage, but the accent colors need smaller amounts. Check your stash for mustard, sage green, chocolate brown, and ocher.
Materials You Will Need
Yarn:
Fingering or light sport weight cotton, approximately 450 to 520 yards total. Here is the suggested color breakdown:
Hook:
3.25 mm crochet hook, or the size needed to obtain gauge.
Notions:
Optional:
1.75 to 2.25 mm steel hook or dental floss threader to pull yarn through beads.
Gauge
After blocking, one small sunflower motif measures about 3.25 inches across. Six openwork mesh spaces measure about 4 inches. Seven rows of the lower lattice measure about 3 inches.
Exact gauge matters less than achieving a supple fabric and hitting the target finished width of 26 inches across the top edge.
Finished Measurements
| Measurement | Target | Adjustment Range |
|---|---|---|
| Top edge width | 26 in / 66 cm | 24 to 28 in |
| Depth to point | 17 in / 43 cm | 15 to 19 in |
| Tie cord, each end | 18 in / 46 cm | 14 to 22 in |
| Tassel length | 5.5 in / 14 cm | 4 to 6 in |
Abbreviations and Stitch Definitions
Before we dive into the pattern, let me define every stitch and abbreviation you will encounter.
ch = chain: Yarn over, pull through the loop on your hook.
sl st = slip stitch: Insert hook, yarn over, pull through both the stitch and the loop on your hook in one motion.
sc = single crochet: Insert hook, yarn over, pull up a loop (two loops on hook), yarn over, pull through both loops.
hdc = half double crochet: Yarn over, insert hook, pull up a loop (three loops on hook), yarn over, pull through all three loops.
dc = double crochet: Yarn over, insert hook, pull up a loop, yarn over, pull through two loops, yarn over, pull through remaining two loops.
tr = treble crochet: Yarn over twice, insert hook, pull up a loop, (yarn over, pull through two loops) three times.
dtr = double treble crochet: Yarn over three times, insert hook, pull up a loop, (yarn over, pull through two loops) four times.
yo = yarn over
sp = space
sk = skip
st(s) = stitch(es)
RS / WS = right side / wrong side
MR = magic ring
beg = beginning
rep = repeat
picot = ch 3, sl st in first ch
Special Stitches
These special stitches create the dimensional details that make this headscarf stand out.
Brown Bobble Center (5-dc bobble)
Yarn over, insert hook in the same stitch, pull up a loop, yarn over and pull through 2 loops. Repeat this 5 times total in the same stitch. You will have 6 loops on your hook. Yarn over and pull through all 6 loops. Chain 1 to close.
This creates that bumpy, textured center of each sunflower.
Elongated Petal
Work all of this into one indicated stitch or space: slip stitch, ch 2, 2 tr, 1 dtr, 2 tr, ch 2, slip stitch.
The dtr at the center makes the petal point taller than a standard petal.
Raised Narrow Leaf
Chain 7. Working back along the chain: sl st in 2nd ch from hook, sc, hdc, dc, hdc, sc, sl st into stem.
For a plumper leaf, work the same sequence on the opposite side of the foundation chain before fastening to the stem.
Bud
Into a ch-2 loop: (yarn over, insert hook, pull up a loop, yarn over, pull through 2) three times, yarn over and pull through all 4 loops. Chain 1.
Shell Edging
5 dc in the indicated space or stitch.
Join-As-You-Go (JAYG)
On the final petal or chain loop of a motif, replace the center chain with a slip stitch into the matching point on the neighboring motif, then complete the petal or loop.
Construction Overview
You will build this headscarf in a specific order:
1. Crochet 7 small sunflower motifs and 1 larger focal sunflower
2. Join 6 small motifs into a shallow crown arc (3 on the upper row, 3 staggered below)
3. Add a cream joining round around the motif group
4. Crochet the lower openwork triangle downward, decreasing until one point remains
5. Attach the larger focal sunflower at center back with sage stems and raised leaves
6. Work decorative ocher buds and sage leaves along both V-shaped sides
7. Work one sage stripe, then the final cream shell border with wooden beads
8. Crochet the mustard point cord and bow, then make and attach two tassels
9. Wet block gently
Small Sunflower Motif (Make 7)
Finished blocked diameter: approximately 3.25 inches. Work the center in chocolate brown, petals in mustard, and the joining round in cream.
Round 1 (brown):
MR, ch 1, work 12 sc in ring. Join with sl st to first sc. (12 sc)
Round 2 (brown bobbles):
Ch 1. In each sc around, work 1 bobble, ch 1. Join with sl st to top of first bobble. (12 bobbles, 12 ch-1 sps)
Round 3 (mustard petal bases):
Join mustard in any ch-1 sp. Ch 1, sc in ch-1 sp, ch 3; repeat from around. Join. (12 ch-3 sps)
Round 4 (elongated petals):
In each ch-3 sp work: sl st, ch 2, 2 tr, 1 dtr, 2 tr, ch 2, sl st. Fasten off. (12 petals)
Round 5 (cream stabilizing lattice):
With RS facing, join cream in the valley between any 2 petals. Ch 4, sc in next valley; repeat from around. Join. Do not pull tightly. (12 ch-4 sps)
Round 6 (cream joining round):
Sc in next ch-4 sp, ch 3, sc in same sp, ch 2; repeat from around. Join. Use these ch-3 points for JAYG. Fasten off unless joining immediately.
Large Center-Back Sunflower (Make 1)
Finished diameter: approximately 4.5 to 5 inches. This focal flower gets sewn on after the scarf body is complete.
Round 1 (brown):
MR, ch 1, 12 sc. Join. (12)
Round 2 (brown):
Ch 1, 2 sc in each st around. Join. (24)
Round 3 (bobble texture):
*Bobble in next st, ch 1, sk next st; repeat around. Join. (12 bobbles)
Round 4 (mustard bases):
Join mustard in any ch-1 sp. *Sc in sp, ch 4; repeat around. Join. (12 ch-4 sps)
Round 5 (petals):
In each ch-4 sp work: sl st, ch 2, 2 tr, 2 dtr, 2 tr, ch 2, sl st. (12 petals)
Round 6 (outer petal layer):
Working behind Round 5, join mustard around the post/valley between petals. *Ch 5, sl st around next valley; repeat around. In each ch-5 sp work: sc, hdc, 2 dc, tr, 2 dc, hdc, sc. Fasten off.
Join the Floral Crown Panel
Block the small motifs lightly before joining so their diameters are consistent. Arrange them with petals touching but not compressed.
1. Place three motifs in a top row. Join neighboring motifs at two adjacent cream ch-3 points using JAYG or whipstitch through the outer cream loops.
2. Place three motifs below, staggered so each lower motif sits beneath a gap between upper motifs. Join at 2 to 3 matching ch-3 points wherever motifs meet.
3. If the crown measures less than about 22 inches across before edging, place the 7th small motif near one outer side or centered between two lower motifs.
4. With cream, work a smoothing round around the entire joined panel: sc in each accessible ch-space and valley, ch 2 across small gaps, ch 3 across deeper gaps. The goal is a continuous edge, not a precise stitch count.
5. Along the lower edge only, mark 49 evenly spaced anchor points. These anchors form the foundation for the openwork triangle.
Lower Openwork Triangle
The triangle is crocheted from the lower edge of the floral crown downward. The fabric is a chain lattice with decreases at both outer edges. One "mesh" equals ch 4 plus sc in the next anchor or space.
Foundation:
Join cream at first marked anchor. Ch 1, sc in anchor; ch 4, sc in next anchor across. (48 meshes) Turn.
Row 1:
Ch 1, sl st into first ch-4 sp, sc in same sp; ch 4, sc in next sp across to last sp. (47 meshes)
Row 2:
Ch 1, sl st into first ch-4 sp, sc in same sp; ch 4, sc in next sp across, stopping before final edge sp. (45 meshes)
Rows 3 through 10:
Repeat Row 2, decreasing one mesh at each side on every row. (43 down to 29 meshes)
Row 11:
Work even across with no extra decrease. (29 meshes)
Rows 12 through 18:
Resume one decrease at each side every row. (27 down to 15 meshes)
Row 19:
Work even. (15 meshes)
Rows 20 through 25:
Decrease one mesh at each side every row. (13 down to 3 meshes)
Row 26:
Sl st to first sp, sc in sp, ch 4, sc in center sp, ch 4, sc in last sp. (2 meshes) Turn.
Row 27:
Sl st to center of first sp, ch 3, sl st in final sp. Fasten off. (1 point)
Leave a 6 inch tail for weaving.
Center Flower, Stems and Raised Leaves
1. Pin the large sunflower at center back, with its lower edge overlapping the top third of the cream lattice. Sew through the backs of the petals and center only, leaving petal tips slightly free for dimension.
2. For each sage stem, join sage just beneath the focal flower. Surface slip stitch or crochet a chain directly on the fabric for 4 to 5 inches, angling one stem down-left and one down-right.
3. Add 2 to 3 raised narrow leaves to each stem. Sew only the center vein to the scarf so the edges remain softly lifted.
4. Add one small branch near the upper half of each stem using 5 to 7 chains and one narrow leaf.
Ocher Buds and Sage Leaves on the V-Sides
Work the side embellishments after blocking the main triangle once.
1. Beginning about 2.5 inches below the floral crown, mark 6 to 7 positions down each side, spaced roughly 2 inches apart.
2. At alternating markers, work one ocher bud into the side chain space. At the next marker, attach one sage narrow leaf angled toward the triangle point.
3. Keep the sequence intentionally irregular: bud, leaf, bud, leaf, with one or two paired leaf-and-bud clusters near the middle.
4. Fasten each motif securely on the WS and weave ends into same-color stitches.
Sage Stripe, Cream Shell Border and Beads
Round A (sage stripe):
Join sage at one top corner. Work sc evenly down the first side, placing approximately 3 sc per 2 lattice rows. At the point work 3 sc in the tip. Continue up the second side. Along the top edge, work sc evenly through the crown edge. Join and fasten off.
Round B (cream preparation):
Join cream in any corner. Ch 1, sc in each st around; at each lower point/corner work 2 sc, ch 1, 2 sc. Adjust by skipping or adding an sc occasionally so the edge lies flat.
Round C (shell finish):
Sk 1 st, 5 dc in next st, sk 1 st, sl st in next st around the two V-sides. Across the top edge, use a simpler finish: sc in next 2 sts, picot repeat. Fasten off.
Wooden beads:
Thread 6 to 9 beads on each side or attach them individually at selected shell valleys. Place beads mainly on the upper two-thirds so the tassel area remains flexible.
Mustard Tie Bow and Two Tassels
Point Cord
Join mustard at the triangle point. Ch approximately 70 to 80 (about 18 to 20 inches), then sl st back along the chain for a firm rounded cord. Fasten off. Make a second matching cord from the same point. Tie the cords into a neat bow after blocking.
Tassels (Make 2)
1. Cut a 5.5 inch piece of cardboard. Wrap cream yarn around it 28 to 34 times and mustard yarn 8 to 10 times, keeping colors interspersed.
2. Slide a 12 inch mustard strand under the wraps at the top and tie tightly. Cut the wraps at the opposite edge of the cardboard.
3. Wrap cream yarn firmly around the tassel neck about 0.6 inches below the top for 8 to 12 turns. Knot securely and bury the end inside the tassel.
4. Trim the tassel to 5 to 5.5 inches. Steam lightly from a distance if the strands kink.
5. Attach one tassel to each cord end with the top mustard strand.
Finishing and Blocking
Weave in every end on the WS, changing direction at least once so cotton ends do not slip out.
Wet block in cool to lukewarm water with a small amount of wool wash or mild soap. Gently squeeze but do not wring.
Pin the top edge straight to the target width. Shape the lower sides into a clean V and pin the point centrally. Shape each sunflower petal individually. Lift the brown centers slightly so they remain dimensional. Arrange the sage leaves with a gentle upward curve.
Allow to dry completely before removing pins.
Sizing and Customization Tips
For a smaller scarf: Use 6 small motifs and 45 lower-edge anchors. Stop the triangle 2 to 3 rows earlier. Aim for 23 to 24 inches top width.
For a larger scarf: Use all 7 small motifs in the crown and 53 to 55 anchors. Add 2 to 4 even lattice rows. Aim for 27 to 29 inches top width.
For more drape: Use a 3.5 mm hook or slightly finer yarn.
For more structure: Use a 3.0 mm hook and mercerized cotton.
Troubleshooting Common Issues
Triangle curls inward: Your side decreases may be too aggressive or your chains are too tight. Add an even row or increase ch-4 spaces to ch-5 for one or two rows.
Triangle flares or ruffles: Your edge chains are too loose or too many stitches were added in the border. Reduce the number of side sc stitches and re-block.
Flowers look bulky: Use a finer yarn for the brown centers or replace 5-dc bobbles with 4-dc bobbles.
Petals flatten after blocking: Re-wet only the petals, pinch each tip, and dry with the centers slightly lifted.
Care Instructions
Hand wash in cool water with mild detergent. Roll in a towel to remove excess water, reshape flat, and air dry. Do not machine dry. If using unfinished wooden beads, avoid prolonged soaking and dry them promptly. Store flat or loosely folded so the raised petals and tassels are not crushed.
Make-Along Checklist
Use this checklist to track your progress:
Final Thoughts on the Sunflower Meadow Headscarf Crochet Pattern
This headscarf is one of those projects where every step reveals something new. First you have a pile of cheerful sunflower motifs. Then they come together into a crown. Then the lacy triangle emerges below them. By the time you add the leaves and buds and tie that mustard bow, you have created something truly special.
The finished piece works beautifully for late summer and early fall. Wear it to a farmers market, an outdoor wedding, or just running errands when you want to feel put together. It also makes a memorable gift for anyone who loves sunflowers or boho accessories.
Thank you so much for choosing this pattern. I hope you enjoy every stitch of it.
If you make this sunflower headscarf, I would love to see your finished piece. Tag me on Instagram or share a photo in our Facebook group. And if you want to come back to this pattern later, go ahead and save it to your Pinterest boards so it is easy to find when you are ready to start. Drop a comment below if you have any questions or just want to share your progress. Happy crocheting!
Want a Quick & Easy Printable Version?
Get a clean, beautifully formatted PDF of this pattern — easy to follow step by step, ready to print or save on any device. No scrolling, no distractions, just the pattern.
Get the Printable PDF →