
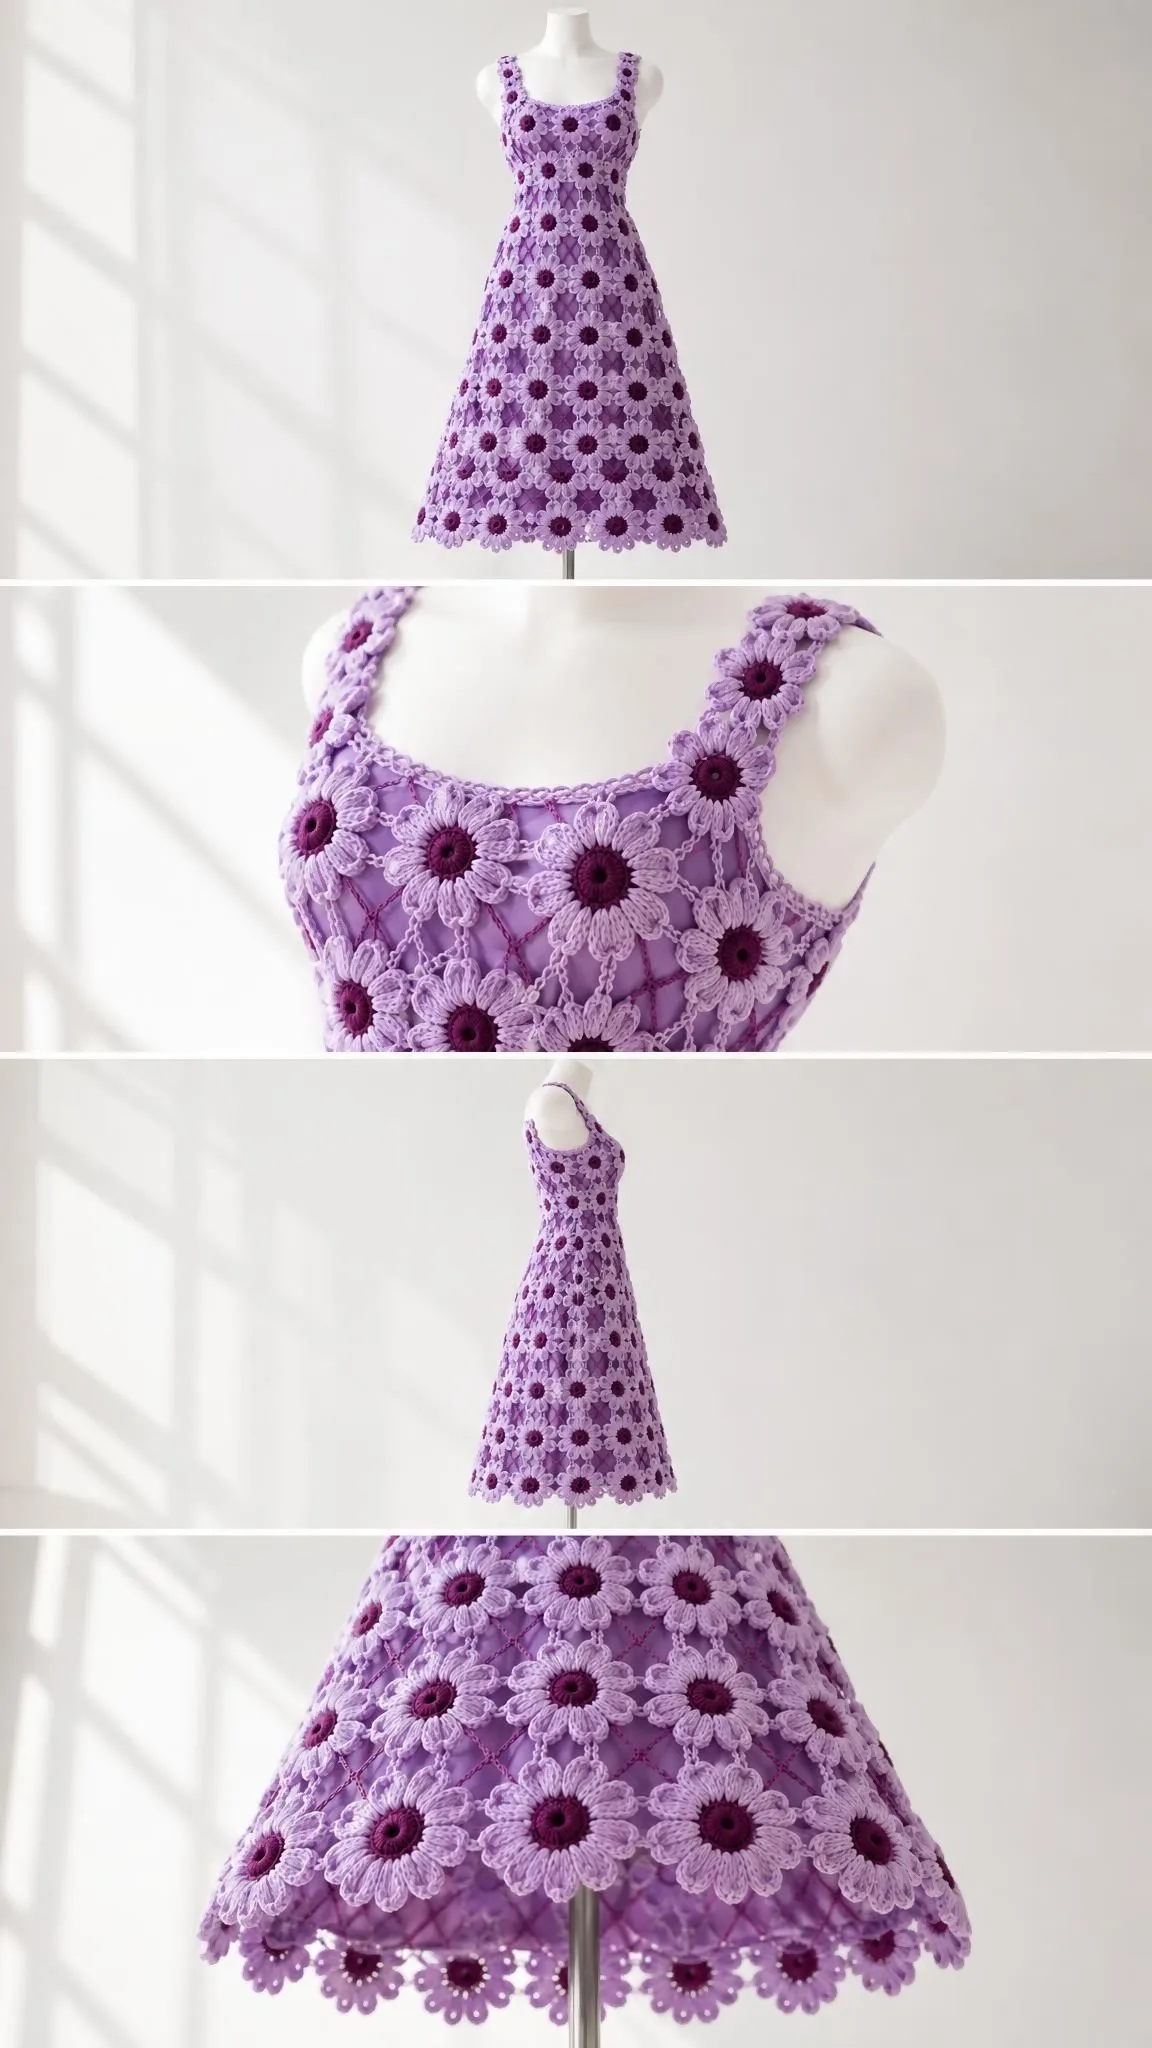
Meet Violet. She’s the kind of dress that turns heads at garden parties and makes everyone ask, "Wait, you made that?" With her soft lilac petals, deep plum centers, and graceful empire silhouette, this crochet flower dress is equal parts romantic and bold.
Get the Ad-Free PDF Pattern
Scroll down for the full pattern, or get the ad-free printable PDF from the shop.
Get the Printable PDF →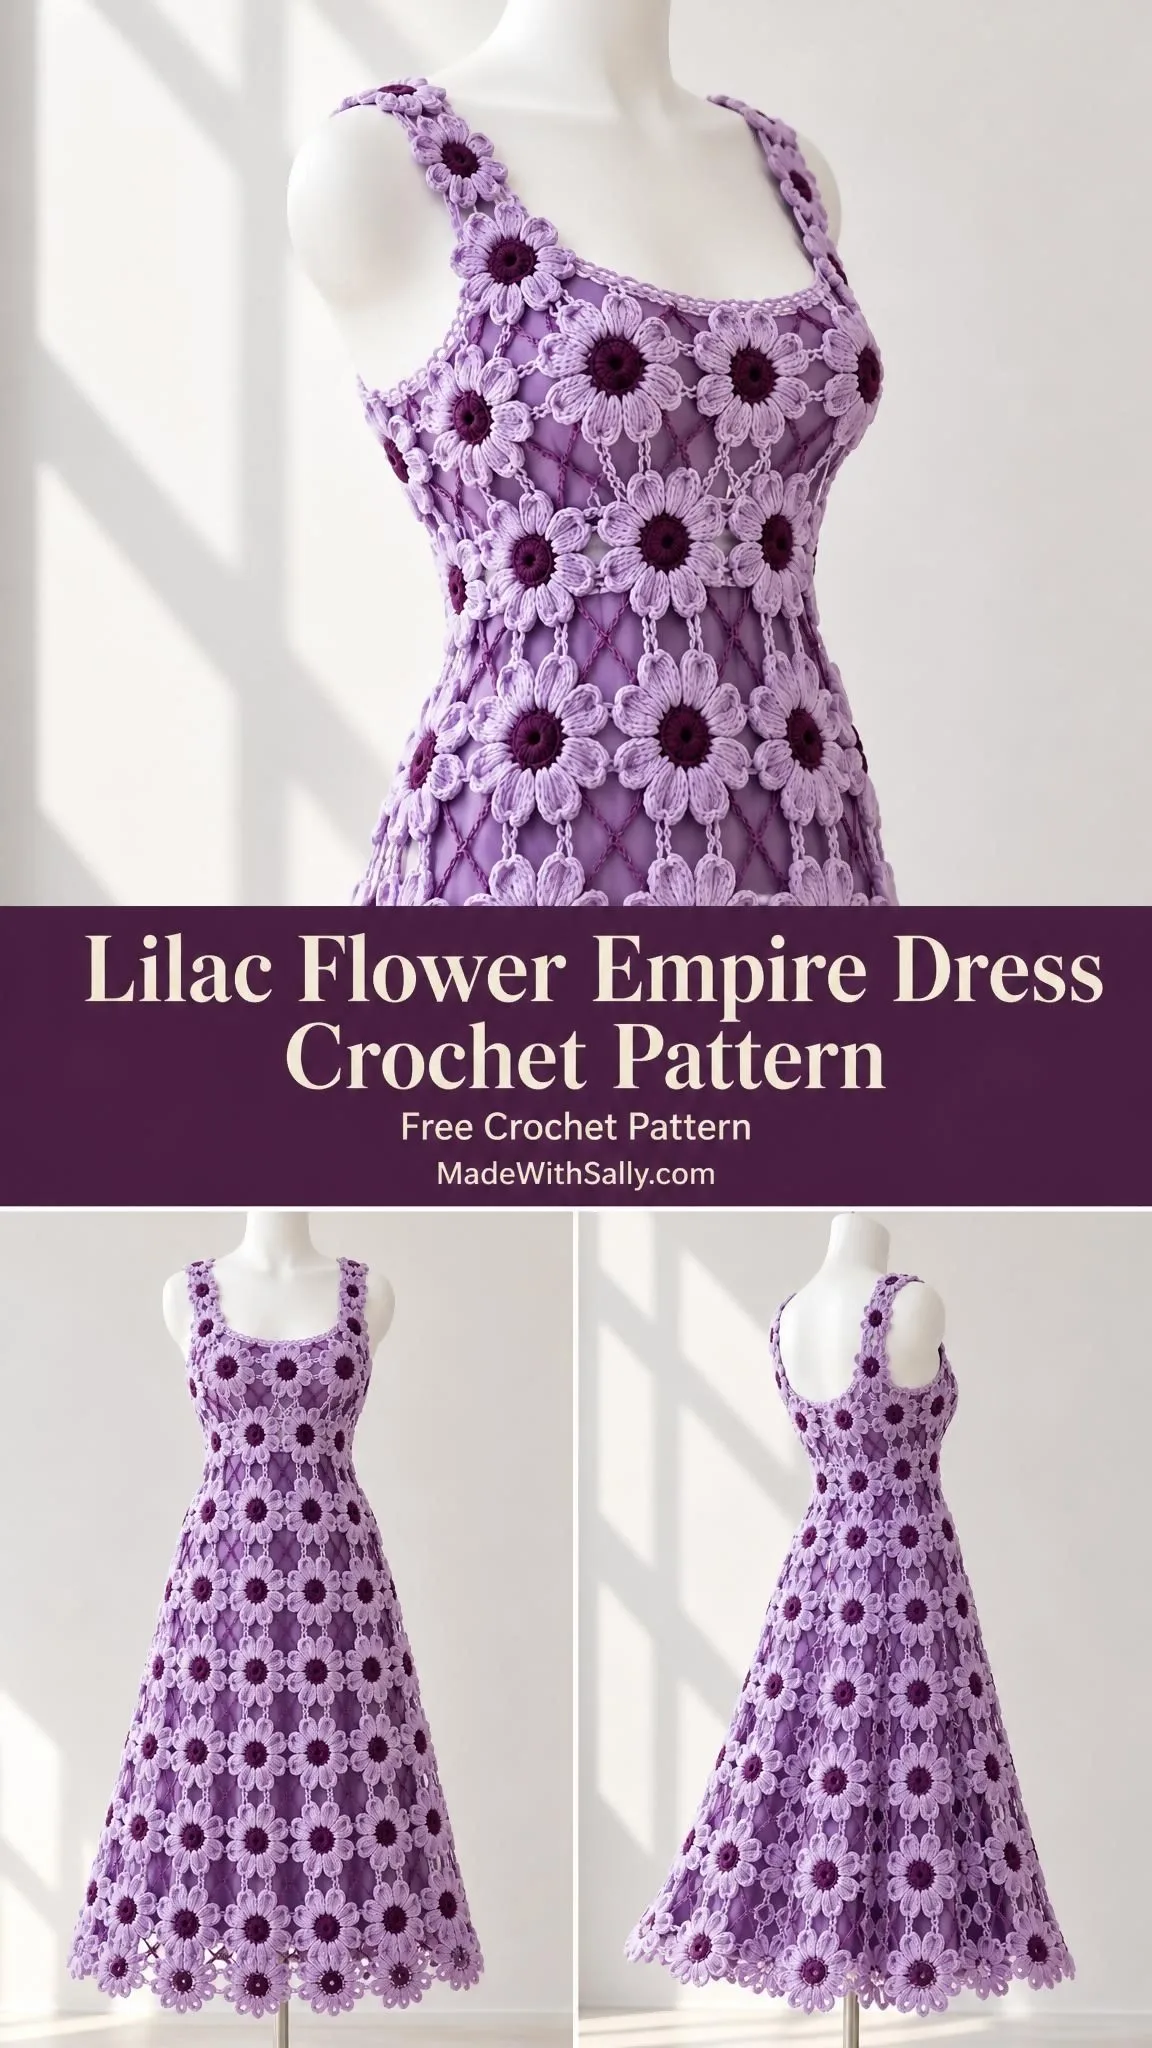
This design feels like a wearable bouquet. The eight-petal flowers create a lattice effect that’s surprisingly structured, while the flared skirt moves beautifully with every step. It’s vintage-inspired without feeling costume-like, and the color combination gives it a modern edge.
Whether you’re dreaming of a summer wedding, a special occasion, or simply a statement piece for your handmade wardrobe, this Lilac Flower Empire Dress delivers. The construction is methodical and satisfying, with individual motifs joined into horizontal bands that gradually widen toward the hem. Let’s walk through everything you need to bring Violet to life.
Pattern Overview and Skill Level
This dress is an intermediate to advanced project. You’ll be making 208 individual eight-petal flowers, then joining them strategically into shaped bands. The technique itself isn’t complicated, but the scale and precision required make this a commitment piece.
If you’ve made motif-based garments before, such as granny square cardigans or hexagon tops, you’ll feel right at home here. The flowers are small and quick to work up individually. The real craft comes in the assembly, where you’ll connect motifs with chain bridges of varying lengths to create the empire waist and flared skirt.
The pattern uses US crochet terminology throughout. If you typically work from UK patterns, remember that US single crochet equals UK double crochet, US half double crochet equals UK half treble, US double crochet equals UK treble, and US treble crochet equals UK double treble.
Finished Measurements
This pattern provides one adult reference size with the following finished dimensions:
- Bust: approximately 96 cm (about 37.8 inches)
- Waist: approximately 96 cm
- Length from shoulder: approximately 104 cm (about 41 inches)
- Intended for: 90 to 92 cm bust measurement
The dress requires a matching opaque slip worn underneath, as the openwork construction is not opaque on its own. A 40 cm side zipper provides the closure.
Materials and Tools
Gather these supplies before you begin:
| Item | Amount / Specification |
|---|---|
| Yarn A (lilac) | 550 g / 1650 m |
| Yarn B (plum) | 150 g / 450 m |
| Yarn weight | Smooth sport cotton, about 150 m per 50 g |
| Hook | 3.0 mm (adjust for gauge) |
| Tapestry needle | For weaving ends |
| Stitch markers | 32 markers |
| Measuring tape | For blocking and checking gauge |
| Pins | For blocking |
| Matching opaque slip | For wearing underneath |
| Side zipper | 40 cm length |
| Sewing thread | Matching color |
| Sewing needle | For zipper and slip attachment |
| Stay tape | 6 mm width |
The yarn amounts include a planning allowance and are estimates. Purchase all yarn from one dye lot to ensure color consistency across all 208 flowers.
Gauge Information
Getting gauge right is essential for this dress to fit properly. Here’s what you’re aiming for:
One finished flower = 5 cm across the outer petal tips using a 3.0 mm hook.
Additional gauge notes:
- A chain 4 (ch-4) horizontal connector adds approximately 1 cm
- A chain 8 (ch-8) vertical connector adds approximately 2 cm
- Four flowers in one bust band, including four connector allowances, span 24 cm
How to Check Your Gauge
Make four flowers and join them into a 2 x 2 swatch. Wash the swatch, then pin it flat without stretching the petals. Measure only when the swatch is completely dry.
If your flower diameter differs by more than 2 mm from the 5 cm target, change your hook size. Go up a hook size if your flowers are too small, or down if they’re too large. Only adjust the connector chain lengths after your motif size is correct.
Here’s why this matters: a 1 mm error across 16 flowers changes the circumference by 1.6 cm. Over the full dress, small errors multiply quickly.
Before making all 208 flowers, pin two completed bands over your intended slip. This lets you verify the fit before committing to mass production. This size is not a graded size range, so if you need to alter the circumference, use an even number of motifs and recalculate using: N x (5 + connector length in cm). Split the motif count equally between front and back.
Abbreviations and Special Stitches
Here are all the abbreviations used in this pattern:
- ch = chain: wrap yarn over hook, pull through loop on hook
- sl st = slip stitch: insert hook, yarn over, pull through stitch and loop on hook in one motion
- sc = single crochet: insert hook, yarn over, pull up a loop (2 loops on hook), yarn over, pull through both loops
- hdc = half double crochet: yarn over, insert hook, yarn over, pull up a loop (3 loops on hook), yarn over, pull through all 3 loops
- dc = double crochet: yarn over, insert hook, yarn over, pull up a loop (3 loops on hook), yarn over, pull through 2 loops, yarn over, pull through remaining 2 loops
- tr = treble crochet: yarn over twice, insert hook, yarn over, pull up a loop, (yarn over, pull through 2 loops) three times
- st(s) = stitch(es)
- sp = space
- RS/WS = right side/wrong side
- rep = repeat
- inc = increase
- dec = decrease
Stitch counts exclude joining slip stitches unless stated otherwise.
Special Stitch: Petal
In one ch-3 loop, work: (sc, hdc, 3 dc, hdc, sc), then sl st in the next anchoring sc.
The middle of the three dc is the petal tip. Each flower has eight petals, and each petal contains seven stitches.
Special Technique: Bridge
Join yarn A with a sl st to one petal tip, chain the specified number, sl st to the opposite tip on the adjacent flower, then fasten off.
For a zero-chain bridge, whipstitch the tips together instead. Use north/south and east/west petal tips for main joins. Diagonal tips carry the stabilizing mesh.
Pattern Notes
Read through these notes before starting:
- Brackets enclose a repeat. Work the bracketed instructions the stated number of times.
- Join each round to its first counted stitch.
- Keep the right side (RS) facing for all motifs.
- Change colors on the final yarn over of the last stitch, then fasten off unused colors.
- All measurements refer to washed, dry, blocked fabric.
- 1 inch = 2.54 cm
Orientation System
Before joining flowers, mark one petal as north. Number the eight petals clockwise: N, NE, E, SE, S, SW, W, NW.
Start at band 1 (upper chest) and work toward the hem. Leave the left side open through the first six bands for the zipper. All bands contain 16 flowers. The skirt flare comes from progressively longer chain bridges between flowers.
Construction Overview
The dress is built in this order:
- Make and block all flowers
- Assemble horizontal bands
- Connect bands into front/back panels
- Add straps
- Close side seam below the zipper
- Stabilize neckline
- Install slip and closure
Band Structure Chart
| Band | Horizontal Chain | Approximate Circumference |
|---|---|---|
| 1 | 4 | 96 cm |
| 2 | 2 | 88 cm |
| 3 | 4 | 96 cm |
| 4 | 6 | 104 cm |
| 5 | 8 | 112 cm |
| 6 | 10 | 120 cm |
| 7 | 12 | 128 cm |
| 8 | 14 | 136 cm |
| 9 | 16 | 144 cm |
| 10 | 16 | 144 cm |
| 11 | 16 | 144 cm |
| 12 | 16 | 144 cm |
Totals:
- Body: 192 flowers
- Upper finish (straps): 16 flowers
- Grand total: 208 flowers
- Vertical joins between body bands: 176
Instructions
Section A: Flower Center (Make 208)
Work all flowers the same way.
Round 1 (B – plum): Make an adjustable ring, ch 1, work 8 sc into ring. Tighten the ring and sl st to first sc. [8 sc]
Round 2 (B – plum): Ch 1, 2 sc in each st around. Sl st to first sc, fasten off. [16 sc]
Round 3 (A – lilac): Join in any st. [Sc in next st, ch 3, skip next st] 8 times. Sl st to first sc. [8 sc, 8 ch-3 loops]
Round 4 (A – lilac): Work one petal (as defined above) in each ch-3 loop. Fasten off after the eighth petal. [8 petals; 56 petal stitches]
Checkpoint: All 208 flowers should have eight petals and measure 5 cm across the petal tips. Set aside 16 flowers for the upper finish (straps).
Section B: Build Horizontal Bands
For each band, arrange 16 flowers with their centers in a straight line. Bridge the east (E) petal tip to the west (W) petal tip of neighbors using the specified chain count. Make 15 bridges now, reserving the closing bridge (to form a tube) until fitting.
Band 1: ch-4 bridges. Target closed circumference: 96 cm. [16 flowers, 15 bridges]
Band 2: ch-2 bridges. Target closed circumference: 88 cm. [16 flowers, 15 bridges]
Band 3: ch-4 bridges. Target closed circumference: 96 cm. [16 flowers, 15 bridges]
Band 4: ch-6 bridges. Target closed circumference: 104 cm. [16 flowers, 15 bridges]
Band 5: ch-8 bridges. Target closed circumference: 112 cm. [16 flowers, 15 bridges]
Band 6: ch-10 bridges. Target closed circumference: 120 cm. [16 flowers, 15 bridges]
Band 7: ch-12 bridges. Target closed circumference: 128 cm. [16 flowers, 15 bridges]
Band 8: ch-14 bridges. Target closed circumference: 136 cm. [16 flowers, 15 bridges]
Band 9: ch-16 bridges. Target closed circumference: 144 cm. [16 flowers, 15 bridges]
Band 10: ch-16 bridges. Target closed circumference: 144 cm. [16 flowers, 15 bridges]
Band 11: ch-16 bridges. Target closed circumference: 144 cm. [16 flowers, 15 bridges]
Band 12: ch-16 bridges. Target closed circumference: 144 cm. [16 flowers, 15 bridges]
Section C: Join Bands from Chest to Hem
Connect all bands vertically using ch-8 bridges between the south (S) petal tip of the upper flower and the north (N) petal tip of the flower directly below.
Join Row 1: Place band 2 below band 1. Align all 16 columns. Connect every S tip above to the corresponding N tip below with ch 8. [16 vertical bridges]
Join Row 2: Place band 3 below band 2. Connect with ch 8. [16 vertical bridges]
Join Row 3: Place band 4 below band 3. Connect with ch 8. [16 vertical bridges]
Join Row 4: Place band 5 below band 4. Connect with ch 8. [16 vertical bridges]
Join Row 5: Place band 6 below band 5. Connect with ch 8. [16 vertical bridges]
Join Row 6: Place band 7 below band 6. Connect with ch 8. [16 vertical bridges]
Join Row 7: Place band 8 below band 7. Connect with ch 8. [16 vertical bridges]
Join Row 8: Place band 9 below band 8. Connect with ch 8. [16 vertical bridges]
Join Row 9: Place band 10 below band 9. Connect with ch 8. [16 vertical bridges]
Join Row 10: Place band 11 below band 10. Connect with ch 8. [16 vertical bridges]
Join Row 11: Place band 12 below band 11. Connect with ch 8. [16 vertical bridges]
Mesh Stabilization
At each space between four flowers, add diagonal bridges to prevent the fabric from distorting:
- Bridge the SE tip of the upper-left flower to the NW tip of the lower-right flower with ch 10.
- Bridge the SW tip of the upper-right flower to the NE tip of the lower-left flower with ch 5, sl st into the fifth chain of the first bridge, ch 5, then join.
If an intersection pulls or distorts, increase both halves of the diagonal bridge equally until the fabric lies flat. [2 diagonal bridges per complete four-flower cell]
Section D: Upper Finish (Straps)
Upper Row 1: Make two straps, each a rectangle 2 flowers wide by 4 flowers long. Join side tips with ch 0 (whipstitch) and end tips with ch 4. [8 flowers per strap; 16 total]
Upper Row 2: Pin each strap between the outer two flowers of the front upper edge and the corresponding back edge. Sew every touching petal tip. [2 straps, approximately 10 x 23 cm each]
For a square neckline, leave the center four flowers of the front and back upper bands level. For the empire version, position the narrowest band (band 2) immediately below the bust and lengthen the shoulder paths only if needed.
Fitting check: Try the pinned garment over the slip. The neckline should sit flat and the shoulders should bear the weight without stretching. Use the side opening for dressing. Do not force the openwork over the hips.
Assembly
Body Seam and Closure
Join Round 1: Close each body band from band 7 to band 12, using that band’s scheduled bridge chain count. [6 closing bridges]
Join Row 2: Connect the seam-adjacent diagonal mesh below the opening using the same crossed-bridge method. [One mesh cell per joined band interval]
Sewing Pass 3: Hand-sew stay tape along both edges of the upper side opening. Sew the zipper to the tape without catching the teeth. [2 supported zipper edges]
Checkpoint: Closed bust should measure approximately 96 cm. Total shoulder-to-hem length should be approximately 104 cm. The zipper should open smoothly with no twisted joins.
Slip and Shoulder Support
Sewing Pass 1: Attach stay tape underneath the straps using small catch stitches. [2 supported shoulder paths]
Sewing Pass 2: Tack the crochet to the slip at shoulders and both underarms, leaving the skirt layers independent. [4 anchor points]
Checkpoint: The slip should allow comfortable movement and cover all openwork areas intended to be opaque.
Edgings and Details
Neckline and Armholes
Round 1: Sc once in each exposed petal stitch. Work one sc into each chain of each exposed bridge. Do not work across the zipper opening. Record the resulting stitch count (E) separately for each opening. [E sc]
Round 2: Sl st loosely in every sc. Fasten off. [E sl st]
Checkpoint: Both armholes should lie flat with matching stitch counts. The hem retains the natural eight-petal flower outline.
Hem
Finishing Pass 1: Secure every bottom-band bridge end. Keep the lower petals unattached. [16 hem flowers]
Checkpoint: The flower scallops should hang evenly without curling.
Finishing
Ends and Blocking
Finishing Pass 1: Weave every yarn end through at least 3 cm of dense stitching, changing direction twice. [0 unsecured ends]
Blocking Pass 2: Dampen the dress and lay it flat according to the band chart measurements. Support the full garment weight while drying. Allow to dry completely before lifting. [16 flowers per band]
Final Checkpoint: Length approximately 104 cm. Chest approximately 96 cm. Each flower approximately 5 cm. Hang only briefly for the final fit check.
Care Instructions
- Hand wash in cool water with mild detergent
- Support the wet dress with both hands when lifting
- Roll in towels to remove excess water
- Dry flat on a blocking surface
- Do not wring, tumble dry, or suspend while wet
- Store folded
- Secure all closures before storing
- Keep long ties and open loops away from machinery, flame, and young children
- Always wear the opaque slip underneath
- Shorten a floor-length hem if it creates a trip hazard
Tips for Success
Batch your flowers. Making 208 flowers feels less overwhelming when you work in batches of 20 or so. This also helps you catch any gauge drift early.
Block as you go. Lightly block each batch of flowers before joining. This makes assembly much easier and helps ensure consistent sizing.
Use stitch markers generously. Mark the north petal on every flower before assembly. This simple step prevents orientation errors that are frustrating to fix later.
Pin before joining permanently. The pattern wisely reserves the closing bridges until fitting. Take advantage of this by pinning and trying on the dress at multiple stages.
Trust the process. The narrower band 2 creates the empire waist effect. It might look strange during construction, but once assembled, the graduated bands create a beautiful fitted-to-flared silhouette.
This dress is a true labor of love. Each flower you complete brings you closer to an absolutely stunning handmade garment. The methodical construction means you can pick it up and put it down easily, making it perfect for working on during quiet evenings or while watching your favorite shows.
Thank you so much for choosing this pattern. If you make your own version of Violet, please share photos on Instagram or in our Facebook group. Seeing your finished dresses is such a joy, and your color combinations might inspire other makers in the community.
If this pattern has you dreaming of garden parties and summer evenings, go ahead and save it to your Pinterest boards so you can find it easily when you’re ready to start. And if you do make this beautiful dress, please leave a comment below. Your feedback means the world, and other crocheters love seeing what’s possible!
Want a Quick & Easy Printable Version?
Get a clean, beautifully formatted PDF of this pattern — easy to follow step by step, ready to print or save on any device. No scrolling, no distractions, just the pattern.
Get the Printable PDF →