
I set out to design a bag that felt like sunshine you could carry. Something structured enough to hold its shape but covered in cheerful daisies that would make me smile every time I reached for it. The bucket silhouette, the bold mustard yellow, the creamy petals popping against that golden background. I wanted all of it.
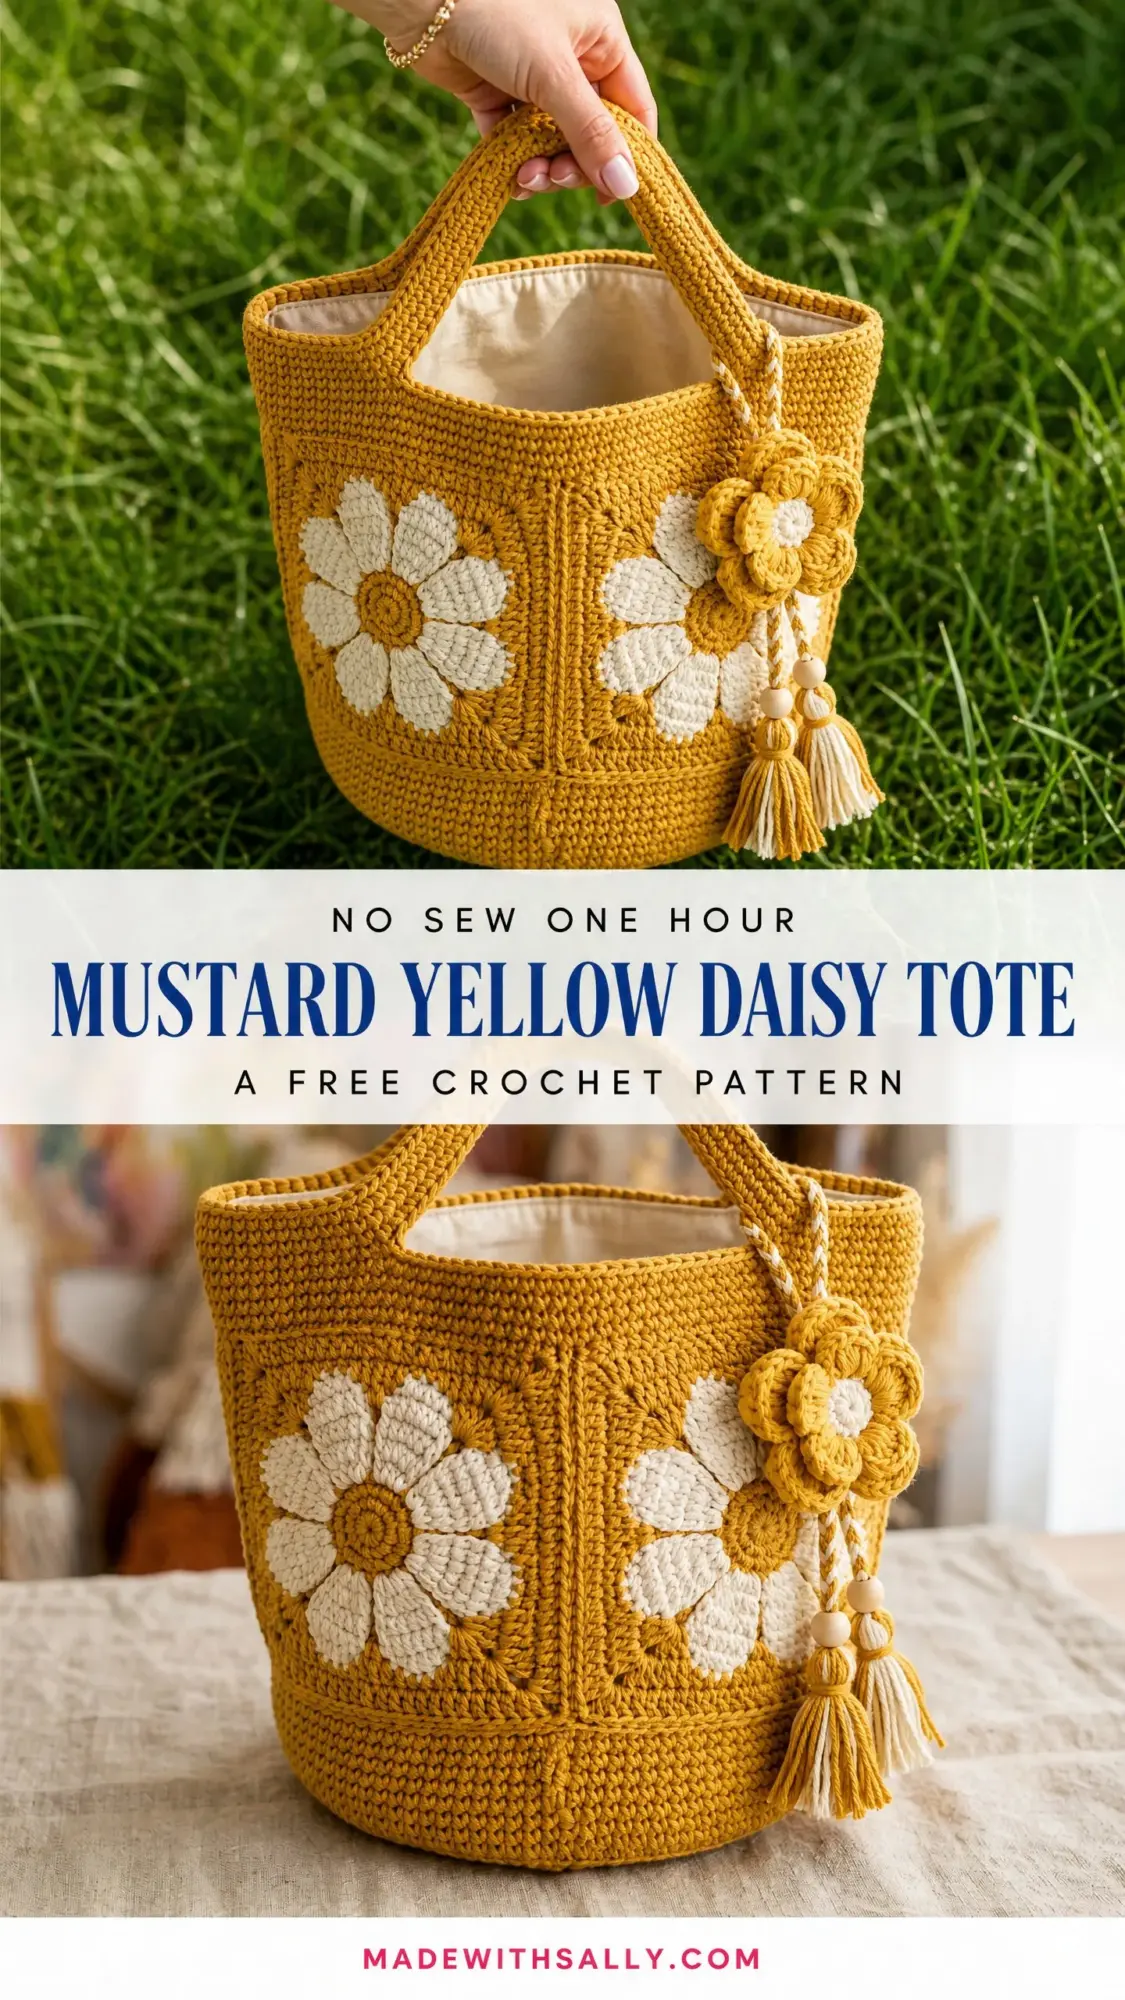
After weeks of swatching and reworking the daisy square construction, I landed on this design. Four oversized granny squares with sculptural puff stitch centers and elongated petals that actually look like flowers. A sturdy cylindrical body that stands up on its own. A sweet little tassel charm with wooden beads and a matching crochet flower.
I am SO pleased with how this mustard yellow daisy tote turned out. It hits every mark I was aiming for, and I cannot wait for you to make one too.
About This Crochet Pattern
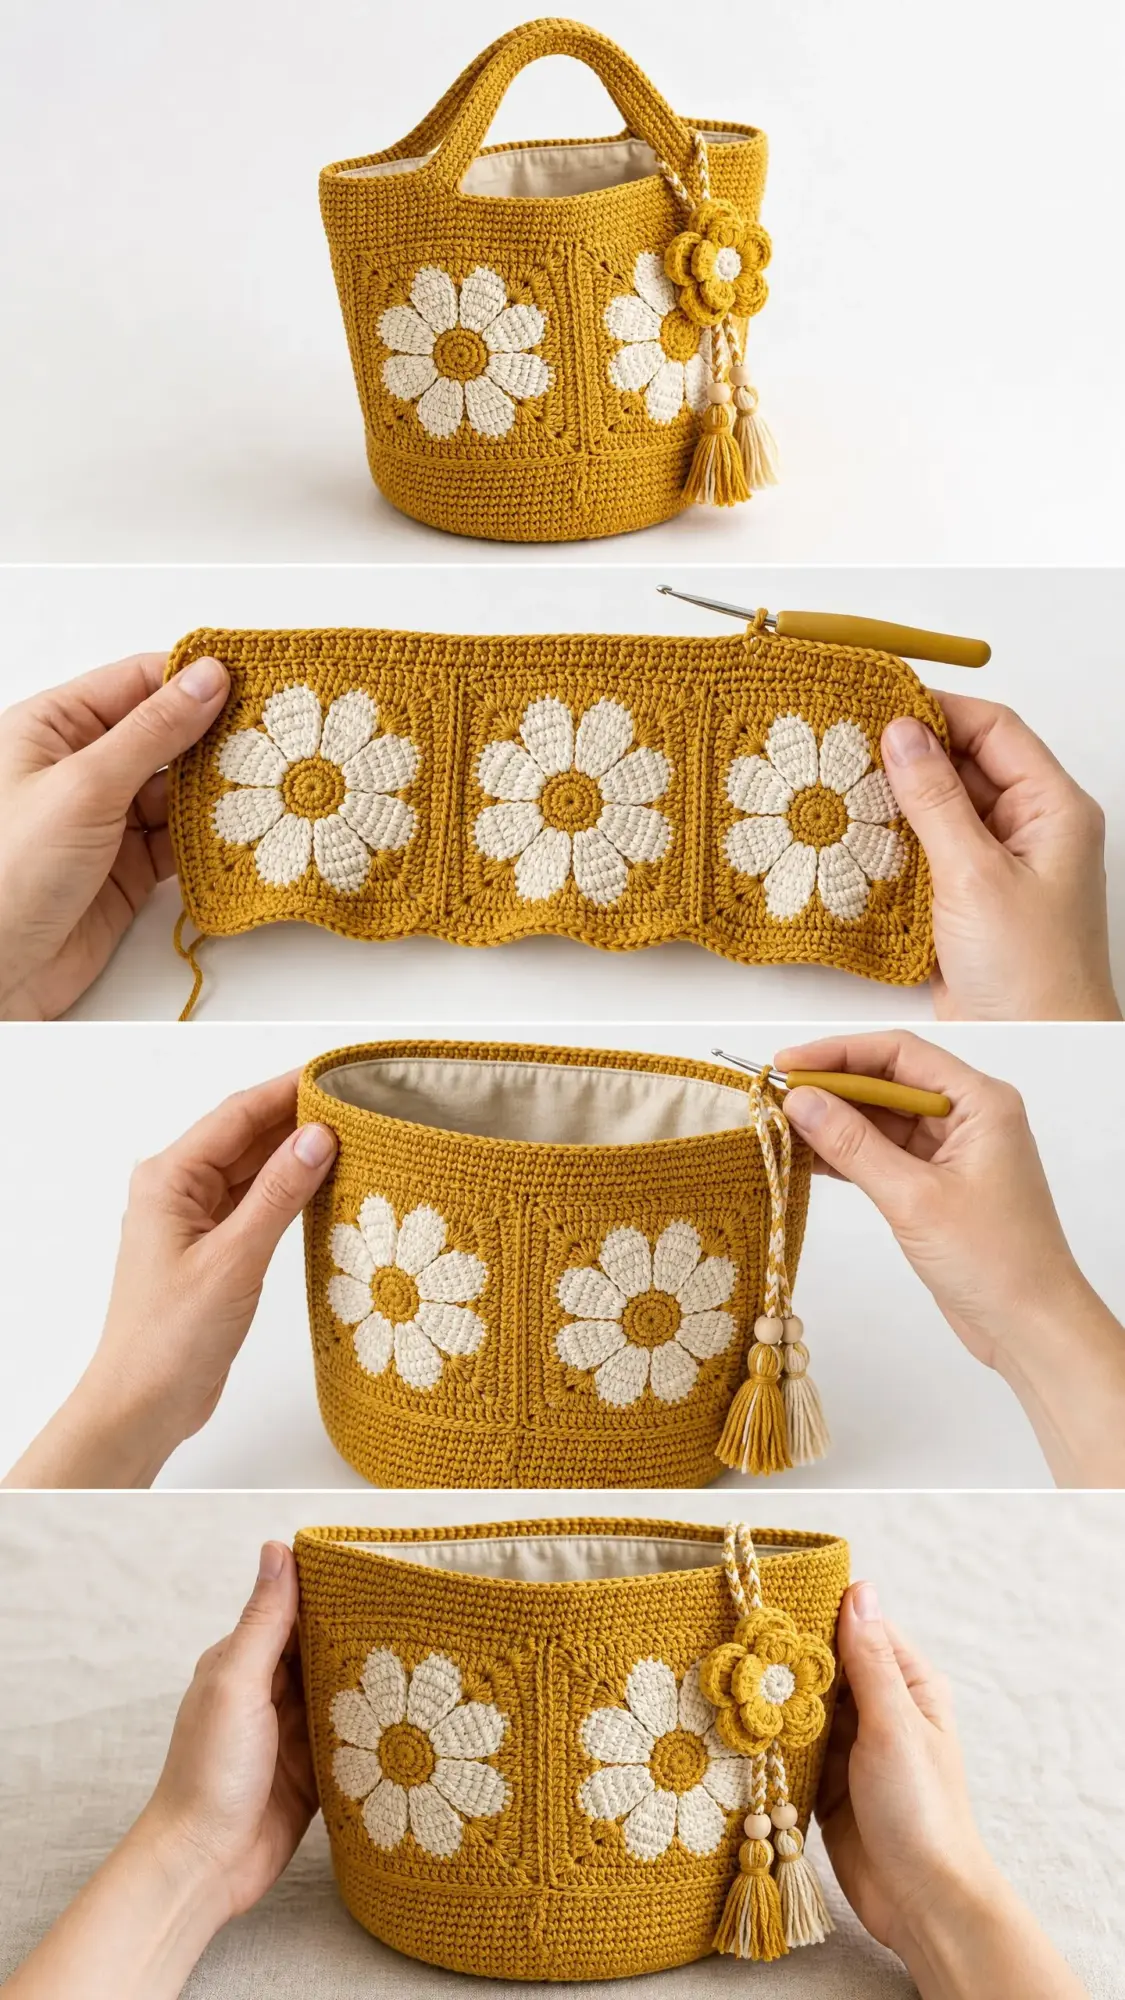
This crochet tote bag pattern creates a structured bucket-style bag with a flat circular base, straight cylindrical walls, and a single looped handle on top. The star of the show is the four large daisy granny squares that get seamed onto the exterior as decorative panels. Two squares sit on the front face, two on the back.
The finished bag measures approximately 12 inches wide by 11 inches tall, not including the handle. The base diameter comes in around 9 inches, giving you plenty of room for farmers market finds, library books, or your current work in progress.
Skill level: Intermediate. You will need to be comfortable working in the round, making granny squares, and doing some basic seaming. The daisy center uses a puff stitch, and the petals use an elongated single crochet technique. Neither is difficult once you get the hang of it, but they do require attention to tension.
Time estimate: Plan for 18 to 24 hours of crochet time if you work at an intermediate pace. That includes all four daisy squares, the bag body, handle, tassel charm, and fabric lining.
Materials You Will Need
Yarn
Main Color (MC): Mustard yellow worsted weight cotton or cotton blend, approximately 650 yards
Contrast Color (CC): Cream or off-white in the same yarn weight, approximately 200 yards
Cotton yarn is important here. The natural stiffness of cotton gives this bag its structured bucket shape. Acrylic will result in a floppy bag that does not hold its silhouette.
Yarn suggestions that work beautifully:
1. Lion Brand 24/7 Cotton in Goldenrod and Ecru. This is 100% mercerized cotton with excellent stitch definition. Machine washable and widely available.
2. Paintbox Yarns Simply DK Cotton in Mustard Yellow and Champagne White. Slightly lighter weight but works well with the larger hook for a dense fabric.
3. We Are Knitters The Cotton in Mustard and Raw White. Pima cotton with a softer hand that still provides good structure.
Hooks
You need both sizes. The smaller hook creates tighter, more defined daisy motifs. The larger hook builds the bag body at the correct gauge.
Notions
Gauge
Getting gauge right matters for this project. A bag that is too loose will flop over. Too tight and it will be stiff and smaller than expected.
Bag body with H-8 hook in single crochet:
16 sc x 18 rounds = 4 inches square
Daisy square with G-6 hook, blocked:
One completed square = 5.5 inches square
Swatch before you start. Adjust your hook size up or down as needed.
Abbreviations and Stitch Definitions
Let me walk you through all the stitches and abbreviations you will encounter. I am defining everything on first use so you have it all in one place.
ch = chain. Wrap yarn over hook, pull through loop on hook.
sl st = slip stitch. Insert hook, yarn over, pull through stitch and loop on hook in one motion.
sc = single crochet. Insert hook into stitch, yarn over and pull up a loop (two loops on hook), yarn over and pull through both loops.
hdc = half double crochet. Yarn over, insert hook into stitch, yarn over and pull up a loop (three loops on hook), yarn over and pull through all three loops.
dc = double crochet. Yarn over, insert hook into stitch, yarn over and pull up a loop (three loops on hook), yarn over and pull through two loops, yarn over and pull through remaining two loops.
MR = magic ring. An adjustable starting loop that can be pulled tight to close the center hole.
BLO = back loop only. Work into just the back loop of the stitch instead of both loops.
inc = increase. Work 2 sc into the same stitch.
pm = place marker
RS = right side
WS = wrong side
st(s) = stitch(es)
rep = repeat
sk = skip
sp = space
ch-sp = chain space
Special Stitches
Puff Stitch (ps): This creates the textured center of each daisy. Insert hook into the stitch, yarn over and pull up a loop to about 1/2 inch height. Without completing the stitch, insert hook into the same stitch again, yarn over and pull up another loop to the same height. Repeat one more time. You now have 7 loops on your hook. Yarn over and pull through all 7 loops at once. Chain 1 to close and secure the puff.
Do not panic if this feels awkward at first. The key is keeping all those pulled-up loops at the same height before you close them.
Elongated Single Crochet Petal (escp): This creates the raised sculptural petals. Insert your hook into the foundation ring or designated space, yarn over, and pull up a loop to about 3/4 inch to 1 inch height. Do not let it collapse to normal sc height. Yarn over and pull through both loops on hook.
The elongated draw-up is what makes the petals stand up and look like actual flower petals instead of flat stitches.
Standing Single Crochet (ssc): A way to join new yarn without a slip stitch. Start with a slip knot on your hook, insert hook into the designated stitch, yarn over, pull up a loop, yarn over, pull through both loops. This gives you a cleaner color join.
Invisible Join: Cut yarn leaving a 6-inch tail. Thread onto tapestry needle. Insert needle under both loops of the first stitch of the round from front to back. Insert needle back down through the center of the last stitch made. Pull gently to match the tension of surrounding stitches.
Pattern Notes Before You Begin
Read through these before you start crocheting. They will save you confusion later.
1. The bag body is worked in continuous rounds with no joining at the end of each round. Use a stitch marker in the first stitch and move it up as you go.
2. The daisy squares are made separately with the smaller hook, blocked flat, then sewn onto the finished bag body.
3. Four squares total. Two go on the front, two on the back, arranged side by side.
4. When changing colors, work the last yarn over of the final stitch in the old color with the new color. This creates a clean color transition.
5. Stitch counts appear in parentheses at the end of each round.
6. All rounds are worked with the right side facing unless noted otherwise.
Section 1: Bag Base
The base is a flat circle worked in joined rounds with turning chains. This creates a firm, flat bottom.
With MC and H-8 hook, make a magic ring.
Round 1: Ch 1 (does not count as st), work 8 sc into the magic ring, sl st to first sc to join, pull ring closed. (8 sc)
Round 2: Ch 1, turn. Working into the WS, 2 sc in each st around, sl st to first sc to join. (16 sc)
Round 3: Ch 1, turn. (2 sc in next st, sc in next st) around, sl st to first sc to join. (24 sc)
Round 4: Ch 1, turn. (2 sc in next st, sc in next 2 sts) around, sl st to first sc to join. (32 sc)
Round 5: Ch 1, turn. (2 sc in next st, sc in next 3 sts) around, sl st to first sc to join. (40 sc)
Round 6: Ch 1, turn. (2 sc in next st, sc in next 4 sts) around, sl st to first sc to join. (48 sc)
Round 7: Ch 1, turn. (2 sc in next st, sc in next 5 sts) around, sl st to first sc to join. (56 sc)
Round 8: Ch 1, turn. (2 sc in next st, sc in next 6 sts) around, sl st to first sc to join. (64 sc)
Round 9: Ch 1, turn. (2 sc in next st, sc in next 7 sts) around, sl st to first sc to join. (72 sc)
Round 10: Ch 1, turn. (2 sc in next st, sc in next 8 sts) around, sl st to first sc to join. (80 sc)
Round 11: Ch 1, turn. (2 sc in next st, sc in next 9 sts) around, sl st to first sc to join. (88 sc)
Do not fasten off.
Checkpoint: Your base should measure approximately 9 inches across when lightly blocked. If it cups upward, your tension is too tight. If it ruffles, too loose.
Section 2: Bag Body (Side Walls)
Now we build the walls straight up from the base. This is where the bag gets its bucket shape.
Continue with MC and H-8 hook. At the end of Round 11, do NOT turn.
Round 12 (Transition Round): Ch 1, do not turn. Working in BLO of each stitch around, sc in each st around. Do not join. Place marker in first st. (88 sc)
Working in the back loop only creates a crisp fold line between the base and walls. This is what gives the bag its defined bucket silhouette.
Rounds 13 through 38: Sc in each st around, working through both loops. Move marker up each round. (88 sc each round)
That is 26 rounds of plain single crochet. The walls should measure approximately 9.5 inches tall from the fold line.
Checkpoint: After Round 38, your bag body should be about 9.5 inches tall and approximately 12 inches wide when laid flat.
Round 39 (Handle Attachment Prep): Sc in next 22 sts, pm for handle left attachment point, sc in next 44 sts, pm for handle right attachment point, sc in next 22 sts. (88 sc)
Your two handle markers should sit directly opposite each other.
Rounds 40 and 41: Sc in each st around. (88 sc each round)
At end of Round 41, sl st to next st, fasten off. Weave in ends.
Section 3: Daisy Granny Square (Make 4)
These are the showstoppers. Each square features a puff stitch center, elongated petal clusters, and a granny square border that converts the round daisy into a square shape.
With G-6 hook and CC (cream).
Daisy Center
Round 1: With MC, make a magic ring. Ch 2 (does not count as st), work 10 hdc into ring, sl st to first hdc to join, pull ring closed. (10 hdc)
Round 2: Ch 1, (ps in next st, ch 1, sk 1 st) 5 times, sl st to top of first ps to join. (5 ps, 5 ch-1 sps)
Fasten off MC. The center medallion should measure approximately 1 inch across.
Daisy Petals
Join CC into the center ring opening.
Round 3: For each of the 5 ch-1 spaces between puffs, work the following petal cluster: Insert hook into center ring, work 1 escp. Repeat twice more so you have 3 elongated sc going into the center ring for that petal cluster. Sl st into the next ch-1 space. Rep for all 5 petal clusters around. Sl st to base of first escp to join. (15 escp total, 5 petal clusters of 3 each)
Fasten off CC.
Outer Petal Round
Rejoin CC with a standing sc at the tip of any petal cluster.
Round 4: Work 1 sc in each of the 3 escp of the first petal cluster, ch 3 (forms petal tip arch), sc in top loop of center escp of same cluster, ch 3. Rep for each of the 5 petal clusters around. Sl st to first sc to join. (5 petal arches, 15 sc, 10 ch-3 sps)
Fasten off CC.
Granny Square Border
This is where we turn the round daisy into a square.
Join MC with standing sc in any ch-3 petal arch space.
Round 5: (Sc, hdc, 3 dc, hdc, sc) into each of the 5 petal arch ch-3 spaces around. Sl st to first sc. (5 petal shells, 35 sts)
Round 6: Ch 3, treat the motif as a square with 4 corners. At each corner petal shell, work (2 dc, ch 2, 2 dc) into the top center dc. Along each edge between corners, work dc across all intervening sts and ch-sps. Adjust to have approximately 7 dc per side between corner ch-2 sps. Join with sl st to top of ch-3. (4 corner ch-2 sps, approximately 7 dc per side)
Round 7: Sl st to corner ch-2 sp, ch 3, (dc, ch 2, 2 dc) in same corner sp, dc in each dc across to next corner ch-2 sp, (2 dc, ch 2, 2 dc) in corner sp. Rep around all 4 corners. Sl st to top of ch-3 to join. (4 corners, 11 dc per side between corners)
Round 8: Sl st to corner ch-2 sp, ch 1, (sc, ch 2, sc) in corner sp, sc in each dc across to next corner. Rep around all 4 sides. Sl st to first sc to join. (4 corners with ch-2 sps, 13 sc per side)
Fasten off MC. Weave in ends. Block square to 5.5 inches square using pins and a damp cloth.
Make all 4 squares before moving on.
Section 4: Handle
With MC and H-8 hook.
Ch 81.
Row 1: Sc in 2nd ch from hook and in each ch across. Ch 1, turn. (80 sc)
Rows 2 through 6: Sc in each st across. Ch 1, turn. (80 sc each row)
At end of Row 6, do not fasten off.
Fold the strip in half lengthwise so the long edges meet. Working through both layers, sl st the long open edge together to form a tube. Fasten off, leaving a 24-inch tail.
The handle should be approximately 20 inches long, giving a loop height of about 5 inches above the bag opening.
Handle Attachment
Locate your handle markers from Round 39. Pin one end of the handle to each marker location, with about 1 inch of overlap on the inside of the bag.
Using the tail and tapestry needle, whipstitch each handle end securely to the inside top of the bag wall. Pass through at least 3 times in each direction for strength. Weave in ends.
Section 5: Tassel Charm and Decorative Flower
Tassel Charm
Cut 20 strands of MC and 10 strands of CC, each 10 inches long.
Cut one strand of MC approximately 18 inches long for the cord.
Fold the cord strand in half. Add 3 wooden beads onto the folded cord. Tie an overhand knot below the beads. Braid or twist the two cord strands together above the beads for approximately 3 inches.
Gather all cut strands into a bundle. Fold the bundle in half. Loop the folded end through the cord loop and pull cut ends through (lark’s head knot). Wrap a separate strand of MC tightly around the bundle about 3/4 inch below the fold. Knot and trim. Trim tassel skirt to approximately 3 inches.
Decorative Crochet Flower
With MC and G-6 hook.
Round 1: MR, ch 1, work 6 sc into ring, sl st to first sc to join. (6 sc)
Round 2: Ch 1, 2 sc in each st around, sl st to first sc to join. (12 sc)
Round 3: (Ch 3, sk 1 st, sl st in next st) 6 times around. (6 ch-3 petal loops)
Round 4: (Sc, hdc, 3 dc, hdc, sc) into each ch-3 petal loop around. Sl st to first sc to join. (6 petals)
Fasten off with a 12-inch tail. Sew the flower to the top of the tassel cord above the beads.
Attach the assembled charm to the handle at the right-side attachment point by looping and tying securely.
Section 6: Attaching Daisy Squares
Block all 4 squares to 5.5 inches square.
Lay the bag flat. On the front face, pin 2 squares side by side with their top edges sitting 1 inch below the bag opening and bottom edges approximately 3 inches above the base fold. Center them horizontally, leaving about 0.5 inches from the side folds.
Repeat on the back face with the remaining 2 squares.
Using MC and tapestry needle, whipstitch each square around all 4 edges, catching both the square border and the bag body stitches. At the center seam where two squares meet, whipstitch them to each other as well.
Section 7: Fabric Lining
Cut two fabric rectangles: 13.5 inches wide by 12 inches tall.
Cut one fabric circle: 9.5 inches diameter.
With right sides together, sew the rectangles along both short edges with 0.5-inch seam allowance. Press seams open.
Pin the circle to the bottom of the tube, right sides together. Clip the circle edge every 1/2 inch to ease the curve. Sew with 0.5-inch seam allowance. Trim and press.
Fold the top edge down 1 inch to the wrong side and press.
Insert lining into bag with wrong side facing the inside wall. Align seams with the bag’s side folds. The folded top edge should sit about 1/2 inch below the bag opening.
Slip stitch the lining to the inside top of the bag body all the way around.
Size Customization Tips
To make it wider: Add repeats of 8 sc to the base (one more increase round). Every 8 stitches adds about 0.75 inches to the width. Scale your daisy squares accordingly.
To make it taller: Add more plain sc rounds between Rounds 12 and 38. Every 4 rounds adds approximately 1 inch of height.
Different yarn weight: DK weight with a G-6 hook produces a bag about 10 percent smaller. Recalculate lining dimensions.
Finishing and Care
Weave in all ends through at least 4 stitches in alternating directions.
Block the finished bag by lightly dampening it and shaping over a rounded form like a bowl or crumpled towel. Pat the daisy squares flat. Let dry completely.
Care: Machine wash gentle cycle in cool water inside a mesh bag. Lay flat to dry. Do not tumble dry. Remove wooden beads before washing or hand wash only.
You Made It!
This mustard yellow daisy tote is such a satisfying project. From that first magic ring on the base to sewing in the final lining stitch, every step builds toward something truly beautiful. The combination of the cheerful daisy granny squares against that rich golden background never fails to make me happy.
Thank you so much for choosing this crochet pattern. I would absolutely love to see your finished bag! Share your photos on Instagram or Facebook and tag me so I can cheer you on.
If you loved making this daisy tote, save this pattern to your Pinterest boards so you can find it again whenever the mood for sunshine-colored crochet strikes. And please drop a comment below if you make one. I read every single comment and your photos make my whole day!
