
I don’t know about you, but I have a serious weakness for dresses that look like they belong in a cottage garden tea party. All the romance, all the delicate details, none of the fussy sewing machine drama.
Get the Ad-Free PDF Pattern
You can find the free pattern below, or you can purchase the ad-free printable PDF from my shop.
Get the Printable PDF →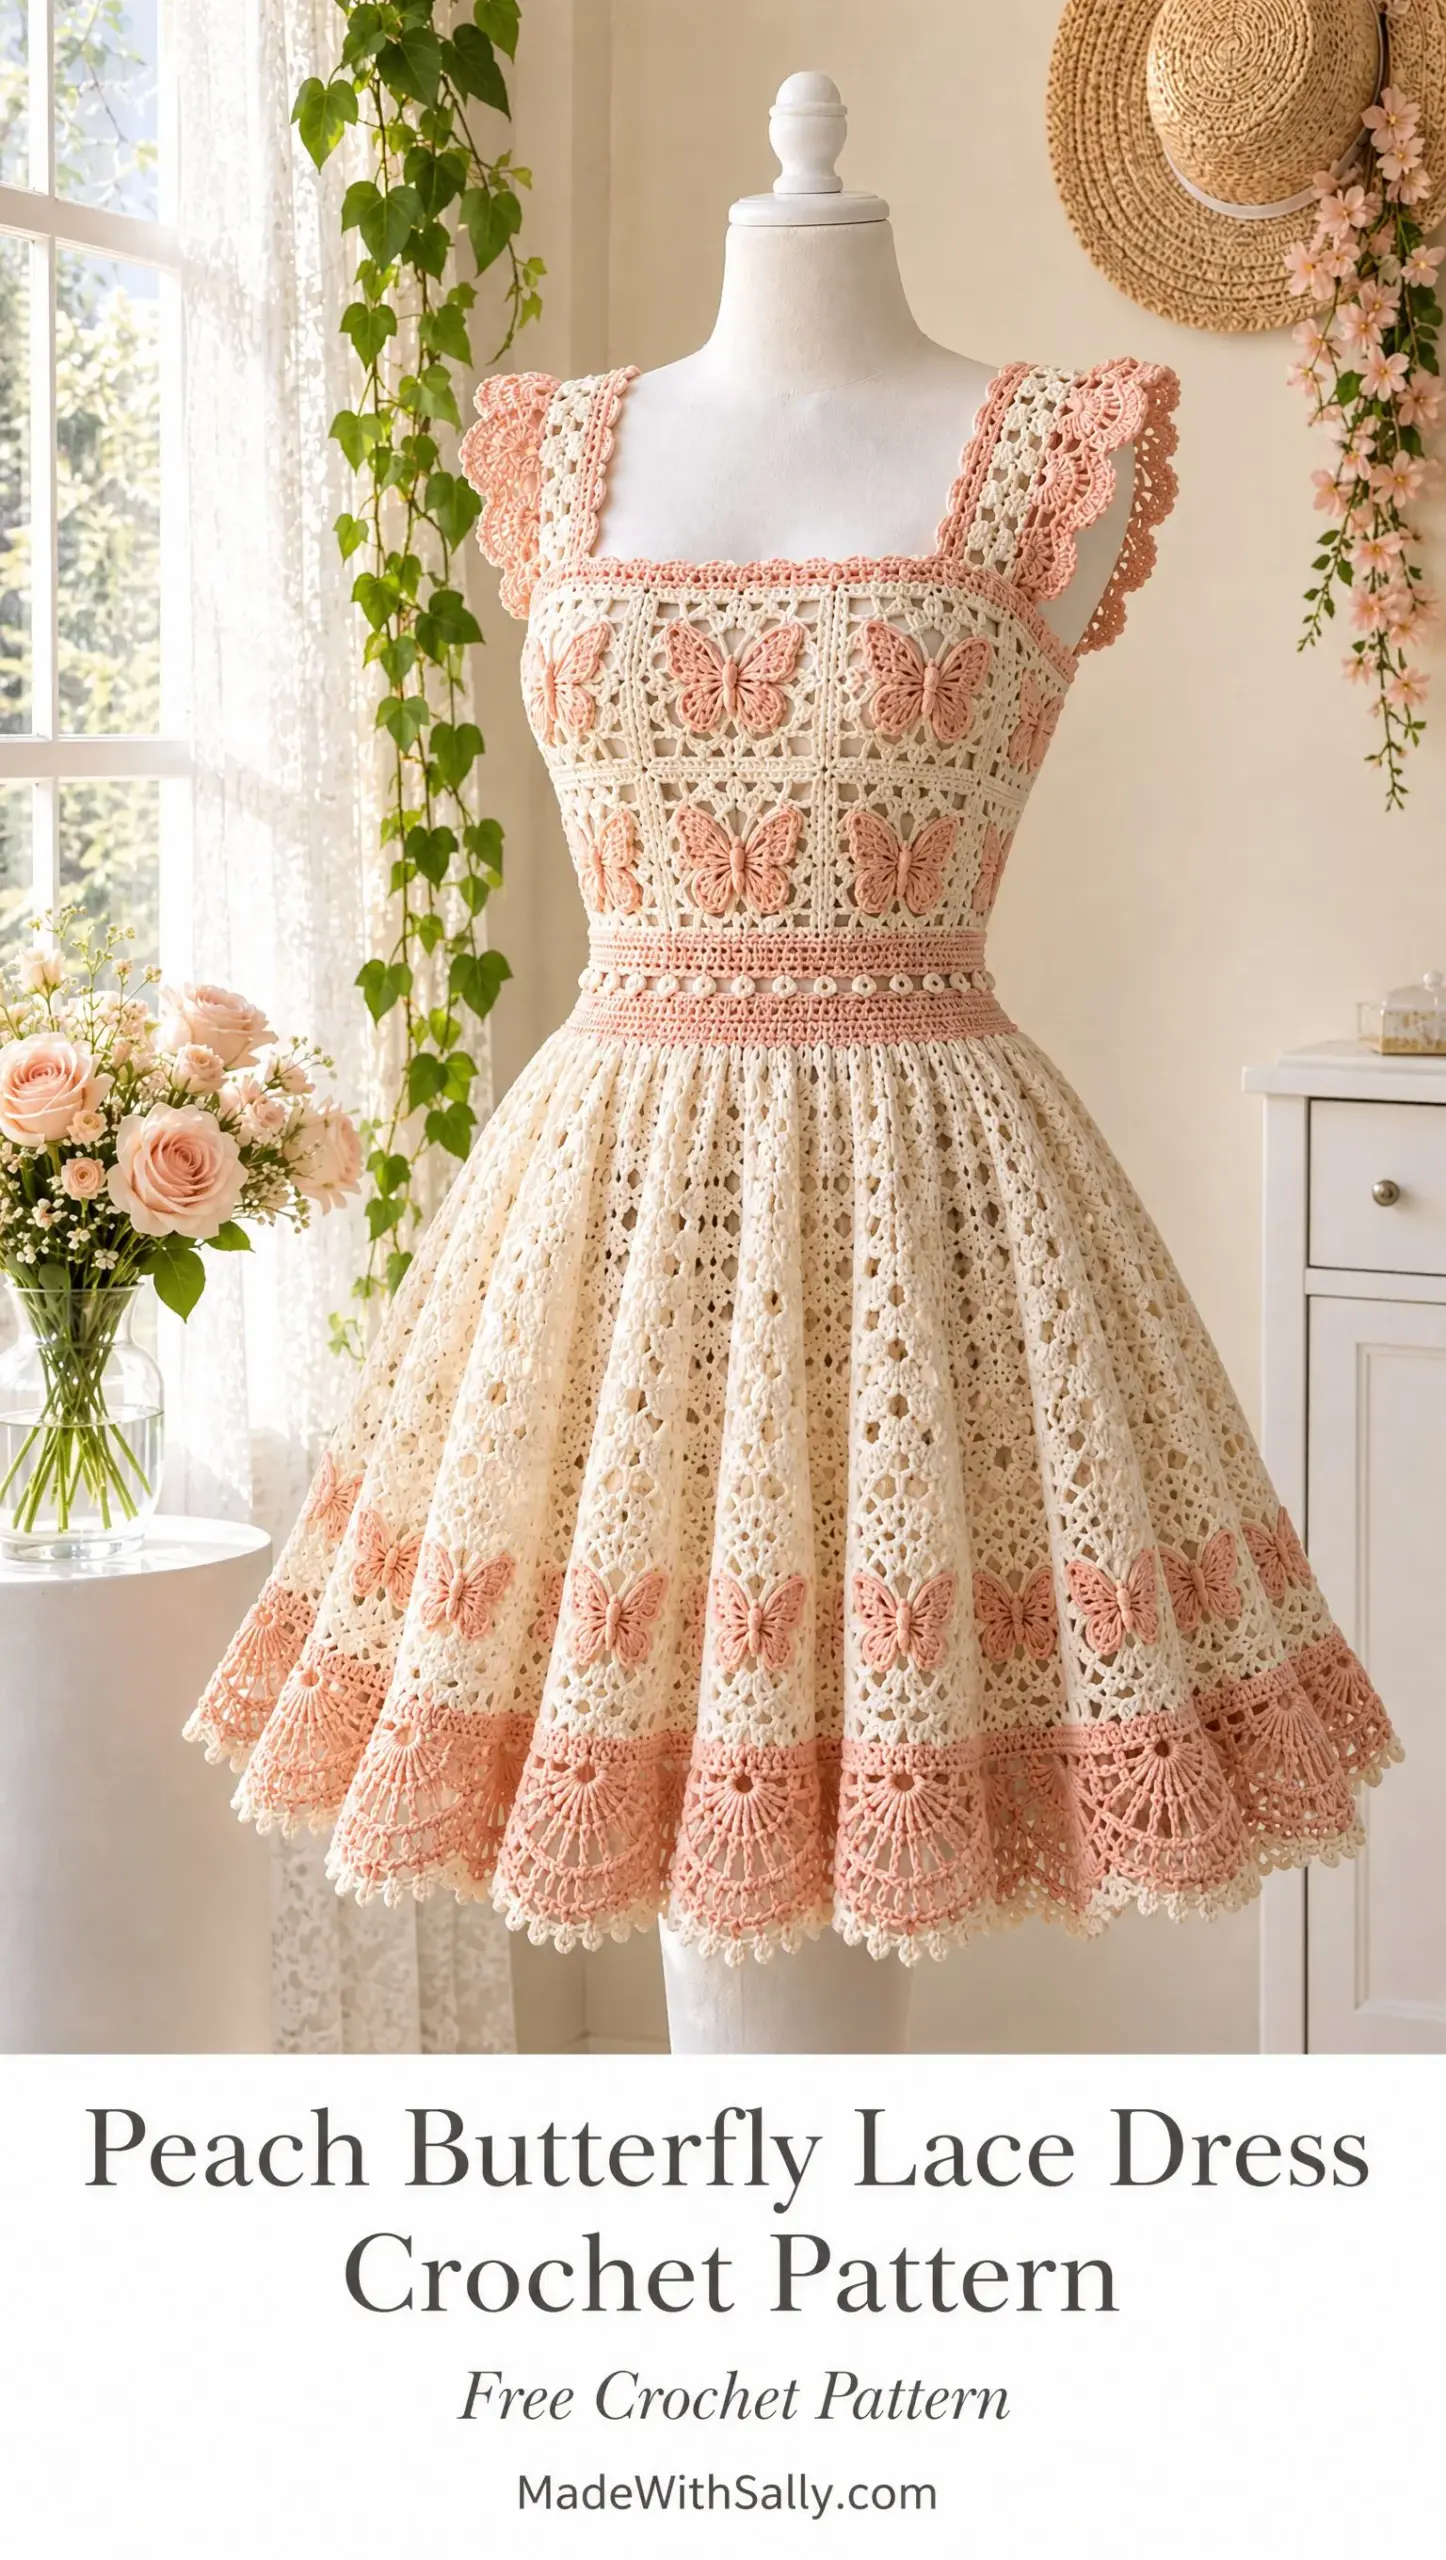
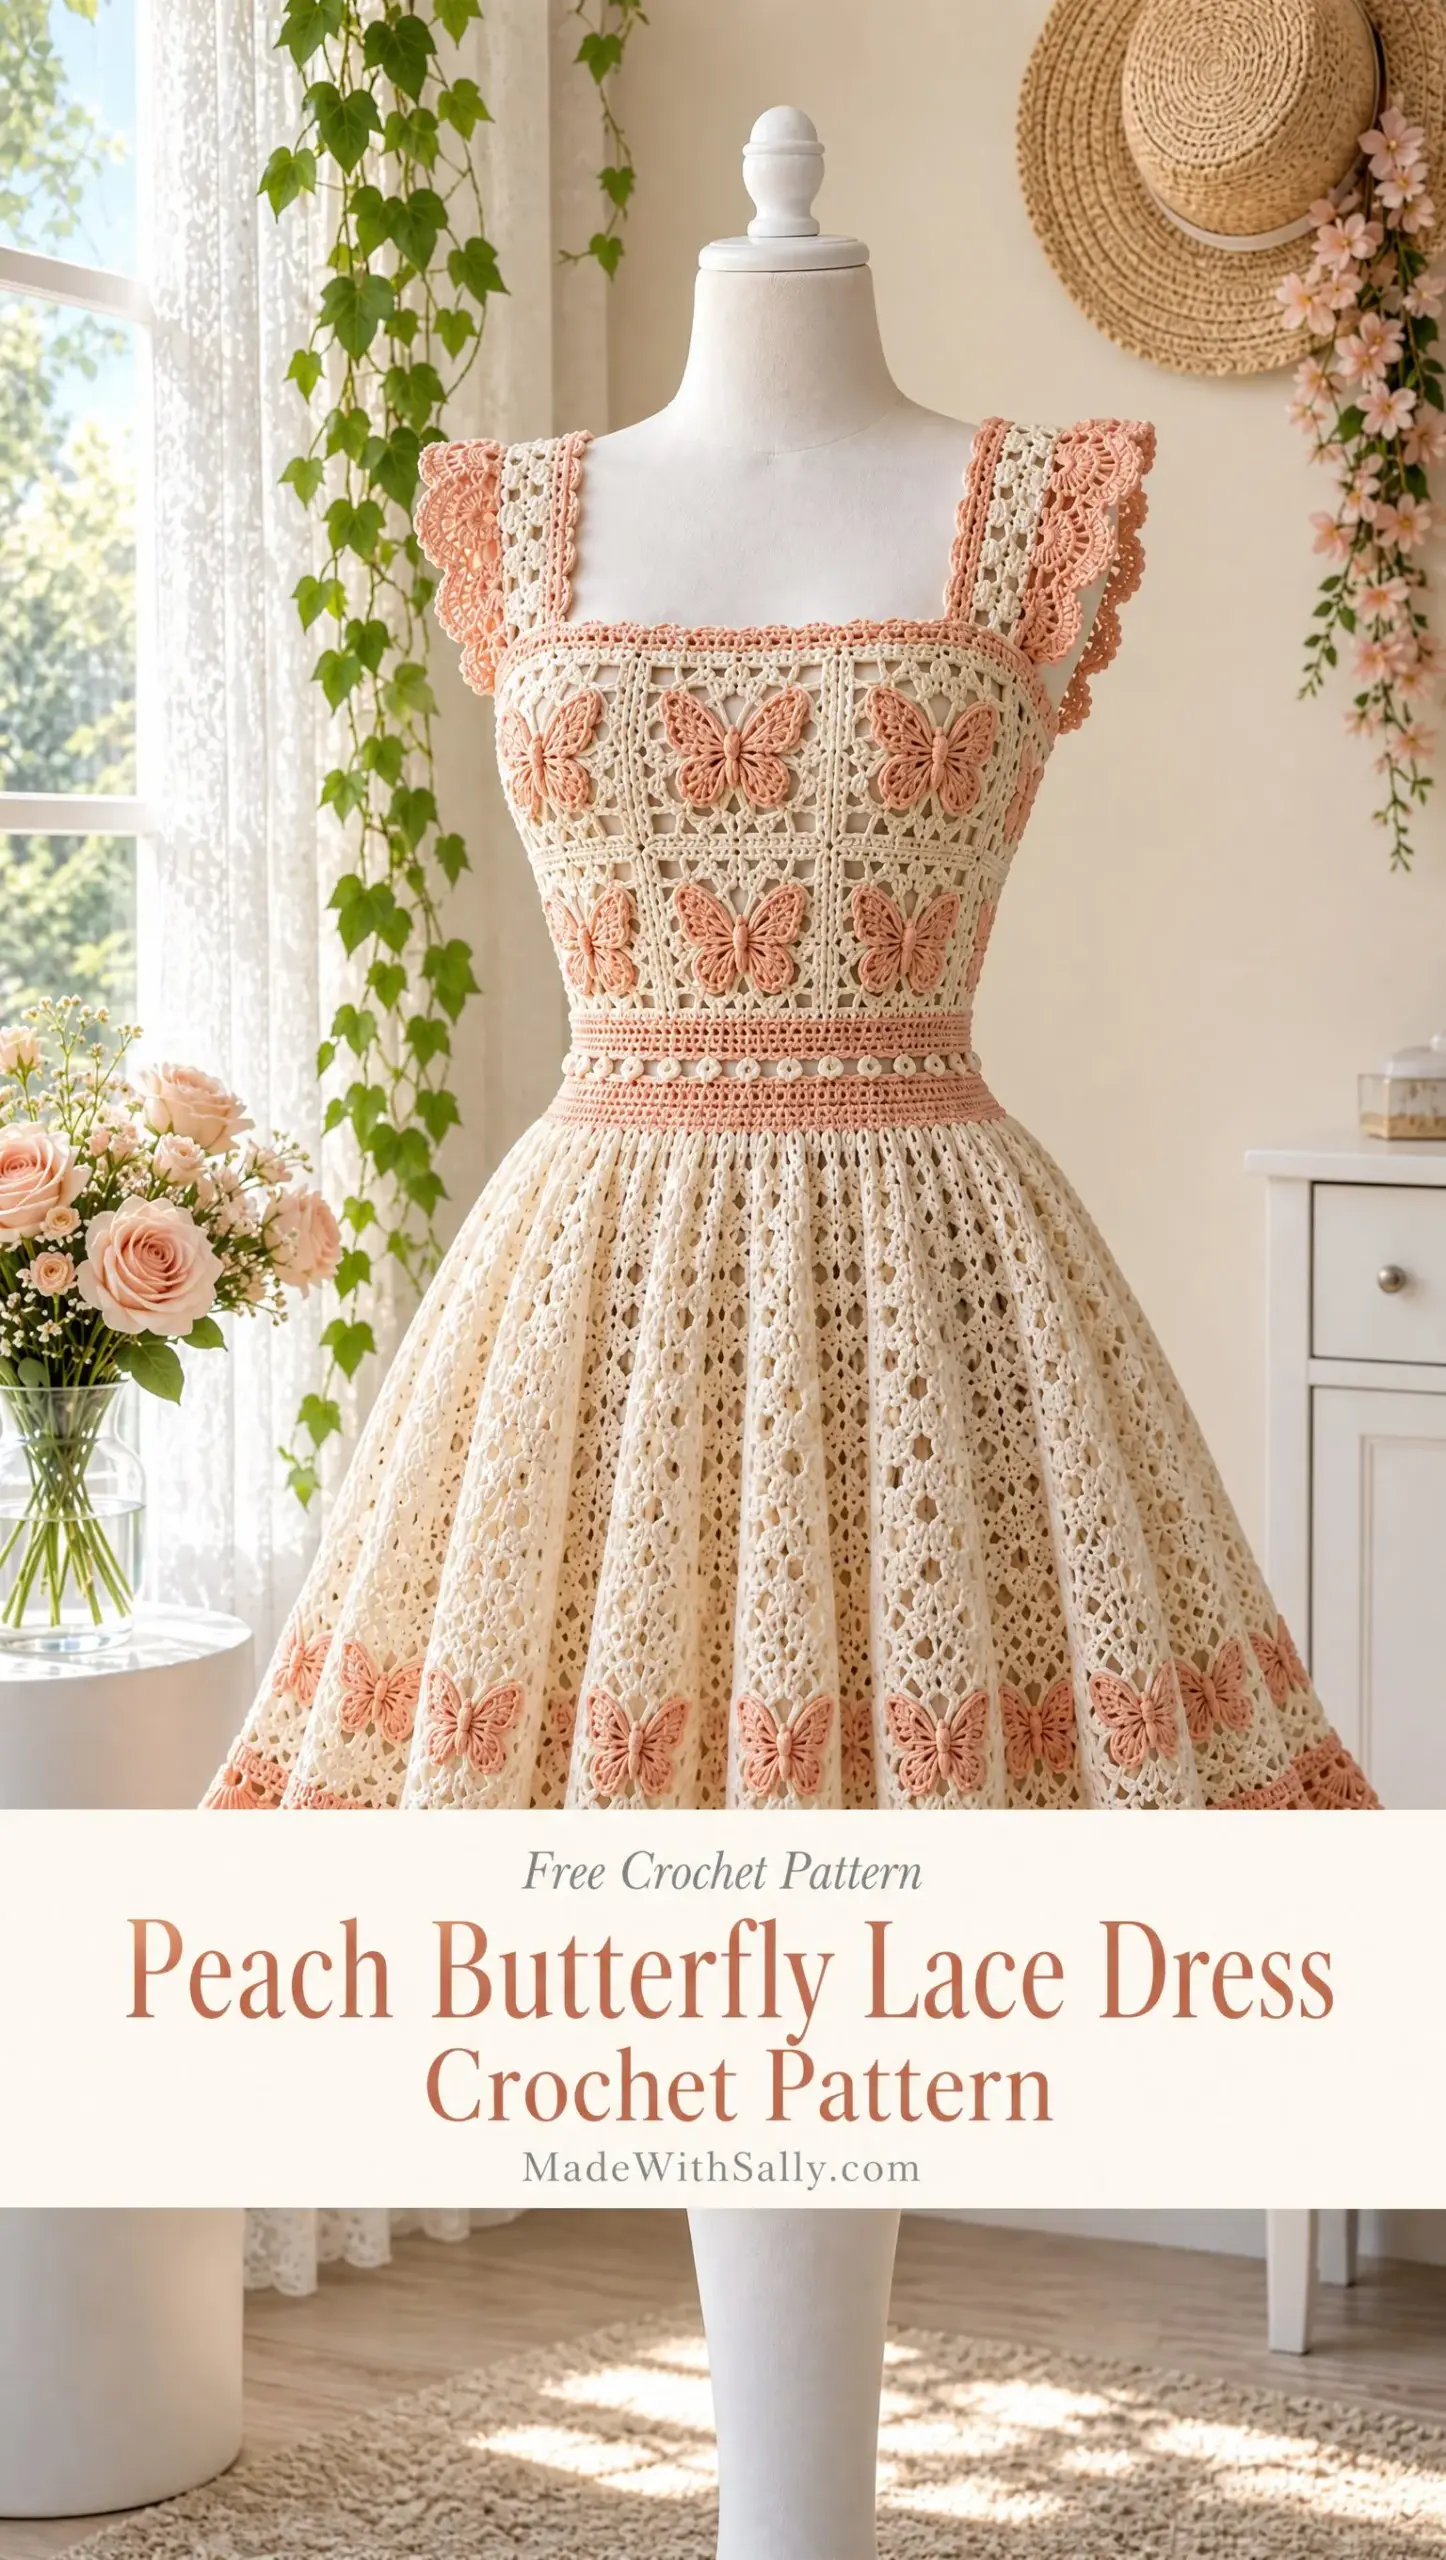
This Peach Butterfly Lace Dress is exactly that kind of project. It combines soft cream openwork squares with raised peach butterflies, a fitted waistband with sweet little chain windows, and a full gathered skirt that swishes when you walk. The broad fan border at the hem? Absolute perfection.
If you’ve been looking for a statement crochet garment that showcases your skills and makes people ask "wait, you MADE that?", this is the one. Let me walk you through everything you need to know.
What Makes This Dress Special
This isn’t your typical throw-it-together summer dress. The Peach Butterfly Lace Dress is a true showpiece, designed with intention at every level.
The bodice features cream openwork squares, each one topped with a raised peach butterfly appliqué that sits slightly lifted from the fabric. These aren’t flat embellishments. They’re dimensional, catching light and creating texture that photographs beautifully.
The fitted peach waistband includes two rows of chain windows, adding visual interest while cinching at your natural waist. Below that, the cream skirt flows outward with controlled fullness, alternating shell columns with filet diamond panels. Near the hem, miniature peach butterflies circle the skirt before it finishes with a broad peach fan border and delicate cream picots.
The square neckline keeps things modern and flattering. The wide straps feature flutter shell edging in peach. Every detail has been considered.
Skill Level and Construction Overview
This pattern is rated intermediate to advanced. If you’re comfortable with motif construction, joining squares, working in the round, and following multi-step garment instructions, you can absolutely do this.
The dress is worked in four main stages:
1. Bodice: Cream openwork squares with raised peach butterflies, joined into a fitted tube
2. Waistband: Peach band crocheted downward from the bodice, including chain windows
3. Skirt: Cream lace worked top-down with increases for fullness, plus miniature butterflies near the hem
4. Finishing: Broad lace straps with flutter edging, peach fan border, and cream picots
The dress is intentionally unlined. Add a slip or custom lining for coverage if you prefer.
Sizes and Finished Measurements
This pattern includes seven sizes from XS through 3XL. Choose your size based on your high bust and waist measurements.
| Size | Bust to Fit | Finished Bodice | Finished Waist | Bodice Height | Skirt Length | Approx. Dress Length |
|---|---|---|---|---|---|---|
| XS | 30-32 in | 30 in | 25 in | 9.5 in | 19 in | 30.5 in |
| S | 34-36 in | 34 in | 28 in | 10 in | 20 in | 32 in |
| M | 38-40 in | 38 in | 31 in | 10.5 in | 21 in | 33.5 in |
| L | 42-44 in | 42 in | 35 in | 11 in | 22 in | 35 in |
| XL | 46-48 in | 46 in | 39 in | 11.5 in | 23 in | 36.5 in |
| 2XL | 50-52 in | 50 in | 43 in | 12 in | 24 in | 38 in |
| 3XL | 54-56 in | 54 in | 47 in | 12.5 in | 25 in | 39.5 in |
Skirt length is measured from the lower edge of the waistband to the picot hem. You can add or subtract repeats before the butterfly band to customize length.
The bodice is designed for 0 to 2 inches of negative ease (meaning it fits close to the body). The waist fits snugly. The skirt has generous positive ease for that beautiful gathered flare.
Materials You’ll Need
Yarn: Fingering or sport weight mercerized or matte cotton, approximately 150-180 meters per 50 grams. Choose yarn with good stitch definition and soft drape.
Cream yarn requirements by size:
Peach yarn requirements by size:
Hooks:
Notions:
Optional:
Gauge
Getting gauge right is essential for garment fit. Make a washed and blocked swatch before beginning.
| Gauge Area | Target After Washing/Blocking |
|---|---|
| Main lace | 22 dc x 11 rows = 4 in (10 cm) |
| Butterfly square | Approx. 4.25 in (10.8 cm) square |
| Waistband | 23 sts x 12 rows = 4 in (10 cm) in linked/sc rows |
| Skirt lace repeat | Approx. 3.25 in (8.3 cm) wide x 3.25 in (8.3 cm) tall |
Because the bodice is motif-based, square size matters more than raw stitch gauge. If your blocked square differs by more than 1/4 inch (6 mm), change your hook size before making all the motifs.
Abbreviations and Special Stitches
Before we dive into the pattern, let’s define all the abbreviations you’ll encounter.
| Abbreviation | Meaning |
|---|---|
| ch | chain |
| sl st | slip stitch |
| sc | single crochet |
| hdc | half double crochet |
| dc | double crochet |
| tr | treble crochet |
| sp | space |
| st(s) | stitch(es) |
| RS / WS | right side / wrong side |
| rep | repeat |
| sk | skip |
| beg | beginning |
| yo | yarn over |
Special Stitches Defined
3-dc shell: Work 3 double crochet stitches in the same stitch or space. This creates a small fan shape.
5-dc fan: Work 5 double crochet stitches in the same stitch or chain space. A fuller fan than the shell.
Peach wing fan: In the same space, work (2 dc, 2 tr, 2 dc). This creates the butterfly wing shape.
Picot: Chain 3, then slip stitch in the first chain. This makes a tiny decorative bump.
dc2tog (double crochet two together): Yarn over, insert hook and draw up a loop, yarn over and draw through 2 loops. Repeat in the next stitch. Yarn over and draw through all 3 loops on hook. This decreases by one stitch.
Standing dc (optional): Begin a new color with a slip knot on hook, yarn over, insert hook, draw up a loop, then complete the double crochet normally. This avoids the need to join with a slip stitch.
Full-Size Butterfly Square Motif
Make enough squares for the bodice according to the size table below. Use cream for the square framework and peach for the raised butterfly. Each motif should block to approximately 4.25 inches (10.8 cm).
Bodice Motif Layout by Size
| Size | Motifs Around | Rows | Total Motifs | Approx. Circumference |
|---|---|---|---|---|
| XS | 7 | 2 | 14 | 29.75 in |
| S | 8 | 2 | 16 | 34 in |
| M | 9 | 2 | 18 | 38.25 in |
| L | 10 | 2 | 20 | 42.5 in |
| XL | 11 | 2 | 22 | 46.75 in |
| 2XL | 12 | 2 | 24 | 51 in |
| 3XL | 13 | 2 | 26 | 55.25 in |
Cream Openwork Square Instructions
1. With cream, ch 6 and join with sl st to form a ring.
2. Round 1: Ch 3 (counts as dc), 2 dc in ring, ch 3; 3 dc in ring, ch 3; repeat from twice. Join to top of ch-3. You have four 3-dc groups and four corner ch-3 spaces.
3. Round 2: Sl st to next corner. Ch 3, 2 dc, ch 3, 3 dc in same corner; ch 2, in next corner work (3 dc, ch 3, 3 dc); repeat from around, ch 2, join.
4. Round 3: Sl st to corner. In each corner work (3 dc, ch 3, 3 dc). Over each side work ch 2, 3 dc in ch-2 space, ch 2. Join.
5. Round 4: Sl st to corner. Work (2 dc, ch 2, 2 dc) in corner; *ch 2, 2 dc in next ch-2 sp, ch 2, 2 dc in next ch-2 sp, ch 2, (2 dc, ch 2, 2 dc) in corner; repeat around. Join. Fasten off.
Optional border round: If needed for sizing, add one round in cream: sc evenly around, placing (sc, ch 1, sc) in each corner. This adds about 1/4 inch (6 mm) to each motif.
Raised Peach Butterfly Appliqué
6. Body: With peach, ch 8. Beginning in 2nd ch from hook, sl st in 2 ch, sc in next 3 ch, sl st in last 2 ch. Fasten off leaving a sewing tail.
7. Upper wing pair: Join peach to the center-side opening of the square, about one round above the square center. In the same opening work wing fan (2 dc, 2 tr, 2 dc), ch 1, sl st back into the opening. Repeat symmetrically on the opposite side.
8. Lower wing pair: Join peach one opening below the upper wings. Work (2 hdc, 3 dc, 2 hdc) in the opening; ch 1, sl st to anchor. Repeat on opposite side.
9. Lay the narrow body vertically over the center of the four wings. Sew through the center only, leaving wing edges free and slightly raised. Make two tiny ch-4 antennae at the top of the body if desired.
Pro tip: For a crisp raised butterfly, steam-block the square before sewing the body. Do not flatten the wing fans. Shape them gently upward while damp.
Joining the Bodice Squares
10. Block every square to identical dimensions. Arrange half the motifs for the front and half for the back, allowing one motif to straddle each side if the total number is odd.
11. Join motifs side-to-side with cream using your preferred flat join. I recommend placing squares RS together and sl st through the back loops only. Alternatively, whipstitch through corresponding edge loops for a nearly invisible seam.
12. Join the two horizontal rows. Keep all butterflies upright and centered.
13. Join the short ends to form a tube. Try on. The tube should fit close to the bust without distorting the square openings.
14. With cream and RS facing, work 1 round sc evenly around the top edge. Place approximately 3 sc per motif corner area and 1 sc in each edge stitch or space, adjusting so the neckline lies flat.
15. Work 1 more round sc. At front and back center, keep the edge straight. Do not curve the neckline. Fasten off.
Square Neck Shaping
The neckline is created by the straight motif edge plus straps rather than cutting into motifs. Mark strap positions so the inside edges sit approximately 6.5 (7, 7.5, 8, 8.5, 9, 9.5) inches apart at the front. Repeat at back. Ensure left and right are symmetrical.
Peach Waistband with Chain Windows
Work downward from the bottom edge of the motif tube with peach. If your natural waist is smaller than the motif tube, decrease evenly in Rounds 1-3 until you reach the target waist circumference.
16. Round 1: Join peach at a side seam. Ch 1, sc evenly around the lower bodice edge. Aim for a multiple of 4 stitches. Join with sl st.
17. Round 2: Ch 1, sc in each st around. If shaping is needed, work evenly spaced sc2tog decreases. Join.
18. Round 3: Repeat Round 2 until the band measures about 3/4 inch (2 cm) and fits snugly.
19. Window Round A: Ch 1, sc in first st, ch 2, sk 2 sts, sc in next 2 sts; repeat from around, adjusting the final repeat if needed. Join.
20. Window Round B: Ch 1, sc in each sc and work 2 sc in each ch-2 sp. Join.
21. Window Round C: Repeat Window Round A.
22. Window Round D: Repeat Window Round B.
23. Lower band: Work 2-4 rounds sc, maintaining waist measurement. Fasten off peach.
Optional stabilization: Thread 1/4 inch (6 mm) clear elastic through the inside of the first and last solid waistband rounds. Join elastic ends securely without stretching the crochet excessively.
Skirt Setup and Fullness
The skirt begins in cream at the lower waistband edge. Fullness is built gradually during the first 4 rounds, then maintained in a repeating lace pattern. The stitch pattern uses an 8-stitch module.
24. Setup Round 1: With cream, join at side seam. Ch 3, dc in each stitch around, increasing evenly by working 2 dc in selected stitches until you have approximately 1.35 times the waistband stitch count. Round to the nearest multiple of 8. Join.
25. Setup Round 2: Ch 3, dc in each dc around. Increase 8 (8, 16, 16, 24, 24, 32) stitches evenly for sizes XS (S, M, L, XL, 2XL, 3XL), keeping the total a multiple of 8.
26. Setup Round 3: Dc in next 7 sts, 2 dc in next st; repeat from around. Join.
27. Setup Round 4: Dc evenly around with no increases. The skirt should now fall away from the waist in soft gathers rather than flare rigidly.
Main Skirt Lace: Shell Columns and Filet Diamonds
Work the following 8-round repeat until the skirt, measured from the lower waistband, is 5.5-6.5 inches (14-16.5 cm) shorter than your desired finished length.
8-Round Lace Repeat
28. Round 1: Ch 3, dc in next 3 sts, ch 2, sk 2 sts, dc in next 3 sts; repeat from around. Join.
29. Round 2: Ch 3, dc in next 2 dc, 3-dc shell in next dc, ch 2, sk ch-2 sp, 3-dc shell in next dc, dc in next 2 dc; repeat from around. Join.
30. Round 3: Ch 3, *dc in next 3 sts, ch 1, sk 1, ch 1, sk 1, dc in next 3 sts; repeat around, using the visible center openings as guides. Join.
31. Round 4: Ch 3, *dc in next 2 sts, 5-dc fan in center opening, dc in next 2 sts, ch 2 over filet area; repeat around. Join.
32. Round 5: Ch 3, *dc in next 3 sts, ch 2, sk center 2 sts/spaces, dc in next 3 sts; repeat around. Join.
33. Round 6: Repeat Round 2.
34. Round 7: Repeat Round 3.
35. Round 8: Repeat Round 4. Join.
To lengthen the dress, repeat Rounds 1-8. For a smoother visual transition, finish after Round 4 or Round 8 before beginning the miniature butterfly band.
Miniature Butterfly Band
The small peach butterflies are worked as appliqués and sewn at regular intervals around the lower skirt, positioned approximately 3.5-4.5 inches (9-11.5 cm) above the fan border.
Mini Butterfly Instructions
Make 7 (8, 9, 10, 11, 12, 13) or more as desired.
36. With peach, ch 5. In 2nd ch from hook work sl st, then sc in next 2 ch, sl st in last ch. This forms the body.
37. For the first upper wing, join yarn at upper side of body and work (2 dc, 1 tr, 2 dc) into the same attachment point; sl st to body.
38. For the lower wing, work (2 hdc, 2 dc, 2 hdc) into the lower side attachment point; sl st to body. Fasten off.
39. Repeat wings on opposite side. Weave tails toward center and use them to sew the butterfly to the skirt.
Pin butterflies with equal spacing, one centered over each broad lace panel or every second panel depending on size. Sew only the bodies and inner wing edges so the outer edges remain dimensional.
Broad Peach Fan Border
Switch to peach. If the stitch count is not a multiple of 6, adjust by increasing or decreasing a few stitches in Border Round 1.
40. Border Round 1: Ch 1, sc evenly around. Join.
41. Border Round 2: Ch 1, sc in next 3 sts, ch 3, sk 3 sts; repeat from around. Join.
42. Border Round 3: Sl st to first ch-3 sp. Ch 3, 6 dc in same sp; *7 dc in next ch-3 sp; repeat around. Join. This creates the first fan tier.
43. Border Round 4: Ch 1, sc in each dc; between fans, work ch 2 over the valley. Join.
44. Border Round 5: Sl st to first ch-2 valley. Ch 3, 8 dc in same valley; *9 dc in next valley; repeat around. Join. For a less ruffled hem, use 7 dc instead of 9 dc.
45. Border Round 6: Ch 1, sc in every dc, working (sc, ch 2, sc) in each fan center. Join. Fasten off peach.
46. Cream picot round: Join cream at any fan edge. *Sc in next 3 sts, picot; repeat around, spacing picots evenly. At each fan center, place one picot at the high point. Join and fasten off.
Broad Lace Straps and Flutter Edges
Make 2. The straps are cream lace bands attached to the marked front and back positions, then edged in peach shells. Finished width is about 1.75-2.25 inches (4.5-5.7 cm) before flutter edging.
Strap Foundation
47. With cream, ch 13. Row 1: Dc in 4th ch from hook and in each ch across. You should have 10 dc plus the turning chain.
48. Row 2: Ch 3, turn, dc in next 2 sts, ch 2, sk 2 sts, dc in next 3 sts, ch 2, sk 2 sts, dc in last 2 sts.
49. Row 3: Ch 3, turn, dc in each dc and 2 dc in each ch-2 sp.
50. Repeat Rows 2-3 until strap reaches from front neckline marker over shoulder to back marker with 1/2 inch (1.3 cm) negative ease. Typical length: 13-16 inches (33-40.5 cm) depending on size and torso length.
51. Fasten off, block straps to equal length, and pin to bodice. Try on before permanent seaming. Sew strap ends securely along at least 1 inch (2.5 cm) of bodice edge.
Peach Flutter Edging
52. Join peach at one long strap edge. Ch 1, sc evenly along edge.
53. Next row: *Sk 1 sc, 5 dc in next sc, sk 1 sc, sl st in next sc; repeat along edge. Adjust spacing near ends so the last shell finishes neatly.
54. Repeat on opposite long edge if you want a fuller flutter. For the photographed look, emphasize the outer shoulder edge and keep the inner neckline edge lighter with simple sc plus picot.
Neckline and Final Finishing
55. With cream, work 1 round sc around the entire neckline, including strap inner edges. At each square corner, work sc2tog across the transition if needed to keep the neckline flat.
56. Optional peach accent: Work 1 very narrow round of peach sl st around the neckline, keeping tension relaxed.
57. Weave in all ends on the WS. Reinforce motif joins at underarms and side seams with a few hidden whipstitches.
58. Wash gently in cool water with mild detergent. Press out water in a towel. Do not wring.
59. Block flat to schematic measurements. Pin the square neckline straight, shape butterflies upward, open filet diamonds, and spread fan border evenly. Allow to dry completely.
60. Try on after blocking. If the waist relaxes too much, add clear elastic inside the waistband. If straps stretch, shorten by one pattern repeat and reattach.
Fit and Customization Guide
| If You Need… | Adjustment |
|---|---|
| More bust room | Add 1 motif around the bodice, or add the optional cream border round to every square |
| Less bust room | Omit optional motif border; use a smaller hook; or remove 1 motif and widen side seams slightly with cream mesh |
| Smaller waist | Add evenly spaced decreases in first 3 peach waistband rounds; insert clear elastic |
| Longer torso | Add 1-3 solid peach waistband rounds before the chain windows |
| Longer skirt | Repeat the 8-round skirt lace sequence before the mini-butterfly band |
| More skirt fullness | Add one additional increase round during skirt setup, keeping stitch count a multiple of 8 |
| Less skirt fullness | Use 1.20-1.25x waistband stitch count instead of 1.35x in Setup Round 1 |
| More coverage | Wear over a slip, add a sewn lining, or replace selected ch-2 spaces with 2 dc |
Optional Lining
For a fully lined version, use a lightweight cotton voile, rayon lining, or stretch tricot. Cut a simple fitted bodice lining and a gathered half-circle or A-line skirt lining approximately 1-2 inches (2.5-5 cm) shorter than the crochet hem.
Hand-sew the lining to the inside upper bodice and lower waistband with loose catch stitches so the crochet can stretch independently. Do not stitch through butterfly wings or fan edging.
Care Instructions
Pattern Notes
This pattern is designed to recreate the visual concept shown in the reference images. For the closest visual match, use fine matte cotton in warm cream and soft peach, keep motif joins narrow, block the square neckline crisply, and preserve dimensional butterfly wings rather than pressing them flat.
Because crochet fabric and yarn behavior vary, I’ve included adjustment checkpoints throughout so you can match your body measurements instead of relying only on standard sizing. Trust your gauge swatch and try on as you go.
You Did It!
Making this Peach Butterfly Lace Dress crochet pattern is a labor of love, and the finished result is absolutely worth every stitch. This is the kind of project that will have people stopping you on the street to ask where you got your dress.
Take your time with the butterflies. They’re the heart of this design. Enjoy the process of watching those delicate wings take shape, and don’t rush the blocking stage. That’s where all your hard work really comes together.
Thank you so much for choosing this pattern. I hope it brings you hours of happy hooking and a finished dress that makes you feel like a million dollars.
If you loved this pattern, I’d be so grateful if you saved it to your Pinterest boards so you can find it easily later. And if you make this dress, please drop a comment below or tag me on Instagram. I absolutely love seeing your finished projects, and your versions always inspire me!
Want a Quick & Easy Printable Version?
Get a clean, beautifully formatted PDF of this pattern — easy to follow step by step, ready to print or save on any device. No scrolling, no distractions, just the pattern.
Get the Printable PDF →