
I don’t know about you, but I have a serious weakness for tiny dresses with big bows. There’s something about a toddler twirling in a handmade dress that just gets me every single time.
Get the Ad-Free PDF Pattern
You can find the free pattern below, or you can purchase the ad-free printable PDF from my shop.
Get the Printable PDF →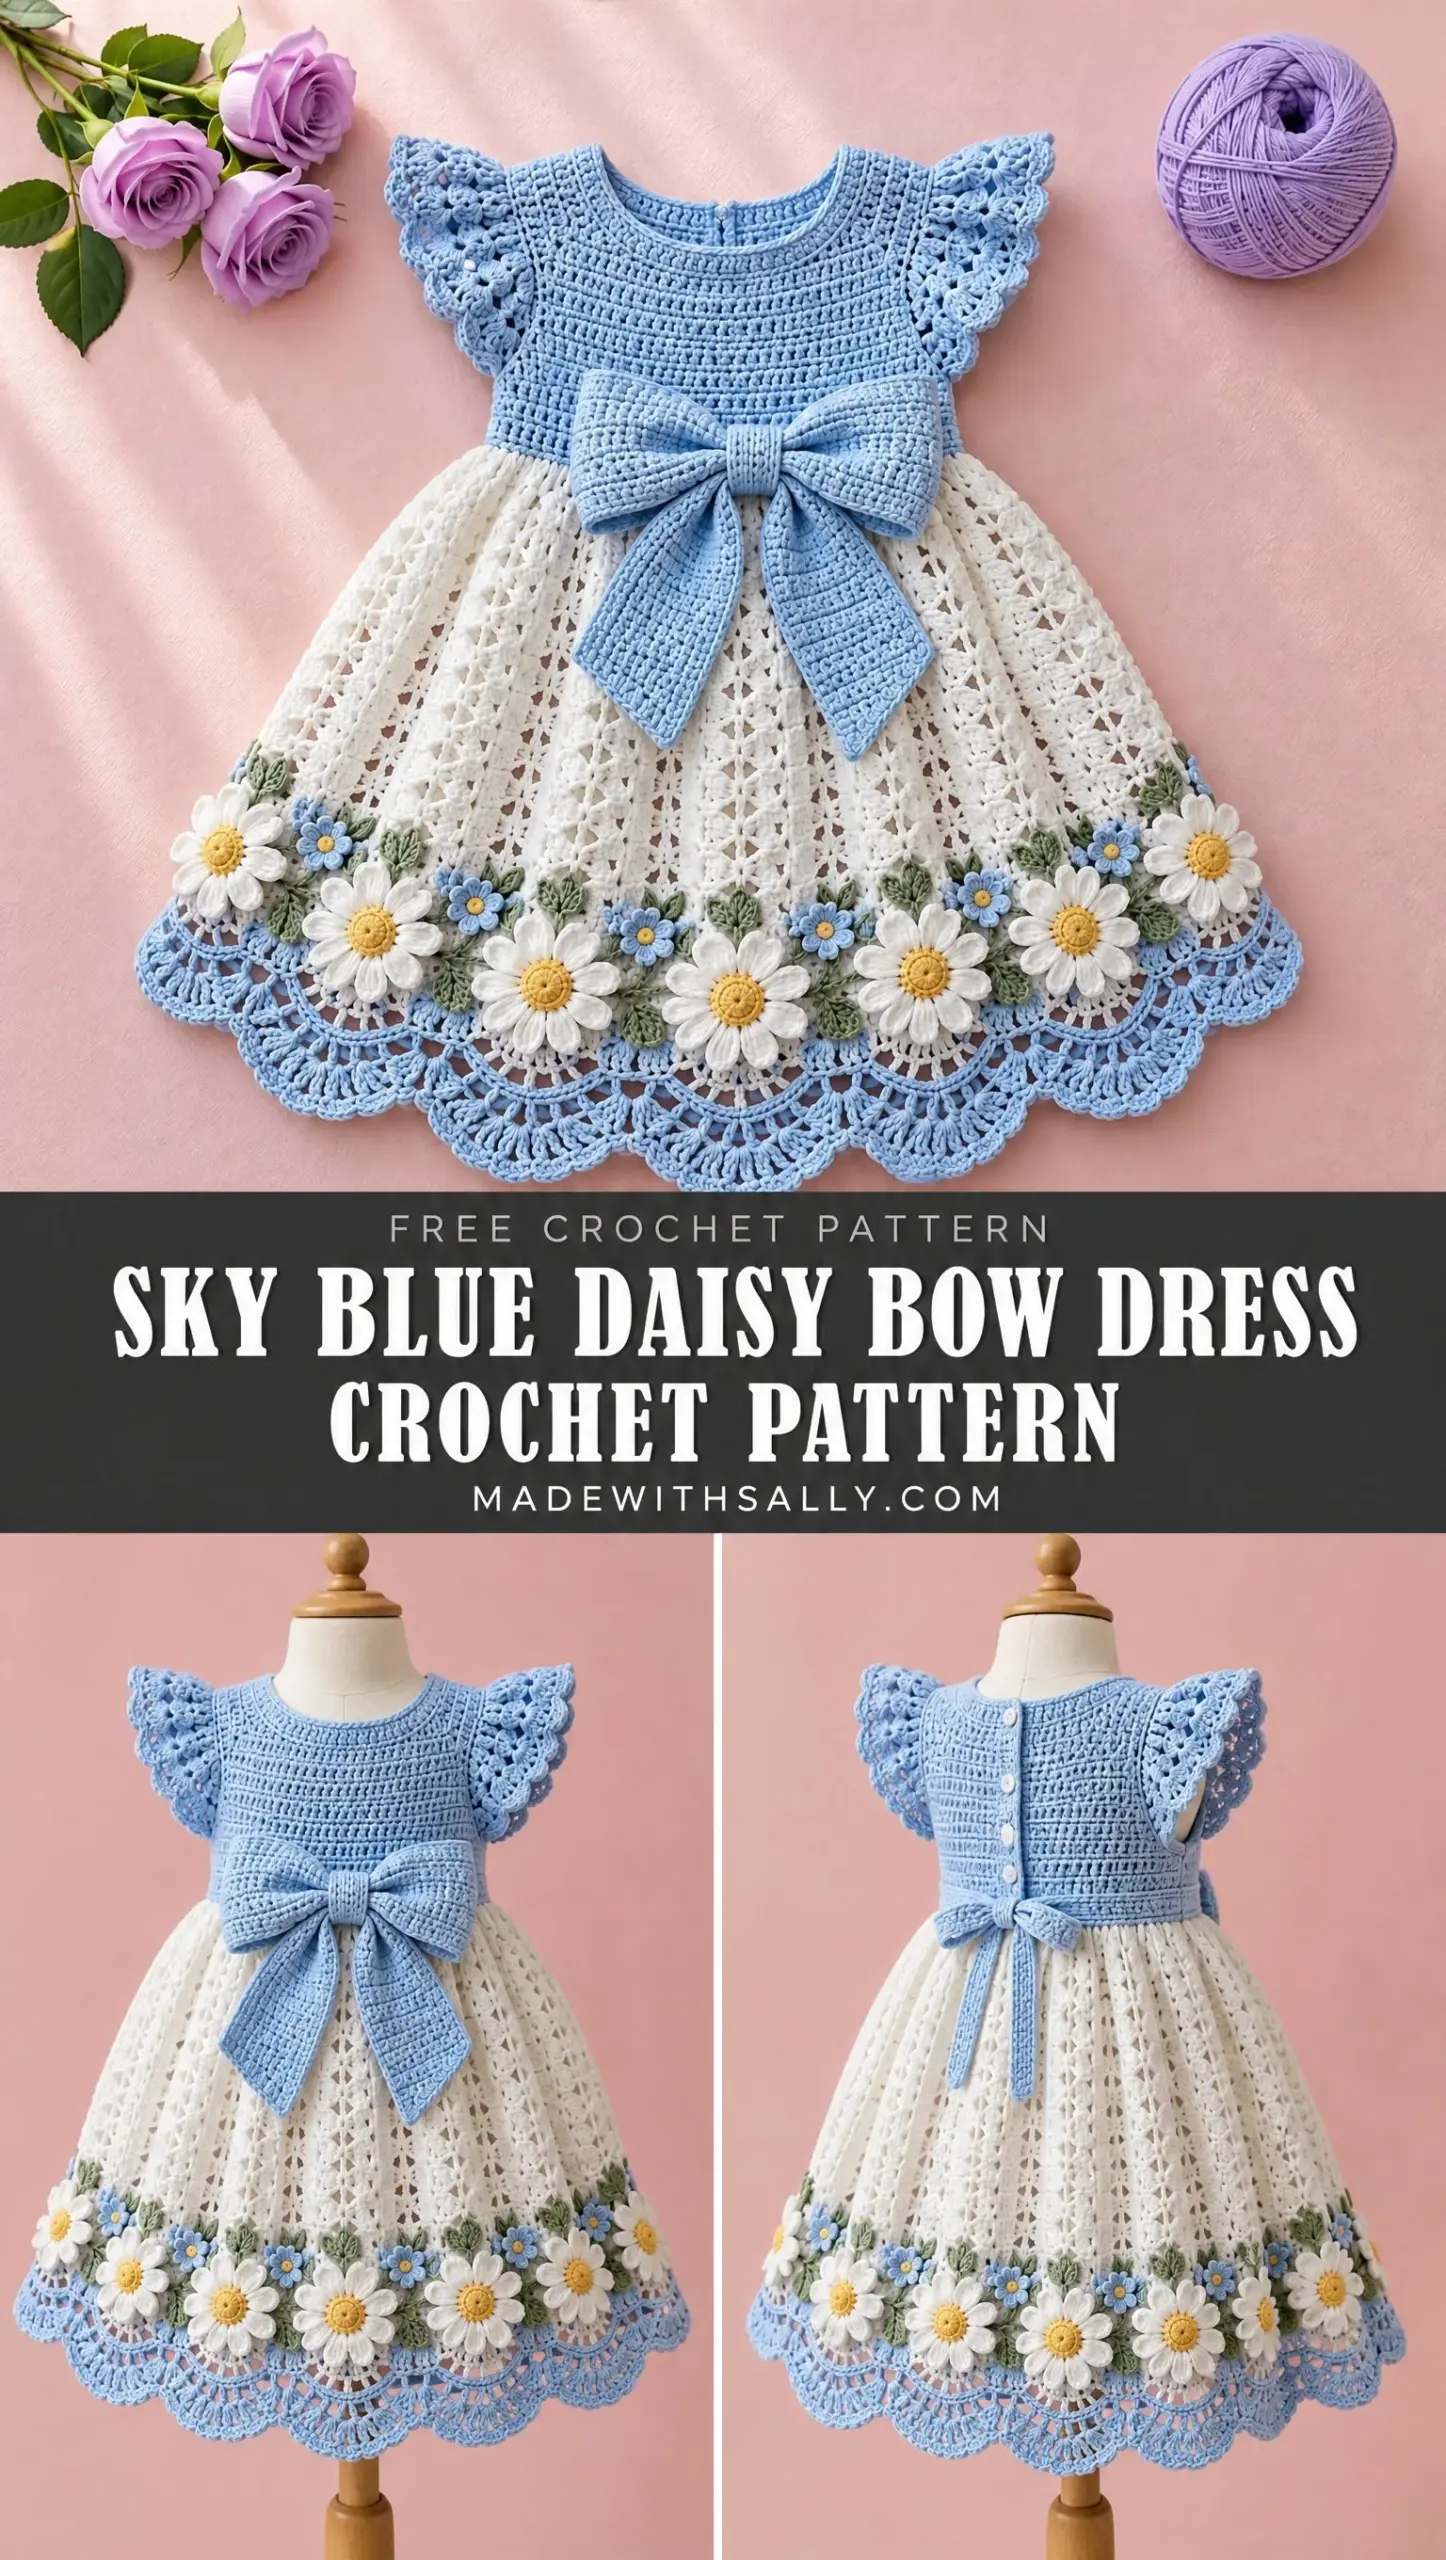
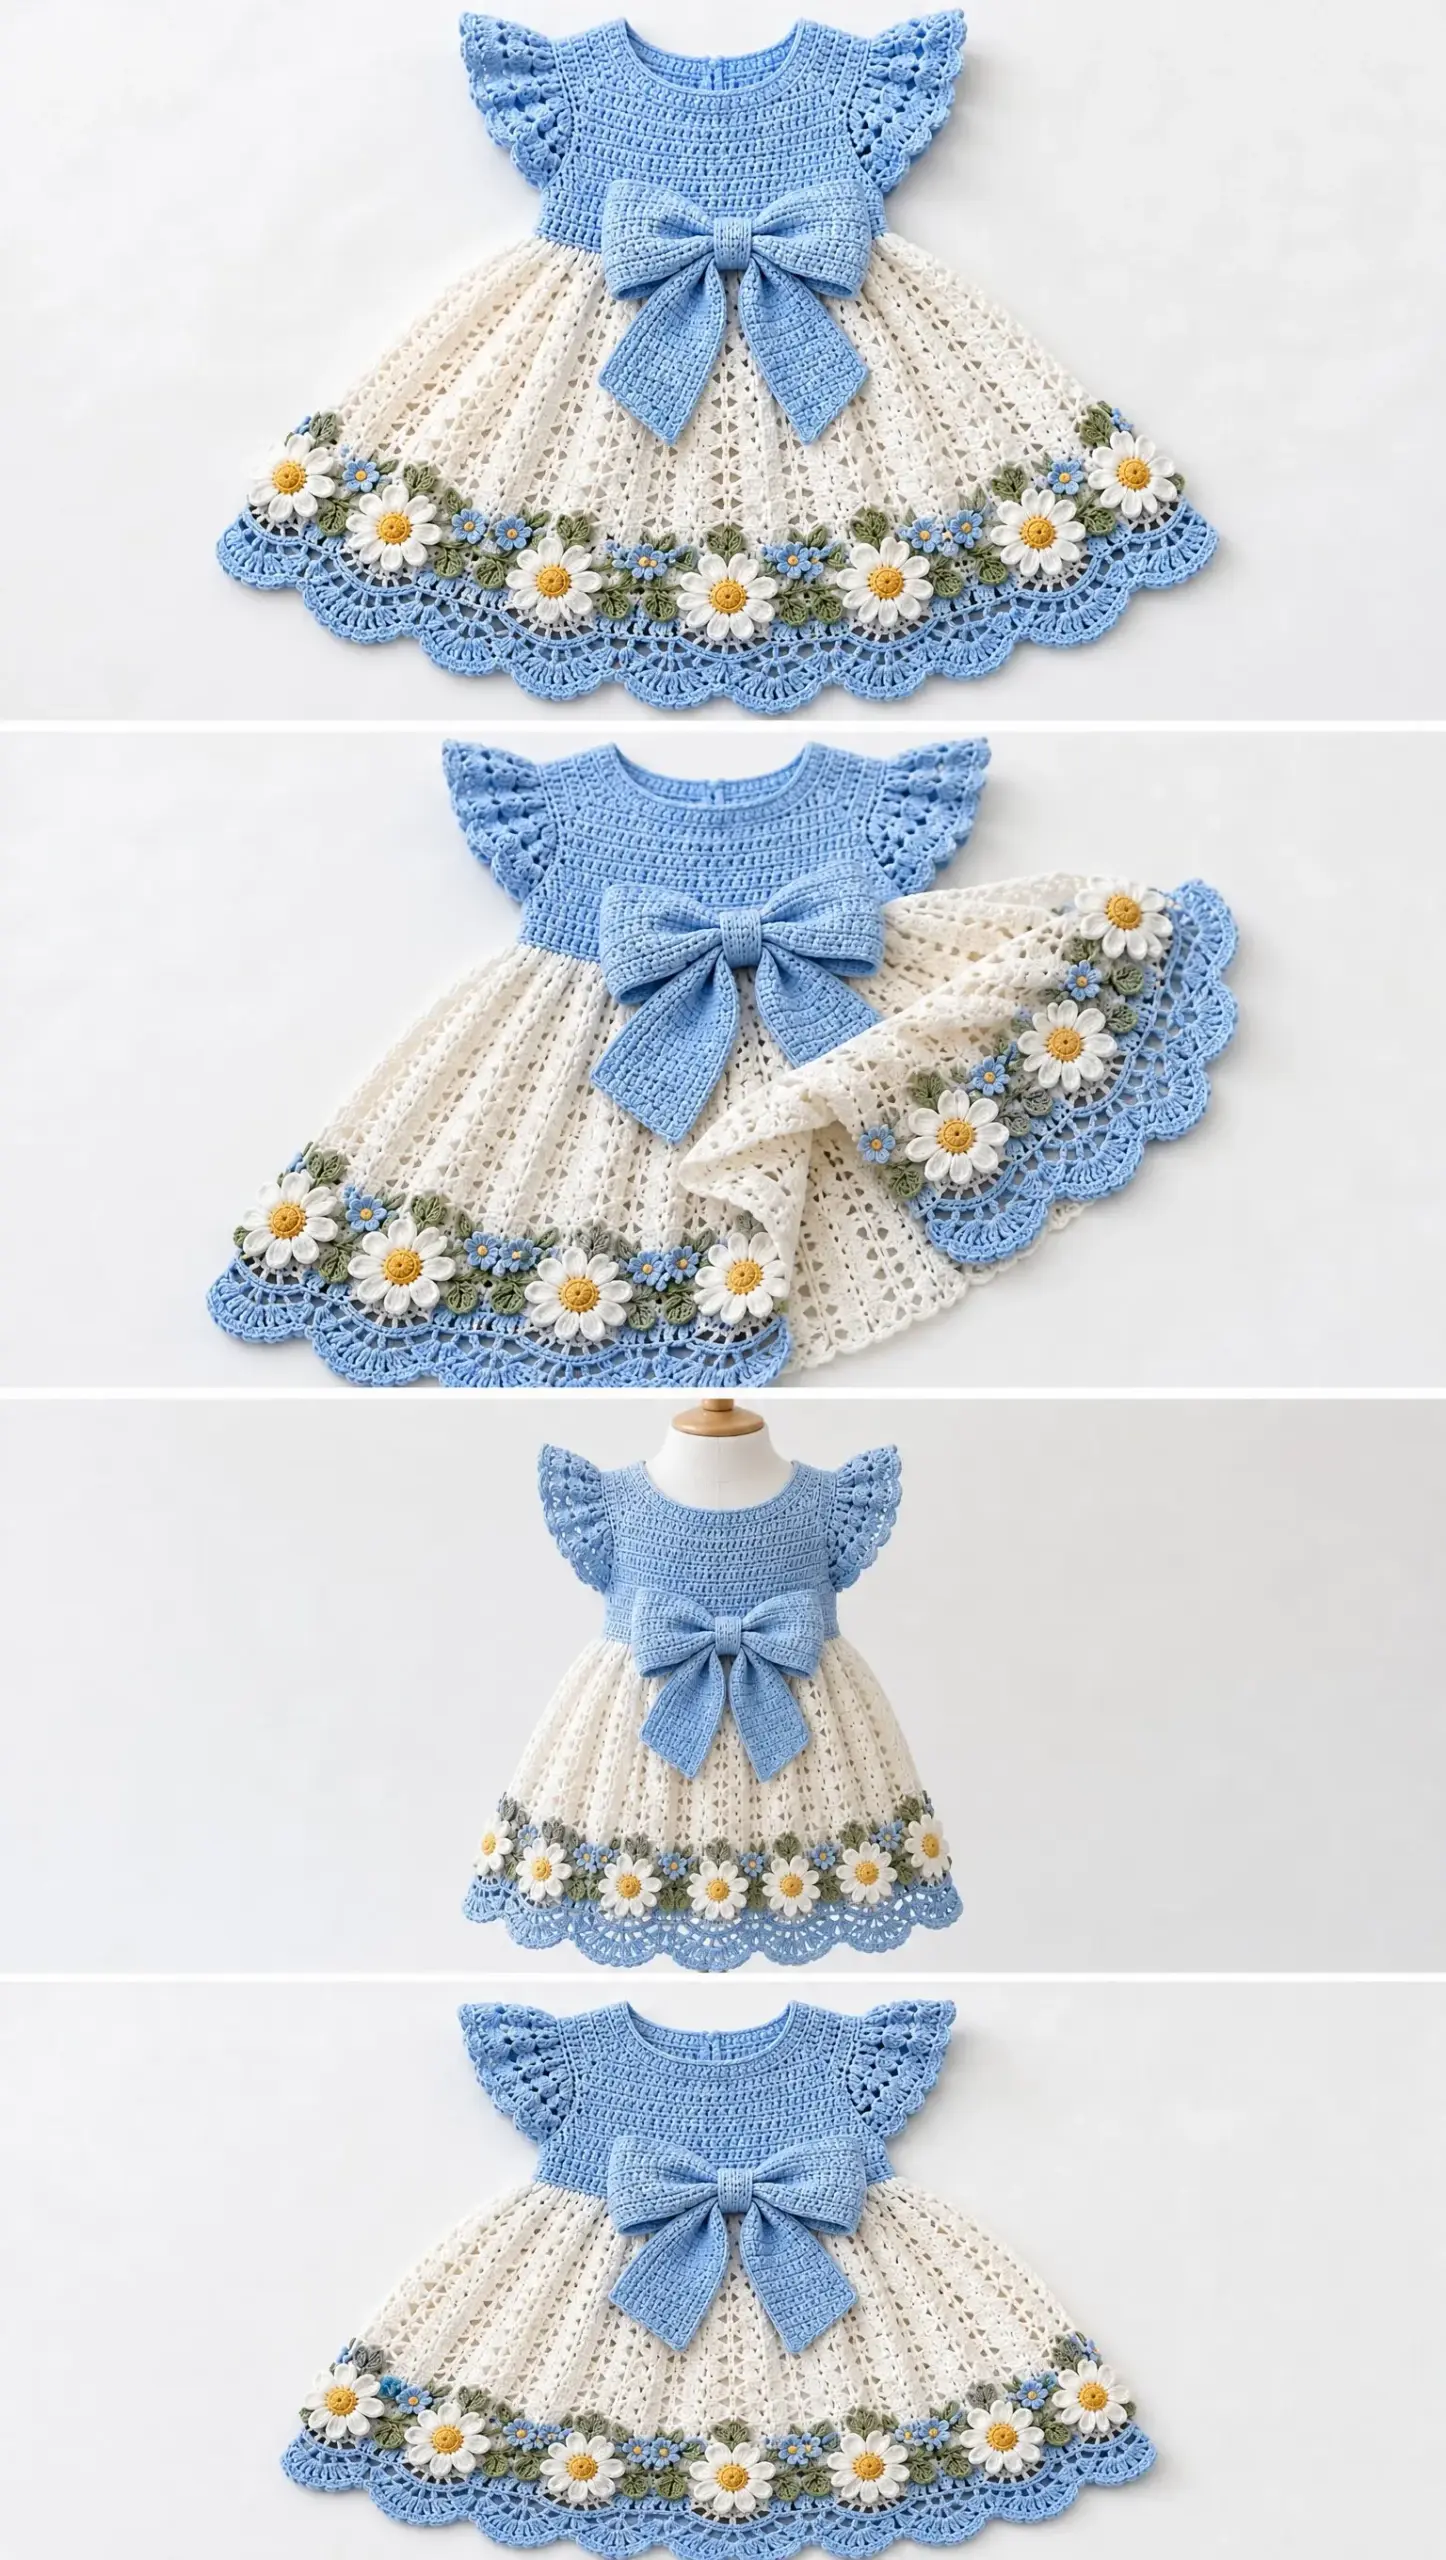
This Sky Blue Daisy Bow Dress combines everything I love. A fitted bodice, a flowy lace skirt, flutter sleeves, and the sweetest daisy appliques along the hem. It’s the kind of occasion dress that makes everyone ask, "Wait, you MADE that?"
If you’ve been looking for a special project that shows off your skills, this is it. Fair warning though. This one is for intermediate to advanced crocheters who are comfortable with garment construction, lace patterns, and detailed applique work. But don’t let that scare you off. I’ll walk you through every step.
About This Pattern
This crochet dress pattern creates a stunning toddler dress sized for approximately 2 to 3 years old. The finished chest measurement is 56 centimeters, which is about 22 inches. This is designed to fit a child with a body chest of 50 to 52 centimeters with 4 to 6 centimeters of ease for comfortable movement.
The total shoulder to hem length runs about 46 to 49 centimeters. The bodice depth is approximately 22 centimeters. Please choose the size based on actual body measurements rather than age alone, since children vary so much at this stage.
Important note: This pattern uses US crochet terminology throughout. The construction method involves a two panel bodice with the skirt worked downward. The back features a center opening with snap closures for easy dressing.
This dress is designed as occasion clothing, not sleepwear. Because of the lace skirt panels, I strongly recommend pairing it with a sewn cotton slip or suitable underdress.
Materials You’ll Need
Yarn
You’ll need sport weight or fine weight cotton yarn with approximately 125 meters per 50 grams. Here’s the breakdown by color:
The total comes to approximately 1,050 meters before the small contrast amounts. Your actual usage may vary, so measure carefully on your sample.
Tools
Gauge
Getting gauge right is absolutely essential for garment construction. Your blocked gauge should be 20 double crochet stitches and 12 rows equals 10 by 10 centimeters.
To make your gauge swatch, chain 32. Work a double crochet (dc) in the third chain from hook and in each remaining chain. You should have 30 dc. Continue working 18 rows total. Wash and dry your swatch exactly as you plan to care for the finished dress, then measure the central 20 stitches and 12 rows.
If your measurements don’t match, change your hook size and try again. A larger hook gives you fewer stitches per 10 cm. A smaller hook gives you more stitches per 10 cm. Keep swatching until both dimensions match.
Abbreviations and Terminology
Let me define every stitch and term you’ll encounter:
Counting rule: The turning chain 1 or chain 2 does NOT count as a stitch anywhere in this pattern. When joining rounds, join to the first actual stitch, not the turning chain. Mark that first stitch and count every shaping row carefully.
Front Bodice Instructions
Rows 1 through 14
Using sky blue yarn and your 3.5 mm hook, chain 58.
Row 1: Work a dc in the third chain from hook and in each remaining chain across. You should have 56 dc. Turn your work.
Rows 2 through 14: Chain 2, then dc in every stitch across. You should still have 56 dc at the end of each row. Turn after each row. Remember, do not add a stitch into the turning chain.
Armhole Shaping, Row 15
Slip stitch in the first 4 stitches. Chain 2, then dc in each of the next 48 stitches. Leave the final 4 stitches unworked. Turn. You now have 48 dc. The 4 unworked stitches on each side create a 2 centimeter underarm ledge.
Rows 16 through 20
Chain 2, dc in all 48 stitches, turn. Repeat for rows 16 through 20. At gauge, your panel should now measure about 16.7 centimeters tall.
Place removable markers around the outermost 10 stitches at each edge. The central 28 stitches will form the neckline opening.
First Shoulder, Rows 21 through 26
Chain 2, dc in the first 10 stitches only. Leave the remaining 38 stitches unworked and turn. You have 10 dc. Work 5 more rows of 10 dc, turning each row. Fasten off, leaving a long tail for sewing.
Second Shoulder, Rows 21 through 26
With the same face of the panel toward you, attach yarn at the opposite outer edge of Row 20. Work toward the center: chain 2 and dc across only the outermost 10 stitches. Turn and work 5 more rows of 10 dc. Fasten off. Both shoulder straps should have 6 rows above Row 20.
Front Bodice Checkpoint
Before moving on, verify these measurements:
Back Bodice Instructions
Rows 1 through 14
Using sky blue yarn, make a second panel exactly like the front. Work 56 dc each row for 14 rows. Mark the center between stitches 28 and 29.
Left Half, Rows 15 through 23
Row 15: Slip stitch in the first 4 stitches. Chain 2, dc in the next 24 stitches, stopping at the center marker. Leave the other half unworked and turn. You have 24 dc.
Rows 16 through 23: Chain 2, dc in each stitch, turn. You should maintain 24 dc. Fasten off.
Right Half, Rows 15 through 23
Return to the unworked half of Row 14. Attach yarn at the center marker and work toward the outer edge: chain 2, dc in the next 24 stitches, leaving the final 4 stitches unworked. Turn. You have 24 dc. Work Rows 16 through 23 the same as the left half. Fasten off. The center edges remain separate to create the back opening.
Back Shoulders, Rows 24 through 26
On each half, attach yarn at the outer armhole edge of Row 23. Work dc across the outermost 10 stitches only. Leave the inner 14 stitches unworked. Turn and work 2 more rows of 10 dc. Fasten off. The two 14 stitch inner gaps create a 28 stitch back neckline.
Joining the Bodice
Block both panels to the target measurements before seaming. With right sides together, join each pair of 10 stitch shoulder tops using mattress stitch. To work mattress stitch, align the matching edges and use your tapestry needle to pick up one small strand from each edge alternately. Tighten gradually so the join lies flat without pulling the seam shorter than the fabric.
Join the side edges from the foundation edge through Row 14 only. Match rows carefully and keep all upper edges open for the armholes. Turn right side out.
The lower edge now has 56 foundation stitches on each panel, giving you 112 stitches total around the bottom. The back slit begins above Row 14.
I recommend trying the bodice on a dress form or a willing toddler at this point. Check the chest ease and head access before adding the weight of the skirt.
Skirt Construction
Round 1
With white yarn, join at a side seam of the 112 stitch lower bodice edge. Chain 2, then work 2 dc in every foundation stitch around. Join to the first dc. You should have 224 dc.
Round 2
Chain 2. Repeat the following sequence 16 times: dc in the next 13 stitches, 2 dc in the next stitch. Join. You now have 240 dc.
Round 3, Establishing the Lace Pattern
Chain 2. Repeat the following sequence 60 times: dc in next stitch, skip 1 stitch, V-st in next stitch, skip 1 stitch. Join to first dc.
Each repeat uses 4 old stitches. You’ll end up with 60 single dc columns, 60 V-stitches, and 60 chain 1 spaces. That’s 180 dc total.
Rounds 4 through 24
Chain 2. Repeat the following sequence 60 times: dc in the next single dc column, skip the first dc of the V-st, work a V-st in its chain 1 space, skip its second dc. Join to first dc.
Maintain 60 repeat units every round. Mark the first column so you don’t mistake a V-st leg for it. Turn after each round.
Hem Foundation
Chain 1. Work 1 sc in every dc and 1 sc in every chain 1 space around. Join. You should have 240 sc total (180 plus 60).
The lace body should measure around 20 centimeters, though lace gauge often differs from solid fabric gauge. Measure before adding the border.
Flutter Sleeves
Sleeve Foundation
Use pale blue yarn and your 3.5 mm hook. On one armhole, find the shoulder seam. Measure 6 centimeters down the front edge and 6 centimeters down the back edge. Mark both points.
Join yarn at the front marker. Work 30 sc evenly across the 12 centimeter upper arc to the back marker, crossing over the shoulder seam. Do NOT work around the lower underarm.
Flutter Rows
Turn your work.
Row 2: Chain 2, work 2 dc in each sc across. You now have 60 dc. Turn.
Row 3: Chain 2, repeat the following 30 times: dc in next stitch, 2 dc in next stitch. You now have 90 dc. Turn.
Row 4: Chain 1, sc in every stitch across. You have 90 sc. Fasten off.
Repeat the entire sleeve on the other armhole, matching the marked arc and stitch counts exactly. This creates a softly ruffled cap sleeve on each side.
Lace Hem Border
Hem Round 1
With pale blue yarn, join in any of the 240 hem foundation sc. Chain 1 and sc in that same stitch.
Repeat the following sequence 24 times: skip the next 4 foundation stitches, 11 tr in the next stitch (this creates a fan), skip the next 4 foundation stitches, sc in the next stitch.
The last sc location is where you started. Instead of making a second sc there, join to the first sc. You now have 24 fans of 11 tr each and 24 sc anchors.
Hem Round 2
Chain 1, sc in the same anchor. For each fan: chain 1, then work dc in each of its 11 tr with chain 1 between each adjacent dc, chain 1, sc in the next anchor.
On the last fan, join to the first sc instead of making a duplicate anchor. Each fan now has 11 dc and 12 chain 1 spaces.
Hem Round 3
Chain 1. Work sc in each sc anchor, each dc, and each chain 1 space around. Join and fasten off. You should have 576 sc total (24 multiplied by 24).
Keep your tension relaxed on this round. When blocking, wet block each individual fan into a smooth rounded scallop without pulling the skirt waist wider.
Daisy Appliques
These cheerful daisies are what make this dress so special. You’ll need 7 main daisies for the front garland, plus one large daisy for the waist area.
Center
Using golden yellow and your 3 mm hook, make a magic ring. To create a magic ring, make an adjustable loop around two fingers, insert your hook through it and draw up the working yarn. Chain 1, then work 6 sc into the ring. Pull the tail to close the center and join to the first sc with a slip stitch.
Round 2: Chain 1, work 2 sc in every stitch around. Join. You have 12 sc.
Round 3: Chain 1, work 2 sc in every stitch around. Join. You have 24 sc. Fasten off the yellow.
Twelve Petals
Join your petal color (pale blue for blue daisies, or white/ivory for white daisies) in any stitch of the center.
Repeat the following 12 times: chain 7, sc in the 2nd chain from hook, hdc in the next chain, dc in the next 2 chains, hdc in the next chain, sc in the last chain, then slip stitch in each of the next 2 center stitches.
This uses all 24 center stitches. Join and fasten off. Block petals into a circle measuring approximately 7 to 9 centimeters across.
Large Waist Flower
Use the same center instructions. For each petal, chain 9. Work the following along the 8 chains: sc, hdc, dc, tr, tr, dc, hdc, sc. Then slip stitch in the next 2 center stitches. Repeat 12 times total.
Aim for 9 to 11 centimeters across. Sew every petal base securely.
Leaves and Small Filler Flowers
Pointed Leaf
Using sage green and your 3 mm hook, chain 9.
Working along one side of the chain: slip stitch in the 2nd chain from hook, sc in next, hdc in next, dc in the next 3 chains, hdc in next, then work (sc, ch 2, sc) in the last chain.
Continue along the opposite side of the same chain: hdc in next, dc in next 3, hdc in next, sc in next, slip stitch in last. Fasten off with a sewing tail.
If desired, embroider a straight vein down the middle of each leaf.
Tiny Filler Flower
Using a contrast color and your 3 mm hook, make a magic ring.
Repeat the following 5 times into the ring: chain 2, 2 dc, chain 2, slip stitch.
Tighten the ring, fasten off, and sew the center securely. Embroider a contrasting center using three short straight stitches.
Quantities Needed
Make the following:
Alternate between blue and white daisies as shown in the design. Keep the dress back plain so it remains comfortable when your little one is seated.
Applique Placement
Lay the blocked dress flat. Mark the front center and both side seams. Arrange your motifs 3 to 5 centimeters above the start of the lace hem, distributing them evenly between the side seams.
Overlap only the leaf bases, never the tips. Baste everything in place first, then sew around all edges and through every layered center with small matching stitches. Every applique edge needs to be secured for child safety.
Waist Bow
This oversized bow is a showstopper. Take your time with it.
Large Bow Rectangle
Using pale blue and your 3.5 mm hook, chain 74.
Row 1: Sc in the 2nd chain from hook and across. You have 73 sc.
Rows 2 through 18: Chain 1, sc in each stitch, turn. Maintain 73 sc each row. Fasten off.
Block the rectangle to approximately 36 by 7 centimeters. When folded, the bow will be about 18 centimeters wide.
Fold the two short ends to the center back with a 1 centimeter overlap. Stitch them together.
Center Wrap
Chain 9. Sc in the 2nd chain from hook and across. You have 8 sc. Work 8 rows total, turning each time.
Pinch the middle of the bow rectangle into three folds to create the bow shape. Wrap the small strip around the center. Sew its ends together on the reverse, then secure through all the folded layers.
Two Tails
For each tail, chain 11. Sc in the 2nd chain from hook and across. You have 10 sc. Work 34 rows total, or until the piece measures 15 centimeters long.
On the last row, skip the first stitch and sc in the remaining 9 stitches. This creates a softly angled end. Fasten off. Turn the angled corner under if needed for a cleaner look.
Attaching the Bow
Sew the tail tops behind the bow. Position the bow at the front waist and angle the tails downward and outward as shown in the images.
Sew the bow center and both outer loops securely to the dress. Stitch each tail along its entire length and at its lower end, keeping it flat to the skirt without stretching the lace. For child safety, every part of the bow must be stitched flat.
Neckline Edging
Using sky blue (or your specified trim color), join at the back neck opening.
Work 1 sc per horizontal stitch and approximately 2 sc per dc row end around the entire neck, excluding the vertical center back slit. At inner corners, work sc2tog across the corner if needed to help the edging lie flat.
Join to the first sc. Work one more round of sc around the neck. Join and fasten off.
The exact stitch count depends on your blocked row gauge. Just make sure both sides are symmetrical.
Back Bands and Closures
Back Bands
Along each vertical back slit edge, work 2 sc into each dc row end for Rows 15 through 23. You should have 18 sc. Turn and work 2 more rows of 18 sc. Fasten off.
Lightly block the two bands so they overlap by about 1 centimeter without pulling or distorting the back panel.
Closures
Sew three small snaps through soft backing patches. Position them at approximately:
Align paired halves carefully before stitching. Cover any exposed backing edges with soft fabric to protect delicate skin.
Test the opening to confirm it allows easy dressing without pulling at the neckline.
Final Blocking and Finishing
Weave in all your ends by threading them through several stitches, reversing direction, and securing. Never just snip ends close to the surface.
Wash the dress according to your yarn label instructions. Gently press out water by rolling in a towel. Never wring.
Pin the bodice to 56 centimeters chest circumference. Ease the skirt outward without stretching the waist. Shape each lace scallop, the sleeve ruffles, and all appliques carefully. Let the dress dry completely on a flat surface before moving it.
Care Instructions
Hand wash in cool water if compatible with all materials used. Support the wet garment fully and dry flat. Never hang the dress while wet, as this can stretch and distort the shape.
Before each wear, check all snaps, seams, and applique attachments. Repair any loose parts immediately before use.
You Did It!
I know this pattern has a lot of steps, but the result is absolutely worth the effort. This Sky Blue Daisy Bow Dress is the kind of heirloom piece that gets passed down and treasured. Seeing a little one twirl in something you made with your own hands? That feeling never gets old.
Thank you so much for choosing this pattern. I hope you love making it as much as I loved designing it. If you create this dress, I would absolutely love to see it! Tag me on Instagram or share it in our Facebook group. Seeing your finished projects is the best part of my day.
If you loved this pattern, go ahead and pin it to your Pinterest boards so you can find it again later. And please drop a comment below if you make one. I’d love to hear how it turned out and see photos of your little model wearing it!
Want a Quick & Easy Printable Version?
Get a clean, beautifully formatted PDF of this pattern — easy to follow step by step, ready to print or save on any device. No scrolling, no distractions, just the pattern.
Get the Printable PDF →