
Last summer, I found myself scrolling through vacation photos and realized every single outfit featured the same boring tank tops. You know the ones. Basic, forgettable, nothing special. I decided right then that I wanted something different for this year. Something that would make me feel like I actually put thought into getting dressed. That’s when I started sketching what would eventually become this halter top.
Get the Ad-Free PDF Pattern
You can find the free pattern below, or you can purchase the ad-free printable PDF from my shop.
Get the Printable PDF →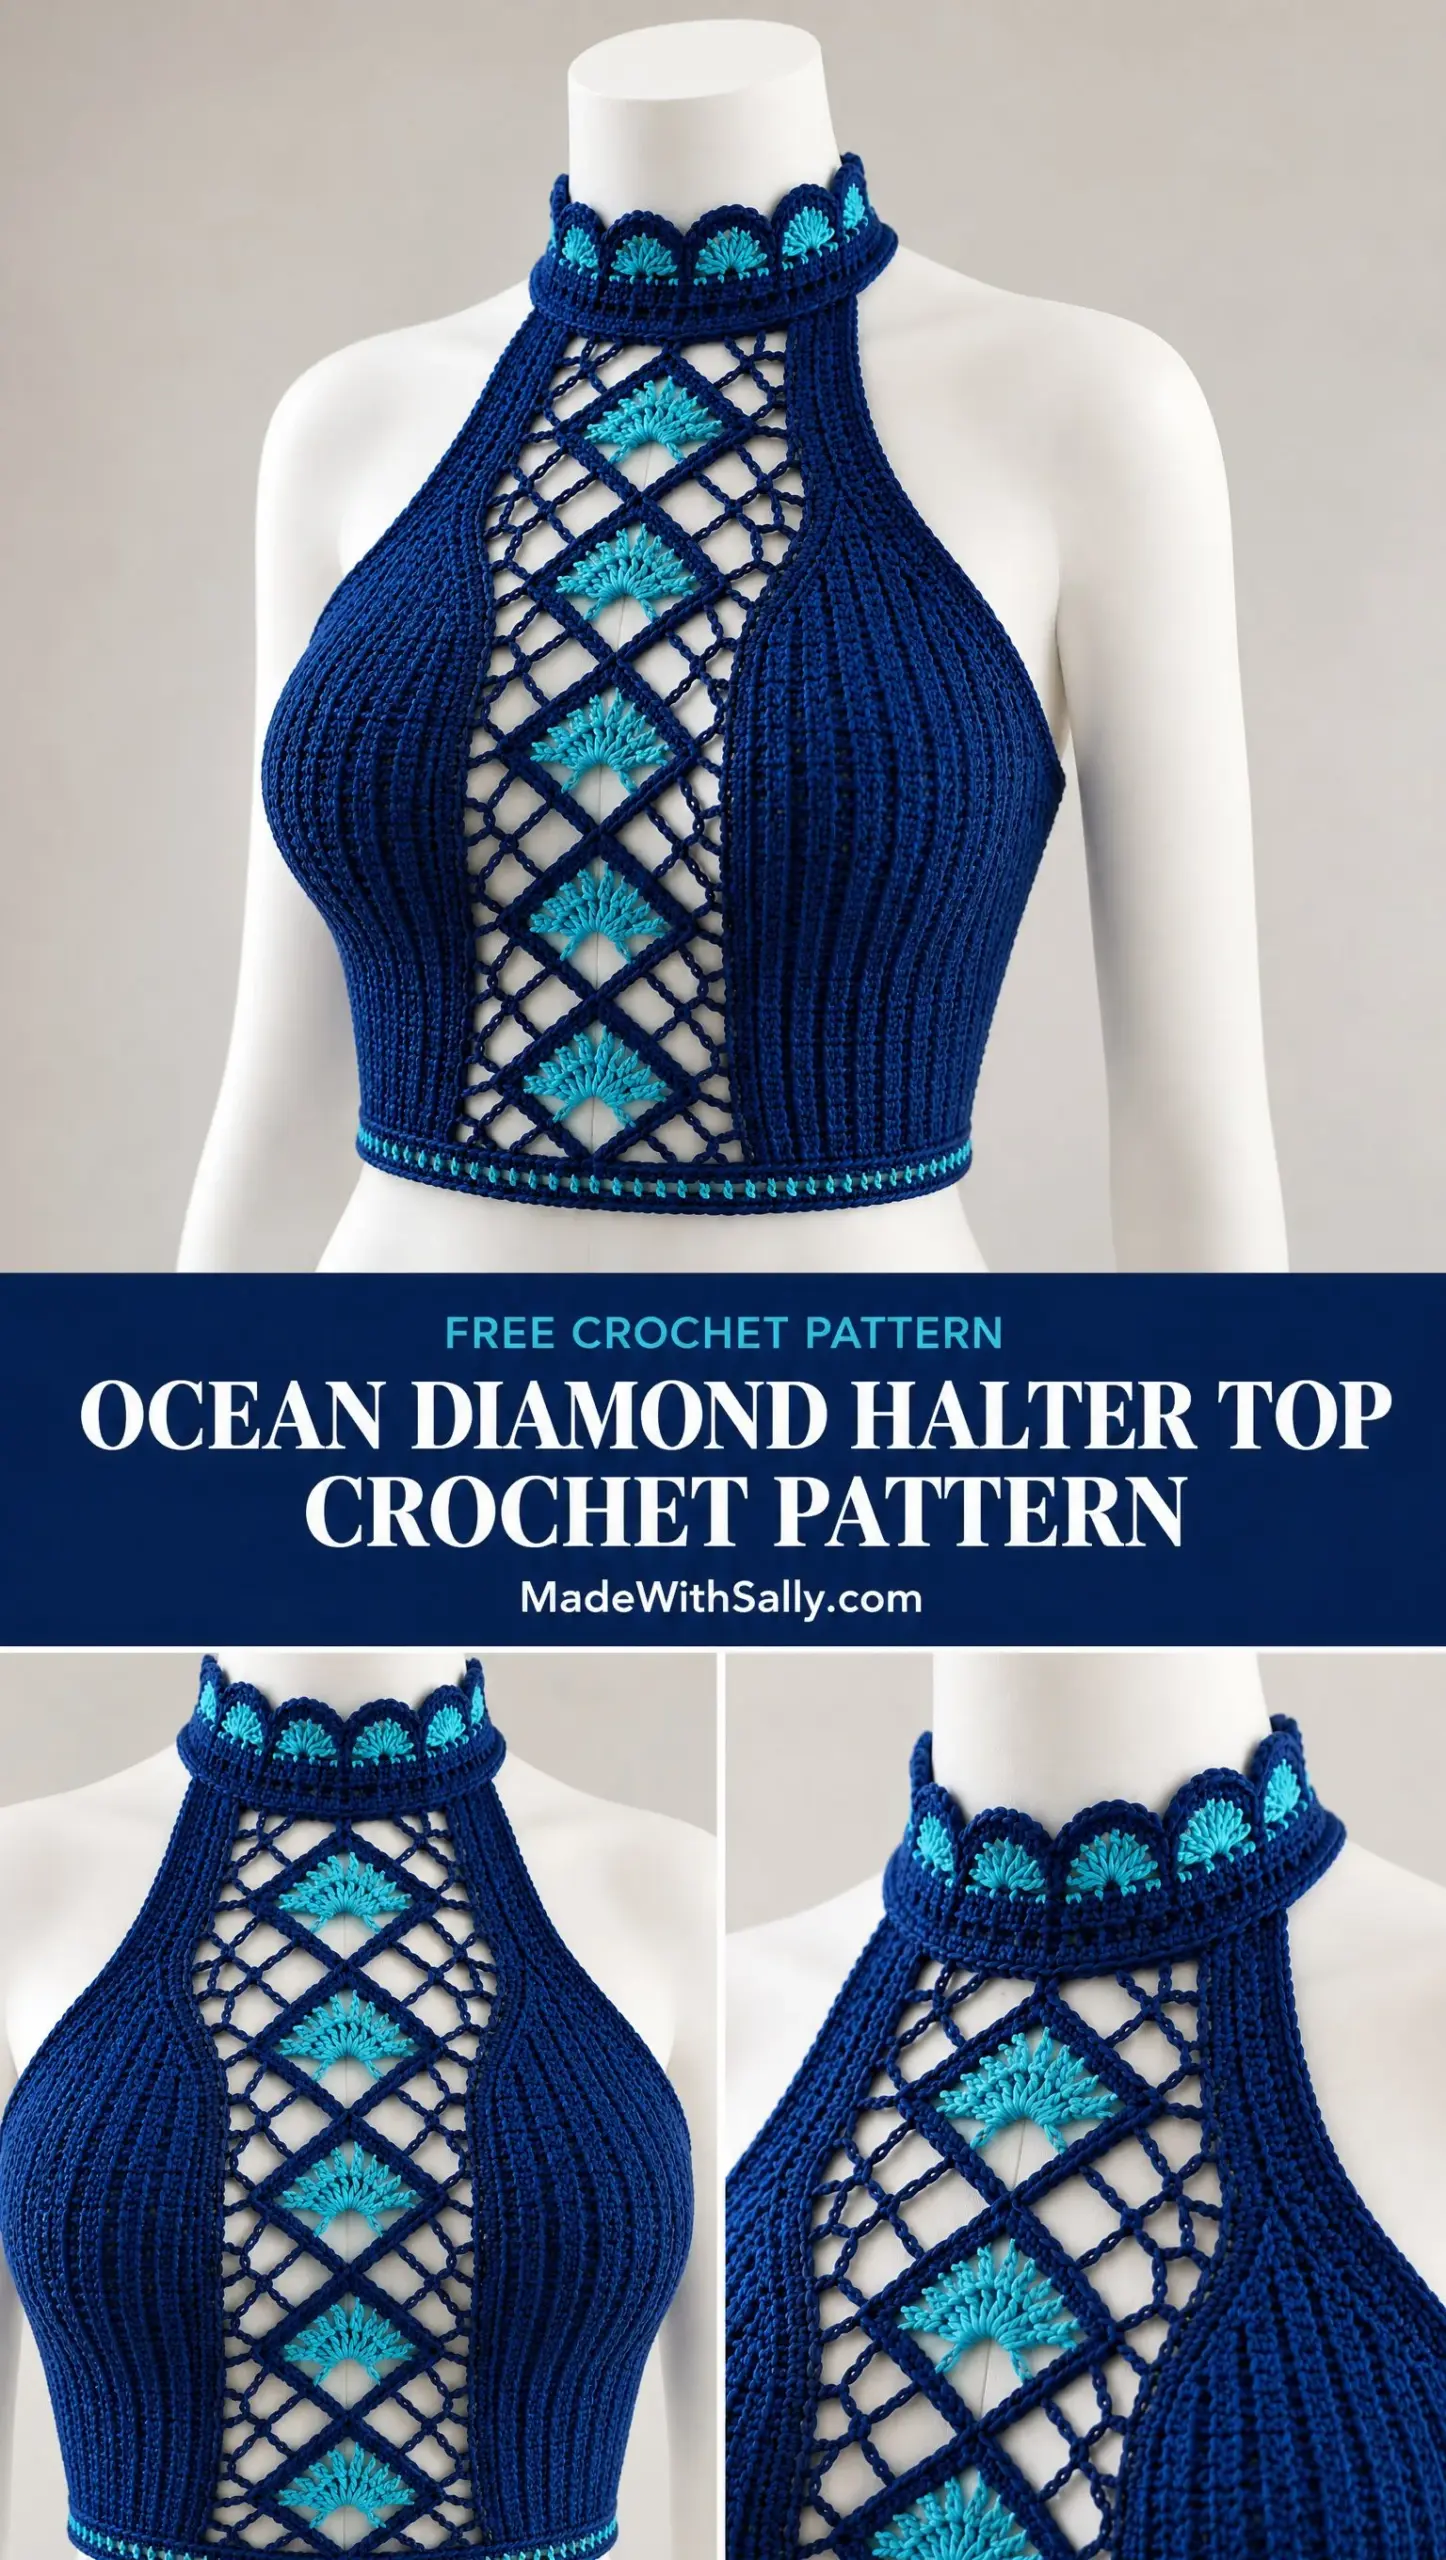
I wanted a piece that felt elegant but still had that handmade charm I love so much. The kind of top that makes people stop and ask, "Wait, did you make that?" The diamond mesh center with those bright turquoise fans against the deep cobalt blue just felt right. It reminded me of looking down into clear ocean water, which is exactly where I wanted to be wearing it.
This pattern took me through several iterations before I landed on the final version. The modular construction means you can adjust the fit as you go, which honestly saved me so much frustration. If you’ve been wanting to try something a little more challenging than your usual projects, this is a beautiful place to push your skills.
About This Pattern
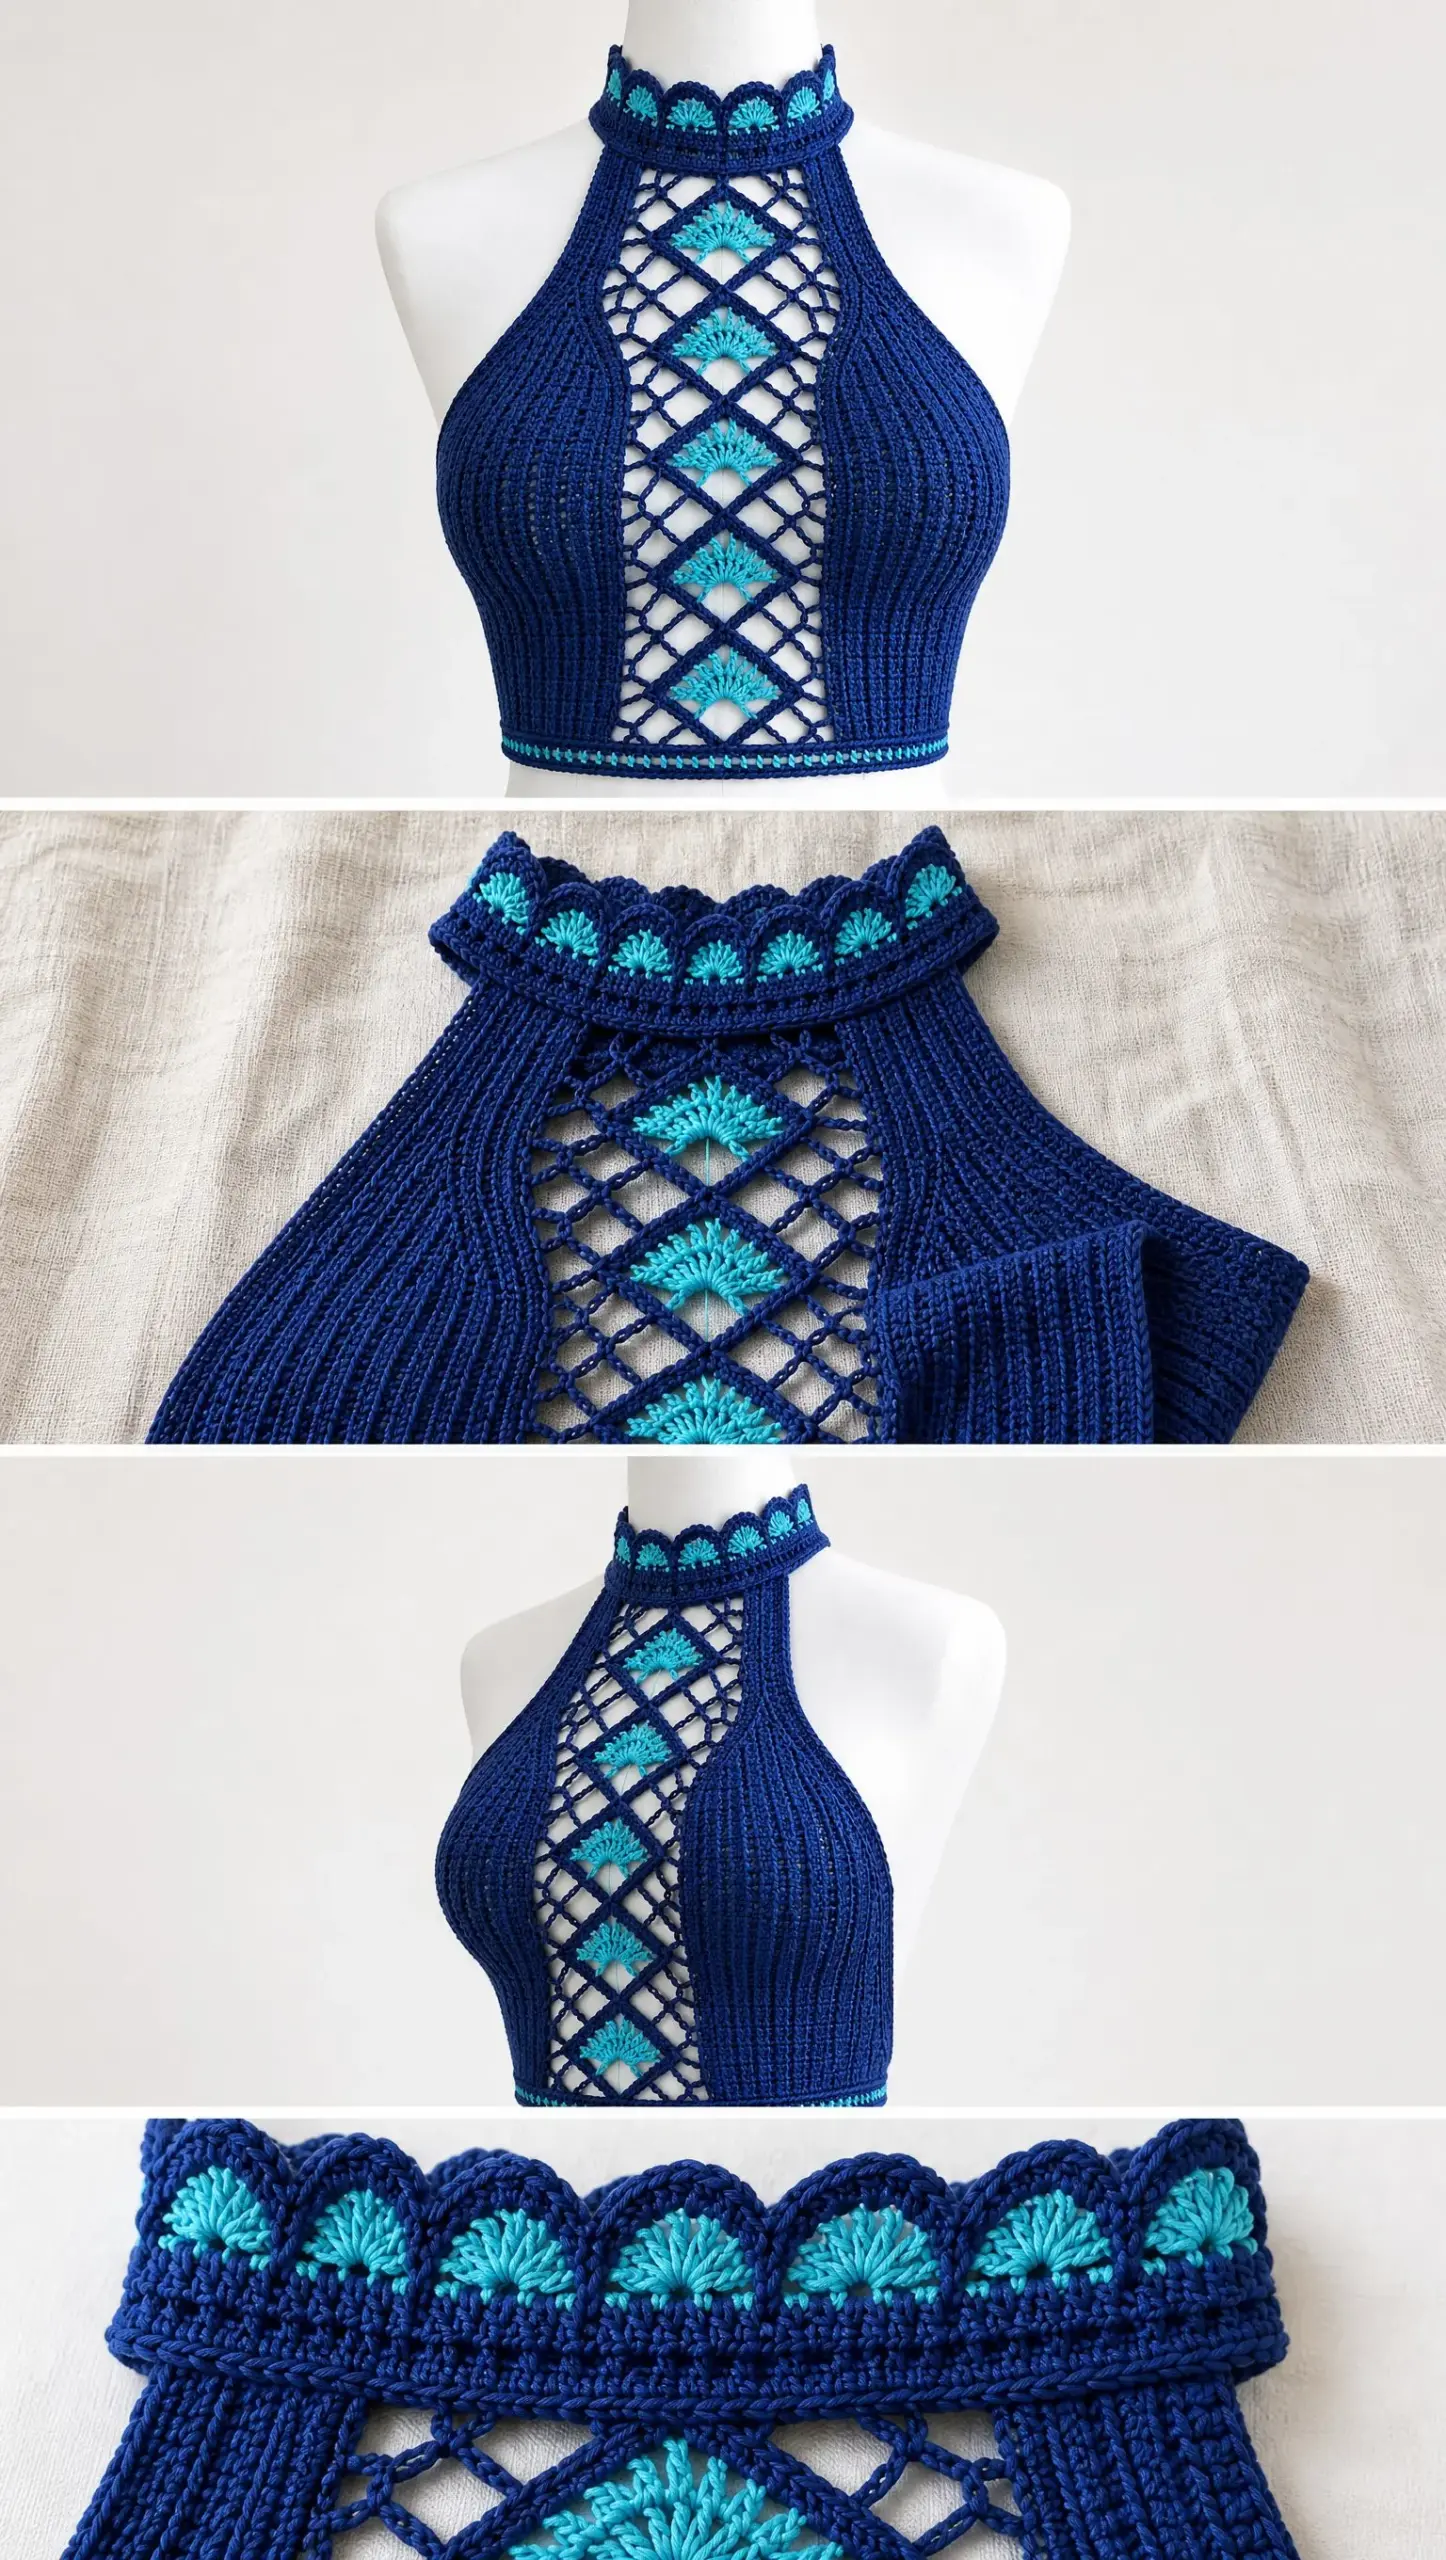
The Ocean Diamond Halter Top is a fitted, waist-length crop top featuring exposed shoulders and a striking high collar. The star of the design is the vertical center panel of open diamond mesh worked in deep navy, with turquoise fan motifs nestled inside alternating diamonds. Flanking this center panel are two solid cobalt ribbed side panels that provide structure and a close, flattering fit.
This pattern uses US crochet terminology and is written for sizes XS, S, M, L, and XL. The sample shown is closest to size M. You’ll work the pieces in modular sections, then join them together and add the finishing edges last.
Skill level: Advanced intermediate. You should be comfortable with shaping, chain spaces, post stitches, joining techniques, and reading stitch repeats before starting this project.
Materials You Will Need
Gathering the right supplies before you begin makes the whole process smoother. Here’s everything you’ll need:
Yarn:
Yardage by size:
The color breakdown is approximately 70% cobalt, 20% navy, and 10% turquoise.
Hook:
Notions:
Gauge Information
Getting your gauge right is essential for this fitted top. The center panel controls the visual width, while the side ribs control the actual fit around your body.
Main gauge: 22 double crochet (dc) stitches and 11 rows equals 10 cm or 4 inches in blocked double crochet fabric.
Center mesh gauge: One diamond repeat measures approximately 5.0 cm wide by 5.5 cm tall.
I highly recommend blocking and measuring one diamond repeat before beginning the full garment. Adjust your hook size up or down until your diamond measures close to these dimensions.
Finished Measurements
| Size | Body Bust | Finished Bust | Bottom Width Laid Flat | Body Length | Collar Circumference |
|---|---|---|---|---|---|
| XS | 76-81 cm | 72 cm | 34 cm | 36 cm | 32 cm |
| S | 82-87 cm | 78 cm | 37 cm | 37 cm | 34 cm |
| M | 88-94 cm | 84 cm | 40 cm | 38 cm | 36 cm |
| L | 95-102 cm | 92 cm | 44 cm | 40 cm | 38 cm |
| XL | 103-112 cm | 101 cm | 48 cm | 42 cm | 40 cm |
Choosing your size: For the fitted look shown in the photos, choose 4 to 8 cm (about 1.5 to 3 inches) of negative ease at the bust. This means your finished garment measurement should be slightly smaller than your actual body measurement. If you fall between sizes, use the smaller center panel count and add width to the side ribs instead.
Abbreviations and Special Stitches
Let me walk you through all the abbreviations and special techniques you’ll encounter in this pattern.
Standard Abbreviations:
Special Stitches:
Rib Pair: Work FPdc around the next dc, then BPdc around the following dc. Repeat this sequence across your row. This creates the narrow vertical cobalt ribs you see in the solid side panels.
Navy Stitch Bar: Work 2 dc together into the same chain space edge area, then 1 dc into the next anchor point. These bars outline each diamond and visually separate the mesh sections.
Turquoise Fan: In the indicated center chain space, work (sc, ch 2, 5 dc, ch 2, sc). For a smaller fan near the collar, use 4 dc instead of 5.
Picot: Chain 3, then slip stitch into the first chain. Used sparingly on the collar scallops for a delicate finish.
Center Diamond Mesh Panel
The center panel is a vertical ladder of open diamonds. You’ll work this section in CC1 (navy), inserting CC2 (turquoise) fans as you go. The bottom begins with a half diamond so your hem remains level.
Foundation Chain by Size:
| Size | Foundation Chain | Full Diamonds Wide | Vertical Diamonds |
|---|---|---|---|
| XS | 31 ch | 3 | 5 |
| S | 31 ch | 3 | 5 |
| M | 35 ch | 3 | 5 |
| L | 35 ch | 3 | 6 |
| XL | 39 ch | 4 | 6 |
Row 1 (WS): Dc in 4th ch from hook and in each ch across. Turn.
Row 2 (RS): Ch 3, dc in next 2 sts, ch 3, skip 2 sts, sc in next st, ch 3, skip 2 sts, dc in next 3 sts; repeat from * across, ending with dc in last 3 sts. Turn.
Row 3: Ch 3, dc in next dc, ch 2, sc in next ch-3 sp, ch 5, sc in next ch-3 sp, ch 2, dc in center dc of next 3-dc group; repeat from * across; dc in final 2 edge sts. Turn.
Row 4: Ch 3, ch 3, sc in ch-5 sp, ch 3, 3 dc in next center anchor; repeat from * across, keeping 2 dc at each outer edge. Turn.
Row 5: Ch 3, dc in next st, ch 2, sc in next ch-3 sp, ch 5, sc in next ch-3 sp, ch 2, dc in center dc of 3-dc group; repeat from * across. Turn.
Row 6: Repeat Row 2, aligning the new open spaces over the previous row so a complete diamond is formed.
Diamond Repeat: Rows 3 through 6 form one full diamond unit. Repeat these four rows until you have the number of vertical diamonds listed for your size. End after a Row 6 equivalent.
Adding the Turquoise Fans
This is where the magic happens! The turquoise fans transform the navy mesh into something truly special.
1. With RS facing, join CC2 into the central ch-5 space of the lowest complete diamond.
2. Work one turquoise fan (sc, ch 2, 5 dc, ch 2, sc). Fasten off neatly to the WS.
3. Place fans in alternating diamonds up the vertical center line. For sizes XS, S, and M, add fans to diamonds 1, 3, and 5. For sizes L and XL, add fans to diamonds 1, 3, and 5, with an optional smaller 4-dc fan in the 6th diamond near the collar.
4. For the look shown in the sample, keep the side diamonds open. Only the central vertical diamonds receive turquoise fans.
Fitted Cobalt Side Panels
Make two mirror-image side panels in MC (cobalt). These panels are worked from the center outward using ribbed post-stitch fabric for structure. You can either attach each panel to the center as you work or seam them afterward using mattress stitch.
Side Panel Specifications:
| Size | Sts at Lower Edge Per Side | Approx. Panel Width | Armhole Shaping Begins |
|---|---|---|---|
| XS | 34 | 15.5 cm | Row 13 |
| S | 38 | 17 cm | Row 13 |
| M | 42 | 19 cm | Row 14 |
| L | 46 | 21 cm | Row 15 |
| XL | 52 | 23.5 cm | Row 16 |
Foundation / Row 1: Chain the listed stitch count plus 2. Hdc in 3rd ch from hook and across. Turn.
Row 2: Ch 2, dc in each st across. Turn.
Row 3: Ch 2, FPdc around next dc, BPdc around next dc across. If one stitch remains, dc in last st. Turn.
Rows 4 through 12 (13, 13, 14, 15 depending on size): Repeat Row 3, maintaining the post-stitch ribs. Work straight until the panel reaches lower bust or underarm level.
Armhole Shaping: At the outer armhole edge only, decrease 2 sts at the beginning of the next 2 RS rows. Then decrease 1 st at that edge on each RS row 4 (5, 6, 7, 8) times depending on your size. Keep the center edge straight for joining to the diamond panel.
Upper Side Shaping: Continue working in the rib pattern while decreasing 1 st at the armhole edge every other RS row until 10 (11, 12, 13, 14) sts remain at the top. These remaining stitches become your collar extension strip.
Collar Extension: Continue working the collar extension strip in the rib pattern until it reaches halfway around the back neck. This should measure approximately 15 (16, 17, 18, 19) cm from the top of the diamond panel. Fasten off, leaving a long tail for seaming.
Bust Shaping Option: For a fuller bust, add short rows before armhole shaping. Work across 70% of the side panel, turn, and work back. Then work 85%, turn, and work back. Resume full rows after that. This adds depth without widening the hem.
Joining the Center and Side Panels
Take your time with this step. Good blocking and careful pinning make all the difference.
1. Block all three body sections lightly to the schematic dimensions before joining. Do not stretch the mesh aggressively.
2. Place one side panel beside the center panel with RS facing up. Pin the lower edges level and align the side panel inner edge with the center panel outer dc edge.
3. Using MC or CC1, seam with a flat mattress stitch. Catch one full stitch from the solid panel and the outer edge loops of the center panel. Keep your seam tension elastic but firm.
4. Repeat on the opposite side.
5. Check that the turquoise fans run exactly down the center front and that the lower edge lies perfectly straight.
6. Try it on! The side panels should wrap the bust snugly while the center mesh lies flat without bowing outward. If needed, adjust by removing or adding one rib repeat at the outer side seam.
Back Closure
The front view shown works beautifully with either a closed back or a laced back. This version uses a short laced opening at center back for the cleanest fit and easiest sizing adjustments.
1. Along each back edge, join MC at the hem. Work 1 row sc evenly up to the armhole level.
2. Next row: Sc in next 3 sts, ch 2, skip 2 sts; repeat to create 5 to 7 evenly spaced lacing loops. Keep the top loop about 2 cm below the collar seam.
3. Make a 120 to 150 cm navy cord by chaining to length, then slip stitching back along the chain. Lace from bottom to top in a crisscross pattern and tie at the upper back.
Closed Back Alternative: If your fitted bust circumference is correct without a lacing gap, seam the back edges from hem to 5 cm below the collar and leave a short keyhole opening. Add a small button and loop closure at the upper back.
High Collar Construction
The structured high collar is one of my favorite features of this design. It frames the face beautifully and adds that elegant touch.
1. With RS facing, pin the two collar extension strips around the neck so the back ends meet. Seam the back ends together in MC.
2. Join MC at center back. Work 1 round sc evenly around the upper neckline, including the top edge of the center diamond panel. Aim for a firm but comfortable circumference. Decrease evenly if the neckline gaps.
3. Round 2: Ch 2, dc in each st around; join.
4. Rounds 3 and 4: Ch 2, FPdc around next dc, BPdc around next dc around; join. These ribs create the structured cobalt collar base.
5. Change to CC1. Round 5: Sc around, decreasing 2 to 4 sts evenly if needed so the collar stands cleanly.
6. Change to CC2. Round 6 (Scallops): Skip 1 st, 5 dc in next st, skip 1 st, sl st in next st around, adjusting the last repeat symmetrically.
7. Optional Navy Rim: With CC1, work sl st loosely around the top edge, placing a picot at the peak of every second scallop.
Crisp Armhole Binding
A clean armhole finish makes the whole garment look polished and professional.
1. Join CC1 at the underarm.
2. Round 1: Sc evenly around the armhole, working approximately 2 sc per 3 row ends on straight sections. Do not overfill the curve.
3. Round 2: Work reverse sc (also called crab stitch) around for a narrow rope-like navy binding. Alternatively, use a firm sl st round for a flatter edge.
4. Repeat for the second armhole. Block both armholes to matching curves.
Level Double-Border Hem
The hem features a double border that keeps everything neat and level, with an optional turquoise accent line.
1. Join CC1 at center back lower edge.
2. Round 1: Sc evenly around the entire hem, placing 1 sc in each solid panel stitch and distributing sc evenly across the bottom of the center panel so the edge becomes level.
3. Round 2: Ch 1, sc in each st around. Keep the round flat. Decrease one stitch at each center panel corner if the edge waves.
4. Optional Turquoise Accent: With CC2, surface slip stitch around the top edge of Round 1, then finish Round 2 in CC1. This creates the narrow turquoise line you see above the navy anchor border in the photos.
Finishing and Blocking
Proper finishing transforms your handmade piece from "homemade looking" to "professionally crafted."
Construction Checkpoints
Use this list to verify your work at each stage:
After center panel: Diamonds are symmetrical; outer edges are straight; fans are centered and not pulling mesh inward.
After side panels: Both panels are identical mirror images; rib columns are vertical; armhole decreases are smooth.
After joining: Front hangs centered; hem is level; center panel width remains stable.
After collar: Collar stands without choking or gaping; back seam is centered.
After edging: Armholes lie flat; hem does not flare; navy borders look crisp and narrow.
Custom Fit Adjustments
Every body is different, and that’s the beauty of making your own clothes! Here are some modifications you can make:
Need more bust width? Add 2 rib stitches to each side panel per extra 1.8 cm needed around the body.
Need less bust width? Remove 2 rib stitches from each side panel. Keep the center diamond panel unchanged for visual balance.
Want a longer torso? Add rib rows before armhole shaping and repeat equivalent rows along the center panel lower section.
Want a shorter crop? Remove 1 diamond repeat only if necessary. Otherwise, shorten the solid side panels and end the center panel after the previous complete repeat.
Want a wider center panel? Move up to the next foundation count and include one extra diamond across. Note that this changes the front visual significantly.
Want a softer collar? Use a 3.25 mm hook for collar rounds 1 through 4 and omit the final navy slip stitch rim.
Want a firmer collar? Use a 2.75 mm hook for the collar and work one additional FPdc/BPdc round.
You Did It!
This halter top is absolutely the kind of project that makes you proud every time you wear it. The combination of the airy diamond mesh, those gorgeous turquoise fans, and the structured ribbed sides creates something truly unique. I hope you’ve enjoyed working through this pattern as much as I enjoyed designing it.
Thank you so much for choosing this pattern for your next project. I would absolutely love to see your finished tops! Tag me on Instagram or share your photos in my Facebook group. Seeing your creations honestly makes my whole day.
If you loved making this Ocean Diamond Halter Top, save this pattern to your Pinterest boards so you can find it again later or share it with your crochet-loving friends. And please drop a comment below if you make one. I’d love to hear which colors you chose and how the fit worked out for you!
Want a Quick & Easy Printable Version?
Get a clean, beautifully formatted PDF of this pattern — easy to follow step by step, ready to print or save on any device. No scrolling, no distractions, just the pattern.
Get the Printable PDF →