
I have been dreaming about designing a crochet dress that actually looks like something you would see in a boutique. Something fitted at the top, flirty at the bottom, and with that perfect gradient color flow that makes people stop and ask where you bought it. This sunset ombre mini dress is exactly what I envisioned. I wanted it to work up in a size range that real people actually wear, use stitches that intermediate crocheters already know, and create that gorgeous color transition from golden yellow through coral to deep tomato red.
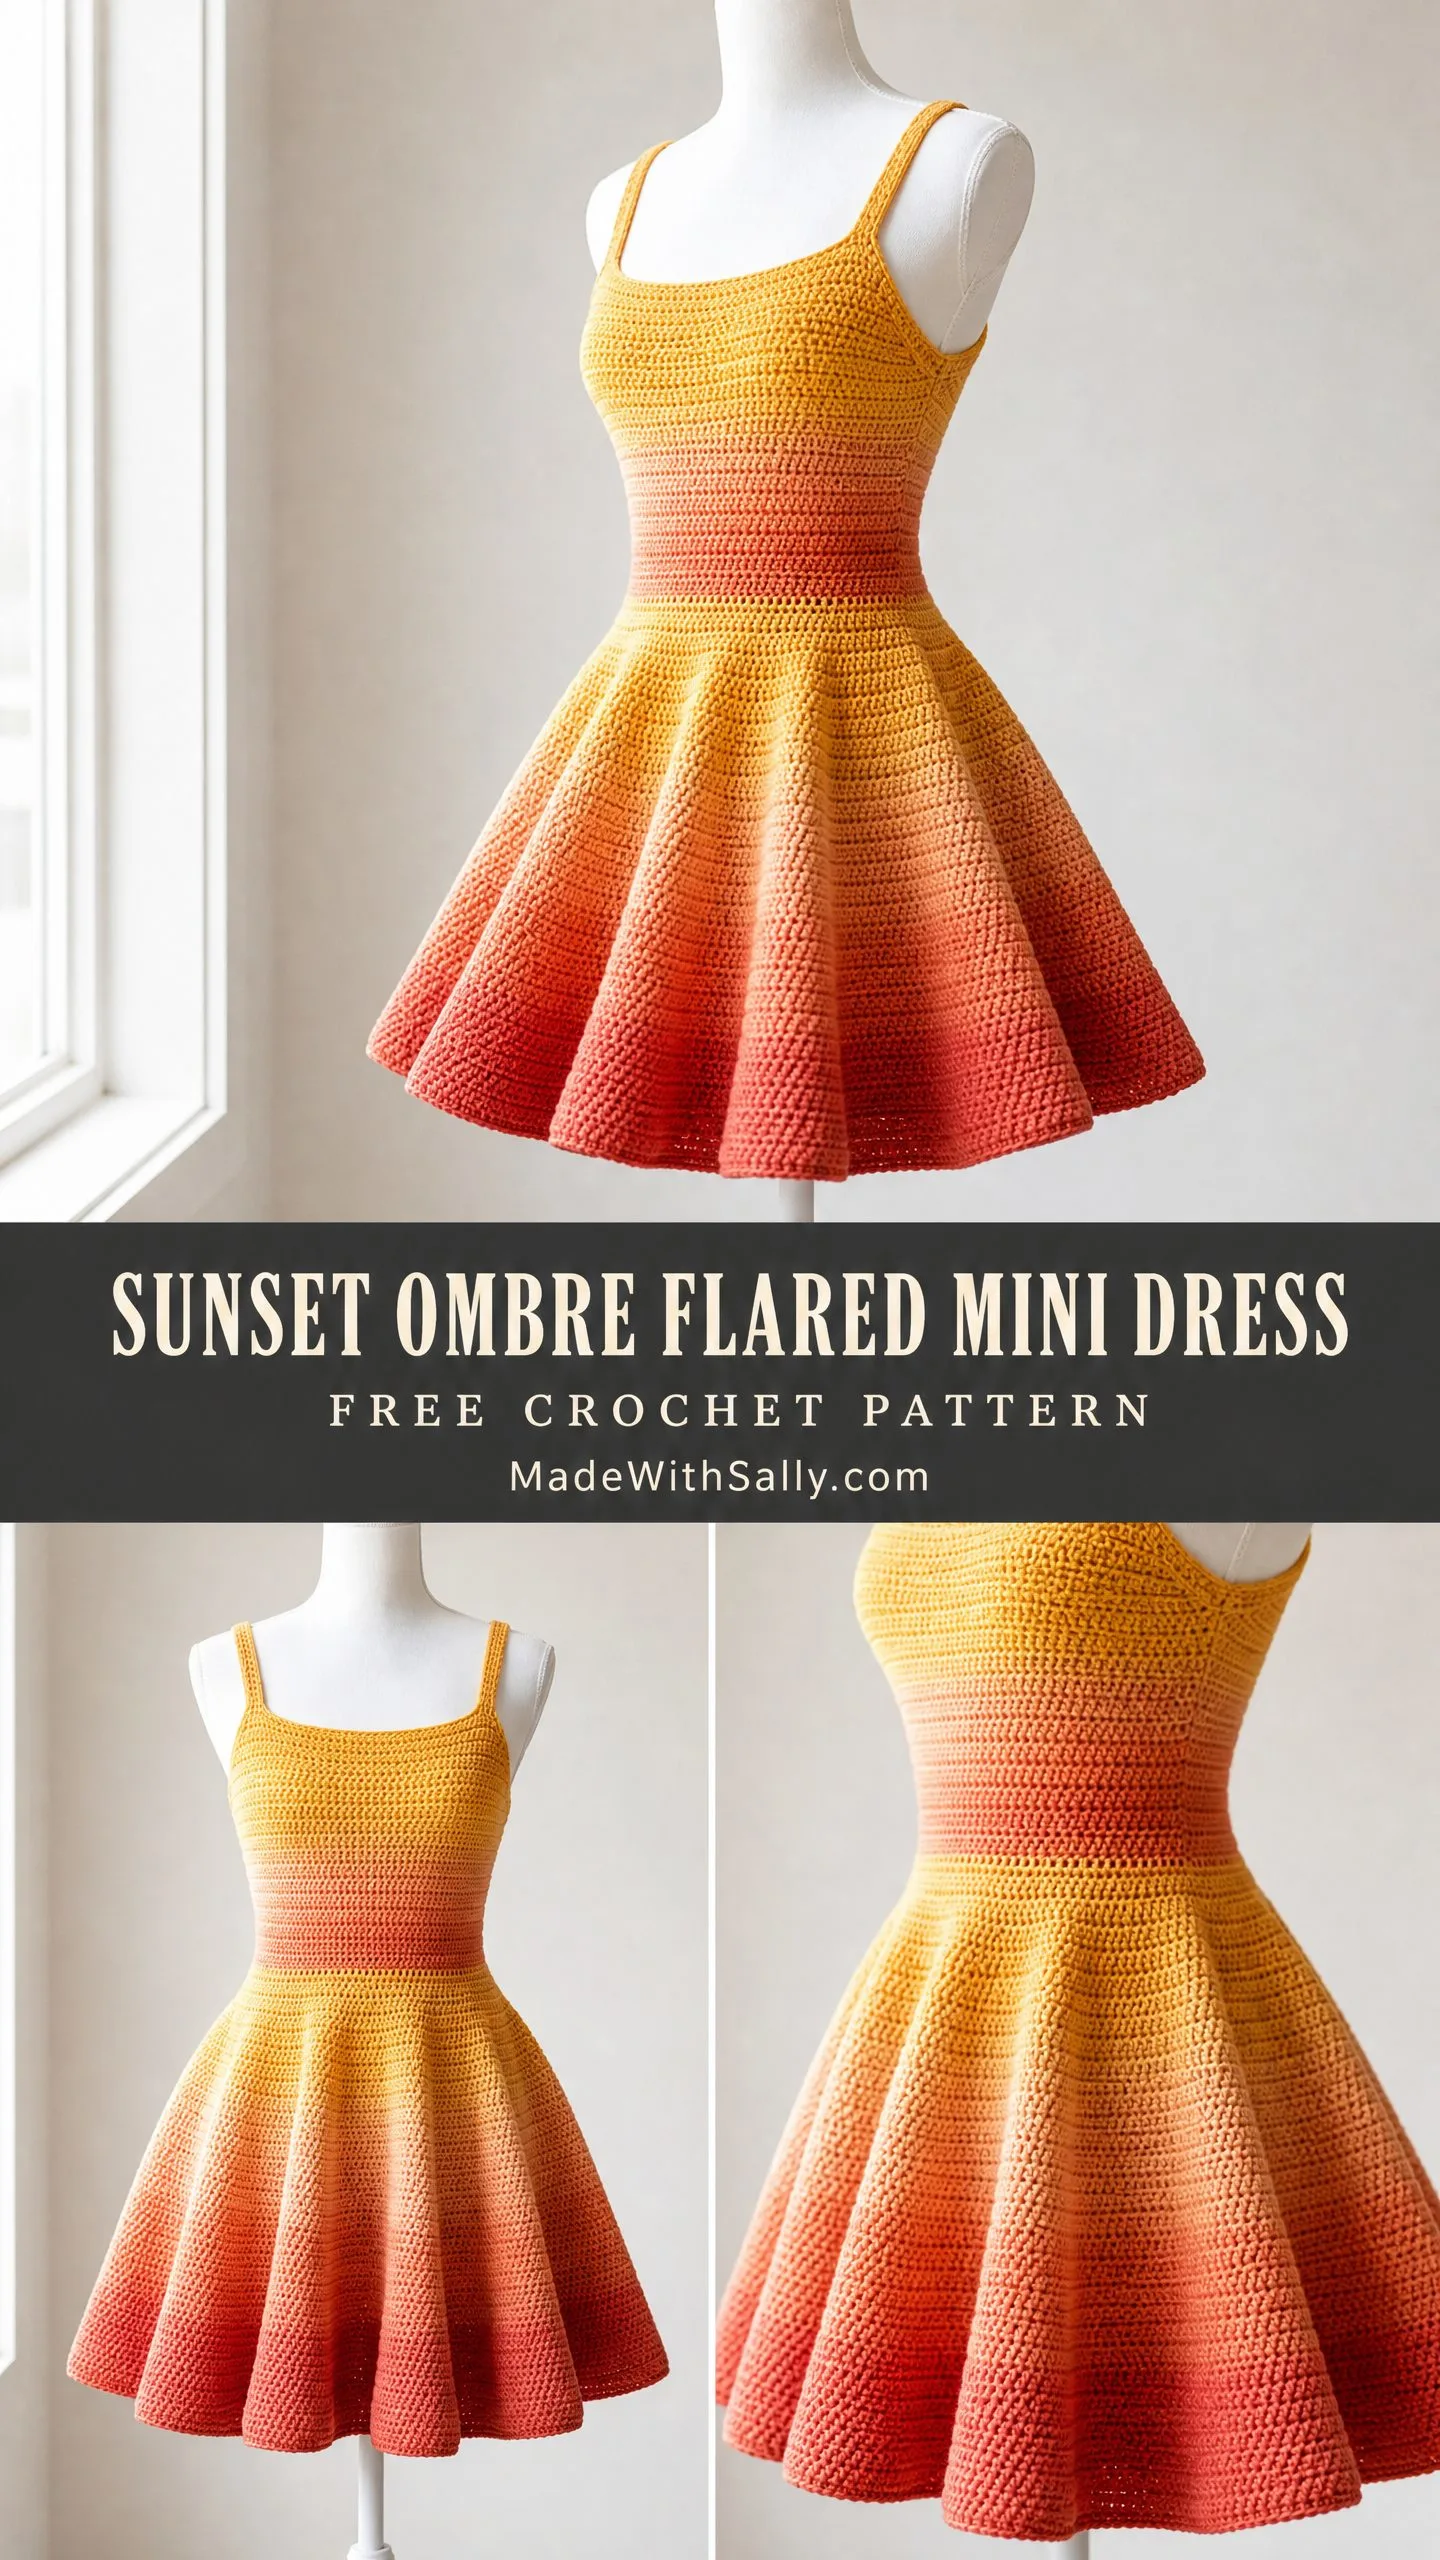
The construction method is straightforward once you understand it. You work two flat bodice panels, join them at the sides, then pick up stitches at the waist and work the flared skirt in continuous rounds all the way down. No complicated shaping. No zippers. Just single crochet worked with intention and a beautiful ombre effect that happens almost automatically if you choose the right yarn.
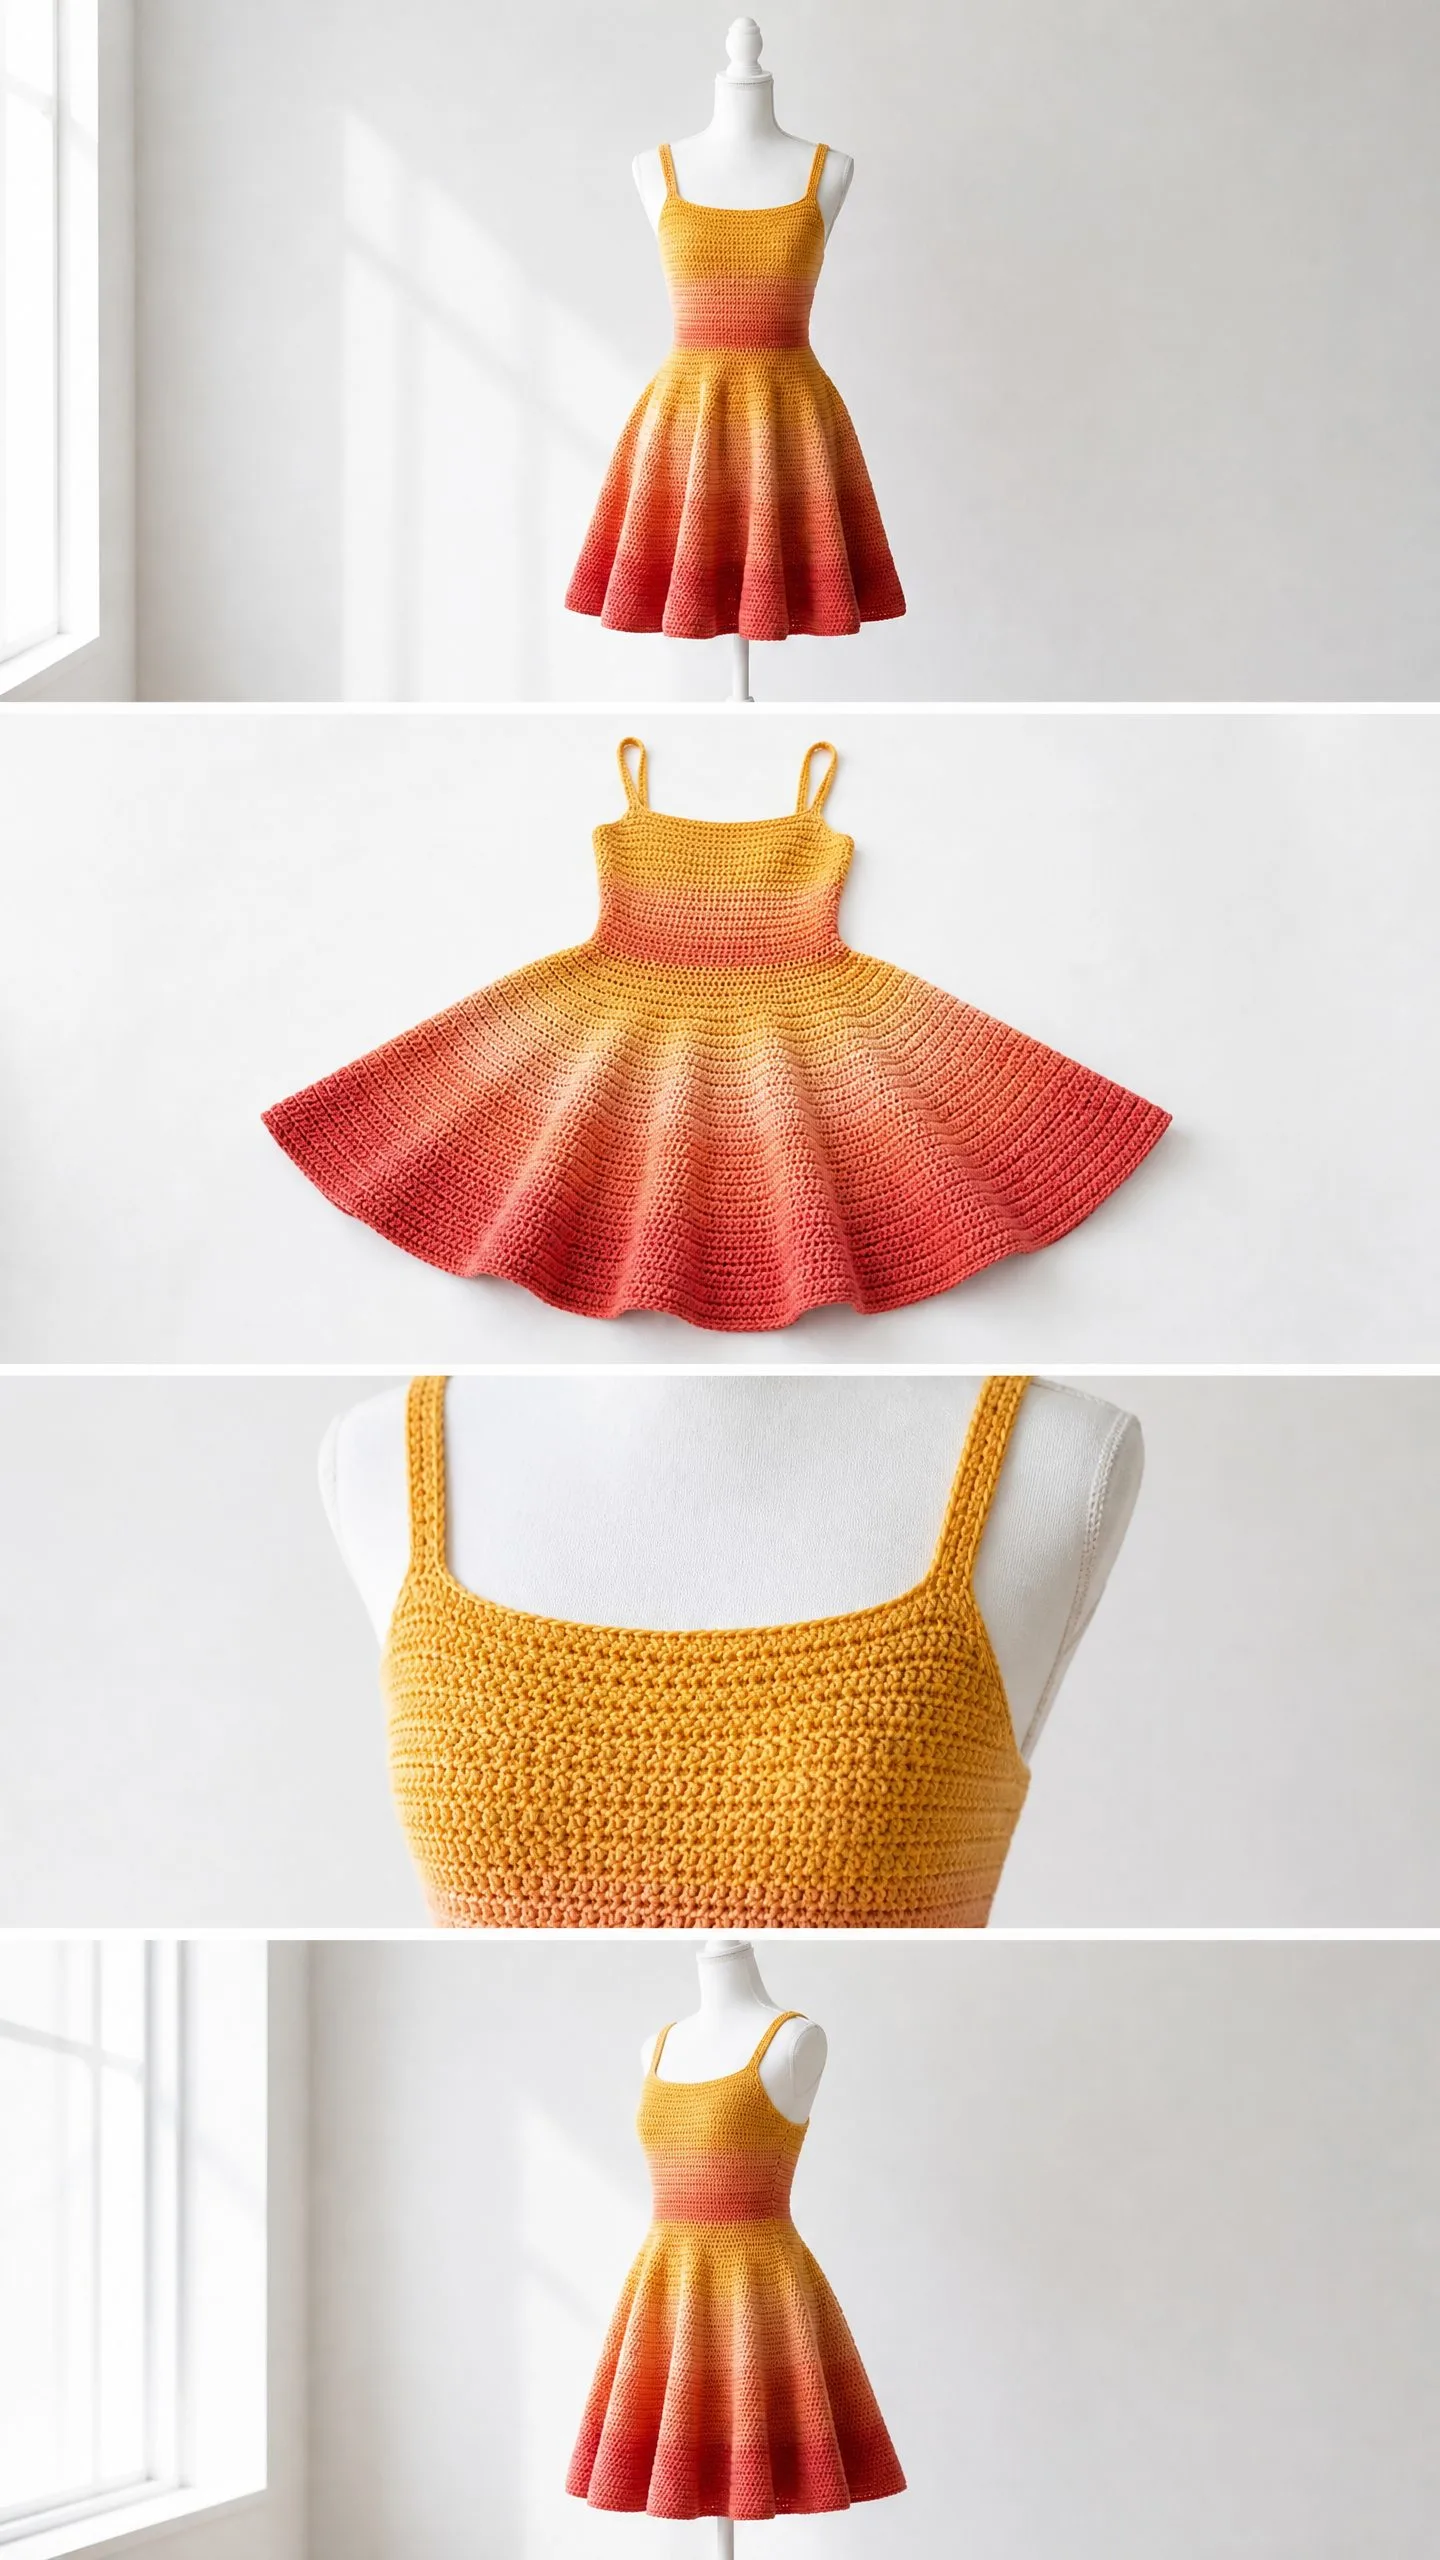
I am SO pleased with how this turned out. The fitted bodice with its subtle horizontal ridge texture, the spaghetti straps, the way the skirt swings and flares when you move. It looks expensive. It looks complicated. But you can absolutely make this if you have worked garments before and you are comfortable with counting stitches carefully.
About This Crochet Pattern
This dress is worked from the top down, which means you can try it on as you go and adjust the length to your liking. The bodice creates a square neckline in both front and back. The waist is gently tapered through simple decreases. And that full, swirly skirt? It comes from regular increases placed every few rounds as you work downward.
The single crochet back loop only stitch on the bodice creates those lovely horizontal ridges you see in the photo. The skirt switches to regular single crochet through both loops, which opens up the fabric slightly and allows the flare to drape beautifully.
If you have never worked a crochet garment before, I would recommend starting with a simpler project first. This dress requires consistent tension, careful gauge swatching, and attention to stitch counts across many rows and rounds. But if you have made a sweater, cardigan, or fitted top before, you have all the skills you need.
Skill Level
Intermediate. You should be comfortable working flat pieces, joining seams, working in continuous rounds, executing consistent color changes for a smooth ombre effect, and reading stitch counts carefully across shaping rows.
Finished Measurements
The pattern is written for a size Small (US 4-6) with notes for adjusting to other sizes.
This dress is designed with zero to one inch of positive ease at the bust and waist for a close, structured fit. The skirt has significant positive ease due to the flare.
Materials Needed for This Crochet Dress Pattern
Yarn: Approximately 1,200 to 1,400 yards (1,097 to 1,280 meters) of DK weight (light 3) cotton or cotton blend yarn in an ombre colorway, or separate skeins in yellow, peach, coral, and red to blend manually.
Yarn suggestions:
Hook: US size E-4 (3.5 mm) crochet hook, or size needed to obtain gauge
Notions:
Gauge
22 single crochet stitches by 26 rows = 4 inches (10 cm), worked flat in single crochet, blocked.
Gauge in the round for skirt: 22 sc by 26 rounds = 4 inches (10 cm).
Gauge is critical for this garment. Take time to swatch both flat and in the round. Block your swatch before measuring. A difference of even one stitch per 4 inches will significantly alter the bust and waist fit.
Abbreviations and Stitch Definitions
Special Techniques
Single Crochet in Back Loop Only (sc blo)
Insert your hook under the back loop only of the indicated stitch. That is the loop farthest from you. Yarn over, pull up a loop. Yarn over, pull through both loops on hook. This creates a subtle ridge line on the right side and adds horizontal texture to the bodice.
Invisible Color Change for Ombre Effect
To create a smooth transition between two colors rather than a hard stripe, follow this method. When approximately 10 to 15 yards remain on the current color, begin holding the new color yarn alongside the old color. On the first ombre round, work every fourth stitch using the new color only. On the second ombre round, work every other stitch in the new color. On the third ombre round, work three of every four stitches in the new color. On the fourth ombre round, switch fully to the new color.
If using a self-striping ombre yarn, simply let the colors transition naturally.
Single Crochet Join (Flat Seam)
Hold two pieces with right sides together. Insert hook through both corresponding edge stitches simultaneously. Work a single crochet through both layers. Continue across. This creates a low-profile seam on the wrong side.
Step by Step Instructions for the Sunset Ombre Flared Mini Dress
Front Bodice Panel
With yellow yarn, chain 48.
Foundation Row (RS): Sc in second ch from hook and in each ch across. Turn. (47 sc)
Rows 1 through 32 (plain bodice section): Ch 1, sc blo in each st across. Turn at end of each row. (47 sc throughout)
These 32 rows create the upper portion of your bodice. Keep your tension consistent. The back loop only stitches will create those lovely horizontal ridges.
Row 33 (begin waist shaping): Ch 1, sc2tog blo, sc blo to last 2 sts, sc2tog blo. Turn. (45 sc)
Row 34: Ch 1, sc blo across. Turn. (45 sc)
Row 35: Ch 1, sc blo across. Turn. (45 sc)
Row 36: Ch 1, sc2tog blo, sc blo to last 2 sts, sc2tog blo. Turn. (43 sc)
Row 37: Ch 1, sc blo across. Turn. (43 sc)
Begin your ombre transition toward peach from Row 37 forward using the invisible color change method.
Row 38: Ch 1, sc blo across. Turn. (43 sc)
Row 39: Ch 1, sc2tog blo, sc blo to last 2 sts, sc2tog blo. Turn. (41 sc)
Rows 40 through 55: Ch 1, sc blo in each st across. Turn at end of each row. (41 sc)
After Row 55, fasten off, leaving a long tail for seaming.
Your front bodice panel should measure approximately 8.5 inches wide at the bust and 7.5 inches wide at the waist, and approximately 8.5 inches tall.
Back Bodice Panel
Work the back bodice panel identically to the front bodice panel. Chain 48, work Foundation Row plus Rows 1 through 55, all shaping as written.
Fasten off, leaving a long tail for seaming. (41 sc at end of Row 55)
Joining the Bodice Panels
Hold front and back bodice panels with right sides together, aligning all side edges. Using the single crochet join method, join both side seams. The seam runs from the bottom waist edge up to the top edge of the bodice on each side.
Turn the bodice right side out.
Your joined bodice should measure approximately 17 inches in circumference at the waist and approximately 19 inches in circumference at the bust.
Strap Construction (Make 2)
With yellow yarn, chain 66.
Row 1: Sc in second ch from hook and in each ch across. Turn. (65 sc)
Row 2: Ch 1, sc in each st across. Fasten off, leaving a long tail for sewing. (65 sc)
For strap attachment, pin one end of each strap to the front top edge, positioning each strap approximately 1.5 inches in from each side seam. Pin the other end to the back top edge at the same position. Try on or check fit before sewing permanently. Sew each strap end securely using whipstitch.
Skirt
The skirt is worked in continuous rounds downward from the waist. Use standard single crochet through both loops.
Setup Round: Join yarn (in coral-peach color) at one side seam at the base of the bodice. Work 1 sc in each stitch around the bottom edge. Pm at beginning of round. (82 sc)
Rounds 1-2: Sc in each st around. (82 sc)
Round 3 (Increase Round 1): (Sc in next 3 sts, inc in next st) 20 times, sc in last 2 sts. (102 sc)
Rounds 4-6: Sc in each st around. (102 sc)
Increase Round 2: (Sc in next 4 sts, inc in next st) 20 times, sc in last 2 sts. (122 sc)
Rounds 7-9: Sc in each st around. (122 sc)
Increase Round 3: (Sc in next 5 sts, inc in next st) 20 times, sc in last 2 sts. (142 sc)
Rounds 10-12: Sc in each st around. (142 sc)
Increase Round 4: (Sc in next 6 sts, inc in next st) 20 times, sc in last 2 sts. (162 sc)
Your color should now be transitioning into deeper orange.
Rounds 13-15: Sc in each st around. (162 sc)
Increase Round 5: (Sc in next 7 sts, inc in next st) 20 times, sc in last 2 sts. (182 sc)
Rounds 16-18: Sc in each st around. (182 sc)
Increase Round 6: (Sc in next 8 sts, inc in next st) 20 times, sc in last 2 sts. (202 sc)
Color should now be transitioning toward coral-red.
Rounds 19-21: Sc in each st around. (202 sc)
Increase Round 7: (Sc in next 9 sts, inc in next st) 20 times, sc in last 2 sts. (222 sc)
Rounds 22-24: Sc in each st around. (222 sc)
Increase Round 8: (Sc in next 10 sts, inc in next st) 20 times, sc in last 2 sts. (242 sc)
Color should now be deepening into full tomato red.
Rounds 25-27: Sc in each st around. (242 sc)
Increase Round 9: (Sc in next 11 sts, inc in next st) 20 times, sc in last 2 sts. (262 sc)
Rounds 28-30: Sc in each st around. (262 sc)
Increase Round 10: (Sc in next 12 sts, inc in next st) 20 times, sc in last 2 sts. (282 sc)
Rounds 31-33: Sc in each st around. (282 sc)
Round 34 (final hem round): Sc in each st around. Sl st to first sc of round to close. Fasten off and weave in end. (282 sc)
Size Customization Tips
To adjust bust size: Add or remove stitches from the foundation chain in multiples of 2. Each 2-stitch adjustment adds or removes approximately 0.36 inches to the total bust circumference. For Medium (34-36 inch bust), begin with chain 52. For Large (36-38 inch bust), begin with chain 56.
To adjust length: Add or remove plain rounds between increase rounds in the skirt. Each round adds approximately 0.15 inches to the length.
To adjust flare: For more dramatic flare, increase every 2 rounds instead of every 4. For a subtler A-line, increase every 5 to 6 rounds.
Finishing and Blocking
Weave in all yarn ends securely, running each tail in two different directions to prevent unraveling.
Wet blocking is strongly recommended. Submerge the dress in cool water and gently press out excess water by rolling in a clean towel. Lay flat on blocking mats. Pin the hem and bodice edges to target measurements. Allow to dry completely, at least 24 hours.
Blocking will open the fabric, even your stitch tension, smooth the ombre transitions, and give the skirt its full flare and drape.
Care Instructions
Machine wash on gentle cycle in cool water. Lay flat to dry. Do not tumble dry. Iron on low-cotton setting while slightly damp if needed. Store folded flat or on a padded hanger.
Final Thoughts on This Crochet Dress Tutorial
This sunset ombre flared mini dress is the kind of project that looks absolutely stunning when finished. Yes, it takes time. Yes, you need to pay attention to your gauge. But when you slip it on and see how the colors flow from that warm golden yellow down through coral into rich red, you will understand why this crochet pattern is worth every stitch.
The construction is logical once you break it down. Two flat panels for the bodice. Side seams. Then continuous rounds for the skirt with regular increases. You have got this.
Thank you so much for choosing this pattern. I truly hope you love making it as much as I loved designing it. If you make this dress, I would absolutely love to see it. Tag me on Instagram or share your finished piece on Facebook. Nothing makes my day like seeing your beautiful creations come to life.
If this crochet dress pattern caught your eye, save it to your Pinterest boards so you can find it when you are ready to start. And please drop a comment below if you make one. I read every single comment and love hearing about your projects.
