
Last winter, my sister called me in a panic three days before her best friend’s birthday. She had completely forgotten to get a gift. "Something handmade," she pleaded. "Something pretty that looks like I actually put thought into it." I dug through my thread stash, grabbed a few colors that reminded me of frosty mornings, and started crocheting tiny roses.
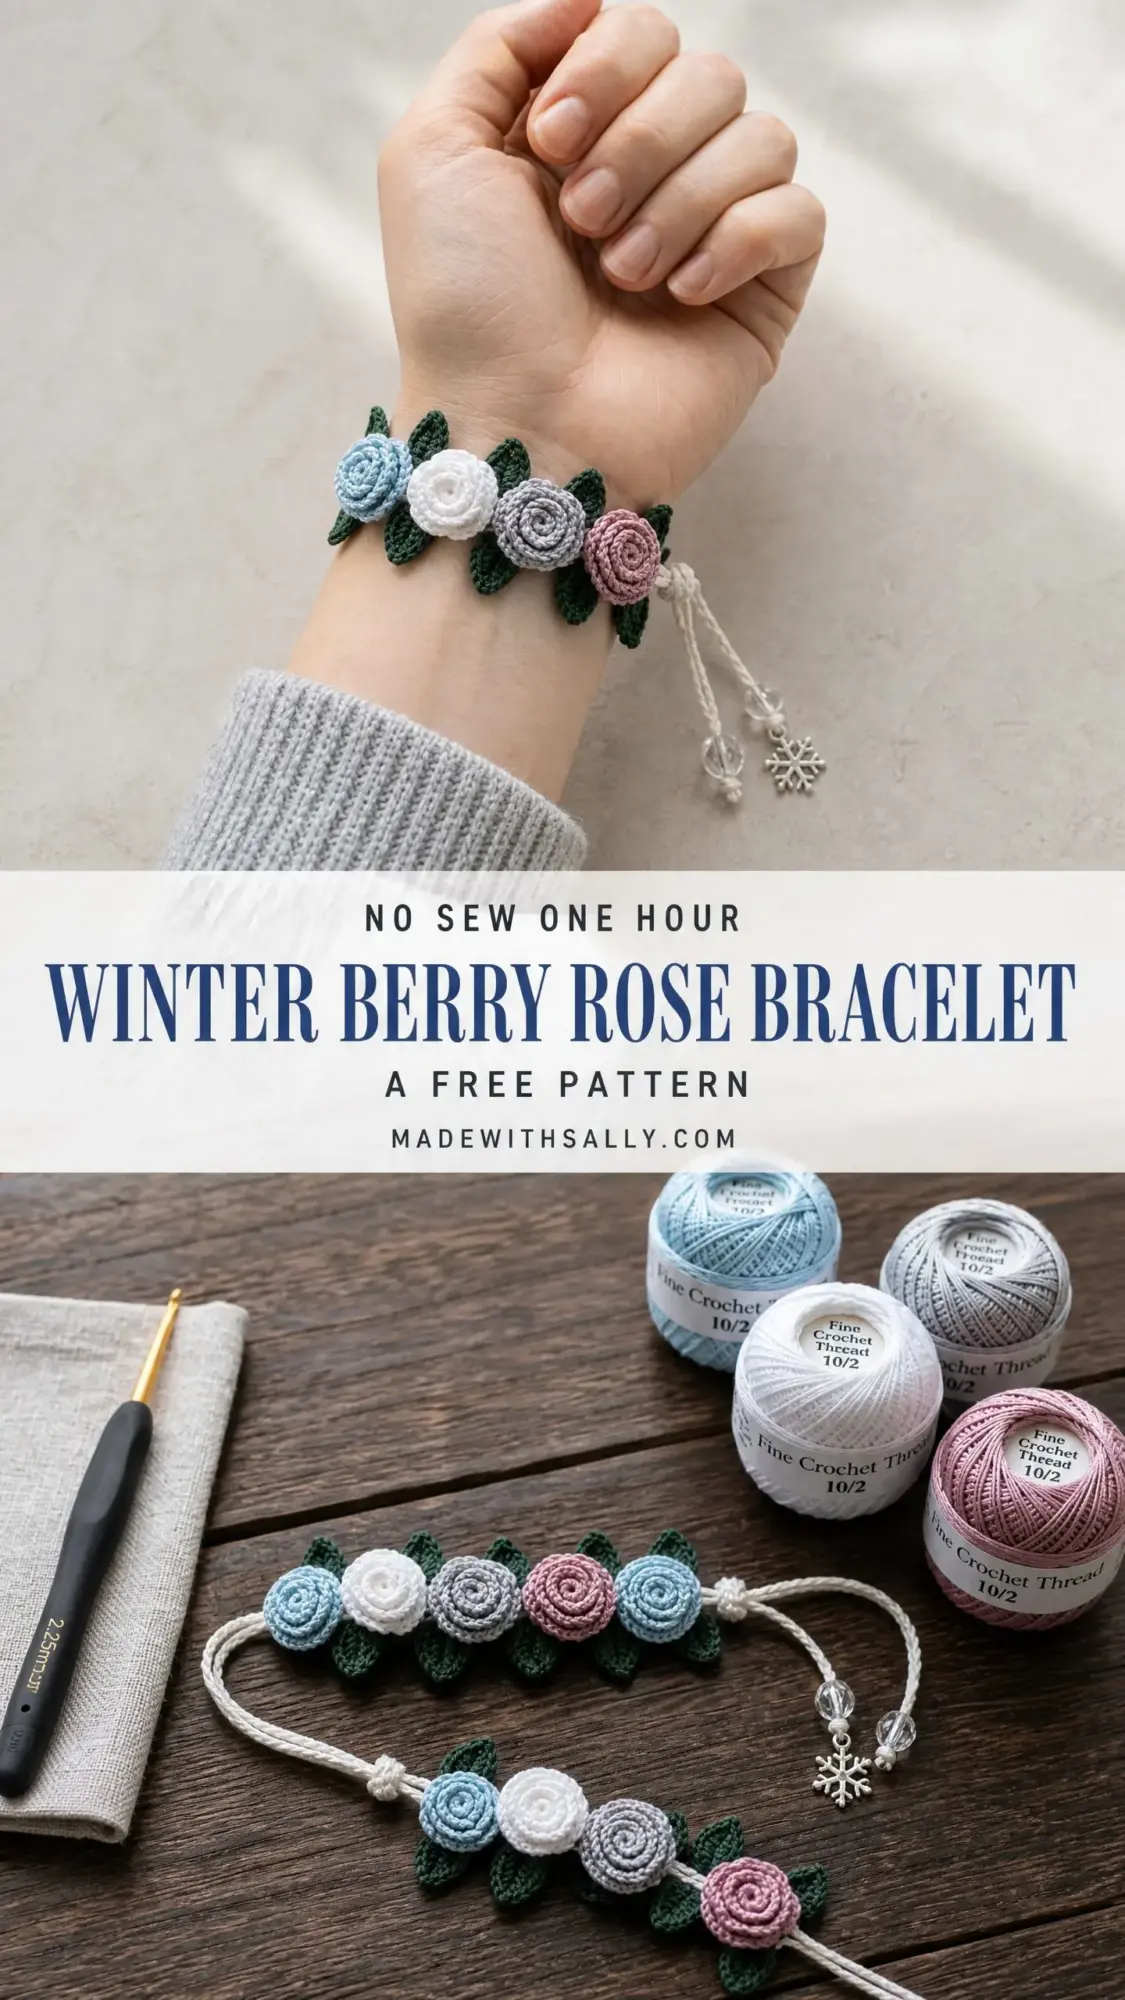
Four hours later, I had created the prettiest little bracelet. Soft blue, white, silvery gray, and dusty rose flowers nestled on dark green leaves, all strung on an adjustable cream cord with crystal beads and snowflake charms dangling at the ends. My sister was thrilled. Her friend cried actual happy tears.
That bracelet became this pattern. And honestly? It might be my favorite thing I have ever designed.
About This Delicate Rose Bracelet Crochet Pattern
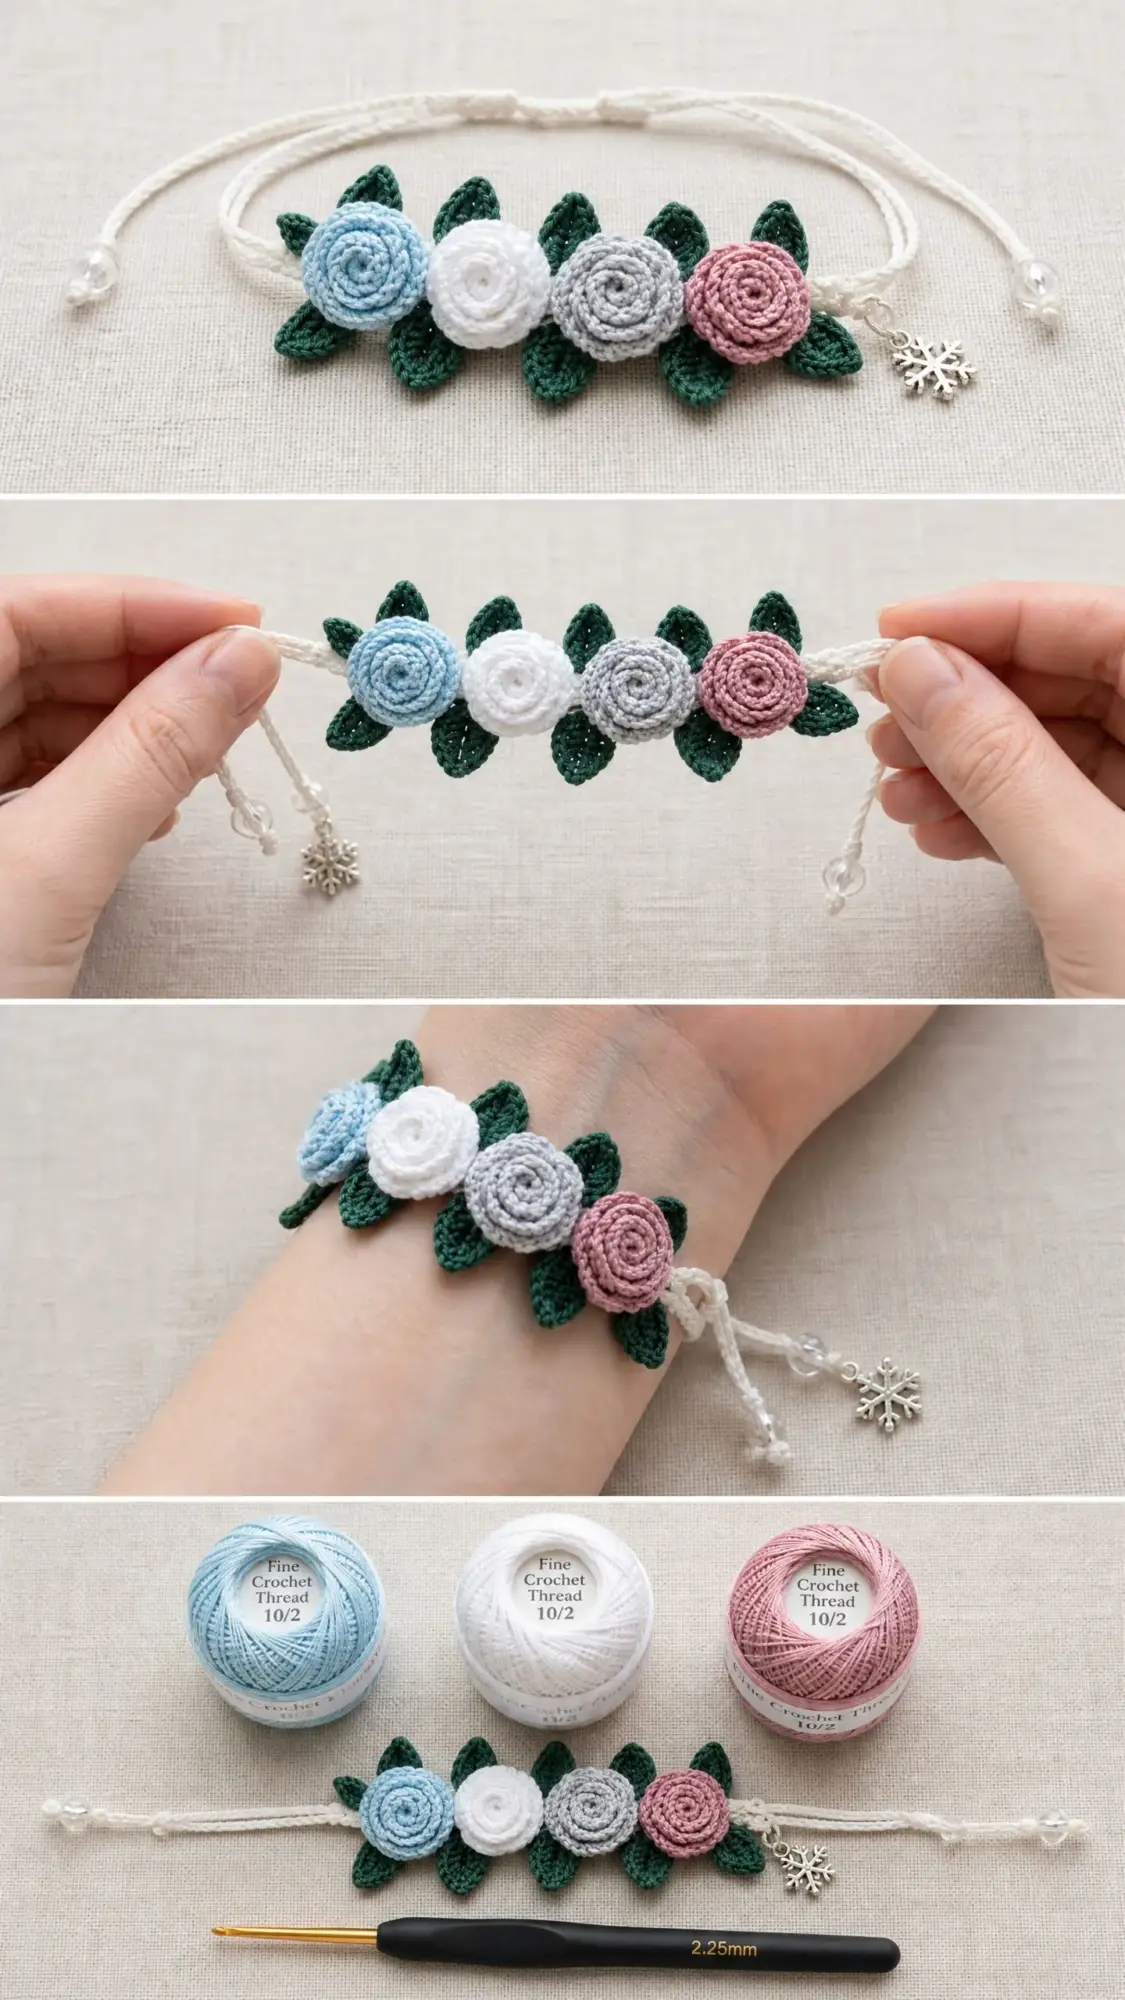
This bracelet features four miniature spiral roses arranged on a bed of crocheted leaves. The whole thing mounts onto a braided adjustable cord with a sliding knot closure, so it fits most adult wrists without any fussy measuring. You finish each tail with crystal beads and a sweet silver snowflake charm.
The best part is that each rose uses only 2 to 3 yards of thread. This is the perfect project for those tiny balls of fine crochet thread you have been hoarding. You know the ones. We all have them.
Skill level: Intermediate. You should be comfortable working in continuous rounds at a small scale and seaming tiny pieces together neatly. If you have never made a spiral rose before, practice one or two on scrap thread first.
Time to complete: 3 to 5 hours for the entire bracelet including all roses, leaves, the band, and assembly. If micro-scale work is new to you, add an extra hour for tension practice.
Finished Measurements
Floral centerpiece panel: Approximately 3.5 inches (9 cm) wide by 0.75 inches (2 cm) tall
Bracelet circumference: Adjustable to fit wrists from 5.5 inches (14 cm) to 7.5 inches (19 cm)
Total length with tails extended: Approximately 10 inches (25.5 cm)
Materials You Will Need
Thread: Fine crochet thread, weight category 10 (also labeled size 10 or thread weight)
You will need six colors:
Each rose uses approximately 2 to 3 yards (1.8 to 2.7 meters). Each leaf set uses approximately 3 to 4 yards (2.7 to 3.7 meters). The band uses approximately 18 to 22 yards (16.5 to 20 meters) of Color F.
Hook: US Steel 7 / 1.65 mm, or size needed to obtain gauge. I strongly recommend a hook with a comfort grip handle for this project. Your hands will thank you.
Notions:
Thread Recommendations
Aunt Lydia’s Classic Crochet Thread Size 10 is widely available and has an excellent color range. This is the easiest option to find at craft stores.
DMC Traditions Crochet Thread Size 10 has a beautiful mercerized sheen that really enhances the spiral texture of the roses.
Lizbeth Crochet Thread Size 10 by Handy Hands offers premium quality with excellent stitch definition at small scale. Particularly nice for the roses where clarity matters most.
Any size 10 mercerized cotton in a smooth finish will work beautifully. Avoid fuzzy or novelty threads for the roses since the spiral texture will be obscured.
Gauge
Rose gauge: One completed rose (Rounds 1 through 4) equals approximately 0.625 inches (1.6 cm) in diameter, measured flat and unblocked.
Leaf gauge: One completed leaf equals approximately 0.5 inches (1.3 cm) long by 0.3 inches (0.8 cm) wide.
Band gauge: 10 chain stitches in Color F equals approximately 0.75 inches (1.9 cm). 10 rows of single crochet in Color F equals approximately 0.6 inches (1.5 cm).
Gauge matters here! If your roses are too large, go down one hook size. If they are too small and stiff, go up one hook size.
Abbreviations
Special Techniques
Spiral Rose Construction
These roses are worked in continuous rounds. This means you do not join at the end of each round. Instead, place a stitch marker in the first stitch of each round and move it up as you go. This keeps you from losing your place.
The tight, coiled appearance comes from the spiral method combined with increasing stitch heights as rounds progress.
Adjustable Sliding Knot Closure
This is the standard macrame-style sliding knot you see on cord bracelets. After both tails are complete, you use a separate short piece of thread to tie around both tails at the center overlap point. The knot lets each tail slide independently to adjust the bracelet size.
I will walk you through this step by step in the assembly section. It sounds complicated but is actually quite simple once you see it.
Pattern Notes Before You Begin
1. All roses are worked in continuous spiral rounds. Do not join unless instructed.
2. Keep your tension tight. Pull your thread snug after each stitch. A loose tension causes the spiral to unravel rather than hold its coiled shape.
3. Make 4 roses total: one each in Colors A, B, C, and D.
4. Make 12 leaves total in Color E. That is 3 leaves per rose position.
5. Block all leaves before assembly. Roses do not need blocking and should not be wet blocked since this flattens the spiral.
6. Fasten off all pieces leaving a 6-inch (15 cm) tail for seaming unless otherwise noted. For roses, leave a 10-inch (25 cm) tail.
7. The rose arrangement from left to right when worn is: Color A (blue), Color B (white), Color C (gray), Color D (rose).
The Roses (Make 4)
Make one rose in each of Colors A, B, C, and D.
Foundation:
Using your chosen rose color and US Steel 7 / 1.65 mm hook, create a magic ring (MR).
Round 1:
Work 6 sc into the MR. Pull the ring closed firmly. Do not join. Place marker in the first sc made. (6 sc)
Round 2:
Work 2 sc in each sc around. Move marker to first st of this round. (12 sc)
Round 3:
This round creates the first layer of petals. For each petal, work into 2 consecutive sts as follows: sc in next st, hdc in next st. Repeat this 6 times around. Do not join. Move marker. (12 sts, 6 petal pairs)
Round 4:
This round creates the visible outer spiral petal row. Work into each stitch as follows: sc in first st, hdc in next st, dc in next st, dc in next st, hdc in next st, sc in next st. This completes one outer petal (6 sts used). Repeat the petal sequence (sc, hdc, dc, dc, hdc, sc) once more. (12 sts used, 2 full outer petals completed)
Finishing the rose:
Sl st in next st to close. Fasten off, leaving a 10-inch (25 cm) tail.
To shape the rose: Hold the center tightly between your thumb and index finger. Gently roll the outer petal strip around the center in a spiral, with the petal row rolling outward and upward. The wrong side of the center circle becomes the flat back of the rose.
Using the long tail threaded on a tapestry needle, take 2 to 3 stitches through the base of the rose at the back, stitching through all layers to hold the coil in place. Do not fasten off the tail yet.
Your completed rose should measure approximately 0.625 inches (1.6 cm) in diameter.
Checkpoint
You should now have 4 completed roses, each approximately 0.625 inches across, with flat backs and coiled fronts. The roses should feel dense and hold their shape without internal support.
The Leaves (Make 12)
Make all leaves in Color E.
Foundation chain:
Using Color E and US Steel 7 / 1.65 mm hook, ch 5. (5 ch)
Row 1 (working back along chain):
Starting in the 2nd ch from hook: sc in 2nd ch from hook, hdc in next ch, dc in next ch, hdc in last ch. (4 sts) Turn.
Row 2:
Ch 1 (does not count as st). Working into the same sts along the opposite side of the foundation chain: sc in first st, hdc in next st, dc in next st, 3 sc in the tip st (the original first ch). Working back down the first side you just completed: hdc in next st, sc in last st. (9 sts total around the leaf perimeter)
Sl st to close at the base. Fasten off, leaving a 6-inch (15 cm) tail.
Blocking the leaves: Lightly mist with water, pin to shape on a foam mat with the tip pointed outward and the base flat. Allow to dry completely before assembly. This step is essential for leaves to lie flat on the finished bracelet.
Checkpoint
You should have 12 blocked leaves in Color E, each approximately 0.5 inches (1.3 cm) long, flat and crisp with a clear pointed tip. Group them into 4 sets of 3 leaves each.
The Band
The band has two stages: the cord tails and the central panel.
Stage 1: Left Tail Cord
Using Color F and US Steel 7 / 1.65 mm hook, ch 50. (50 ch)
Do not fasten off. Place a removable stitch marker in the live loop to hold it. Set aside.
Stage 2: Right Tail Cord
Using a separate length of Color F, ch 50. (50 ch)
Fasten off, leaving a 6-inch (15 cm) tail. Set aside.
Stage 3: Central Band Panel
Using Color F and US Steel 7 / 1.65 mm hook, ch 23. (23 ch)
Row 1:
Starting in the 2nd ch from hook, sc across. (22 sc)
Row 2:
Ch 1, turn. Sc in each sc across. (22 sc)
Fasten off, leaving a 10-inch (25 cm) tail for seaming.
Stage 4: Attaching the Tails
Using the long tail from the left tail cord, thread it onto a tapestry needle. Align the end of the chain with the left short edge of the central panel. Whipstitch the last 3 ch of the left tail cord securely to the left edge of the panel, stitching through both layers 4 to 5 times. Fasten off and weave in end.
Repeat to attach the right tail cord to the right edge of the panel.
Checkpoint
Your band should measure approximately 9.5 inches (24 cm) from tail tip to tail tip when laid flat. The central panel section is 1.65 inches (4.2 cm) wide.
Assembly
This is where everything comes together. Take your time with this section.
Step 1: Arrange the Leaf Sets
For each of the 4 rose positions, arrange 3 leaves in a fan shape. One leaf points straight upward from the band center. One leaf angles to the upper left at approximately 45 degrees. One leaf angles to the upper right at approximately 45 degrees.
The leaf bases should overlap at the center of each rose position. Pin all 12 leaves in position on the front of the band, spacing the 4 clusters evenly across the panel.
Approximate center positions measured from left edge of panel: Cluster 1 at stitch 3, Cluster 2 at stitch 8, Cluster 3 at stitch 14, Cluster 4 at stitch 19.
Step 2: Sew Leaves to Band
Using Color E thread and a tapestry needle, sew each leaf to the band at its base with 3 to 4 tight whipstitches. Work all 12 leaves before attaching any roses.
Step 3: Attach Roses
Place each rose centered over its leaf cluster, covering the leaf bases.
The order from left to right: Color A (blue) over Cluster 1, Color B (white) over Cluster 2, Color C (gray) over Cluster 3, Color D (rose) over Cluster 4.
Using the 10-inch tail from each rose, stitch through the back of the rose, through the leaf bases beneath it, and through both rows of the band panel. Make 4 to 6 stitches in a circular pattern around the base of each rose. The stitches should not show on the front. Fasten off and weave in all ends on the wrong side.
Step 4: Create the Sliding Knot Closure
Cut a piece of Color F approximately 7 inches (18 cm) long. Overlap the two cord tails by approximately 1.5 inches (3.8 cm) at the center back.
Fold the short piece in half and lay it alongside both tails at the center overlap point. Tie a series of half hitches (overhand knots made by looping around both tails together) moving in opposite directions from the center. Work 4 half hitches on each side. Pull firmly.
Trim the short ends to 0.25 inches (0.6 cm) and secure with a tiny dab of clear fabric glue. Allow to dry completely before testing.
Step 5: Add Beads and Charms
On each tail end, thread 2 crystal beads onto the cord. Tie an overhand knot immediately below each bead to hold them in position.
Thread the snowflake charm onto the cord end below the beads and tie a final overhand knot to secure. Trim the cord end to 0.5 inches (1.3 cm) below the final knot. Apply a tiny dab of clear glue for security.
Size Customization Tips
For 5 roses: Work the central panel with ch 28 (giving 27 sc across for 2 rows) and add one additional rose and leaf cluster.
For larger wrists: Add additional chains to each tail. Every 6 chains adds approximately 0.5 inches (1.3 cm) of cord length.
For children’s sizes: Begin with ch 38 in each tail instead of ch 50.
For a hair accessory: Work the floral panel as written, omit the cord tails, and sew onto a covered elastic hair tie or barrette base.
Care Instructions
Hand wash only in cool water with mild soap. Do not wring or twist. Gently press between clean towels to remove excess water. Reshape the roses and leaves by hand while damp. Lay flat to dry away from direct sunlight.
Do not machine wash, tumble dry, bleach, or iron directly on the crocheted surface. Remove before swimming or bathing. Store flat or loosely coiled in a small pouch to preserve the rose shapes.
Final Thoughts on This Crochet Bracelet Pattern
I have made this bracelet at least a dozen times since that frantic phone call from my sister. It works up beautifully in spring pastels, autumn jewel tones, or classic holiday red and green. The tiny roses are surprisingly sturdy once you get your tension right, and the adjustable closure means you never have to guess at sizing.
This makes an absolutely perfect handmade gift. Tuck it into a small organza pouch or a vintage teacup for presentation. Trust me, the recipient will feel incredibly special.
I hope you love making this Winter Berry Rose Bracelet as much as I loved designing it. If you found this crochet tutorial helpful, save it to your Pinterest boards so you can find it when you are ready to start stitching. And please leave a comment below if you make one. I would love to hear which color combination you chose!
