
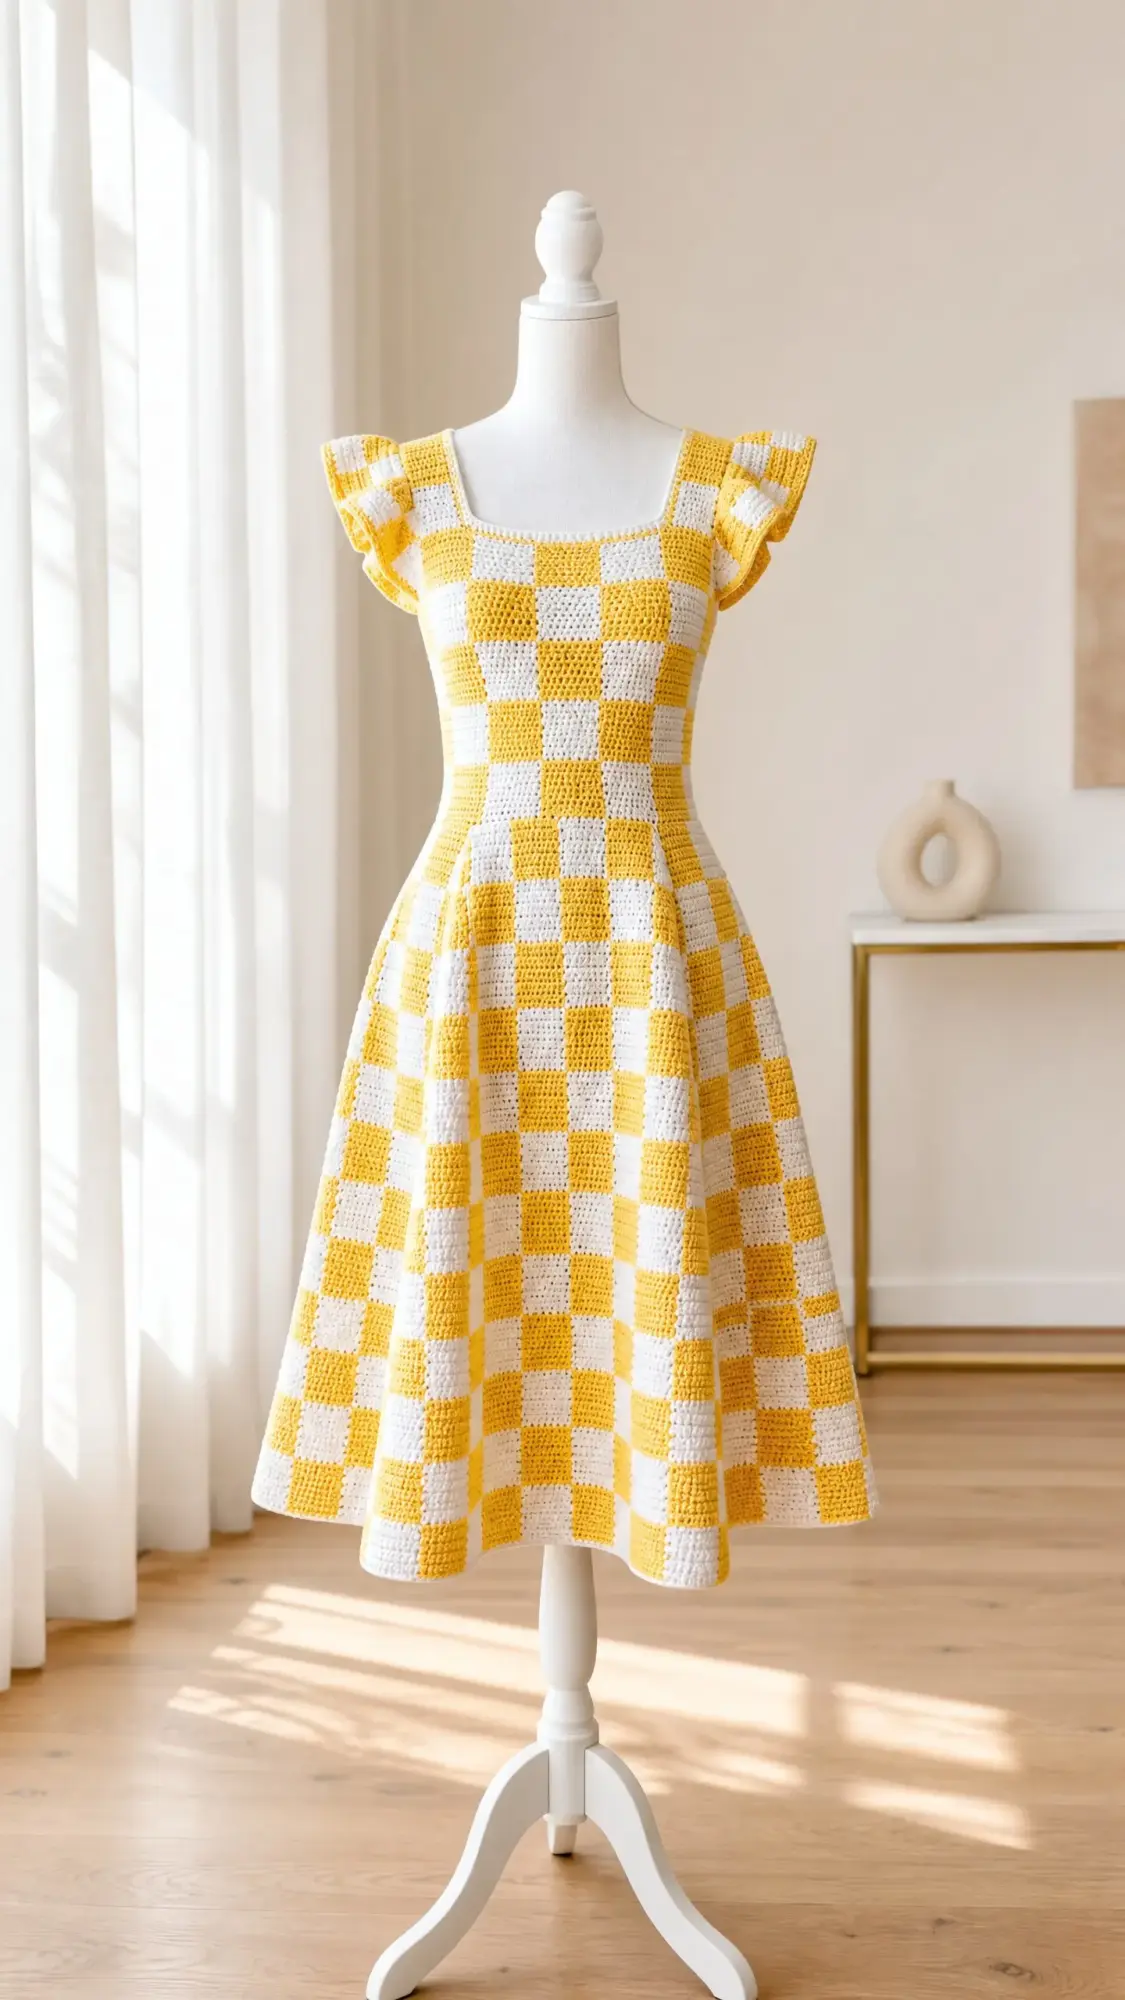
This is a fitted A-line dress with a bold yellow and white checkerboard pattern. It uses single crochet throughout with tapestry colorwork. The bodice is worked flat, the skirt is worked in the round, and ruffle cap sleeves are added at the end.

I won’t sugarcoat it. This is an advanced intermediate project that takes 40 to 60 hours. But if you have made at least one fitted garment before and you are comfortable with color changes, you can absolutely do this.
The checkerboard effect comes from alternating 4-stitch by 4-row blocks of color using the tapestry method. Each square measures about 1 inch at gauge. The result is a structured, graphic fabric that looks far more complicated than it actually is.
Why This Checkered Crochet Dress Pattern Works
The construction is straightforward once you understand the pieces. You work the bodice front from the top down. Then you work two separate back panels to accommodate a center back zipper. After seaming the sides, you join everything at the waist and work the skirt in continuous rounds, adding increases to create that beautiful A-line flare.
The square neckline gives this dress a classic, flattering shape. The ruffle cap sleeves add a feminine touch without overwhelming the bold pattern. And that checkerboard single crochet texture creates visual interest while keeping your hands busy with a satisfying rhythm.
This dress falls to approximately mid-calf, making it perfect for summer brunches, garden parties, or any occasion where you want to turn heads.
Finished Sizes and Measurements
The pattern is written for Small with Medium and Large in parentheses.
Body measurements this pattern fits:
Finished garment measurements (with 1 to 2 inches ease at bust):
Materials Needed for This Crochet Dress Pattern
Yarn: Sport weight yarn, also labeled as 2 Fine or Baby weight
You need approximately:
Recommended Yarn Options:
Paintbox Yarns Cotton DK in Daffodil Yellow and Paper White. 100% cotton, 137 yards per 50g skein. Purchase 9 (10, 11) skeins of each color.
Drops Safran Sport in Golden Yellow (color 50) and Off White (color 17). 100% Egyptian cotton, 175 yards per 50g skein. Purchase 7 (8, 9) skeins of each color.
Lion Brand 24/7 Cotton in Buttercup and White. 100% mercerized cotton, 186 yards per 100g skein. Purchase 6 (7, 8) skeins of each color.
Choose a smooth, plied cotton or cotton blend with excellent stitch definition. Avoid fuzzy fibers like mohair or alpaca. They will obscure the checkerboard pattern.
Hooks:
Notions:
Gauge
Gauge is critical for a fitted garment. Do not skip swatching.
In checkerboard single crochet pattern with US B-1 / 2.25 mm hook, after blocking:
Swatch at least 5 inches by 5 inches. Wash and block your swatch before measuring. Adjust hook size as needed.
Abbreviations and Stitch Definitions
Understanding the Checkerboard Single Crochet Pattern
This is the heart of the dress. The checkerboard single crochet (CSC) pattern creates solid-looking color blocks through color alternation.
The pattern works on a multiple of 8 stitches plus 4 stitches. For example, 84 stitches divides as (8 x 10) + 4 = 84.
How it works:
Rows 1 through 4: Work 4 sc in CA, then 4 sc in CB, alternating across. Carry the unused color inside the stitches using the tapestry method.
Rows 5 through 8: Shift colors. Where you had CA, now work CB. Where you had CB, now work CA.
This alternating of 4-row bands creates the checkerboard grid.
Color change technique: On the last stitch before the color change, insert hook, pull up a loop, drop current color to WS, pick up new color, pull through both loops to complete the stitch. Lay the unused color across the tops of stitches so it gets enclosed inside each new stitch.
Pro tip: Always pick up the new color from underneath the dropped color. This locks the float and prevents twisting.
Bodice Front Instructions
The bodice front is worked flat in rows from the top edge downward.
Foundation Chain: Using CA and B-1 hook, ch 85 (93, 101).
Row 1 (RS): Sc in 2nd ch from hook and in each ch across. Turn. (84, 92, 100 sts)
Rows 2 through 4: Begin CSC pattern. Ch 1, turn. Work CSC pattern across, starting with 4 sc in CA, then 4 sc in CB, alternating to end. Turn. (84, 92, 100 sts)
Rows 5 through 8: Ch 1, turn. Continue CSC pattern but shift color assignment. Positions that were CA in Rows 1 through 4 now become CB, and positions that were CB now become CA. Turn. (84, 92, 100 sts)
Continue working 4-row color bands, alternating checker assignment, until bodice front measures 5 (5.5, 6) inches from foundation. End after a complete 4-row color band. This is approximately 24 to 28 rows.
Square Neckline Shaping
Place a stitch marker at stitch 21 (21, 23) from the left edge and another at stitch 64 (72, 78) from the left edge. The center section between these markers forms the neckline opening.
Left Shoulder Panel:
Row 1 (Neckline Row, RS): Ch 1, turn. Work CSC pattern across first 20 (20, 22) sts only. Turn. (20, 20, 22 sts)
Rows 2 through 4: Ch 1, turn. Work CSC pattern across, maintaining established color sequence. Turn. (20, 20, 22 sts)
Continue straight on left shoulder panel for 16 (16, 18) more rows until bodice front measures 14 (14.5, 15) inches from foundation.
Fasten off and weave in ends.
Right Shoulder Panel: Rejoin yarn at stitch 65 (73, 79) on the RS.
Row 1: Ch 1, sc in each of remaining 20 (20, 22) sts maintaining CSC pattern. Turn. (20, 20, 22 sts)
Continue to match left shoulder panel for same number of rows.
Fasten off and weave in ends.
Bodice Back Instructions
The back has two separate panels for the zipper opening.
Left Back Panel
Foundation Chain: Using CA, ch 43 (47, 51).
Row 1 (RS): Sc in 2nd ch from hook and in each ch across. Turn. (42, 46, 50 sts)
Rows 2 through 4: Ch 1, turn. Work CSC pattern across. Begin with CA at the center back edge. Turn. (42, 46, 50 sts)
Continue in CSC pattern until left back panel measures 14 (14.5, 15) inches total.
Fasten off.
Right Back Panel
Work to mirror the left back panel.
Foundation Chain: Using CB, ch 43 (47, 51).
Row 1: Sc in 2nd ch from hook and in each ch across. Turn. (42, 46, 50 sts)
Rows 2 onward: Work CSC pattern beginning with CB at the center back edge so the checker grid mirrors correctly.
Continue straight until right back panel measures 14 (14.5, 15) inches.
Fasten off.
Assembling the Bodice
With RS facing outward, hold the front bodice and left back panel with right sides together. Using a tapestry needle threaded with CA, use a whipstitch or mattress stitch to join the left side seam from shoulder to hem. Repeat for right side seam with right back panel.
The bodice now forms a tube open at the top, bottom, and center back.
Waist Transition
Join CA at the left back panel bottom edge. Work in continuous rounds.
Total stitch count at bodice bottom: 168 (184, 200) sts around.
Target waist stitch count: 140 (148, 156) sts.
Round 1 (Waist Decrease Round): Ch 1.
Round 2 (Waist Stabilization): Ch 1. Sc in each st around maintaining CSC pattern color alignment. Join. (140, 148, 156 sts)
Skirt Instructions
The skirt is worked in continuous rounds from the waist downward.
Target hem stitch count: 268 (276, 284) sts.
Total increases needed: 128 sts for all sizes. Work 16 increase rounds with 8 increases each, spaced every 8 to 9 rounds.
Rounds 1 through 8: Work plain CSC pattern rounds. (140, 148, 156 sts)
Round 9 (Increase Round 1): Work inc at 8 evenly spaced positions. (148, 156, 164 sts)
Rounds 10 through 17: Work plain. (148, 156, 164 sts)
Round 18 (Increase Round 2): Work inc at 8 evenly spaced positions. (156, 164, 172 sts)
Continue this pattern of 8 plain rounds followed by 1 increase round until you have completed 16 increase rounds and the skirt measures 28 (28.5, 29) inches from waist.
Fasten off and weave in ends.
Ruffle Cap Sleeves
Using the C-2 hook for a slightly looser drape:
Row 1: Join yarn at underarm. Work sc evenly around armhole edge.
Row 2: Ch 3 (counts as dc), work 2 dc in same stitch, 3 dc in each stitch across. This triples the stitch count and creates the ruffle.
Row 3: Ch 1, sc in each stitch across.
Fasten off. Repeat for second sleeve.
Finishing
Zipper Installation: Sew the 14 inch invisible zipper into the center back opening using a sewing needle and matching thread.
Blocking: Wet block the completed dress on blocking mats. Pin to measurements and allow to dry completely.
Weave in all remaining ends with your tapestry needle.
Helpful Tips for Success
Take your time with the tapestry colorwork. The first few rows feel awkward. By row 10, it becomes second nature.
Use a row counter religiously. Losing track of which 4-row band you are on will throw off the entire checkerboard.
Check your gauge every few inches. Cotton yarn can tighten up as you work, especially in colorwork where you are carrying yarn.
Try on the bodice before joining to the skirt. This is your last chance to adjust fit easily.
I hope you love making this sunny checkered dress as much as I loved designing it. If you make one, I would absolutely love to see it. Tag me on Instagram or share a photo on Facebook.
Save this pattern to your Pinterest boards so you can find it when you are ready to start. And please drop a comment below if you give it a try. I read every single one and they genuinely make my day.
