
I found this design tucked away in one of my old project notebooks from a few years back. I had sketched it out during a particularly golden October, sitting on my porch watching the dahlias in my garden put on their final show before the frost. I called it the Autumn Dahlia Shawl because those layered petals and warm sunset colors felt like wrapping yourself in the last breath of fall.
Get the Ad-Free PDF Pattern
You can find the free pattern below, or you can purchase the ad-free printable PDF from my shop.
Get the Printable PDF →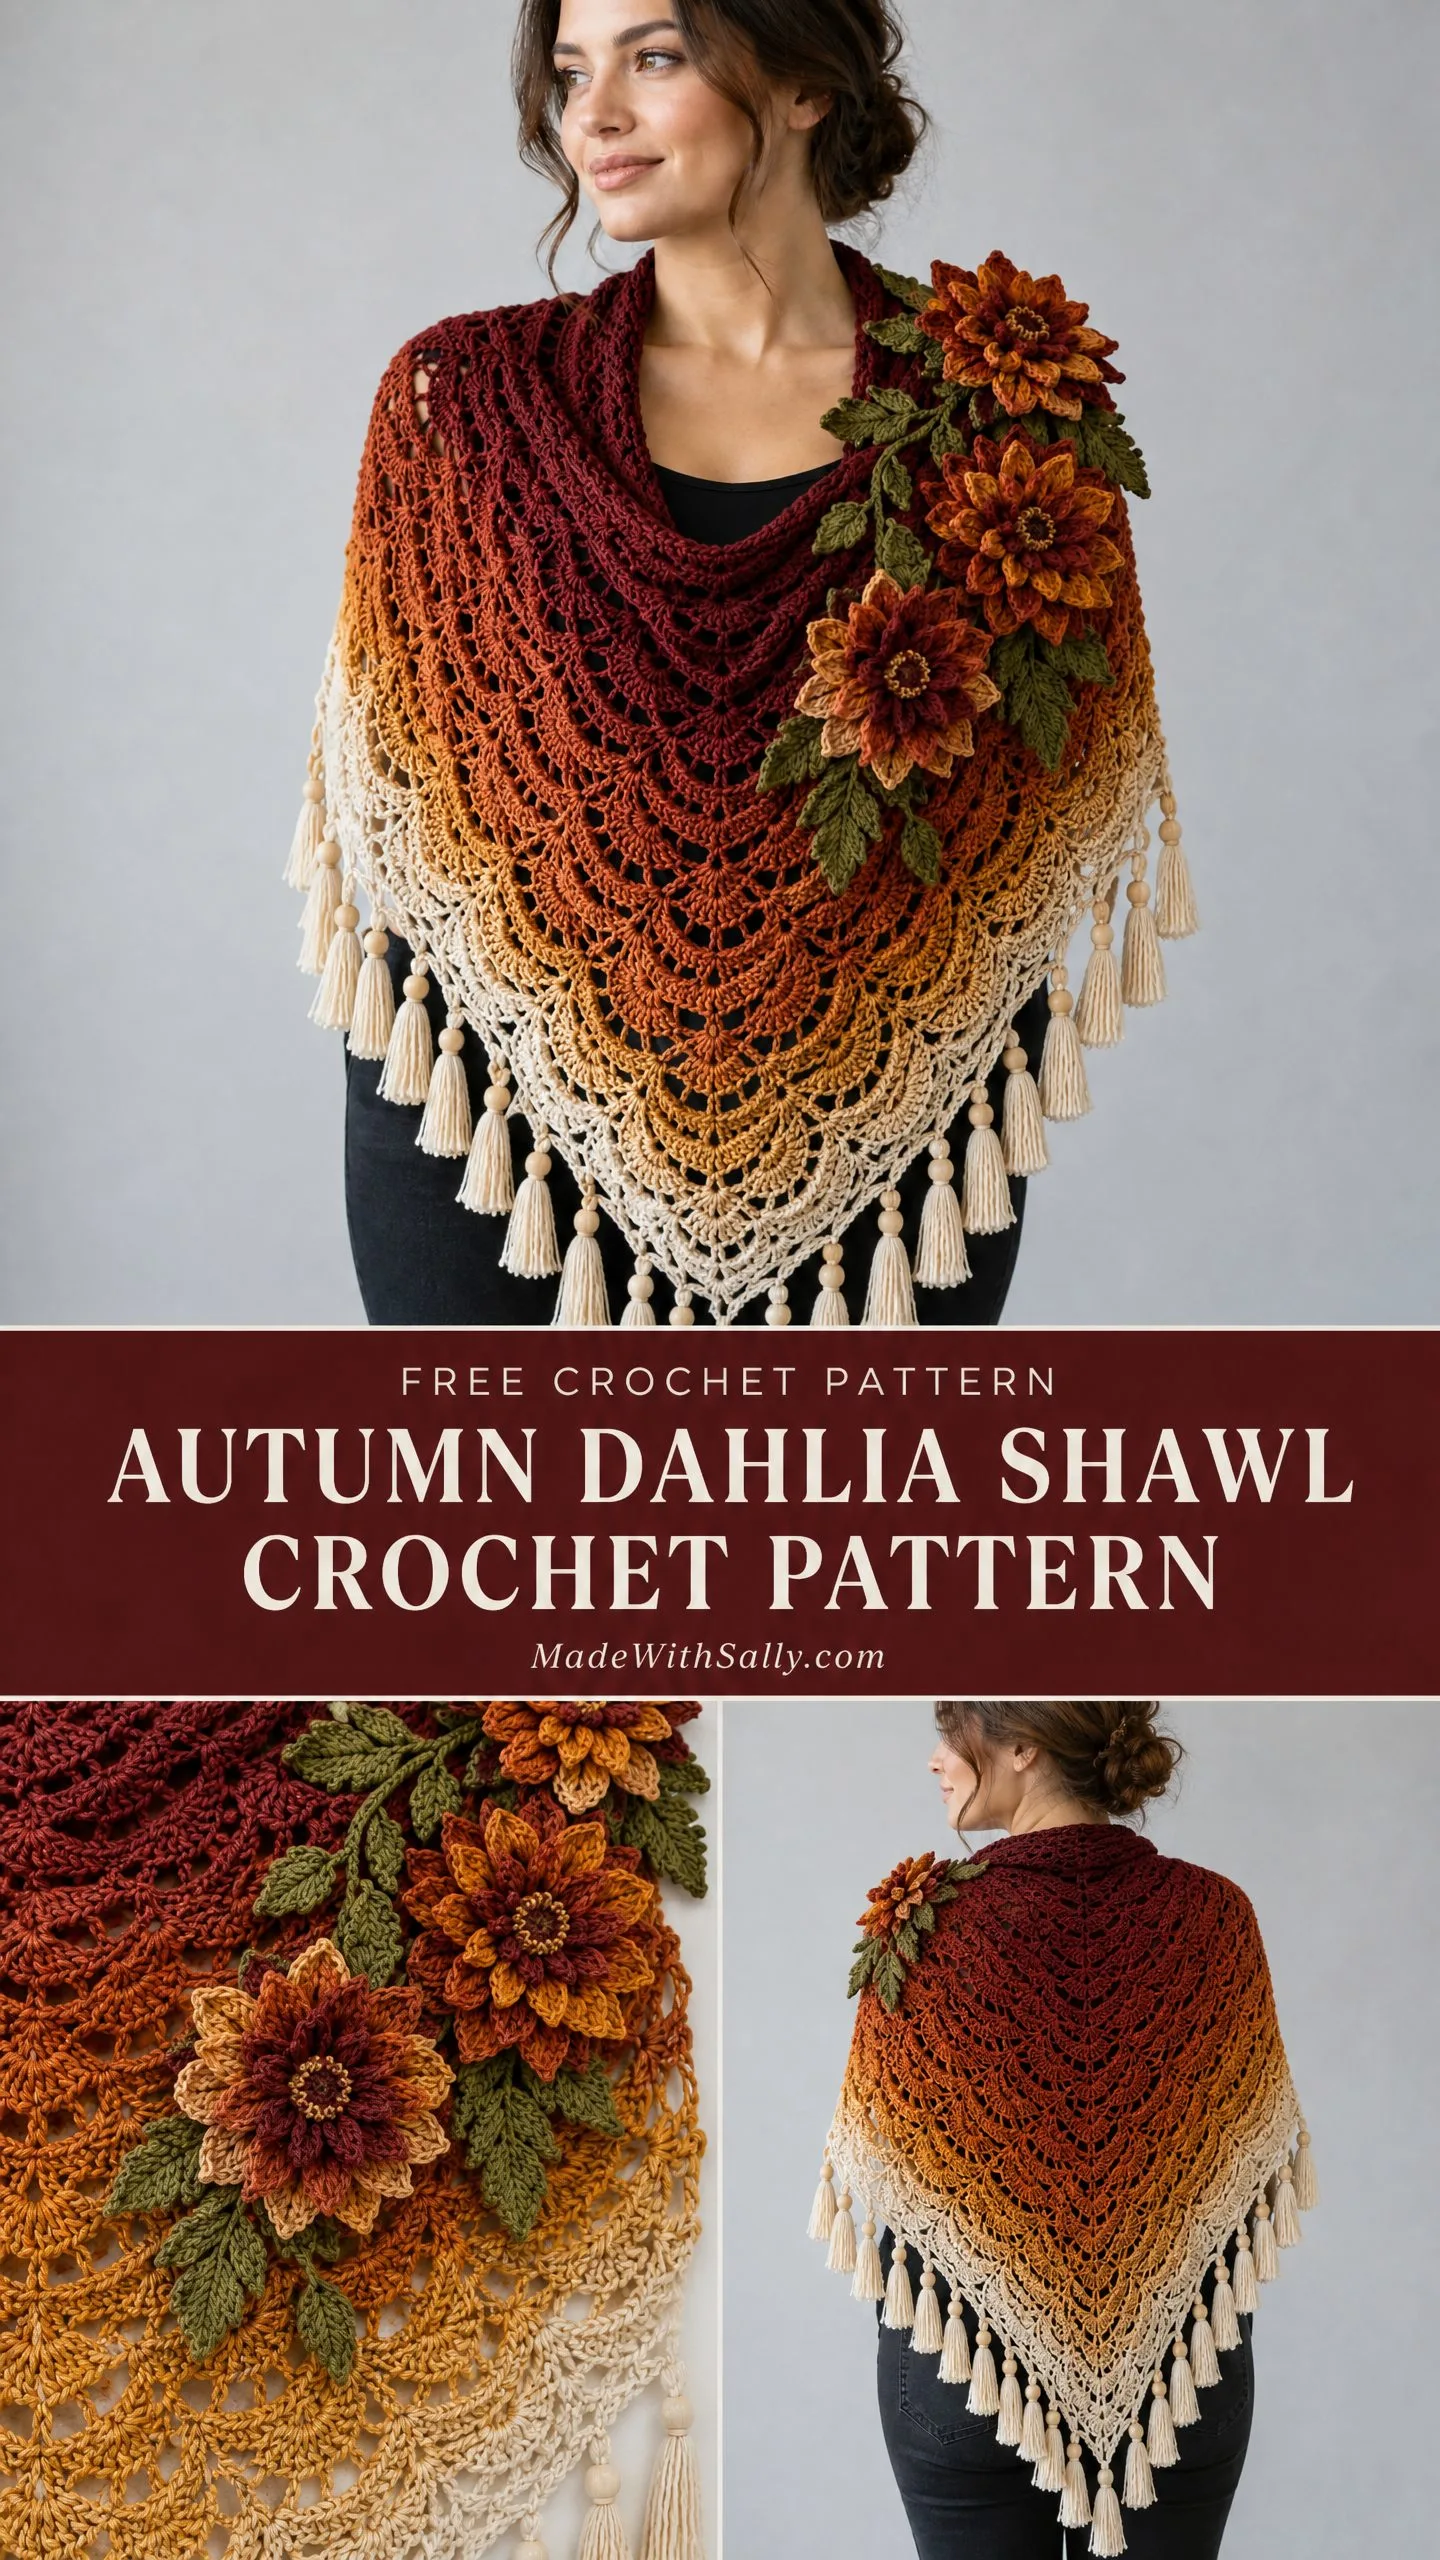
I finally sat down to write out the full pattern, and I am so glad I did. The combination of a simple triangular body with those dimensional flowers creates something that looks incredibly impressive but is absolutely achievable for an intermediate crocheter.
If you have been wanting to try your hand at a statement shawl with floral appliqués, this is the one. Let me walk you through every single step.
About This Pattern
The Autumn Dahlia Shawl is an elegant triangular crochet shawl inspired by layered dahlia petals and autumn garden colors. It features a flowing lace body with dimensional floral accents and a decorative scalloped edge.
What I love most about this design is how the construction breaks down into manageable pieces. You work the main shawl body first, then create the dahlia flowers separately, and finally bring everything together during finishing. No complicated colorwork while you are trying to maintain your triangle shape.
The shawl is worked from the center top outward, increasing every row to create a triangular shape. This means you start small and watch your project grow steadily with each row. The dahlia flowers are crocheted separately and attached during finishing, so you can make as many or as few as you like.
Finished Size
Your completed Autumn Dahlia Shawl will measure approximately:
This gives you a generous wrap that drapes beautifully over your shoulders and provides real coverage on chilly days.
Skill Level
This pattern is rated Intermediate.
Skills Used:
If you have made a basic triangle shawl before and feel comfortable with treble crochet, you are ready for this project. The flower motifs might look intimidating, but I promise they are just rounds of increases with some clever petal shaping.
Materials You Will Need
Yarn
You will need DK weight yarn (Category 3) in the following amounts:
Suggested yarn types:
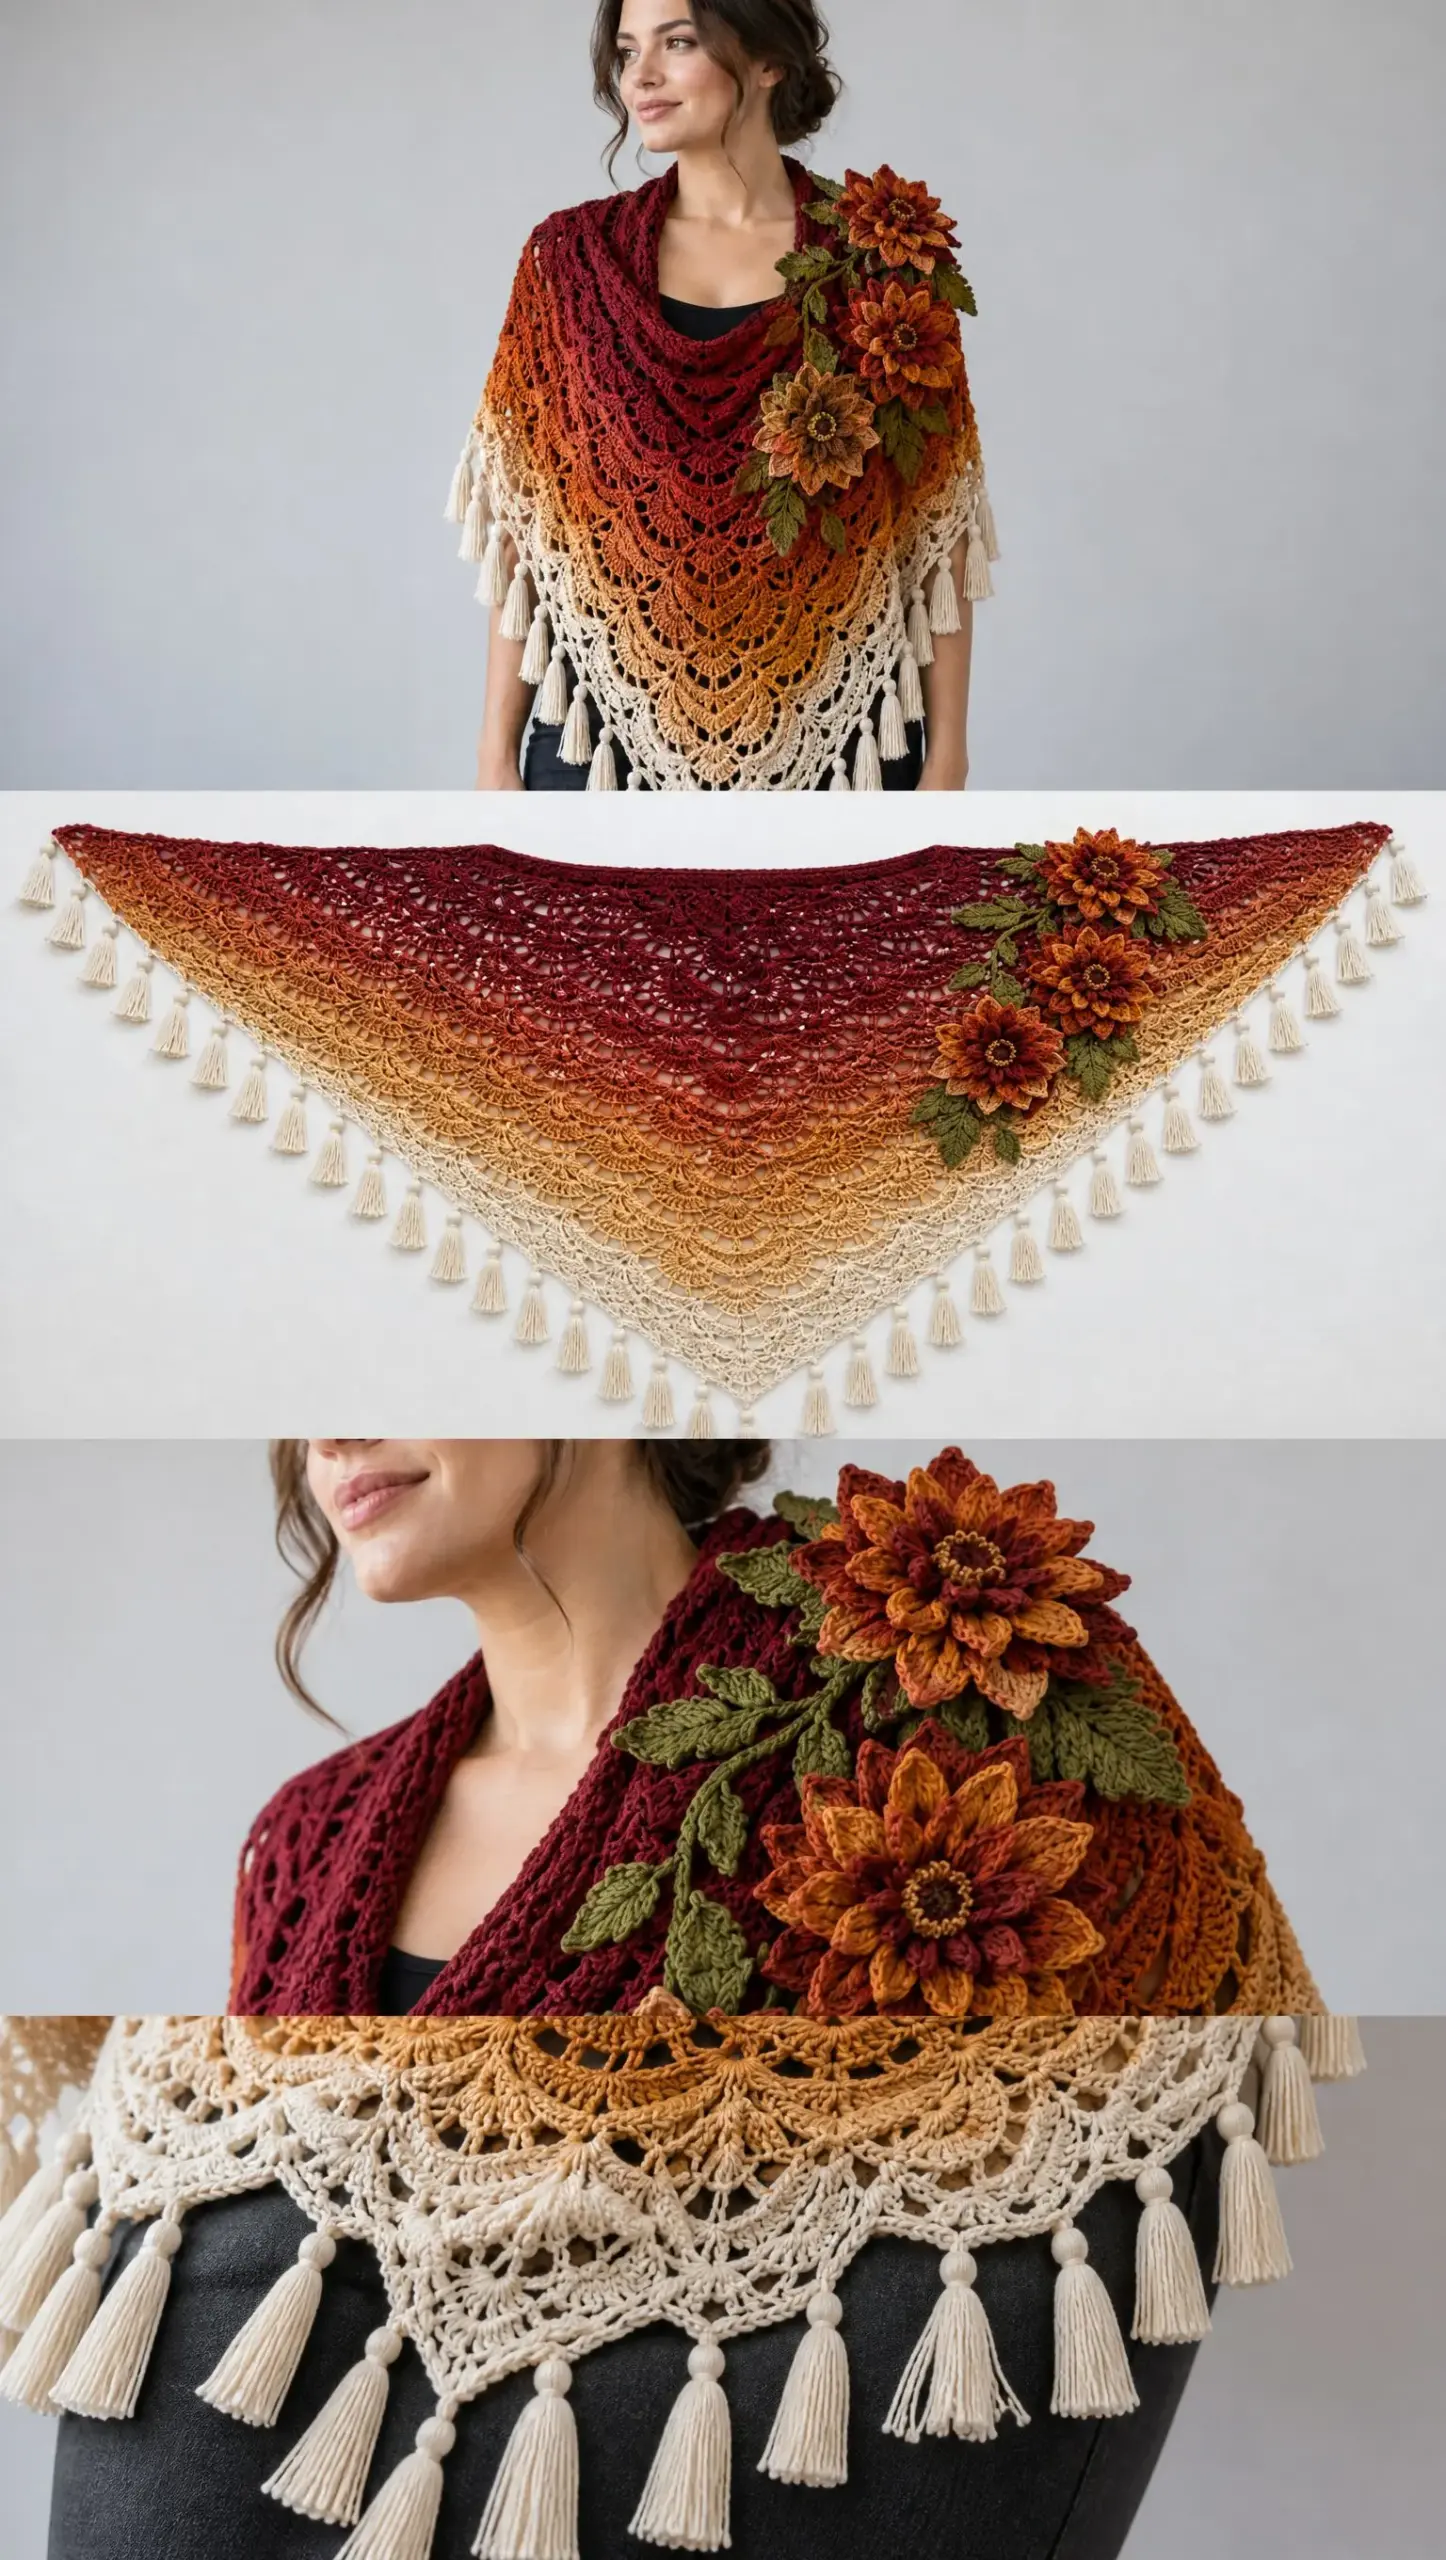
The image shows a gorgeous gradient effect moving from deep burgundy at the top through burnt orange, golden amber, and down to cream at the bottom edge. If you want to recreate this look, you could use a gradient cake yarn or work with several coordinating solid colors, changing every few inches.
For the dahlia flowers, choose warm autumn tones that complement your main color. Think burnt sienna, rust, deep orange, and bronze. The leaves look beautiful in an olive or forest green.
Hook
You may need to adjust your hook size to achieve the correct gauge. Always make a gauge swatch before starting.
Notions
Gauge
18 double crochet stitches x 9 rows = approximately 10 x 10 cm (4 x 4 inches)
Gauge matters for this project because it affects your final size. If your gauge is too tight, your shawl will be smaller and stiffer. If it is too loose, it will be larger and may droop more than you want.
Abbreviations
Before we dive into the pattern, here are all the abbreviations you will encounter:
Body Pattern Instructions
This is where the magic happens. You will start with just a few chains and build outward row by row.
Row 1
Chain 5 (ch 5). Work a double crochet (dc) into the first chain made to form a small triangle space.
This creates your foundation. That first chain you made is where your dc goes, forming a little V shape that becomes the center spine of your shawl.
Row 2
Chain 3 (this counts as your first dc). Work 2 dc into the center space. Chain 2. Work 3 dc into the same space.
You now have a small fan shape with a chain 2 space in the middle. This center space is crucial and will appear in every row.
Row 3
Chain 3. Work dc across to the center chain space. In the center space work: 2 dc, ch 2, 2 dc. Continue dc across the opposite side.
Row 4
Chain 3. Work dc in each stitch until center. In the center space: 2 dc, ch 2, 2 dc. Repeat to the end.
Continuing the Body
Repeat Row 4 until the shawl reaches approximately 70 cm depth.
This is the bulk of your work. Each row adds stitches to both sides of the triangle while maintaining that center increase. Place a stitch marker in your center chain space if you find yourself losing track of it.
A quick tip: count your stitches every few rows to make sure both sides of your triangle have the same number. If they do not match, you may have missed a stitch somewhere.
Lace Section
Once your shawl body reaches about 70 cm, you will transition into the lace section. This adds beautiful texture and visual interest to the lower portion of your shawl.
First Lace Row
Chain 3. Skip 2 stitches, 5 dc in next stitch (this creates a shell), skip 2 stitches, dc in next stitch. Repeat from * across.
At the center, increase with 5 dc, ch 2, 5 dc.
Following Rows
Continue the shell pattern while maintaining the center increase.
The shell stitch is simply 5 double crochets worked into a single stitch. It creates those pretty scalloped fans you see in the image. Work as many lace rows as you like to achieve your desired depth.
Dahlia Flower Motif
Now for my favorite part. These dimensional flowers are what make this shawl truly special.
Large Dahlia
Round 1:
Make a magic ring. Chain 3, work 11 dc into the ring. Join with a slip stitch to the top of your beginning chain 3. (12 dc total including the ch 3)
Round 2:
Chain 3. Work 2 dc in each stitch around. Join. (24 dc)
Round 3:
Chain 1, sc in the first stitch. In the next stitch work: (sc, ch 3, 3 tr, ch 3, sc) to create a petal. Repeat around.
You should have 12 petals when you finish this round.
Round 4:
This is where you create that gorgeous layered dahlia look. Working behind the previous petals, attach yarn and create a second layer of larger petals using: (sc, ch 4, 5 tr, ch 4, sc).
Make 5 to 7 flowers depending on your desired decoration. The image shows a cluster of three large dahlias with leaves arranged along one shoulder edge.
Leaf Motif
The leaves add a beautiful finishing touch and help tie your flower arrangement together.
Chain 10. Work sc, hdc, dc, tr, dc, hdc, sc along the chain. Slip stitch back along the opposite side of the chain.
Fasten off and leave a tail for attaching.
This creates a simple pointed leaf shape. Make as many as you need to fill in around your flowers.
Border
The border frames your entire shawl and gives it a polished, finished look.
Round 1
Work single crochet evenly around all edges of your shawl. Try to keep your tension even so the border lies flat.
Round 2
Skip 2 stitches, 5 dc in next stitch, skip 2 stitches, slip stitch. Repeat around.
This creates a lovely scalloped edge that echoes the lace section and ties everything together visually.
Assembly
Now you get to bring all the pieces together.
1. Block the shawl gently to open the lace pattern. Wet blocking works best for this project.
2. Arrange dahlia flowers along one side edge and near the lower point. Play with the placement before sewing anything down. The image shows flowers clustered on the shoulder with leaves tucked between them.
3. Sew flowers securely using matching yarn and your yarn needle. Weave through the back of the flower and into the shawl fabric in several places.
4. Add small leaf motifs between flowers if desired.
Finishing
Weave in all ends securely. You do not want anything coming loose after all this work.
Wet block the shawl into a smooth triangle shape. Pin out the edges and the point, gently stretching the lace sections to open them up.
Allow to dry completely before wearing. This might take a day or two depending on your climate.
Care Instructions
To keep your Autumn Dahlia Shawl looking beautiful:
Troubleshooting
If the shawl curls:
If the triangle is uneven:
Final Thoughts
The Autumn Dahlia Shawl is one of those projects that looks like it belongs in a gallery but is actually made up of techniques you probably already know. The triangle body is straightforward increasing. The flowers are just rounds of double crochet with some petal shaping. And when you put them together, you get something truly stunning.
I hope you love making this pattern as much as I loved designing it. Those layered petals and warm autumn colors never fail to make me smile.
Thank you so much for choosing this pattern. I would absolutely love to see your finished shawls, so please tag me on Instagram or share your photos in our Facebook group. Every maker puts their own spin on a design, and seeing your color choices and flower arrangements is genuinely one of my favorite things.
If you loved this Autumn Dahlia Shawl crochet pattern, go ahead and save it to your Pinterest boards so you can find it when you are ready to cast on. And if you make one, please drop a comment below. I read every single one and would love to hear how yours turns out!
Want a Quick & Easy Printable Version?
Get a clean, beautifully formatted PDF of this pattern — easy to follow step by step, ready to print or save on any device. No scrolling, no distractions, just the pattern.
Get the Printable PDF →