
Okay, yarn lovers. This is your sign to dig into that stash and finally use those beautiful cotton threads you have been saving for something special.
Get the Ad-Free PDF Pattern
You can find the free pattern below, or you can purchase the ad-free printable PDF from my shop.
Get the Printable PDF →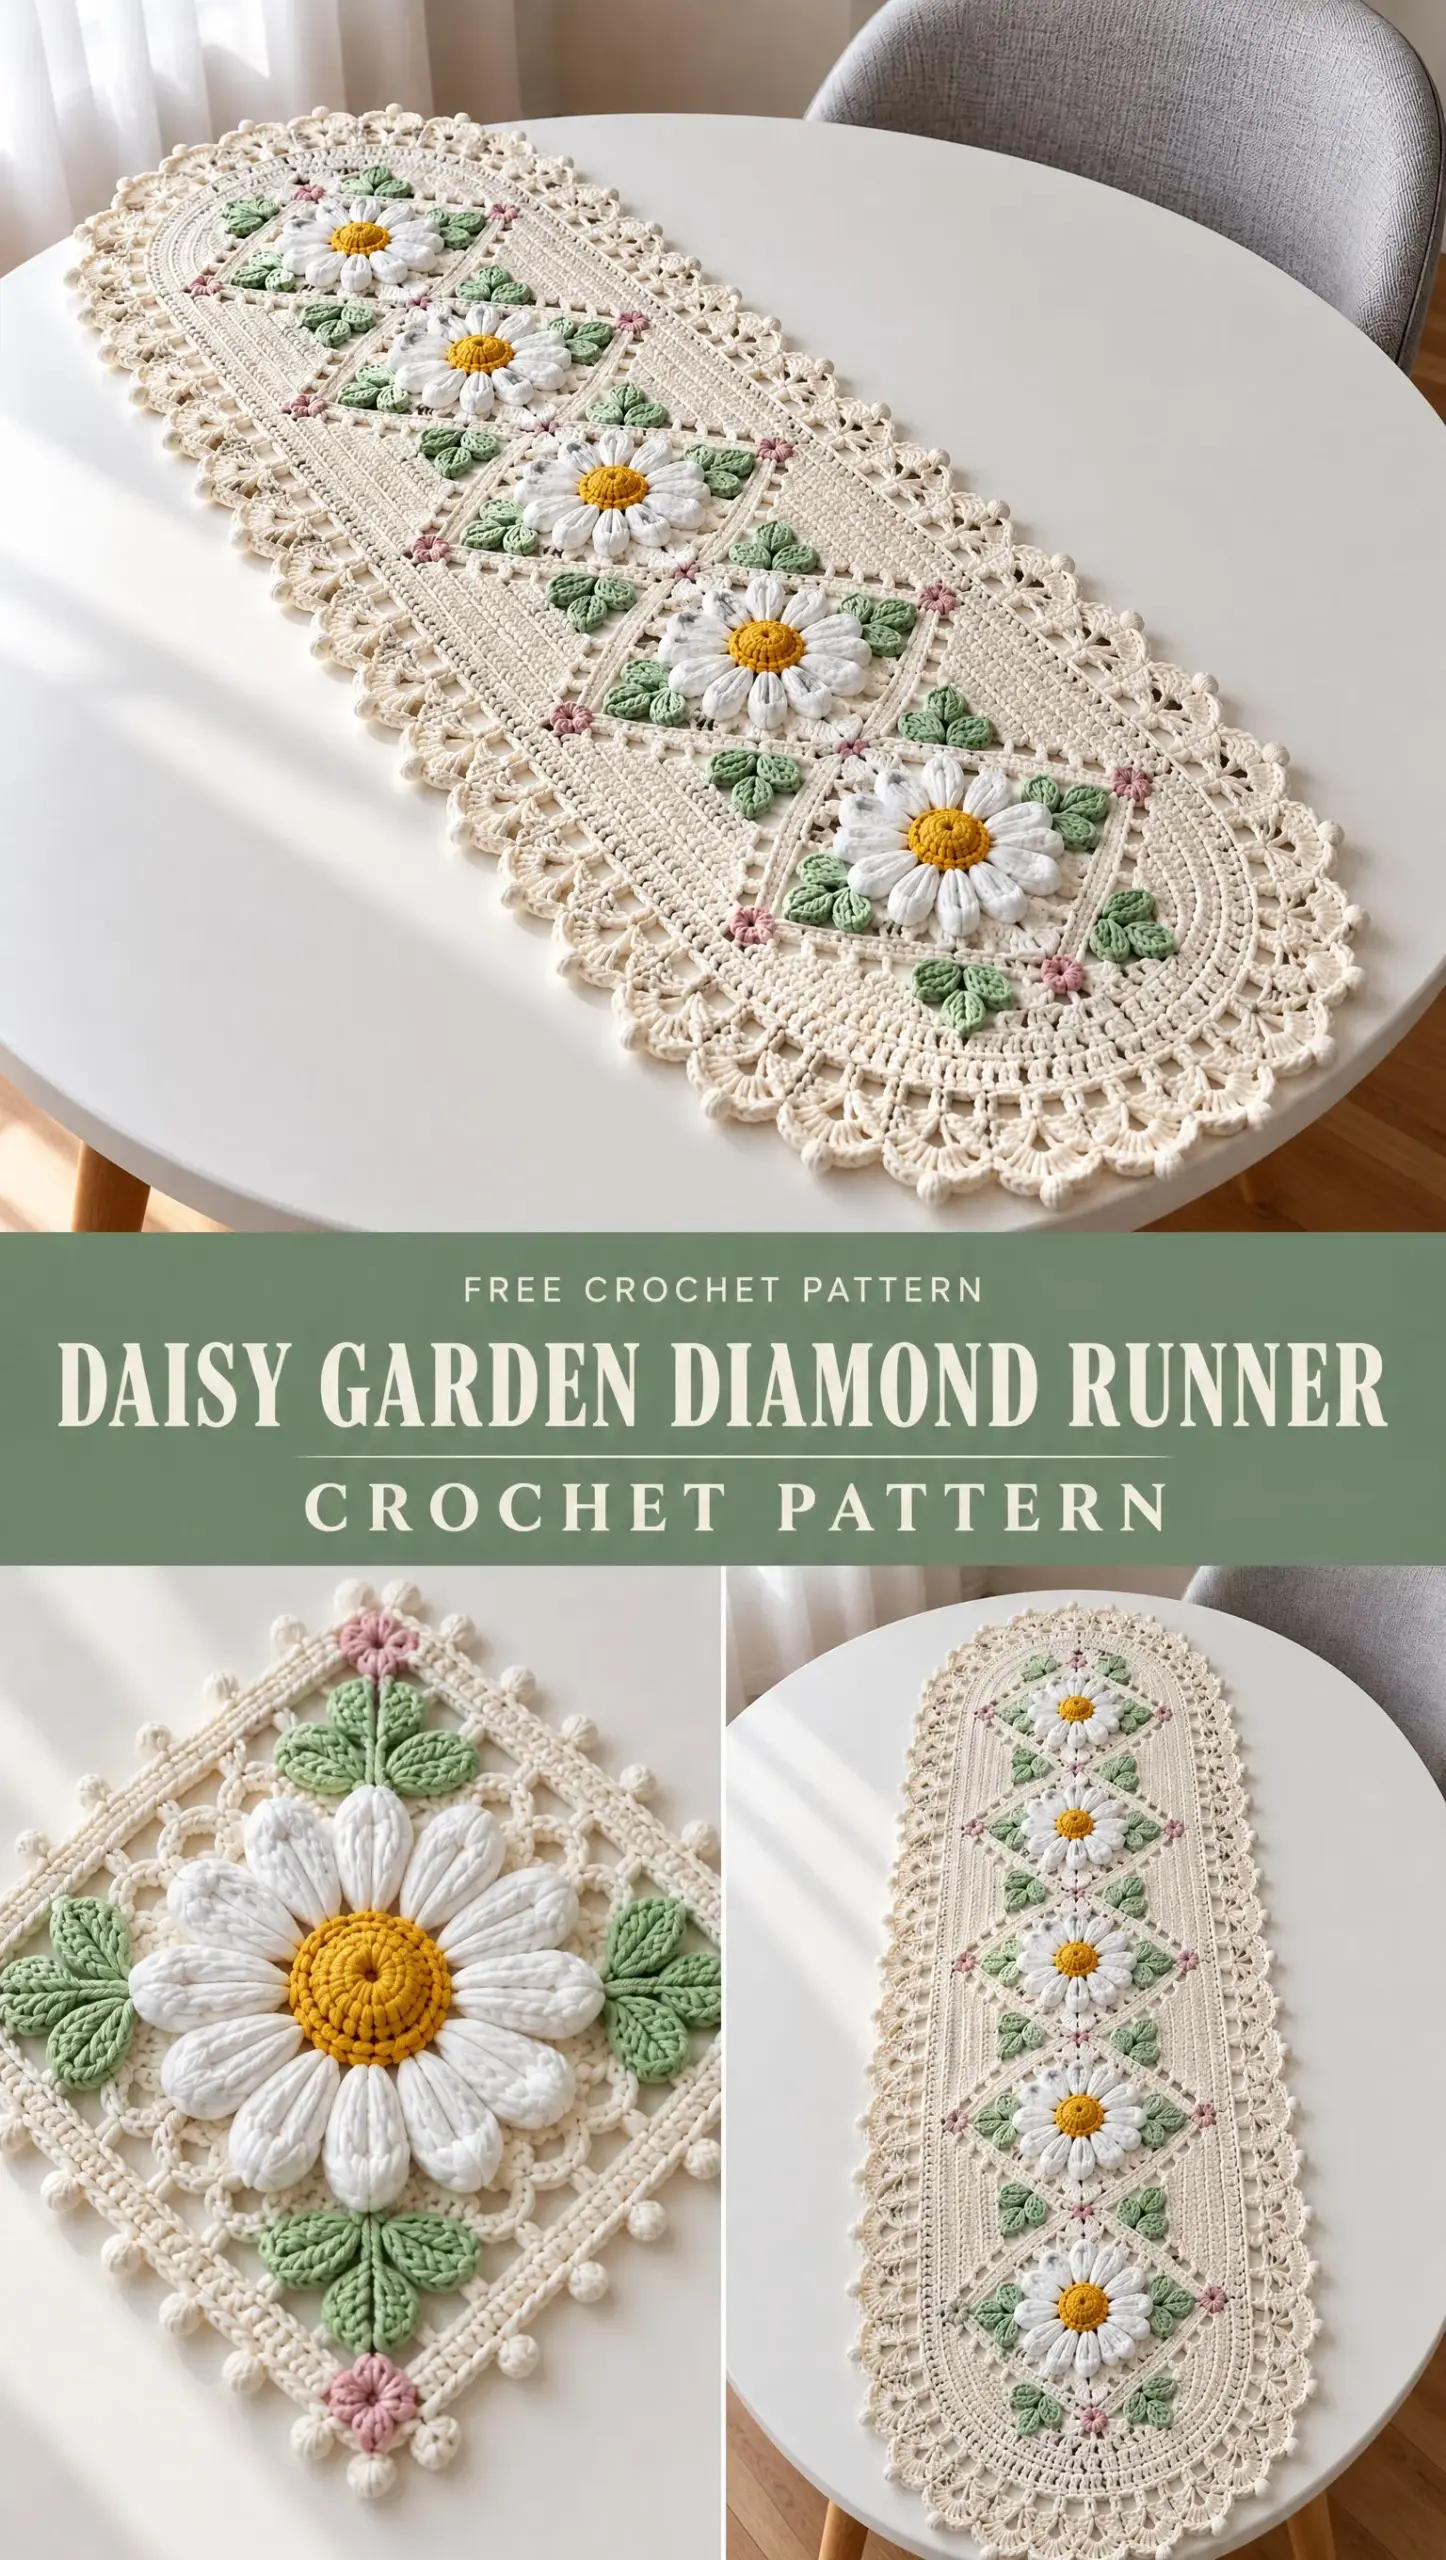
This Daisy Garden Diamond Runner combines raised floral motifs with an elegant diamond lattice structure. The construction is genuinely interesting because you work the daisy motifs separately, then join them into the lace panels as you go. It creates dimension and texture that looks far more complicated than it actually is.
I will be honest with you. This pattern is rated intermediate, and it earns that label. You will need to be comfortable with basic stitches, joining techniques, and shaping. But if you have made granny squares and tried any kind of motif work before, you are absolutely ready for this.
Why This Table Runner Is Worth Your Time
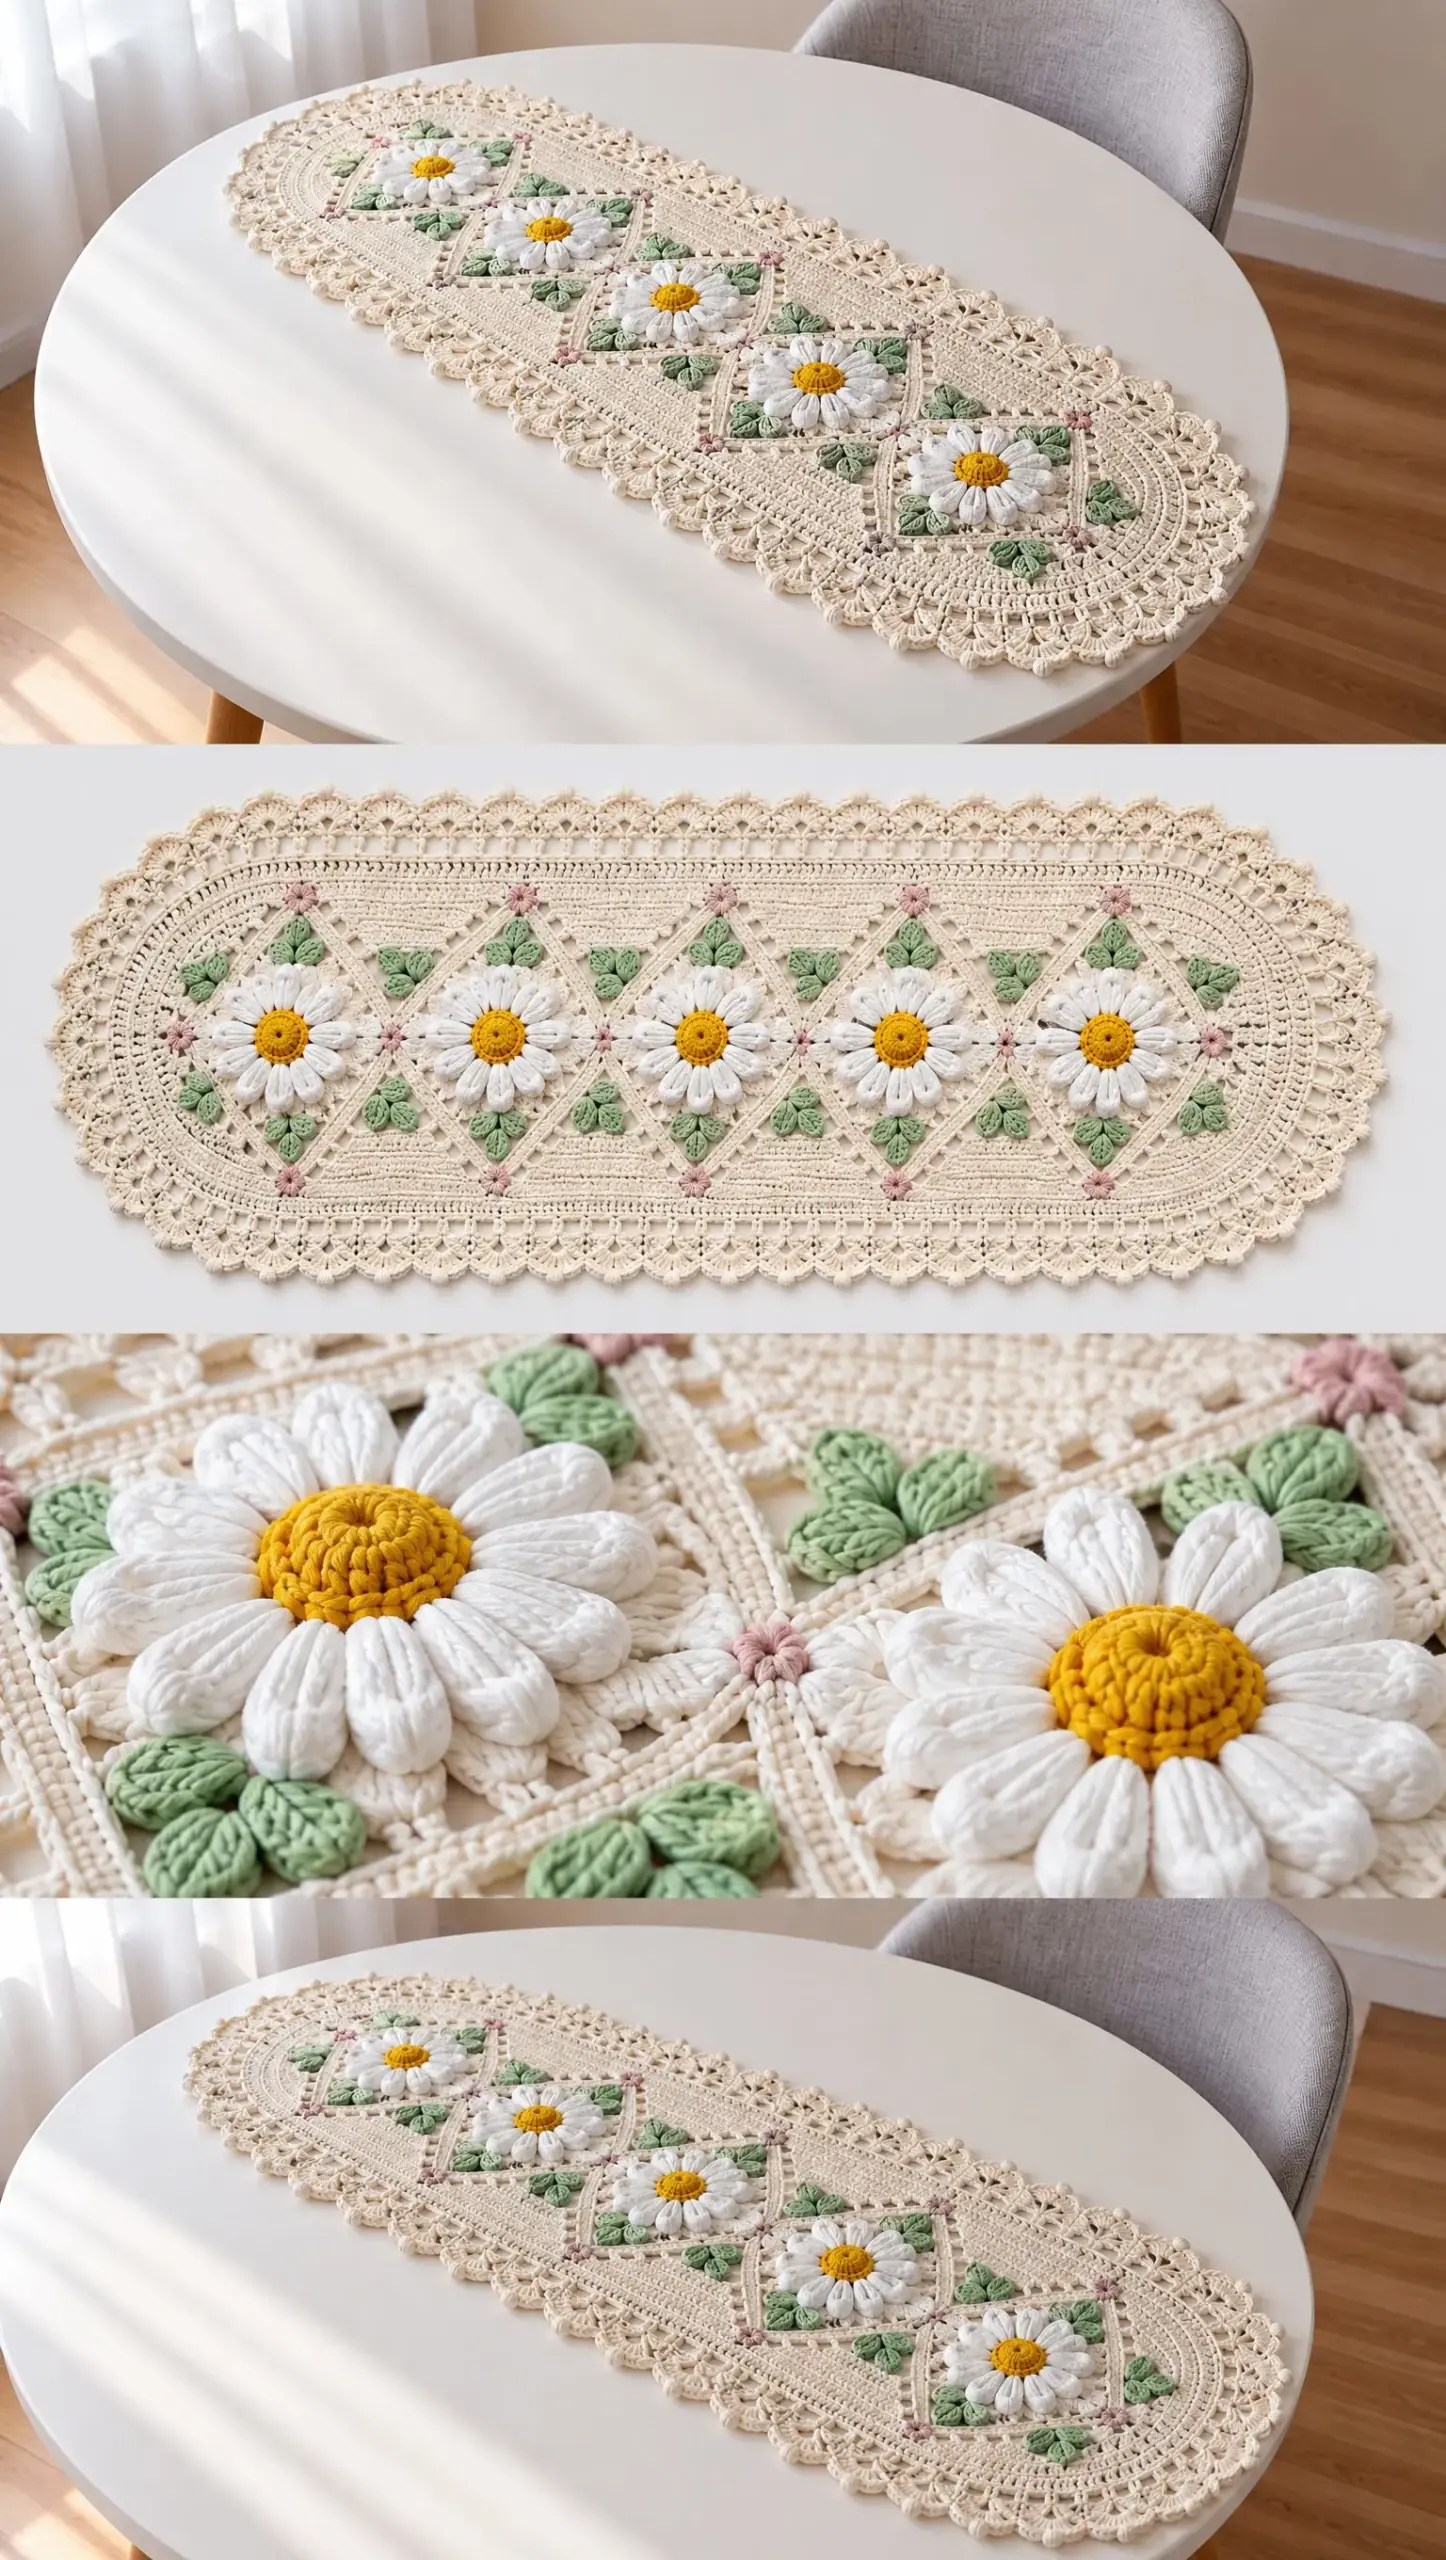
The finished piece features repeating diamond sections framed by dense single crochet stitches and airy chain spaces. White daisies with sunny yellow centers sit inside each diamond, surrounded by pale mint leaf clusters and delicate pink accent stitches. The ends taper into matching oval points and finish with a fan lace border trimmed in rounded picots.
This runner works beautifully on dining tables, console tables, buffets, and dressers. It makes a stunning centerpiece for spring and summer tablescapes, but honestly, it looks gorgeous year round. The botanical design feels fresh without being trendy, which means you will enjoy it for years to come.
The construction method is smart. You create the daisy motifs first, then build the diamond lace panels, then join everything together. Working in sections like this makes the project portable and helps you catch mistakes early.
Materials You Will Need
Gather these supplies before you start:
Yarn:
Tools:
Cotton thread gives this runner its classic lace appearance and crisp stitch definition. If you have never worked with crochet thread before, choose a size 10 thread and a 1.75 mm steel hook. The smaller hook creates tighter stitches that hold their shape beautifully after blocking.
Stitch Abbreviations and Definitions
Before we dive in, let me explain every stitch you will use in this pattern:
If you are new to any of these stitches, practice them with scrap yarn before starting the runner. Cotton thread shows every stitch clearly, which is beautiful in the finished piece but unforgiving if you are still learning a technique.
Step 1: Create the Daisy Motifs
The daisy flowers are the heart of this design. You will make them first, then set them aside until you are ready to join them into the diamond panels.
Round 1: With white yarn, make a magic ring. A magic ring, sometimes called a magic loop, is an adjustable starting ring that lets you pull the center completely closed. If you prefer, you can chain 4 and slip stitch to join, but the magic ring gives a neater center.
Round 2: Crochet a center round using single crochet (sc) stitches into the ring. This creates the base for your petals.
Round 3: Change to white yarn if needed. Create evenly spaced petals using groups of double crochet (dc) stitches. Each petal is formed by working multiple double crochets into the same stitch or space, creating a shell shape.
Round 4: Add raised texture by working front post stitches around the petal base. A front post stitch means you insert your hook from front to back around the post of the stitch below, rather than into the top of the stitch. This pushes the petal forward and creates lovely dimension.
Finishing: Complete the round with a slip stitch (sl st) to join. Fasten off and weave in the ends securely.
Make enough daisies for your desired runner length. For a standard table runner, plan on 5 to 7 daisies. For a longer dining table runner, you may want 9 or more.
Quick tip: I like to make all my motifs first, then lay them out to check spacing before I start the diamond panels. It is much easier to add one more daisy at this stage than to rip back lace work later.
Step 2: Crochet the Leaf Clusters
The pale mint leaves frame each daisy and add a botanical touch to the design.
To begin: Attach pale mint yarn near the flower edge using a slip stitch.
Working the leaves: Create small pointed leaves using chains and single crochet (sc) increases. Start with a chain of 6 or 7 stitches, then work back along the chain, increasing at the base to create width.
Shaping: Shape each leaf with decreases toward the tip. You can use single crochet two together (sc2tog) or simply skip stitches to narrow the point.
Placement: Add leaf clusters between flower placements. Typically, you will want 2 to 4 leaves around each daisy, positioned at the corners of the diamond frame.
The leaves do not need to be perfect. In fact, slight variations in size and angle make the finished piece look more natural and garden like.
Step 3: Build the Diamond Lace Panels
Now you will create the cream colored lattice that holds everything together.
Foundation: Using cream yarn, begin the foundation chain for the runner width. The number of chains depends on how wide you want your finished runner. A typical table runner is 12 to 14 inches wide.
Row structure: Work rows of alternating single crochet (sc) frames and chain spaces (ch sp). The single crochet sections create the solid lines of the diamond, while the chain spaces create the open, airy look.
Creating diamonds: Form the diamond shapes by increasing and decreasing around chain openings. To increase, work multiple stitches into one space. To decrease, skip stitches or work stitches together.
Pattern repeat: Continue repeating the diamond pattern until the runner reaches your required length. Each diamond section should be large enough to frame one daisy motif comfortably.
Symmetry check: Keep both sides symmetrical as you work. I recommend counting stitches at the end of every row to catch mistakes early.
This is the most time consuming part of the project, but it is also very meditative once you get into the rhythm. Put on a podcast or audiobook and enjoy the process.
Step 4: Join the Daisy Garden Sections
This is where your project really comes together.
Layout: Arrange the daisy motifs evenly along the diamond panels. Lay everything flat on your blocking mat and play with the spacing until it looks balanced.
Joining: Attach motifs using slip stitches (sl st) through matching chain spaces. Work carefully to keep the daisies centered within each diamond frame.
Adding leaves: Position leaf clusters around each flower, attaching them the same way.
Final check: Check spacing before securing all joins. Once you have slip stitched everything in place, it is difficult to adjust without cutting yarn.
Step 5: Shape the Oval Ends
The tapered oval ends give this runner its elegant, finished appearance.
Tapering: Continue the cream lace pattern while gradually reducing stitch count. Decrease by skipping stitches or working stitches together at regular intervals.
Mirroring: Mirror the decreases on both ends so your runner is symmetrical. If you decrease 2 stitches per row on one end, do the same on the other.
Finishing: Complete each end with a smooth rounded point. The final rows should have very few stitches, creating that classic oval shape.
Step 6: Add the Decorative Border
The border frames your work and adds a professional, polished finish.
Round 1: Crochet a full round of single crochet (sc) around the entire runner. Work 3 single crochets into each corner to keep the edges flat.
Round 2: Add fan shells along the outer edge. A fan shell is typically 5 to 7 double crochet (dc) stitches worked into one stitch, with a slip stitch or single crochet between each fan.
Round 3: Finish each shell with small picot stitches. A picot is made by chaining 3, then slip stitching into the first chain. It creates a tiny decorative loop.
Blocking: Block the runner carefully to open the lacework and define the diamonds. This step is essential for cotton thread projects.
Finishing Instructions
Almost done! These final steps make the difference between a handmade piece and a professional looking heirloom.
Weave in ends: Hide all yarn tails securely. Thread each tail onto your yarn needle and weave through at least 2 inches of stitches on the wrong side. Cotton thread can be slippery, so weave in multiple directions.
Blocking: Wet block or steam block into the final shape. For wet blocking, soak the runner in cool water for 15 minutes, gently squeeze out excess water in a towel, then pin to your blocking mat. For steam blocking, pin first, then hover a steam iron above the surface without touching.
Drying: Allow the cotton fibers to dry completely before placing on the table. This may take 24 to 48 hours depending on humidity.
Care Instructions
Your beautiful runner deserves gentle care:
Hand wash gently in cool water with a mild detergent or soap specifically designed for delicates. Avoid harsh detergents, bleach, or fabric softeners that can break down cotton fibers over time.
Lay flat to dry on a clean towel or blocking mat. Never hang cotton lace, as the weight of the water can stretch and distort your work.
If your runner gets wrinkled, a light steam or careful pressing with a cool iron will restore its shape. Always block again after washing to maintain the crisp diamond lines and open lacework.
Design Notes and Customization Ideas
This pattern creates a classic botanical crochet runner with a garden inspired diamond lattice. It is suitable for dining tables, consoles, sideboards, and seasonal home decor.
Size adjustments: Add or remove diamond repeats to change the length. Add width by increasing your foundation chain in multiples of your diamond repeat.
Color variations: Try all white for a traditional vintage look, or use bright spring colors for a modern interpretation. The design also looks stunning in variegated thread.
Seasonal styling: Add small crocheted butterflies or bees for spring. Use autumn colors and add tiny pumpkin appliques for fall. The basic pattern is incredibly versatile.
I hope you love making this Daisy Garden Diamond Runner as much as I enjoyed designing it. The combination of raised flowers, delicate lace, and botanical details creates something truly special for your home.
Thank you so much for choosing this pattern. If you make one, I would absolutely love to see it! Tag me on Instagram or share a photo in our Facebook group. Seeing your finished projects is honestly the best part of my day.
If this pattern caught your eye, go ahead and save it to your Pinterest boards so you can find it when you are ready to start. And please drop a comment below if you make one. I love hearing which colors you choose and where you display your finished runner!
Want a Quick & Easy Printable Version?
Get a clean, beautifully formatted PDF of this pattern — easy to follow step by step, ready to print or save on any device. No scrolling, no distractions, just the pattern.
Get the Printable PDF →