
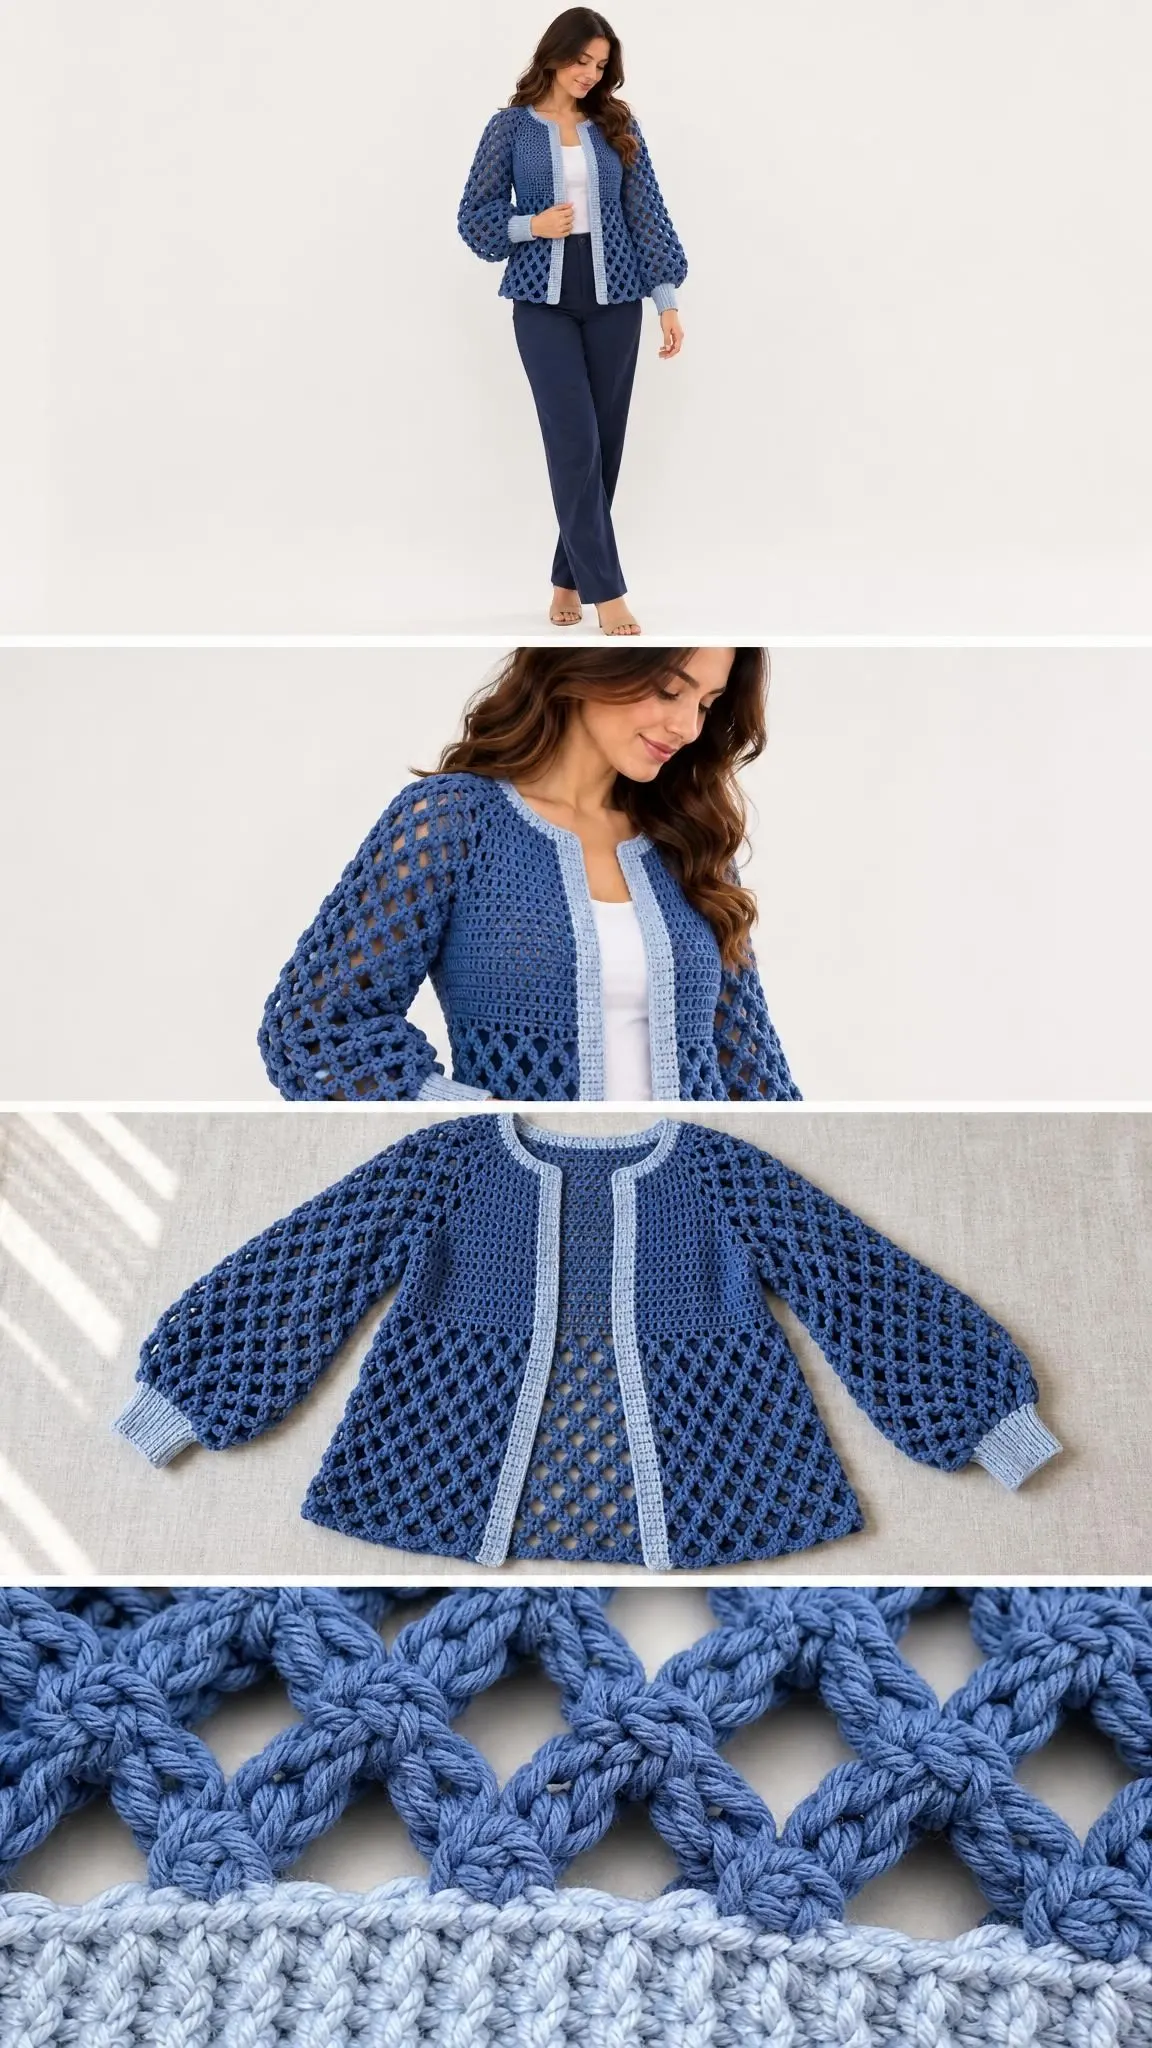
This is a cropped open-front cardigan with a boxy silhouette and dramatic balloon sleeves. The design combines dense small mesh on the upper body with an open diamond lattice below, creating visual interest without complicated techniques.
Get the Ad-Free PDF Pattern
Scroll down for the full pattern, or get the ad-free printable PDF from the shop.
Get the Printable PDF →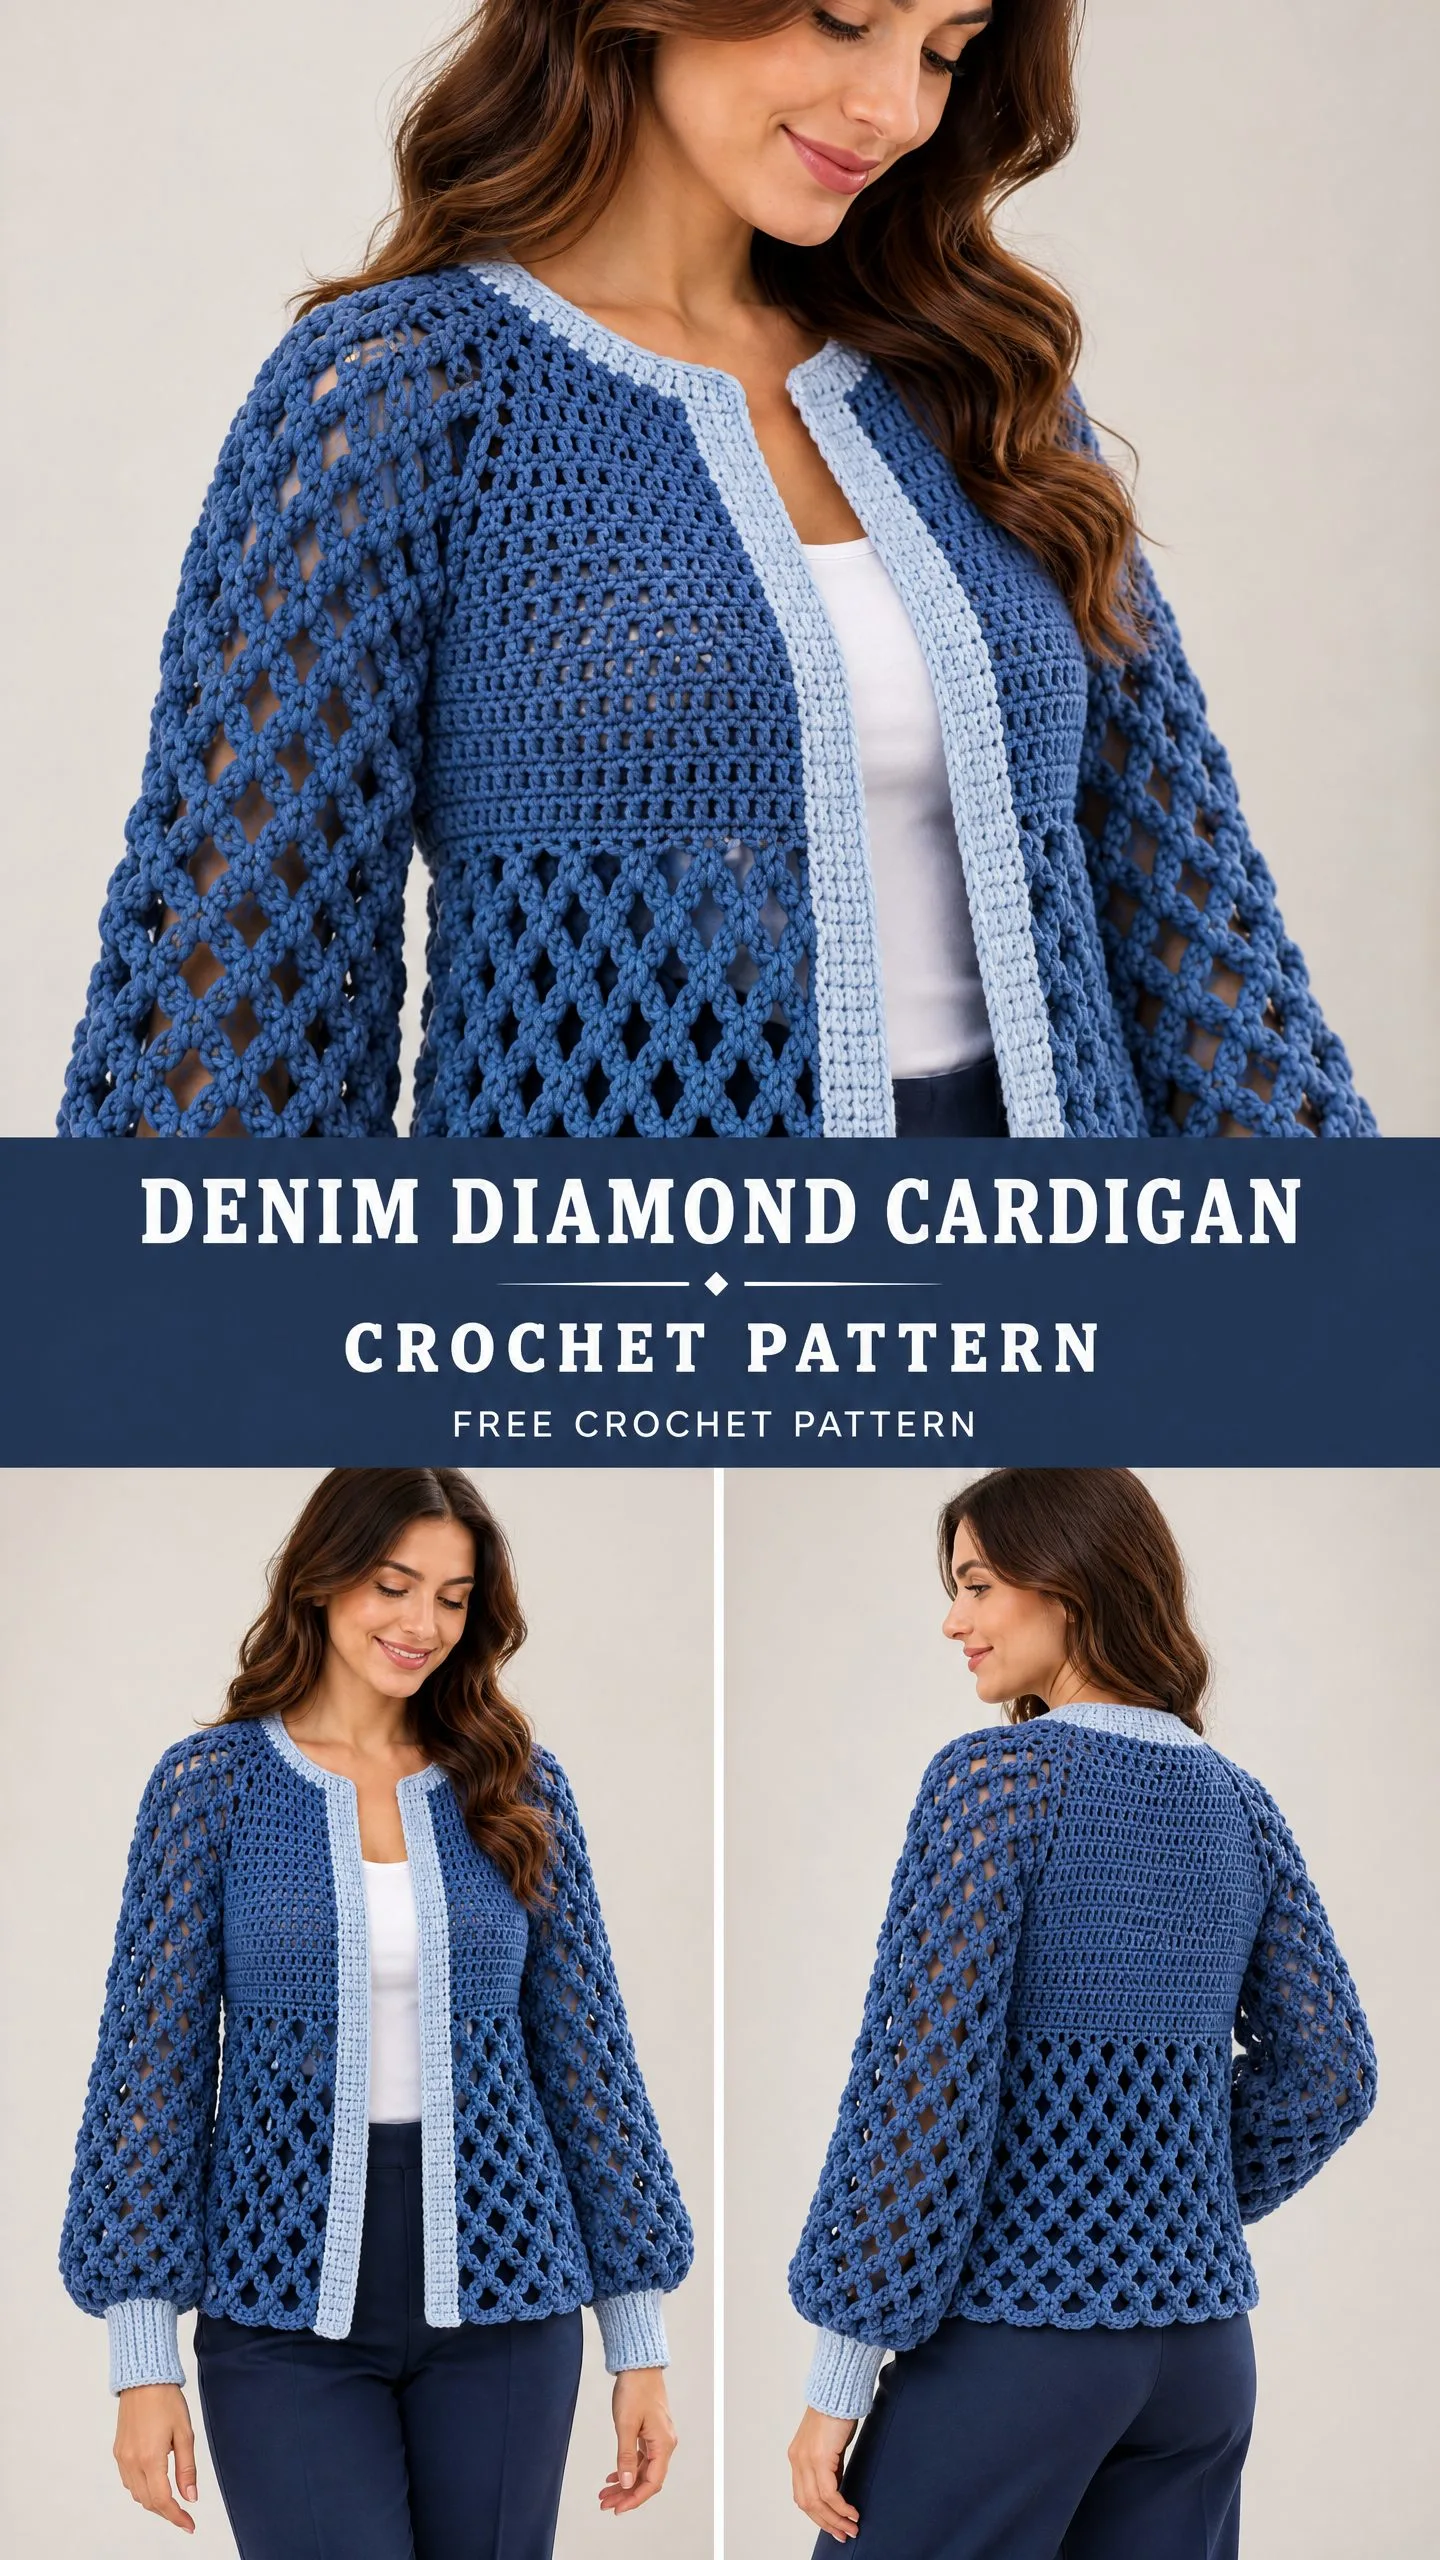
The construction is straightforward: work three flat panels from the shoulders down, join them, add the sleeves, then finish with contrasting pale blue ribbed cuffs and front bands. If you can double crochet and chain, you have the skills for this project.
The denim blue main color paired with soft pale blue trim gives it a modern, polished look. Perfect for layering over a simple top when you want something lightweight but eye-catching.
About This Design
This crochet cardigan pattern features two distinct textures working together beautifully. The upper portion uses a small mesh stitch, which is simply double crochet (dc) posts separated by chain one (ch 1) spaces. This creates a dense, structured fabric that provides coverage across the shoulders and bust.
Below that, the pattern transitions to a large diamond lattice. This open mesh uses chain five (ch 5) arches anchored with single crochet (sc), giving the lower body and sleeves that gorgeous lacy, breathable quality you see in the photos.
The balloon sleeves are entirely worked in the diamond lattice, gathered into fitted ribbed cuffs at the wrist. This creates that lovely puffed silhouette without any complicated shaping. The cuffs are worked separately in back loop only single crochet, which produces a stretchy ribbed texture that hugs the wrist comfortably.
Skill Level
This pattern suits confident beginners and intermediate crocheters. You should be comfortable with:
- Working flat rows and turning
- Double crochet and single crochet
- Increasing at row edges
- Basic seaming
- Working in back loop only
The mesh and lattice stitches are repetitive once established, making this a relaxing project after the first few rows of each section.
Finished Measurements
- Body coverage: approximately 102 cm (about 40 inches) around
- Fits bust: 88 to 94 cm (about 35 to 37 inches) with 8 to 14 cm ease
- Body length: approximately 54 cm (about 21 inches)
- Sleeve length: approximately 42 cm (about 16.5 inches) including cuff
- Back width: approximately 51 cm (about 20 inches)
- Each front panel: approximately 26 cm (about 10 inches)
This pattern provides one adult size only. Check the measurements against your body before beginning. Altering stitch counts requires recalculating the lattice placement and shaping.
Materials and Tools
Yarn:
- Main color (denim blue): 500 g / 1100 m of smooth DK weight cotton blend, approximately 220 m per 100 g
- Contrast color (pale blue): 100 g / 220 m total for bands and cuffs
Hooks:
- 4 mm hook for main fabric (or size needed to meet gauge)
- 3.5 mm hook for cuffs and trim
Notions:
- Tapestry needle
- 8 stitch markers
- Measuring tape
- Scissors
Optional for pearl version:
- 12 sew-on imitation pearls
- Strong sewing thread
Gauge
Getting gauge right matters here because you are working two different fabric textures that need to match up at the transition row.
Small mesh gauge: 16 stitch positions (8 cells) x 10 rows = 10 cm square
Large lattice gauge: 4 arches x 10 rows = 10 cm square, lightly blocked
Make a swatch at least 15 x 15 cm in each stitch pattern. Wash and dry the swatches as you plan to care for the finished garment, then measure the central 10 cm without stretching. Change hook size if needed. Record both width and height measurements.
Cotton lace tends to lengthen while worn, so all dimensions in this pattern are blocked targets.
Abbreviations and Special Stitches
This pattern uses US crochet terminology throughout.
- ch = chain
- st(s) = stitch(es)
- sp = space
- sl st = slip stitch (insert hook, yarn over, pull through stitch and loop on hook in one motion)
- sc = single crochet (insert hook, yarn over, pull up loop, yarn over, pull through both loops)
- hdc = half double crochet
- dc = double crochet (yarn over, insert hook, yarn over, pull up loop, [yarn over, pull through 2 loops] twice)
- tr = treble crochet
- BLO = back loop only (insert hook under only the back loop of the stitch)
- RS/WS = right side / wrong side
- rep = repeat
- inc = increase
- sc2tog = single crochet two stitches together (a decrease)
Small Mesh Stitch (Flat)
Ch 3 (counts as first dc), [ch 1, skip next ch-1 sp, dc in next dc] to end of row.
Work the dc into the post of the stitch, not into the gap. A mesh cell is one ch-1 space bounded by dc posts on either side. For flat work with C cells, you will have C+1 dc posts and C chains, giving you a total of 2C+1 stitch positions.
Large Lattice Foundation
Ch 1, sc in first dc; [ch 5, skip next mesh cell and its following cell, sc in their ending dc post] across.
Each arch spans 4 old stitch positions and ends on every second old dc post. Back panel: 20 arches. Each front panel: 10 arches.
Offset Lattice Row
Ch 5 (counts as edge dc + ch 2), sc in first old arch; [ch 5, sc in next old arch] to last arch; ch 2, dc in last edge sc (or third chain of prior turning ch-5). Turn.
Count the two edge half-arches together as one arch.
Return Lattice Row
Ch 1, sc in first dc; [ch 5, sc in next full arch] across, then ch 5, sc in last edge dc. Turn.
These two rows alternate throughout the lattice sections.
Shell Trim (Optional)
On a prepared sc edge with a multiple of 6 stitches: [skip 2 sc, 5 dc in next sc, skip 2 sc, sl st in next sc].
Picot Trim (Optional)
[Sc in next 3 sts, ch 3, sl st into third ch from hook].
Pattern Notes
- Turning ch 3 counts as a dc
- Ch 1 does not count as a sc
- Join rounds with sl st unless stated otherwise
- Flat rows turn after each row
- Brackets [ ] enclose a repeat
- Do not count joining sl sts in your stitch totals
- Sew with RS together unless directed otherwise
- Work main fabric in denim blue; use pale blue for trims and cuffs
Instructions
Back Panel
Row 1: Ch 84; dc in sixth ch from hook, [ch 1, skip 1 ch, dc in next ch] 39 times; turn. (40 cells; 41 dc + 40 ch-1 spaces)
Rows 2 through 30: Work small mesh across; turn. (40 cells)
Row 31: Work large-lattice foundation; turn. (20 arch equivalents, counting two edge halves as one)
Rows 32 through 54: Alternate offset lattice rows and return lattice rows with plain sc anchors. Turn after each row. (20 arch equivalents throughout)
Checkpoint: Back length should measure approximately 54 cm; width approximately 51 cm. Do not block lower lace wider than upper grid.
Left Front Panel
Row 1: Ch 28; dc in sixth ch from hook, [ch 1, skip 1 ch, dc in next ch] 11 times; turn. (12 cells; 13 dc + 12 ch-1 spaces)
Mark the neck edge. The neck edge is at the start of Row 2 for the left front. Keep the opposite armhole edge straight throughout.
Rows 2 through 9: Work small mesh, increasing one cell at the marked neck edge only; turn. You will add one cell per row. (Row 2: 13 cells, Row 3: 14 cells, continuing until Row 9: 20 cells)
To increase at row start: ch 3, then (ch 1, dc) in the first dc. To increase at row end: add (ch 1, dc) in the last dc.
Rows 10 through 30: Work small mesh across; turn. (20 cells)
Row 31: Work large-lattice foundation; turn. (10 arch equivalents)
Rows 32 through 54: Alternate offset lattice rows and return lattice rows with plain sc anchors. Turn after each row. (10 arch equivalents throughout)
Checkpoint: Left front length approximately 54 cm; width approximately 26 cm.
Right Front Panel
Work as for Left Front, but the neck edge is at the end of Row 2 rather than the start. All other instructions remain the same.
Checkpoint: Right front length approximately 54 cm; width approximately 26 cm.
Sleeves (Make 2)
Work from upper arm down.
Row 1: Ch 84; dc in sixth ch from hook, [ch 1, skip 1 ch, dc in next ch] 39 times; turn. (40 cells)
Row 2: Work large-lattice foundation; turn. (20 arches)
Rows 3 through 37: Alternate offset lattice rows and return lattice rows. Turn after each row. (20 arch equivalents throughout)
Ribbed Cuffs (Make 2)
Using 3.5 mm hook and contrast color:
Row 1: Ch 11; sc in second ch from hook and each remaining ch; turn. (10 sc)
Rows 2 through 40: Ch 1, sc BLO in each st; turn. (10 sc)
Cuff target: approximately 5 cm deep x 20 cm around before joining. Adjust row count only if needed to pass comfortably over the hand. Record your actual count for the matching second cuff.
Assembly
Shoulder Seams
At each side, join the outer 12 front mesh cells to the outer 12 back mesh cells along the foundation edge. Leave the center 16 back cells unseamed for the neck opening. The front neck shaping remains open. (2 shoulder seams, 12 cells each)
Side Seams
Mark 25 cm down from shoulder on both back and corresponding front panels. Sew body sides from hem to markers, leaving the armhole openings. (2 armholes, approximately 50 cm circumference each)
Attach Sleeves
Sew each sleeve lengthwise to form a tube. Place the sleeve seam at underarm, match the sleeve-top midpoint to the shoulder seam, and sew the top edge evenly into the armhole.
Attach Cuffs
Join cuff first and last rows into a ring using sl st or whipstitch. Quarter-mark both the cuff and the sleeve opening. Whipstitch cuff to sleeve while gathering the sleeve fabric evenly. Do not stretch the cuff beyond comfortable hand circumference.
Checkpoint: Shoulders should sit evenly. Sleeves move comfortably. Front edges remain open. Adjust seam tension before trimming yarn tails.
Edgings and Details
Using contrast color and 3.5 mm hook:
Border Round 1: Join at one lower front corner. Sc evenly around entire open-front, neck, and hem outline. Use these guidelines: 2 sc per dc row end, 1 sc per foundation position, 4 sc per complete lower-lattice arch (2 per edge half-arch), and 3 sc at each outward corner. Record your total stitch count (B) and mark the middle corner stitches.
Border Round 2: Sc in each st, placing 3 sc in each marked corner st. Move markers to new middle corner stitches. (B + 2K sc, where K = number of corners)
Border Round 3 (optional for wider band): Repeat Round 2. (B + 4K sc)
For shell-edged versions, add shell trim along lower hem and sleeve openings using complete 6-st repeats. Finish any remainder in sc.
For picot versions, add picot trim along hem. Keep front and neck edge plain to avoid curling.
Checkpoint: Front bands lie flat. Hem does not flare unintentionally. Cuffs pass over hands and recover their shape.
Finishing
Weave every yarn end through at least 5 cm of fabric, reverse direction, and trim.
Wet-block flat, aligning side seams and matching sleeve lengths. Pin lace to the upper-panel width rather than stretching it wider.
Final measurements: Body length approximately 54 cm, sleeves approximately 42 cm including cuffs, total body coverage approximately 102 cm. Recheck after drying and again after a short wear.
Care Instructions
Follow your yarn label for specific guidance. For most DK cotton blends:
- Hand-wash cool with mild detergent
- Support the wet fabric to prevent stretching
- Dry flat away from direct heat
- Do not wring, tumble dry, or iron acrylic components
Safety Notes
This is an adult garment. Open mesh does not provide sun protection or opaque coverage. If adding pearls or other embellishments, attach them securely and inspect before each wear. Beads and appliques can be snagging hazards.
This denim diamond cardigan crochet pattern makes a beautiful addition to any handmade wardrobe. The combination of textures, the flattering boxy shape, and those statement balloon sleeves create something truly special. Whether you make it for yourself or as a gift, the contrast trim adds that polished, finished look that elevates the whole piece.
Thank you so much for choosing this pattern. If you make this cardigan, I would love to see it! Share your finished project on Instagram or Facebook and tag your photos so fellow crafters can admire your work.
If you loved this pattern, save it to your Pinterest boards so you can find it easily when you are ready to start. And if you make this cardigan, please leave a comment below. I always enjoy seeing what colors and yarn choices everyone picks!
Want a Quick & Easy Printable Version?
Get a clean, beautifully formatted PDF of this pattern — easy to follow step by step, ready to print or save on any device. No scrolling, no distractions, just the pattern.
Get the Printable PDF →