
Looking for a stunning summer set that turns heads at beach resorts, music festivals, or rooftop gatherings? This crochet bandeau and wide-leg pants combo delivers serious bohemian style while keeping you comfortable in warm weather. The shell stitch pattern creates beautiful drape in cotton yarn, and the fringe detail along the side seams adds movement with every step.
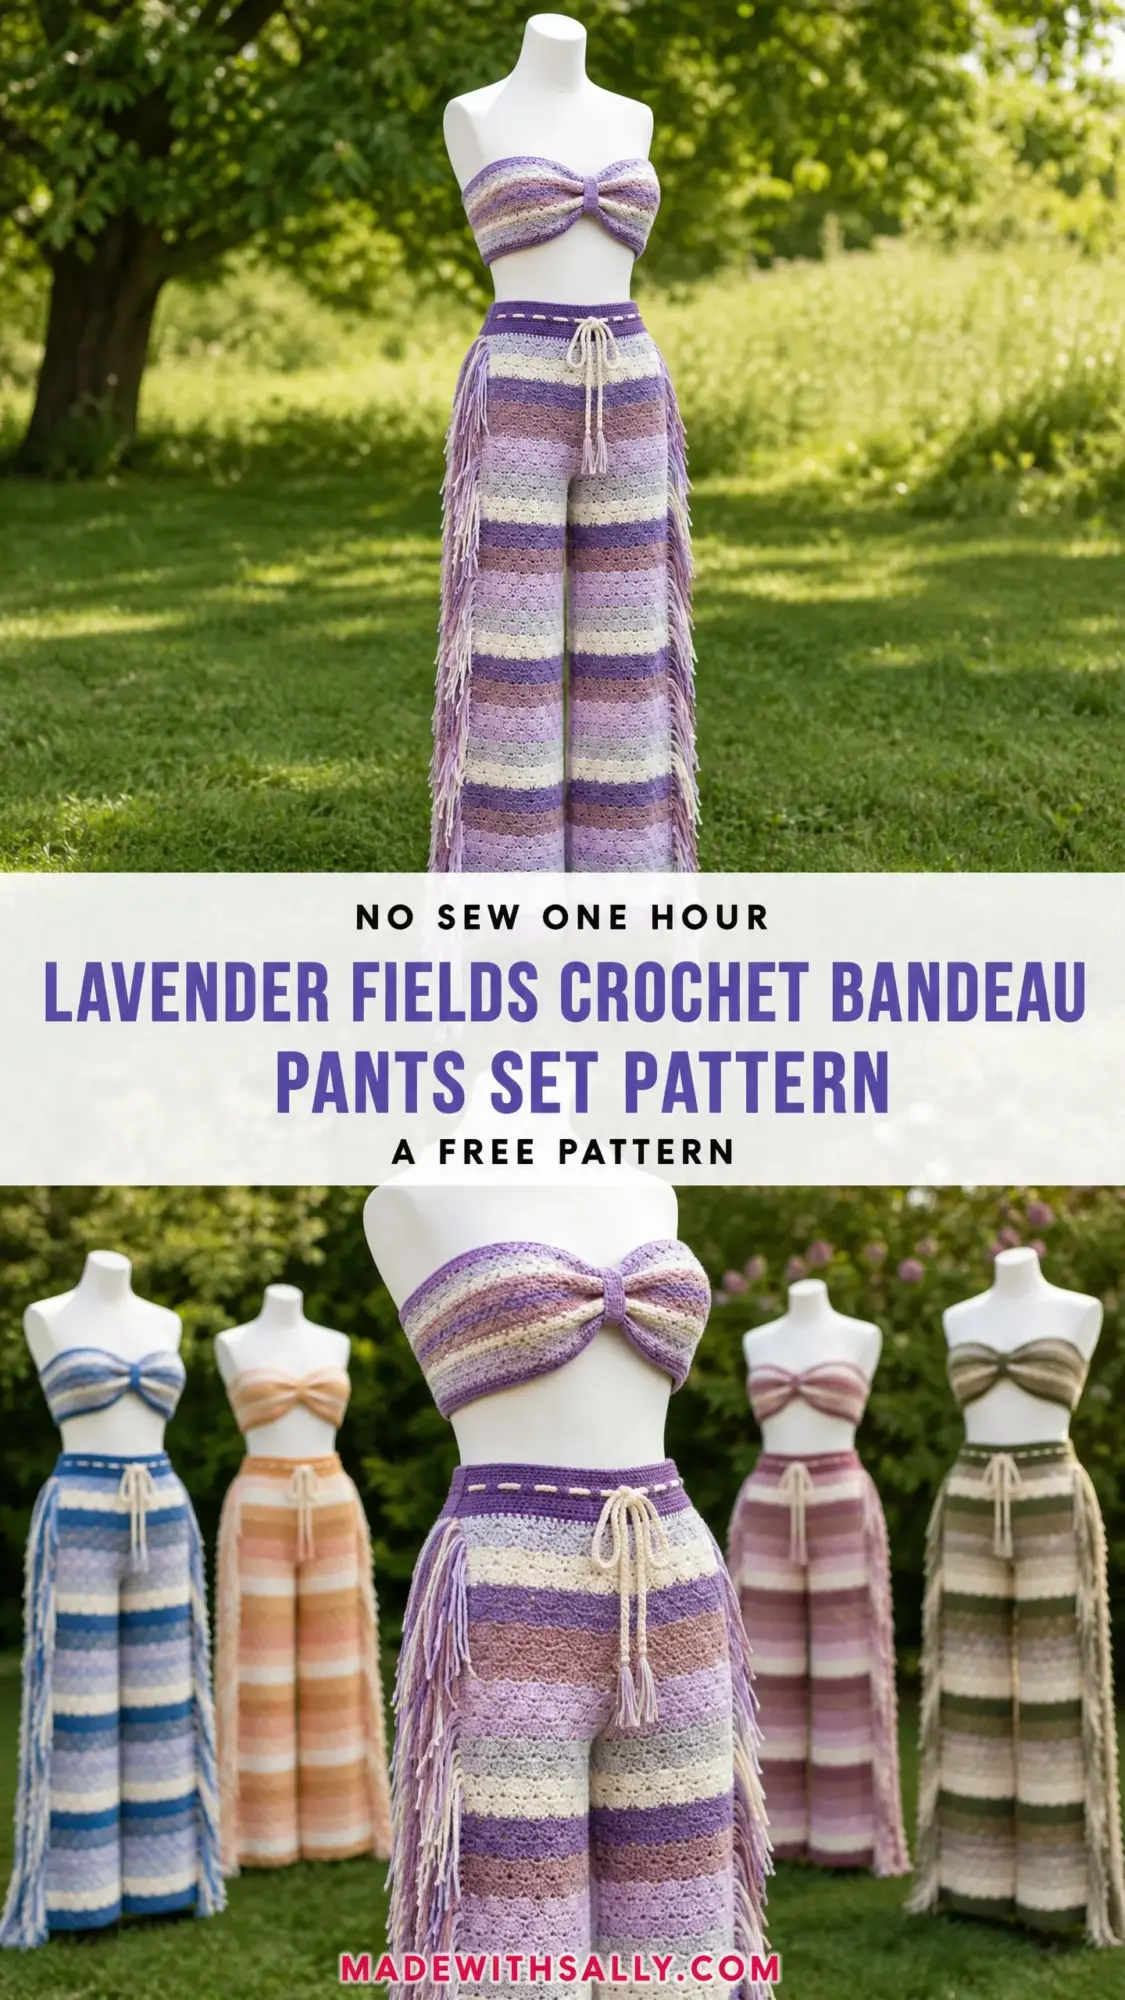
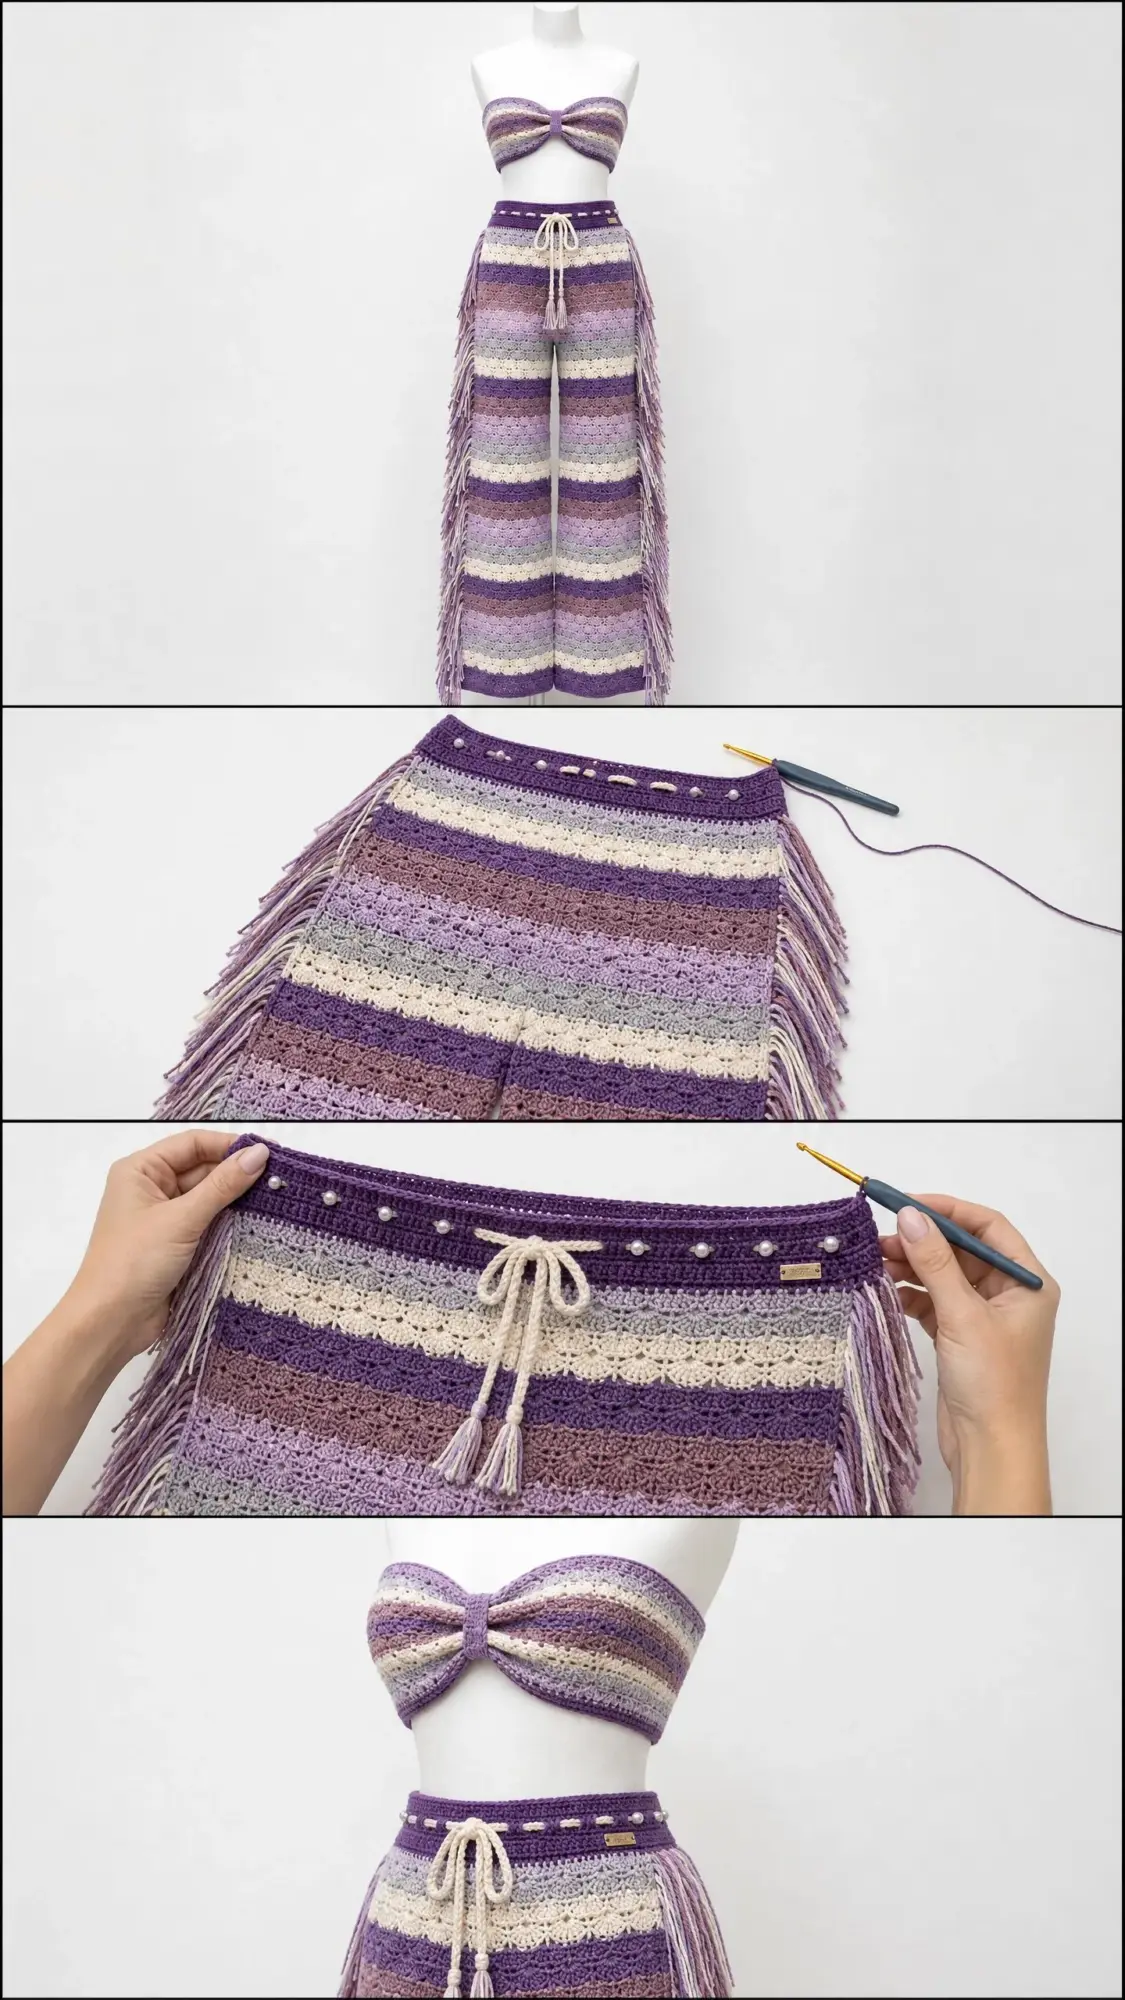
This two-piece set uses intermediate techniques, but I break everything down clearly so you can follow along with confidence. You will work the bandeau flat as a rectangle, then shape the center front into that gorgeous bow detail. The pants start at the waistband and work down in the round, splitting at the crotch for each leg. Both pieces feature the same rotating stripe sequence in soft purples, lavender, cream, dusty rose, and grey-blue.
Whether you are making this for a vacation, a gift for someone who loves statement pieces, or simply because you have been wanting to try a garment project, this pattern gives you everything you need. The finished set fits a 32 inch bust and 28 inch waist, with built-in stretch and customization tips for other sizes.
Why You Will Love This Crochet Set
This Lavender Fields crochet bandeau pants set is the kind of project that looks incredibly impressive but builds on repeating techniques you can master quickly. Once you get the rhythm of the shell stitch pattern, the rows and rounds fly by. The five-color stripe rotation keeps things interesting without overwhelming you with constant color changes.
The shell stitch creates a lacy, openwork fabric with excellent drape. Perfect for warm weather wear. Cotton yarn ensures breathability and gives the stitches beautiful definition. The fringe along the side seams adds that extra boho touch that makes this set truly special.
Materials You Will Need
Gather these supplies before starting your crochet pants set pattern:
Yarn: DK weight (CYCA 3), 100% cotton or cotton blend recommended
Total yarn needed: Approximately 1800 yards / 1646 meters across all five colors
Hooks:
Notions:
Yarn Suggestions
Lion Brand 24/7 Cotton works beautifully for this project. The mercerized cotton has excellent stitch definition and comes in a wide range of colors to match this palette.
Paintbox Yarns Cotton DK is another great affordable option with consistent dye lots across multiple skeins.
Scheepjes Cahlista produces an elegant, fluid fabric if you prefer a slightly finer hand. Swatch carefully as it runs a bit lighter than standard DK.
Gauge Information
Getting gauge right matters for garment fit. Take time to swatch before diving in.
With US E-4 / 3.5 mm hook in shell stitch pattern:
To make a gauge swatch: Chain 38. Work shell stitch pattern for 16 rows. Block your swatch before measuring. It should measure approximately 9 inches / 22.9 cm wide and 8 inches / 20.3 cm tall. Adjust hook size up or down if needed.
Finished Measurements
Bandeau Top:
Pants:
Abbreviations and Stitch Definitions
Here are all the abbreviations used in this crochet tutorial:
Special Stitches
Shell Stitch
Work 5 double crochet stitches all into the same stitch or space. This creates one shell unit. Shells are separated by chain-1 gaps and single crochet anchors.
Shell Stitch Pattern (Worked Flat)
Uses a multiple of 6 stitches plus 2 for foundation.
Foundation row (RS): Sc in second ch from hook, sk 2 ch, shell (5 dc) in next ch, sk 2 ch, sc in next ch. Rep across. Turn.
Row 1 (WS): Ch 3 (counts as first dc), 2 dc in first sc (half shell at edge), sk 2 dc, sc in next dc (center of shell), sk 2 dc, shell in next sc. Rep sc then shell across, ending sc in center of last shell, 3 dc in last sc (half shell at edge). Turn.
Row 2 (RS): Ch 1, sc in first dc, shell in next sc, sc in center dc of next shell. Rep shell then sc across, ending shell in last sc, sc in top of ch-3 turn. Turn.
Repeat Rows 1 and 2 for pattern.
Shell Stitch Pattern (Worked in the Round)
Uses a multiple of 6 stitches.
Round 1: Sc in first st, ch 1, sk 2 sts, shell in next st, ch 1, sk 2 sts. Rep around. Join with sl st to first sc.
Round 2: Ch 3 (counts as dc), 2 dc in same sc (half shell), sc in center dc of first shell, shell in next sc. Rep around. Join.
Stripe Color Sequence
Both pieces follow this rotation: 2 rows/rounds Color A, 2 rows/rounds Color B, 2 rows/rounds Color C, 2 rows/rounds Color D, 2 rows/rounds Color E. Repeat this 10-row cycle throughout.
To change colors: Work the last stitch of the old color until 2 loops remain on hook. Pull new color through both loops. Chain to turn as required.
Bandeau Top Instructions
The bandeau is worked flat as a rectangle, seamed at the back, then gathered at center front to create the bow detail.
Foundation Chain
With Color A and hook E-4, loosely chain 122.
This gives you 120 working stitches (20 complete shell repeats of 6 stitches each).
Row 1 (RS):
Sc in second ch from hook. Sk 2 ch. Shell (5 dc) in next ch. Sk 2 ch. Sc in next ch.
Rep across: sk 2, shell in next, sk 2, sc in next.
Continue until all chains are used, ending with a sc. (120 sts)
Row 2 (WS):
Continue with Color A (still in first 2-row stripe).
Ch 3, turn. 2 dc in first sc (edge half shell). Sk 2 dc. Sc in third (center) dc of first shell. Sk 2 dc. Shell in next sc.
Rep: sc in center dc of shell, shell in sc, across.
End: sc in center dc of last shell. Sk 2 dc. 3 dc in last sc (edge half shell). (120 sts)
Stripe and Row Progression:
Continue in this stripe rotation until piece measures 6 inches / 15 cm from foundation chain, ending after completing a full 2-row stripe. Approximately 12 rows total.
Checkpoint: Piece should measure 32 inches / 81 cm across and 6 inches / 15 cm tall with 20 shell repeats across.
Top Edge
With Color A and hook D-3, join yarn at top right corner (RS facing).
Row 1 of edging: Ch 1. Sc evenly across top edge, placing 1 sc in each sc and 1 sc in the center of each shell. Work 120 sc total. Turn. (120 sc)
Row 2 of edging: Ch 1. Sc in each sc across. Turn. (120 sc)
Fasten off. Weave in ends.
Bottom Edge
With Color A and hook D-3, join at bottom right corner of foundation chain edge (RS facing).
Row 1: Ch 1. Sc in each foundation chain stitch across. 120 sc. Turn. (120 sc)
Row 2: Ch 1. Sc in each sc across. (120 sc)
Fasten off.
Back Seam and Bow Construction
Fold the bandeau so the right short edge meets the left short edge. With tapestry needle and Color A yarn, whipstitch the two short edges together for approximately 4 inches / 10 cm from the bottom edge upward. Leave the top 2 inches / 5 cm open for the back tie opening.
Back tie: Cut 6 lengths of Color C, each 20 inches / 50 cm long. Hold together and fold in half. Thread folded end through top corner of back opening on one side. Pull tails through loop. Repeat on other side of opening. Tie in a bow or knot at the back when worn.
Bow formation at center front: Mark the center front of the bandeau (opposite the seam). Using a length of Color C approximately 24 inches / 60 cm, wrap tightly around the center front panel several times vertically, cinching the fabric inward to create a soft gathered bow shape. Knot securely at the back of the bow cinch. Tuck ends into the back side and secure with a few whipstitches.
Fringe Pants Instructions
The pants are worked in the round from the top down. The waistband yoke is worked first, then the shell stitch body, then each leg separately.
Waistband Yoke
With Color A and hook E-4, chain 169. Being careful not to twist chain, join with sl st to first ch to form a ring. (168 ch)
Waistband Round 1: Ch 1. Sc in each ch around. Join with sl st to first sc. (168 sc)
Waistband Rounds 2 through 4: Ch 1. Sc in each sc around. Join. (168 sc each round)
Round 5 (eyelet round): Ch 1. Sc in first 3 sc. (Ch 2, sk 2 sc, sc in next 4 sc) rep around, ending last rep sc in last sc. Join. This creates 28 eyelets total for the drawstring. (168 working sts)
Rounds 6, 7, and 8: Continue in sc, working sc into the ch-2 spaces from round 5 as 2 sc. (168 sc each round)
Waistband measures approximately 2.5 inches / 6.4 cm tall.
Do not fasten off. Continue directly into pants body.
Checkpoint: Waistband circumference should measure 28 inches / 71 cm around.
Pants Body Setup
The pants body uses 168 stitches (168 / 6 = 28 complete shell repeats).
Begin stripe sequence with Color A for 2 rounds, then Color B for 2 rounds, continuing through the rotation.
Pants Body Round 1 (Color A):
Ch 1. Sc in first sc. Sk 2 sc. Shell (5 dc) in next sc. Sk 2 sc.
(Sc in next sc, sk 2, shell in next, sk 2) rep around.
Join with sl st to first sc. (28 shells, 28 sc = 168 working sts)
Pants Body Round 2 (Color A):
Ch 3 (counts as dc). 2 dc in same sc (beg half shell). Sc in center dc of first shell.
(Shell in next sc, sc in center of next shell) rep around, ending shell in last sc. Sc in center dc of last shell.
Join with sl st to top of beg ch-3. (28 shells, 28 sc = 168 working sts)
Continue this 2-round shell pattern, changing colors every 2 rounds following the stripe sequence.
Work pants body rounds without shaping until piece measures 10 inches / 25.4 cm from bottom edge of waistband (approximately 20 rounds).
Checkpoint: Piece should measure approximately 10 inches / 25.4 cm from the bottom of the waistband. Hip circumference should measure approximately 40 inches / 101.6 cm.
Crotch Divide
Mark the round evenly: Place a stitch marker at stitch 1 (side seam point A) and at stitch 85 (side seam point B). This divides the round into two halves of 84 stitches each.
84 / 6 = 14 shell repeats per half. This works perfectly for the shell pattern.
Front Crotch Panel
Join yarn at stitch marker A. Work in shell pattern across 84 sts to stitch marker B. Turn (do not join in the round).
Work 4 rows flat in shell pattern on these 84 sts, maintaining stripe sequence. (84 sts each row)
Back Crotch Panel
Join yarn at stitch marker B. Work in shell pattern across remaining 84 sts to stitch marker A. Turn.
Work 4 rows flat in shell pattern on these 84 sts. (84 sts each row)
After 4 flat rows each, crotch panels are approximately 2 inches / 5 cm tall.
Joining the Legs
After crotch rows, fold the pants so front and back panels are aligned. Using tapestry needle and Color A, mattress stitch the front crotch panel rows to the back crotch panel rows, creating a seam approximately 2 inches / 5 cm long. This closes the crotch.
Each leg opening now measures 84 stitches around (14 shell repeats per leg).
Leg 1 (Worked in the Round)
Join color in current stripe sequence at outer side edge of first leg.
Leg Round 1: Ch 1. Sc in first st. Sk 2. Shell in next. Sk 2. Sc in next. Rep around all 84 sts. Join with sl st. (14 shells, 14 sc = 84 sts)
Leg Round 2: Ch 3. 2 dc in same st. Sc in center of first shell. (Shell in next sc, sc in center of next shell) rep around. Join. (84 sts)
Continue these 2 shell rounds while following stripe sequence rotation.
Work leg rounds without shaping until leg measures 24 inches / 61 cm from crotch join.
Leg Flare for Wide-Leg Silhouette
At 24 inches / 61 cm from crotch, work a modest flare by replacing each 5 dc shell with a 7 dc shell for the final 4 inches / 10 cm of the leg. This increases the hem circumference. (112 sts for final hem rounds)
Leg Hem Edging
With Color A and hook D-3, join at bottom of leg.
Ch 1. Sc in each st around. (112 sc)
Join. Fasten off.
Repeat for Leg 2 using the same instructions.
Checkpoint: Each leg should measure approximately 30 inches / 76 cm from crotch seam to hem edge. Total pants length from waistband top to hem: approximately 42 inches / 107 cm.
Waistband Finishing
Fold the waistband yoke in half toward the inside of the pants along the center of the 8-row waistband (at Row 4). The eyelet row should sit near the top edge on the outside when folded.
Whipstitch the folded edge of the waistband to the wrong side of the pants body, creating a double-layered waistband with a channel for the drawstring.
Thread the drawstring cord through the eyelet holes around the waist. Bring both ends to the center front. Tie a knot at each end and untwist the plies to create a small tassel effect.
Crochet Your Own Drawstring (Optional)
With Color C and hook E-4, ch 200 (or to desired length). Sl st in second ch from hook and in each ch across. Fasten off. This creates a firm twisted cord approximately 55 inches / 140 cm long.
Fringe Construction and Attachment
The fringe is what really makes this crochet pants pattern stand out. Take your time with this step for beautiful results.
Fringe Preparation
Cut yarn lengths 16 inches / 40 cm long. Each fringe bundle uses 4 strands folded in half, creating finished fringe approximately 7 to 8 inches / 18 to 20 cm long.
Use all five colors for fringe, matching the stripe color at each attachment point, or work fringe in a random stripe rotation for visual texture.
Fringe Attachment
Attach fringe along both side seams of each pants leg (the two vertical lines running from the waistband to the hem at the outside of each leg).
For each fringe bundle:
1. Fold 4 strands in half together
2. Insert hook through the seam stitch from front to back
3. Pull the folded loop of the fringe through the seam stitch
4. Pull the cut tails through the folded loop (lark’s head knot)
5. Pull firmly to secure
Attach one fringe bundle into every other row of the seam, working from waistband to hem on both side seams of each leg. This places fringe at approximately every 0.5 inch / 1.3 cm.
Total fringe bundles needed: Approximately 240 bundles total (60 bundles per seam line, 4 seam lines).
After all fringe is attached, trim the fringe hem to an even length using sharp scissors.
Blocking and Finishing
Wet Blocking Method
Submerge each piece in cool water until fully saturated. Gently press out excess water without wringing. Lay flat on blocking mats. Use rust-proof pins to hold pieces to finished measurements. Allow to dry completely, usually 24 to 48 hours for cotton.
Block before seaming when possible for best results.
Seaming Tips
Use a tapestry needle and matching color yarn for all seaming. Mattress stitch gives the most invisible seams on flat panels. Whipstitch works well for the waistband fold.
Weaving in Ends
Weave all yarn ends for a minimum of 2 inches / 5 cm in two directions. Cotton yarns can slip more than wool, so be thorough.
Size Customization Tips
To adjust bandeau width: Add or subtract shell repeats of 6 stitches from the foundation chain. Each 6-stitch repeat adds approximately 1.5 inches / 3.8 cm.
To adjust bandeau height: Work more or fewer rows. Each 2 rows adds approximately 1 inch / 2.5 cm.
To adjust pants waist: Increase or decrease the foundation chain by multiples of 6. For a 32-inch / 81 cm waist, chain 193 (192 working sts). For a 24-inch / 61 cm waist, chain 145 (144 working sts).
To adjust pants length: Work more or fewer leg rounds. Each 2 rounds adds approximately 1 inch / 2.5 cm.
Care Instructions
Machine wash on gentle cycle in cool water with mild detergent. Lay flat to dry. Do not tumble dry as this can shrink cotton and distort the shell stitch fabric. Turn pants inside out and place in a mesh laundry bag to minimize fringe tangling during washing. Store folded rather than hung to prevent stretching.
Time Estimate
Plan your project time accordingly:
This is definitely a labor of love, but the finished set is absolutely worth the time investment.
Final Thoughts on This Crochet Bandeau Pants Set
This Lavender Fields set is the kind of project that grows your skills while creating something truly wearable and beautiful. The shell stitch becomes second nature after a few rows, and watching the stripe pattern develop is so satisfying. I love how the fringe adds movement and that effortless bohemian feel.
Take your time with the crotch shaping and leg division. Read through those sections before you start so you understand the construction. And do not skip blocking. Cotton really opens up beautifully with wet blocking, and your finished pieces will look so much more polished.
Thank you so much for choosing this pattern for your next project. I genuinely hope you love making it as much as I loved designing it. If you finish your set, I would absolutely love to see it. Tag me on Instagram or share in our Facebook group. Your finished pieces always make my day.
If this pattern caught your eye, save it to your Pinterest boards so you can find it when you are ready to start. And please leave a comment below if you make this set. I love hearing about your color choices, any modifications you tried, and how the finished pieces fit. Happy crocheting!
