
I’ve been on the hunt for the perfect heirloom-quality baby dress pattern for months now. Something elegant but not fussy. Something that looks like it belongs in a vintage photograph but works up with modern techniques. This lavender ruffle baby dress set is exactly what I was looking for, and I’m thrilled to share it with you today.
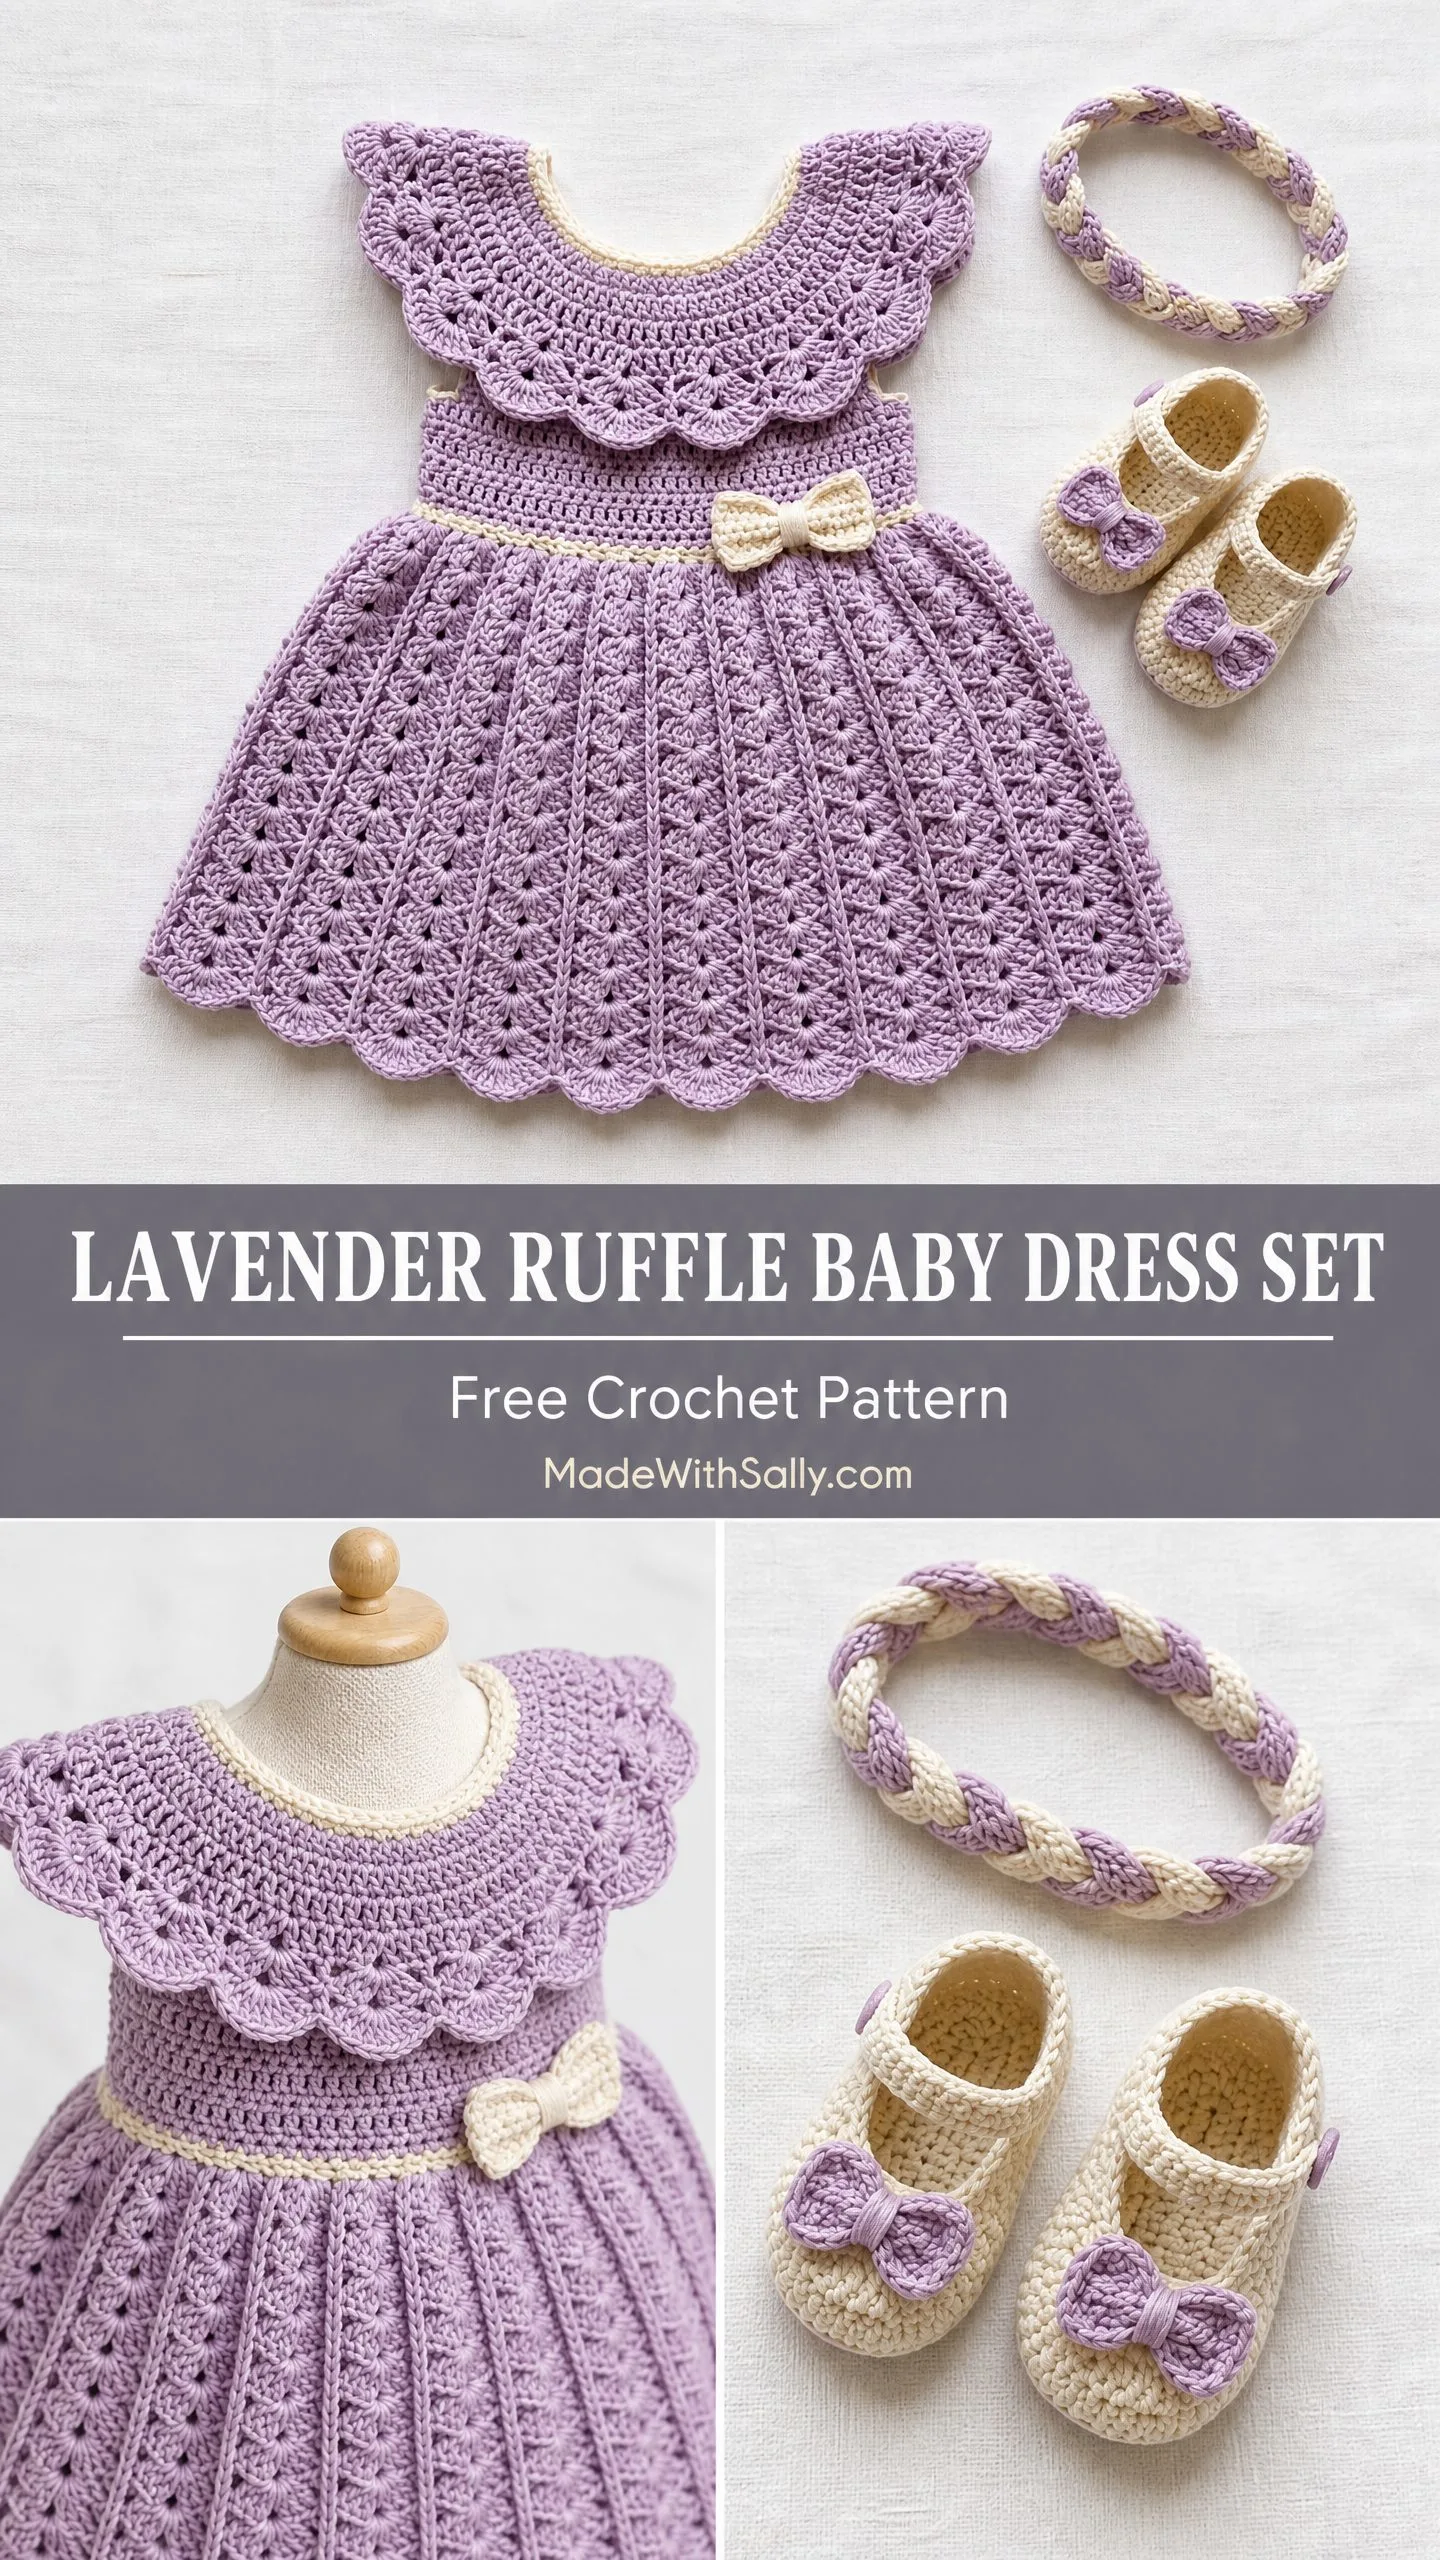
The complete set includes a gorgeous yoke-construction dress with a flowing fan-stitch skirt, a sweet braided headband, and the most adorable cream Mary Jane booties with tiny lavender bow accents. Every piece coordinates beautifully for a baby shower gift that will absolutely steal the show.
Whether you’re making this for your own little one, a grandchild, or a friend’s new arrival, this pattern walks you through every single stitch. Let’s dive in.
What Makes This Baby Dress Set Special
This isn’t your typical baby dress pattern. The construction method starts at the neckline and works down, which means you can try it on as you go (if you have a willing baby model) and adjust the length easily. The yoke shaping creates those beautiful raglan lines you see in high-end children’s clothing.
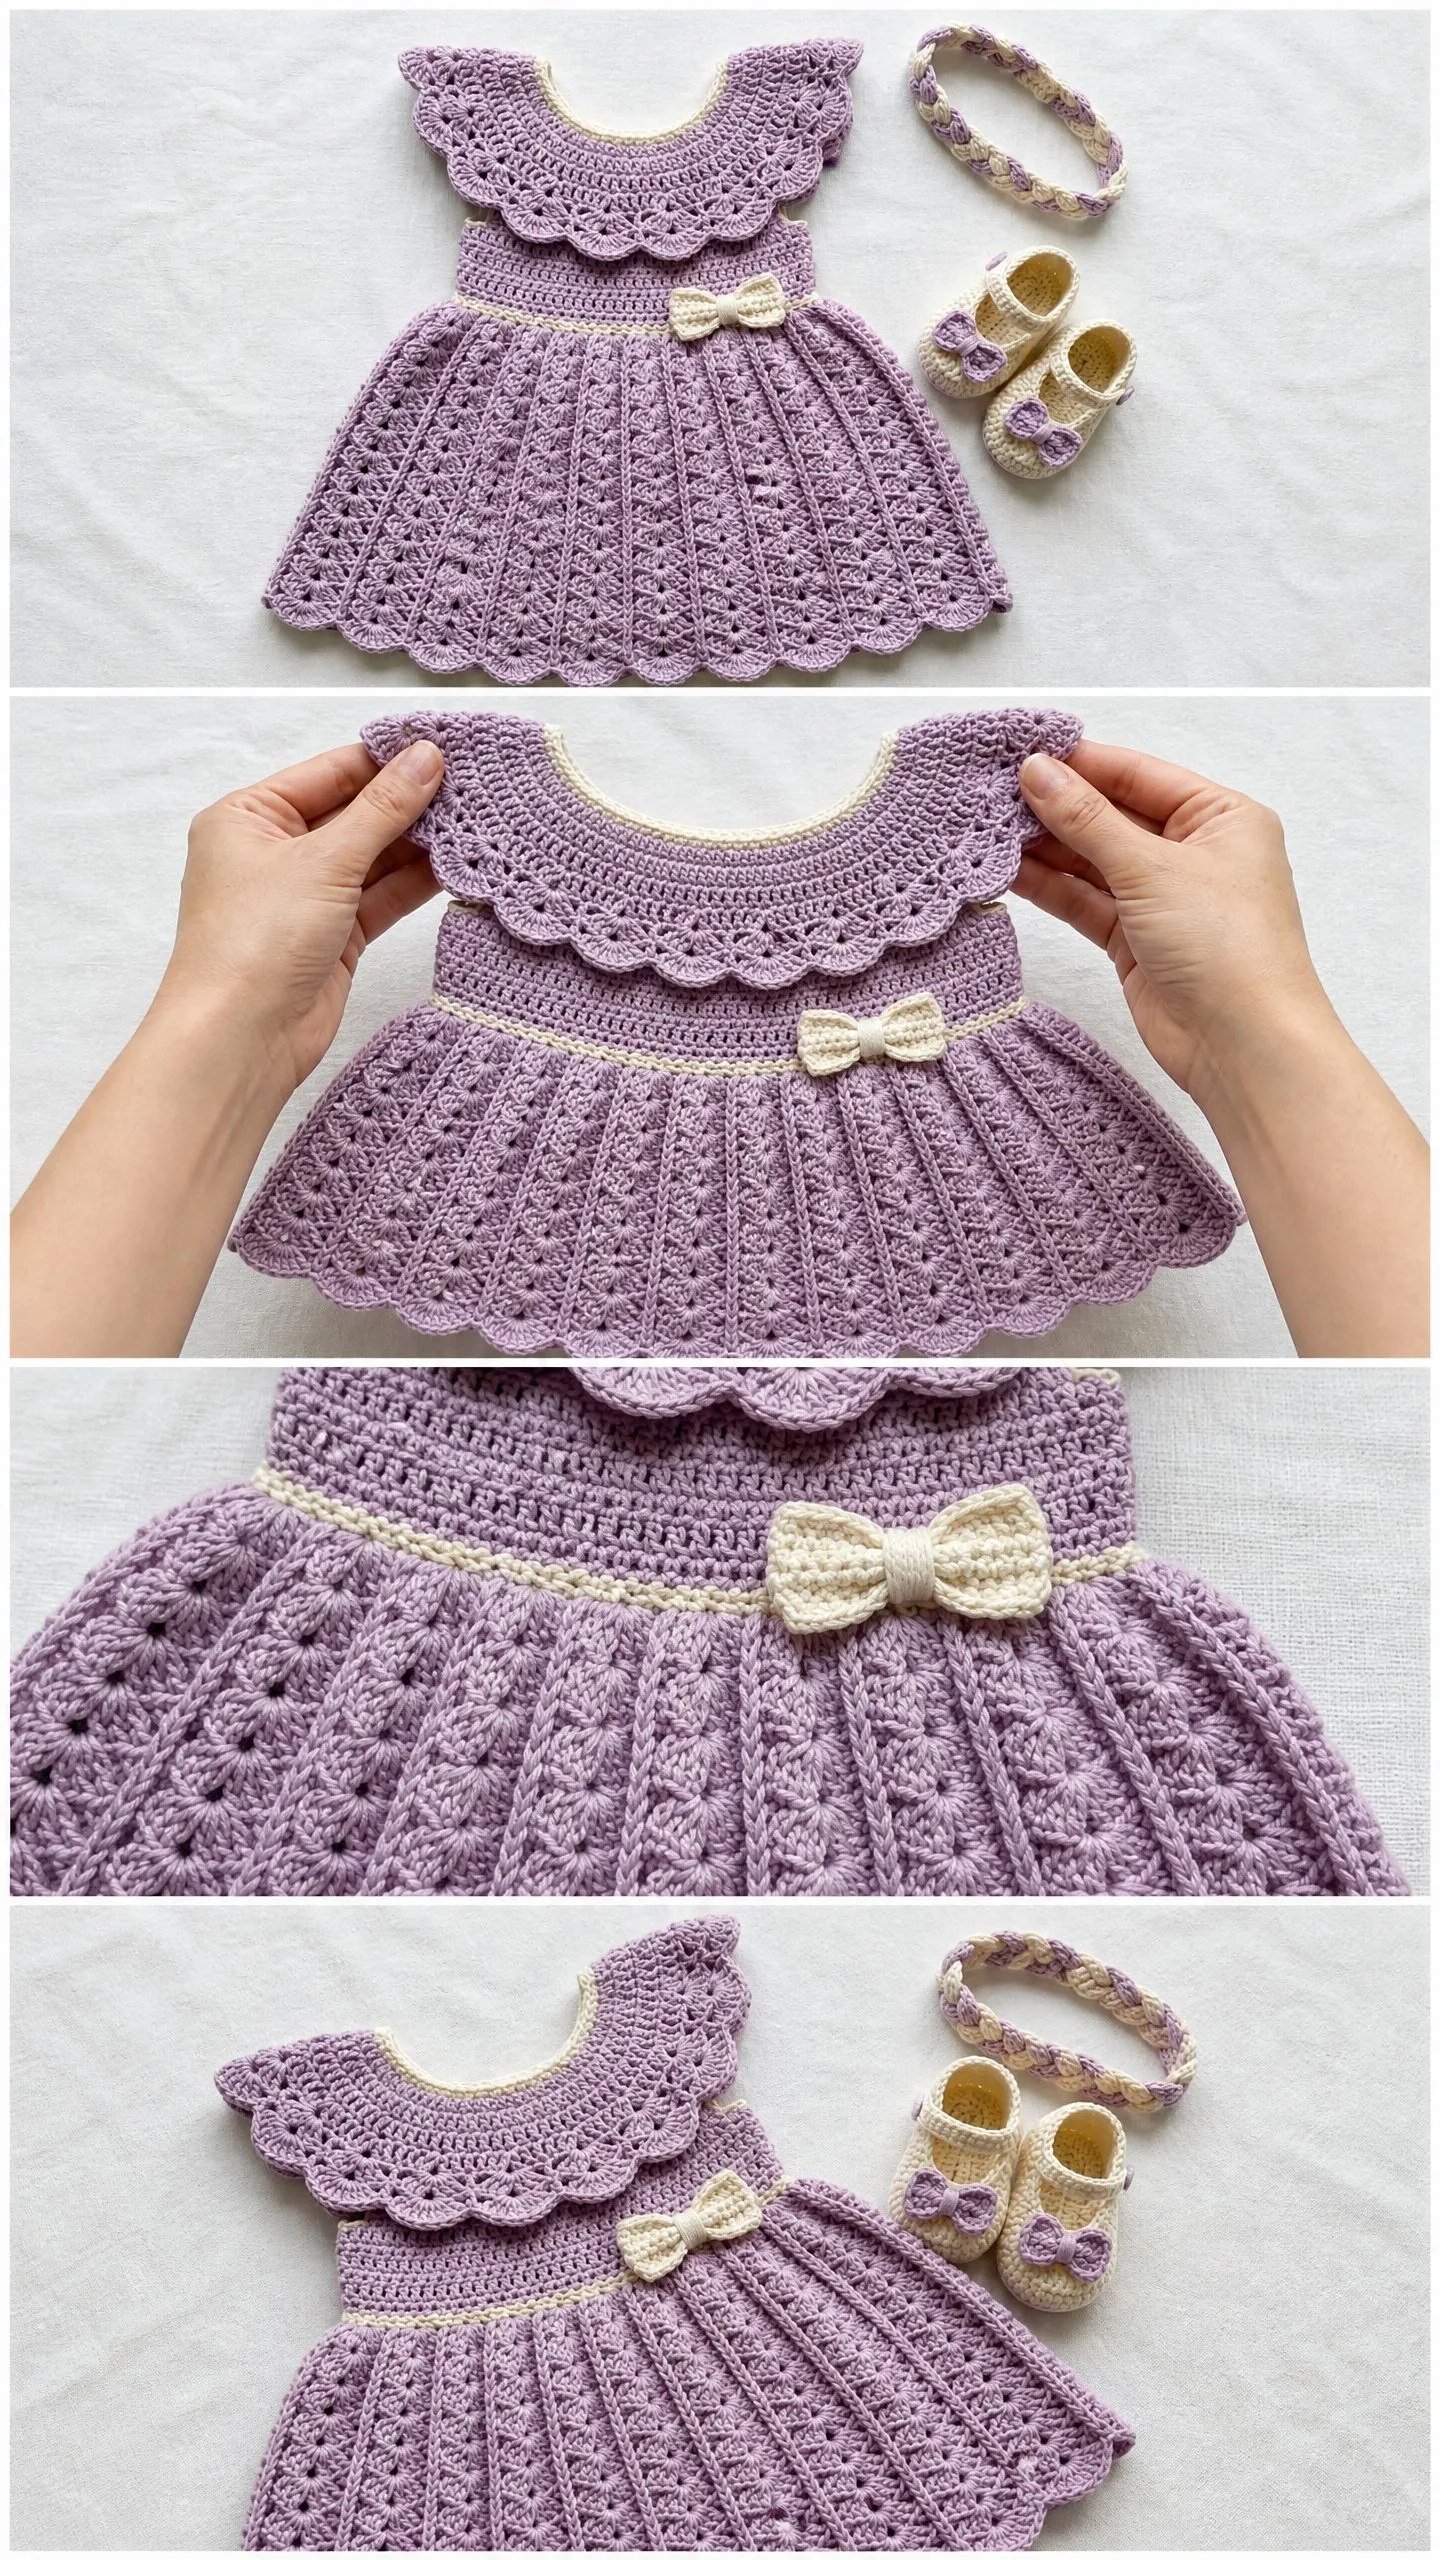
The shell stitch skirt is where this dress really shines. Those vertical panels create an elegant drape that flows when baby moves. The scalloped hem adds a professional finishing touch that looks far more complicated than it actually is.
The coordinating pieces transform this from a simple dress into a complete layette set. The braided headband mixes both colors for visual interest, while the Mary Jane booties feature that same lavender and cream combination with sweet bow details.
Skill Level and Time Commitment
I’d call this an advanced beginner to intermediate project. If you’ve completed at least one garment before, you can absolutely handle this pattern. You’ll use only basic stitches: chain (ch), single crochet (sc), double crochet (dc), and slip stitch (sl st). The complexity comes from managing stitch counts across the yoke shaping, working with two colors, and assembling multiple pieces.
Here’s a realistic time breakdown:
Don’t let those numbers scare you. This is a wonderful project to work on over several evenings while watching your favorite shows.
Finished Measurements
The dress fits babies 3 to 6 months with these dimensions:
Size customization tips are included at the end of the pattern for those who need adjustments.
Materials You’ll Need
Yarn:
Hooks:
Notions:
Yarn Recommendations
Paintbox Yarns Simply DK (100% acrylic, 137 yards per 50g skein) is my top pick. It’s widely available, machine washable, and comes in a beautiful Violet Purple and Champagne White. Perfect for baby items that need frequent laundering.
Drops Safran (100% cotton, 164 yards per 50g skein) gives you gorgeous stitch definition and breathability for warm weather. Natural fiber is gentle on baby skin.
Lion Brand Pound of Love (100% acrylic, 1020 yards per 16 oz skein) offers incredible value. One skein of each color makes multiple sets, making it ideal for crafting several baby shower gifts.
Substitution note: Any smooth DK weight yarn (weight category 3) works beautifully. Avoid fuzzy or textured yarns because they’ll obscure the pretty stitch pattern.
Gauge
Getting gauge right matters for garment fit. With your larger hook (E-4 / 3.5 mm) and Color A:
16 stitches x 10 rows = 4 inches (10 cm) in double crochet
For the fan stitch skirt panel:
Work a swatch at least 5 inches square, wash and block it, then measure. If your swatch is too small, go up a hook size. Too large? Go down a hook size.
Abbreviations and Stitch Definitions
Let me walk you through every abbreviation you’ll encounter:
Special Stitches Explained
Shell Stitch
Work 5 double crochet stitches all into the same stitch or space. This creates a fan-shaped cluster that forms the main decorative element of the skirt. Think of it as tucking 5 tall stitches into one tiny spot.
Fan Stitch
Work 7 double crochet stitches all into the same stitch or space. Used at the bottom hem and collar for a fuller ruffle effect.
Scallop Edge
1. Slip stitch into first stitch
2. Chain 1, single crochet into same stitch
3. Work 5 double crochet into the next stitch
4. Single crochet into the stitch after that
5. Repeat steps 3 and 4 across for a neat scalloped border
Bow Embellishment
Using CC, chain 25. Row 1: Single crochet into second chain from hook and across. (24 sc). Fasten off leaving a long tail. Pinch the piece at its center and wrap the tail tightly around the center several times, pulling firm. Knot to secure and use the tail to sew the bow to the dress waistband.
Important Pattern Notes Before You Begin
1. The dress works in joined rounds from the top down. The yoke is worked flat first (back and forth in rows) to create the back button opening, then joins to work the body in the round from the underarm down.
2. The collar ruffle is worked separately and sewn onto the yoke after the dress body is complete. This gives you clean attachment and helps the ruffle lie flat.
3. Turning chains for double crochet rows count as one double crochet throughout this pattern unless stated otherwise. Place a stitch marker in the top of each turning chain to help with count accuracy.
4. When changing colors, complete the last yarn-over pull-through of the final stitch using the NEW color. Cut and weave in ends as you go.
5. The back opening uses a simple overlap method with chain button loops on the left panel and buttons sewn to the right panel.
6. All rounds join with a slip stitch to the top of the beginning chain or first stitch unless otherwise noted.
The Dress Pattern
Section 1: Yoke
The yoke is worked flat in rows beginning at the neckline.
Foundation: With Color A and larger hook, chain 61.
Row 1 (RS): Double crochet into 4th chain from hook (this counts as first dc plus turning chain of 3), double crochet in each chain across. Turn. (59 dc)
Row 2 (WS): Chain 3 (counts as dc), dc into next 5 sts, 2 dc in next st, dc in next 4 sts, 2 dc in next st, dc in next 15 sts, 2 dc in next st, dc in next 4 sts, 2 dc in next st, dc in next 15 sts, 2 dc in next st, dc in next 4 sts, 2 dc in next st, dc in last 6 sts. Turn. (65 dc)
Row 3: Chain 3 (counts as dc), dc into next 6 sts, 2 dc in next st, dc in next 4 sts, 2 dc in next st, dc in next 17 sts, 2 dc in next st, dc in next 4 sts, 2 dc in next st, dc in next 17 sts, 2 dc in next st, dc in next 4 sts, 2 dc in next st, dc in last 7 sts. Turn. (71 dc)
Row 4: Chain 3 (counts as dc), dc into next 7 sts, 2 dc in next st, dc in next 4 sts, 2 dc in next st, dc in next 19 sts, 2 dc in next st, dc in next 4 sts, 2 dc in next st, dc in next 19 sts, 2 dc in next st, dc in next 4 sts, 2 dc in next st, dc in last 8 sts. Turn. (77 dc)
Row 5: Chain 3 (counts as dc), dc into next 8 sts, 2 dc in next st, dc in next 4 sts, 2 dc in next st, dc in next 21 sts, 2 dc in next st, dc in next 4 sts, 2 dc in next st, dc in next 21 sts, 2 dc in next st, dc in next 4 sts, 2 dc in next st, dc in last 9 sts. Turn. (83 dc)
Row 6: Chain 3 (counts as dc), dc into next 9 sts, 2 dc in next st, dc in next 4 sts, 2 dc in next st, dc in next 23 sts, 2 dc in next st, dc in next 4 sts, 2 dc in next st, dc in next 23 sts, 2 dc in next st, dc in next 4 sts, 2 dc in next st, dc in last 10 sts. Turn. (89 dc)
Row 7: Chain 3 (counts as dc), dc into next 10 sts, 2 dc in next st, dc in next 4 sts, 2 dc in next st, dc in next 25 sts, 2 dc in next st, dc in next 4 sts, 2 dc in next st, dc in next 25 sts, 2 dc in next st, dc in next 4 sts, 2 dc in next st, dc in last 11 sts. Turn. (95 dc)
Row 8: Chain 3 (counts as dc), dc into next 11 sts, 2 dc in next st, dc in next 4 sts, 2 dc in next st, dc in next 27 sts, 2 dc in next st, dc in next 4 sts, 2 dc in next st, dc in next 27 sts, 2 dc in next st, dc in next 4 sts, 2 dc in next st, dc in last 12 sts. Turn. (101 dc)
CHECKPOINT: After Row 8, the yoke should measure approximately 3.5 inches (9 cm) from foundation chain to current edge. The piece should be 101 stitches wide.
Section 2: Dividing for Armholes
Row 9 (Divide Row): Chain 3 (counts as dc). Work 12 dc across left back. Chain 4 (underarm chain bridge). Skip 15 sts (sleeve stitches). Work 27 dc across front. Chain 4 (underarm chain bridge). Skip 15 sts (sleeve stitches). Work 13 dc across right back. Turn.
Working stitch count: Left back 13 + underarm chain 4 + front 27 + underarm chain 4 + right back 13 = 61 stitches
Row 10 (WS): Chain 3 (counts as dc), dc across left back (12 dc), dc across 4 chain bridge (4 dc), dc across front (27 dc), dc across second chain bridge (4 dc), dc across right back (13 dc). Turn. (61 dc)
Row 11: Chain 3 (counts as dc), dc across all stitches. Turn. (61 dc)
Button Band Setup
With RS facing, join CC at top right corner of right back opening. Work 1 sc into each row end down the right back edge (approximately 9 sc), chain 1, turn. Work 1 sc into each sc back up. Fasten off.
On left back edge, join CC at bottom left corner. Work 1 sc into each row end up the left back edge (approximately 9 sc). On the final row of left band, work button loops as follows: sc in first 2 sts, (chain 3, skip 1 st, sc in next 2 sts) three times. Fasten off. Sew three buttons onto right back band opposite the loops.
Section 3: Joining to Work in the Round (Body)
Overlap the button bands (left over right when viewed from front) and pin in place. Beginning at the center back overlap point, join Color A with a slip stitch.
Round 1 (Body): Ch 3 (counts as dc), dc in each st around, working 2 dc into the center underarm chain stitch at each underarm (2 increases total, one at each underarm). Sl st to top of ch-3. (63 dc)
Round 2: Ch 3 (counts as dc), dc in each st around. Sl st to top of ch-3. (63 dc)
Round 3: Ch 3 (counts as dc), dc in each st around, increasing 1 st evenly at each side (work 2 dc in one st at each underarm region). Sl st to top of ch-3. (65 dc)
Waistband
Switch to CC.
Round 4: Ch 1 (does not count as st), sc in each st around. Sl st to first sc. (65 sc)
Round 5: Ch 1, sc in BLO of each st around. Sl st to first sc. (65 sc)
Switch back to Color A.
Round 6: Ch 3 (counts as dc), dc in each st around. Sl st to top of ch-3. (65 dc)
CHECKPOINT: After Round 6, the dress body should measure approximately 5 inches (12.5 cm) from the foundation chain to the current working edge with 65 working stitches.
Make the bow using the special stitch instructions and set aside. You’ll sew it to the front waistband after completing the skirt.
Section 4: Skirt
The skirt uses a shell/fan stitch repeat creating vertical panels. You need a stitch count divisible by 12.
Skirt Setup Round: Ch 3 (counts as dc), dc in next 8 sts, 2 dc in next st, (dc in next 9 sts, 2 dc in next st) 6 times, dc in remaining 1 st. Sl st to top of ch-3. (72 dc)
Verification: 65 + 7 increases = 72. 72 divided by 12 = 6 complete fan repeats.
Skirt Round 1 (written in full): Ch 3 (counts as first dc), dc in next st, sk 2 sts, work shell (5 dc) into next st, sk 2 sts, dc in next 3 sts, sk 2 sts, work shell (5 dc) into next st, sk 2 sts, dc in next 3 sts, sk 2 sts, work shell (5 dc) into next st, sk 2 sts, dc in next 3 sts, sk 2 sts, work shell (5 dc) into next st, sk 2 sts, dc in next 3 sts, sk 2 sts, work shell (5 dc) into next st, sk 2 sts, dc in next 3 sts, sk 2 sts, work shell (5 dc) into next st, sk 2 sts, dc in next st. Sl st to top of ch-3.
Skirt Round 2: Ch 3 (counts as dc), dc in next st, ch 2, sc into center dc of first shell from previous round, ch 2, dc in next 3 dc of column, ch 2, sc into center dc of next shell, ch 2, dc in next 3 dc, ch 2, sc into center dc of next shell, ch 2, dc in next 3 dc, ch 2, sc into center dc of next shell, ch 2, dc in next 3 dc, ch 2, sc into center dc of next shell, ch 2, dc in next 3 dc, ch 2, sc into center dc of next shell, ch 2, dc in last st. Sl st to top of ch-3.
Skirt Round 3: Ch 3 (counts as dc), dc in next st, work shell (5 dc) into ch-2 sp before sc, sk sc, work shell (5 dc) into ch-2 sp after sc, dc in next 3 dc of column. Repeat from shell pair to end of round. Sl st to top of ch-3.
After Round 3, reset stitch count to 84 stitches (72 + 12 added across 6 repeat expansions).
Skirt Rounds 4 through 7: Ch 3 (counts as dc), dc in next 4 sts, shell into center of shell space, dc in next 5 sts, shell into center of next shell space, dc in next 3 sts. Repeat this 6-repeat sequence around. Sl st to top of ch-3. (84 dc equivalent)
Skirt Round 8 (Expansion): Work as previous rounds but add 2 dc increases evenly in the column sections. Total sts: 96
Skirt Rounds 9 through 12: Ch 3 (counts as dc), shell into center of shell space, dc across column stitches. Repeat 6 times around. Sl st to top of ch-3. (96 sts)
Skirt Round 13 (Expansion): Increase 12 sts evenly (2 per repeat section). Total sts: 108
Skirt Rounds 14 through 16: Work even in shell and column pattern as established. (108 sts)
CHECKPOINT: After Round 16, the dress should measure approximately 12 inches (30.5 cm) from shoulder to current edge with 108 working stitches.
Section 5: Hem Scallop
Hem Round 1: Ch 1, sc in each st around. Sl st to first sc. (108 sc)
Hem Round 2 (Scallop): Ch 1, sc in first st, 5 dc in next st (scallop made), sc in next st, 5 dc in next st, continue alternating sc and 5-dc scallop around. Work 54 scallops total. Sl st to first sc.
Fasten off and weave in ends.
CHECKPOINT: The completed dress should measure approximately 14 inches (35.5 cm) from shoulder to hem and approximately 17 inches (43 cm) in chest circumference.
Section 6: Collar Ruffle
The collar is worked separately and attached along the neckline.
With RS facing, join Color A at the right back neckline corner.
Collar Round 1: Ch 1, sc evenly around the neckline edge. Work 1 sc per dc stitch along the foundation row edge and 1 sc per chain along the original foundation chain. (60 sc)
Collar Round 2: Ch 3 (counts as dc), dc in same st, 2 dc in each st around. Sl st to top of ch-3. (120 dc)
Collar Round 3: Ch 3 (counts as dc), dc in next st, sk 1 st, shell (5 dc) in next st, sk 1 st, dc in next 2 sts, sk 1 st, shell in next st, sk 1 st. Repeat from dc in next 2 sts around. Sl st to top of ch-3.
Collar Round 4: Ch 1, sc in each dc and into center of each shell around. For each shell, sc in each of the 5 dc. Sc across all column dc. Sl st to first sc. (120 sc)
Collar Round 5 (Scallop Edge): Ch 1, sc in first st, 5 dc in next st, sc in next st. Repeat around. Work 40 scallops. Sl st to first sc.
Fasten off leaving a long tail of at least 18 inches (45 cm). Using the tail and yarn needle, whipstitch the collar base evenly onto the yoke. The collar should ruffle outward and downward over the upper yoke.
Cream Border: Join CC at right back neckline. Work 1 round of sc through both the collar base and yoke neckline simultaneously. Sl st to first sc. Fasten off. (60 sc)
Headband Instructions
You have two options here.
Option 1: Braided Headband
Cut 12 strands of Color A, each 36 inches (91 cm) long. Divide into three groups of 4 strands. Braid tightly. Knot both ends.
Cut 6 strands of Color B, each 36 inches (91 cm) long. Divide into three groups of 2 strands. Braid or twist each group.
Hold one Color A braid and one Color B strand together. Braid these with a third Color A cord. The finished braid should measure approximately 16 inches (40.5 cm).
Bring ends together and sew firmly, hiding the join inside a 1.5 inch (4 cm) overlap so the headband forms a circle. Trim ends neatly.
Option 2: Crocheted Headband
With Color A and smaller hook, chain 6.
Row 1: Sc into 2nd chain from hook and across. Turn. (5 sc)
Row 2: Ch 1, sc in each st across. Turn. (5 sc)
Repeat Row 2 until piece measures 14 to 16 inches (35.5 to 40.5 cm).
Fasten off. Sew short ends together.
Work a surface slip stitch chain in alternating Color A and Color B along the top edge for the braided look.
Mary Jane Booties (Make 2)
Sole
With Color B and smaller hook, chain 12.
Round 1: Work 3 sc in 2nd chain from hook, sc in next 9 chains, work 5 sc in last chain. Working along opposite side of foundation chain: sc in next 9 chains, work 2 sc into the same stitch you began with. Sl st to first sc. (28 sc)
Round 2: Ch 1, 2 sc in first st, 2 sc in next st, 2 sc in next st, sc in next 9 sts, 2 sc in next 5 sts, sc in next 9 sts, 2 sc in last 2 sts. Sl st to first sc. (38 sc)
Round 3: Ch 1, sc in BLO of each st around. Sl st to first sc. (38 sc)
This BLO round creates the ridge defining the sole edge.
Upper
Round 4: Ch 1, sc in each st around. Sl st to first sc. (38 sc)
Round 5: Ch 1, sc in each st around. Sl st to first sc. (38 sc)
Continue working the upper, shaping for the toe box and adding the strap with small bow accent in Color A. The strap crosses over the instep and buttons or sews to the opposite side.
Finishing Touches
Block all pieces gently using your blocking mat and rust-proof pins. For acrylic yarn, steam blocking works well. For cotton, wet blocking gives the best results. Allow pieces to dry completely before assembling.
Sew the bow to the center front waistband using matching yarn. Attach the three buttons to the back opening. Weave in any remaining ends.
Care Instructions
For machine-washable yarn, launder on gentle cycle in cold water. Lay flat to dry. Store folded, not hung, to prevent stretching. If using cotton yarn, expect some initial shrinkage with the first wash, so blocking to measurements after washing is recommended.
Thank you so much for choosing this pattern for your next project. I truly hope you enjoy making this sweet lavender dress set as much as I enjoyed designing it. There’s something incredibly satisfying about creating handmade heirloom pieces for the littlest ones in our lives.
If you make this dress set, I would absolutely love to see your finished work. Tag me on Instagram or share your photos in my Facebook group. Seeing your creativity and color choices always makes my day.
Save this pattern to your Pinterest boards so you can find it easily when you’re ready to start. And please drop a comment below if you make it. I read every single one and love hearing about your crochet adventures.
