
I found this design tucked away in one of my old project notebooks from three summers ago. I had sketched it out for my niece’s first birthday, calling it "Ocean Breeze" because the mint and coral colors reminded me of beach glass and seashells. Life got busy, and the pattern sat there waiting. When I finally pulled it out and worked up the full set, I fell completely in love with how the granny squares frame the solid sections like little windows of color.
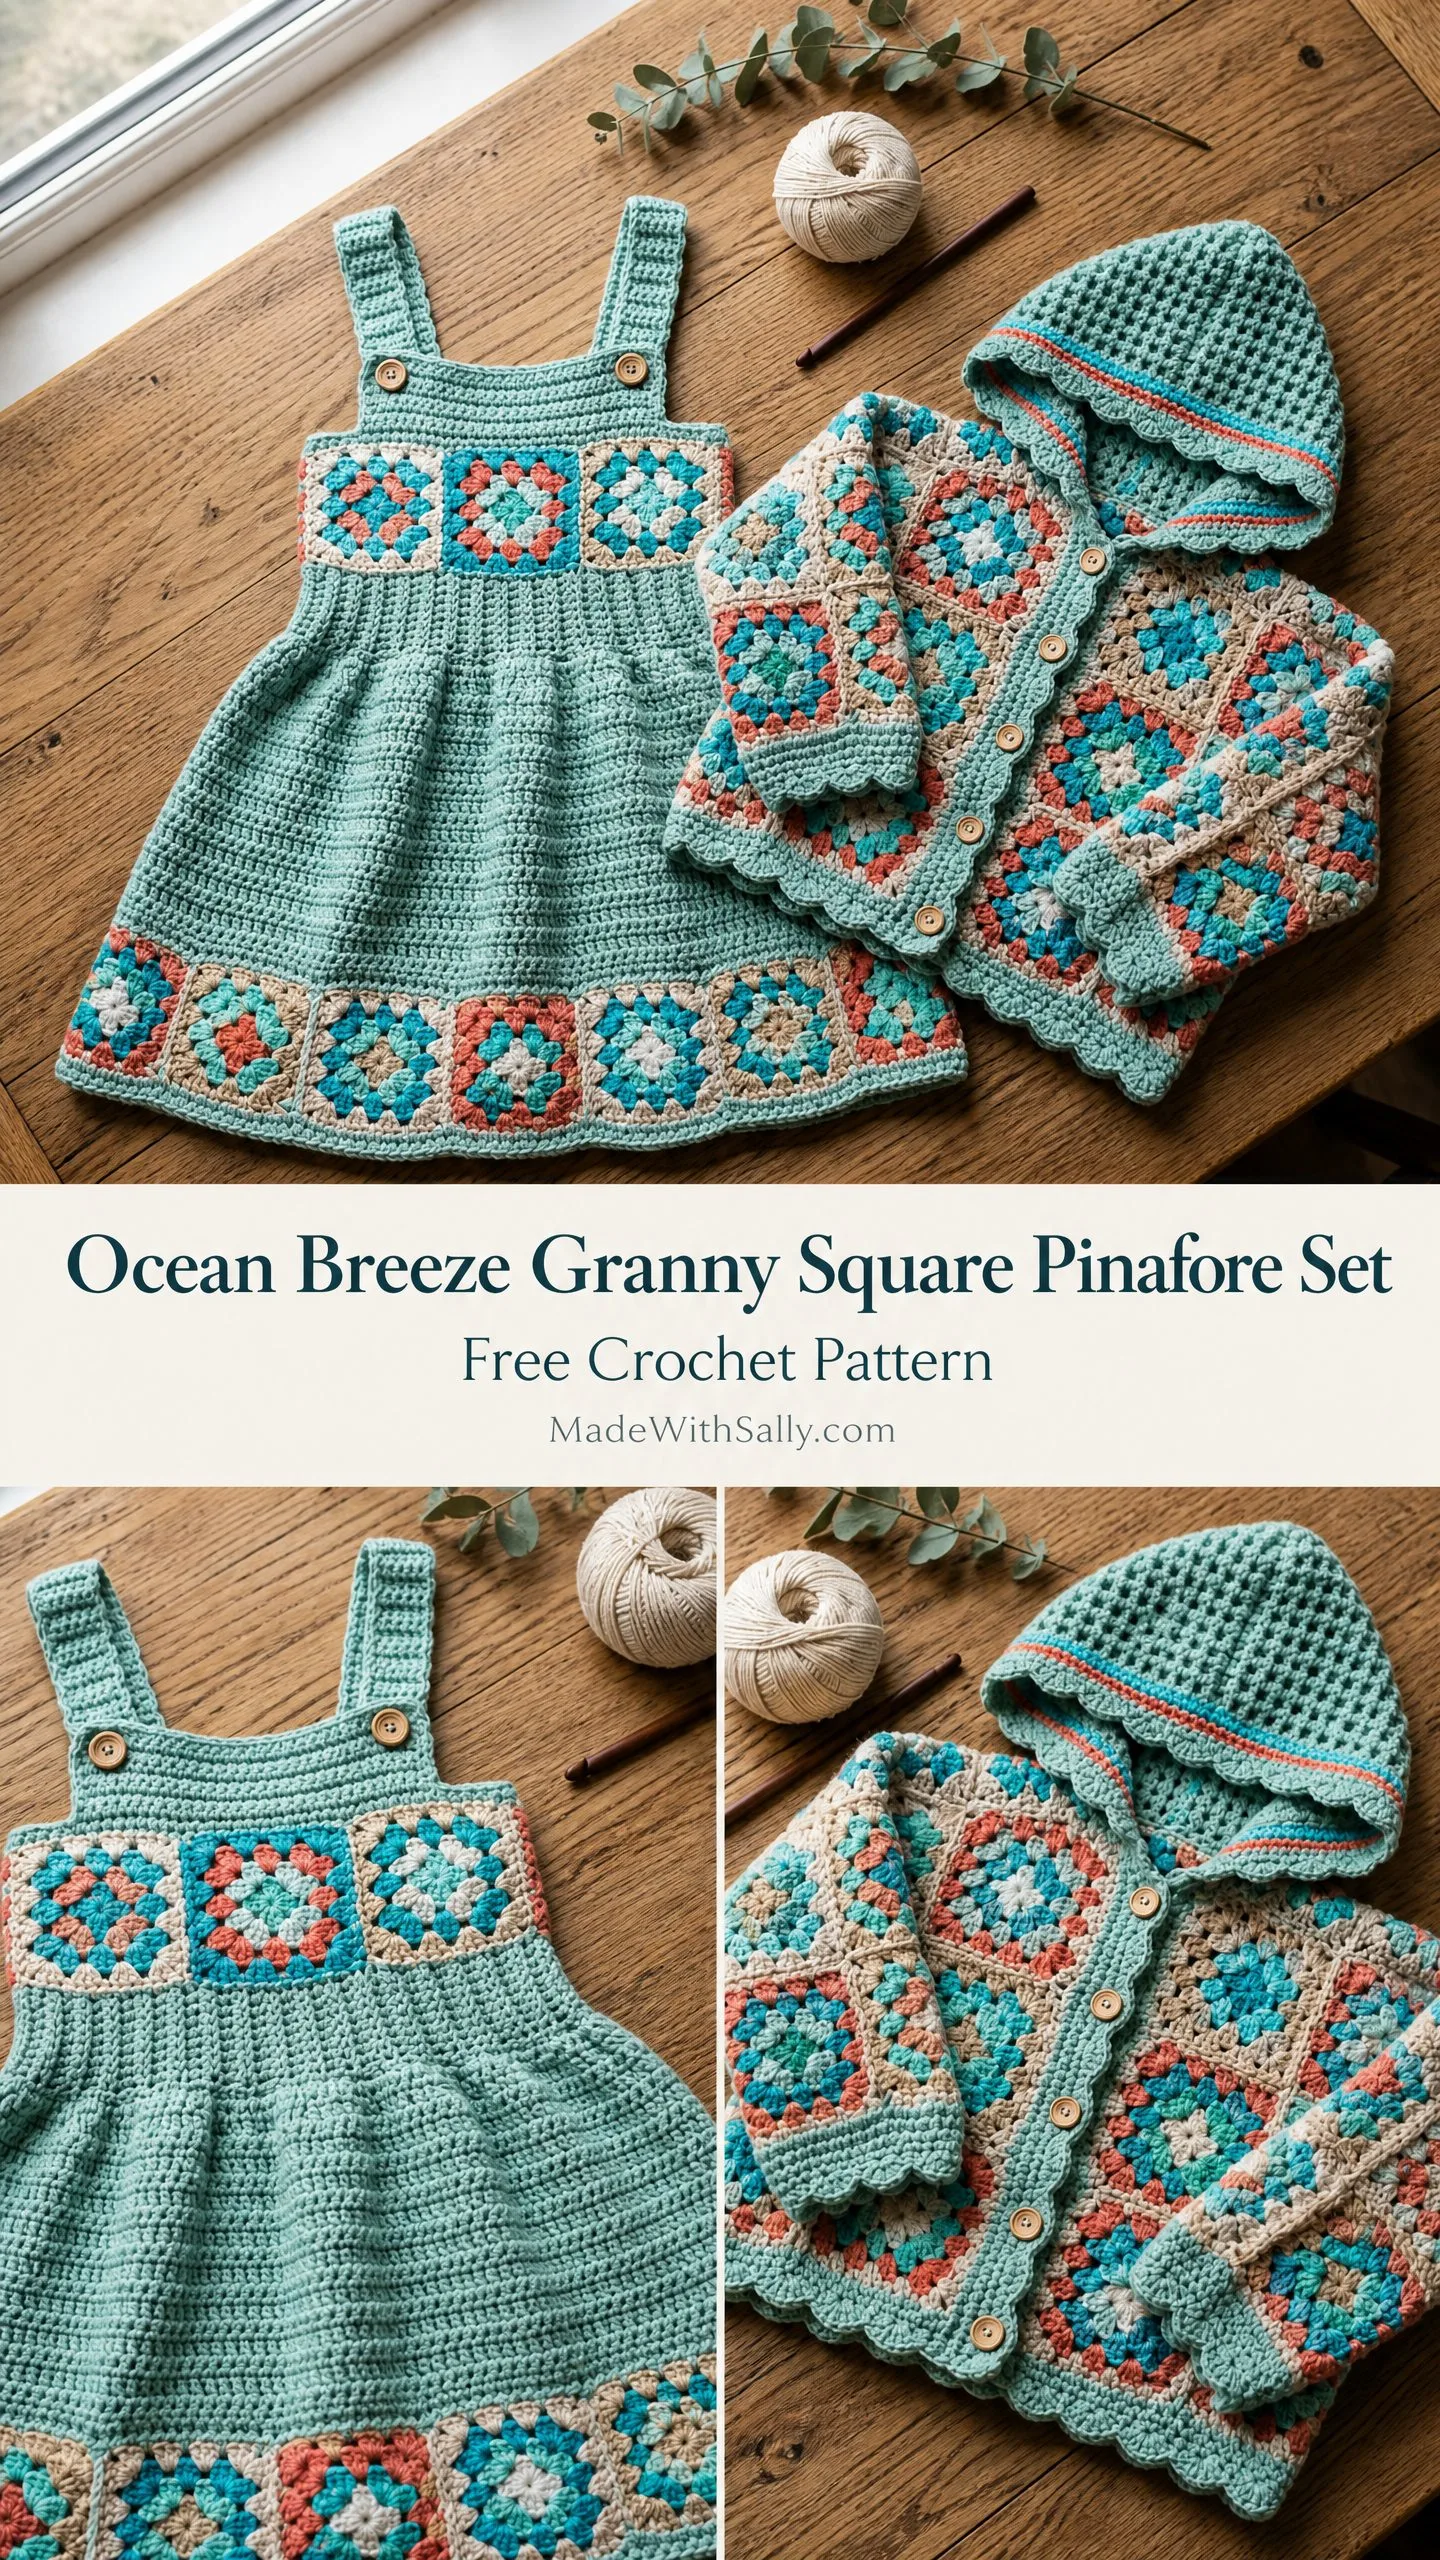
This three-piece toddler set includes a pinafore dress with an A-line skirt, a matching cardigan built almost entirely from granny squares, and a coordinating bucket hat with a waffle-textured crown. The pieces share the same four-color palette, so they mix and match beautifully. Whether you make the whole set or just one piece, you will end up with something truly special.
The construction is more approachable than it looks. You make all your granny squares first, seam them into strips, then build the solid sections directly from those strips. If you can work a basic granny square and follow garment shaping instructions, you can absolutely make this set.
Why You Will Love This Crochet Pattern
This Ocean Breeze Granny Square Pinafore Set hits that sweet spot between heirloom-quality craftsmanship and practical everyday wear. The cotton yarn makes it machine washable. The wooden buttons add a vintage touch. And those granny square accents? They transform simple garment shapes into something magazine-worthy.
The pinafore features wide shoulder straps that button at the back, a solid single crochet (sc) bodice band, granny square yoke and hem borders, and a flared skirt worked in half double crochet (hdc). The cardigan uses a join-as-you-go method for the squares, with scalloped edging along the hem and cuffs. The bucket hat rounds out the set with a textured crown and a granny square band at the brim.
Every piece in this crochet tutorial uses the same gauge and the same square pattern, so once you get your rhythm going, you will fly through the making.
Skill Level
Intermediate. You should be comfortable working granny squares, joining them neatly, reading multi-section garment instructions, working increases for shaping, and picking up stitches along edges. If you have made a few granny square blankets and maybe one simple garment, you are ready for this project.
Time Estimate
Here is roughly how long each piece takes:
Break it into small sessions. Make a few squares each evening while watching your favorite show. Before you know it, you will have enough to start assembling.
Finished Measurements
This pattern is written for size 12 to 18 months.
Dress:
Cardigan:
Hat:
Size customization tips appear at the end of the pattern.
Materials Needed for This Crochet Pattern
Yarn
Sport weight, also called 2-ply (CYCA weight 2). Use 100 percent cotton or a cotton blend for best drape and washability.
Yardage:
Yarn Suggestions:
1. Paintbox Yarns Cotton Sport (100% cotton, 155 yd/142 m per 50 g ball). Excellent stitch definition, full color range. My top recommendation.
2. Lion Brand 24/7 Cotton in Sport weight (100% mercerized cotton, approx 186 yd/170 m per 100 g skein). Smooth with a slightly heavier hand.
3. Drops Safran (50% cotton/50% polyamide, 175 yd/160 m per 50 g ball). The nylon content adds durability for frequent laundering.
When substituting yarn, match yards rather than weight. Avoid acrylic or wool for babies unless you have tested for allergies.
Hook
US C-2 / 2.75 mm (adjust to meet gauge). Some crocheters prefer a D-3 / 3.25 mm with a softer cotton. Swatch both and use whichever gives you the correct gauge.
Notions
Gauge (Check This First)
Granny square gauge: One completed 3-round granny square equals 2.75 inches (7 cm) measured flat after light blocking.
Fabric gauge in half double crochet rows: 20 hdc x 16 rows equals 4 inches (10 cm).
Fabric gauge in single crochet rows: 22 sc x 24 rows equals 4 inches (10 cm).
Gauge matters for garment fit. Make at least one granny square and one 4-inch swatch in hdc before you begin. Adjust your hook size up or down until you match.
Abbreviations and Stitch Definitions
Here are all the abbreviations used in this step by step crochet pattern, with plain-English definitions:
Special Stitches
Granny Square Cluster (GS-CL)
Yarn over, insert hook into designated chain space, yarn over and pull up loop, yarn over and draw through 2 loops on hook. That is one double crochet made. Repeat that process two more times in the same chain space. Then yarn over and draw through all 4 loops on hook. This creates a 3-dc cluster worked into one chain space.
Granny Corner
In one corner ch-2 space, work: GS-CL, ch 2, GS-CL. This produces the classic granny square corner.
Granny Side
In one side ch-1 space, work: GS-CL, ch 1, GS-CL. On Round 1, there are no side spaces. Corners are the only spaces.
Scallop Edging
In designated stitch: sc in first st, skip 2 sts, 5 dc in next st, skip 2 sts, sc in next st. Repeat across or around. Each scallop unit uses 6 stitches.
Waffle Stitch (worked in rounds, hat only)
Round A: Front post double crochet (fpdc) around post of next st, sc in next st; rep from around.
Round B: Back post double crochet (bpdc) around post of next st, sc in next st; rep from around.
Alternate Rounds A and B.
Fpdc: Yarn over, insert hook from front to back to front around post of next stitch, yarn over and pull up loop, (yarn over, draw through 2 loops) twice.
Bpdc: Yarn over, insert hook from back to front to back around post of next stitch, yarn over and pull up loop, (yarn over, draw through 2 loops) twice.
Important Pattern Notes
1. Granny squares are made individually then seamed or joined. All squares are worked in rounds, not rows.
2. Dress construction order: (a) make all granny squares, (b) seam yoke strip, (c) pick up and work solid bodice upward from yoke strip, (d) pick up and work solid skirt downward from yoke strip, (e) add hem granny square strip to skirt bottom, (f) work straps.
3. Cardigan construction order: (a) make all squares, (b) JAYG into back panel, front panels, and sleeves, (c) seam shoulders and sides, (d) add button band and scallop edging.
4. Hat construction: Worked top-down in the round. (a) waffle crown, (b) granny square band, (c) brim edging.
5. All granny squares in this set are 3-round squares worked to the same gauge. A finished square measures 2.75 inches (7 cm).
6. Color sequence for each square: Round 1 in CC1 or CC2 (alternated per placement), Round 2 in CC3, Round 3 in MC.
7. Fasten off and weave in ends after each color change unless instructed otherwise.
8. Right side is always facing when working granny square rounds.
9. Turning chains: In hdc rows, ch 2 at turn (does not count as a stitch). In sc rows, ch 1 at turn (does not count as a stitch).
10. All stitch counts appear at the end of each row or round in parentheses.
Granny Square Pattern (Make 42 Total)
Distribution: 18 for dress (6 yoke, 12 hem). 20 for cardigan. 4 for hat band.
All 42 squares are made identically. Only joining placement differs.
Foundation: With CC1 (or CC2 for alternating squares), make a magic ring or ch 4 and join with sl st to form ring.
Round 1 (RS): Ch 3 (counts as first dc), 2 dc into ring, ch 2, [3 dc into ring, ch 2] 3 times, join with sl st to top of beg ch-3. Fasten off CC1/CC2. (4 clusters of 3 dc, 4 ch-2 corner spaces)
Round 2 (RS): Join CC3 in any corner ch-2 sp. Ch 3 (counts as first dc of first GS-CL), complete first GS-CL in same corner sp, ch 2, GS-CL in same corner sp (first corner made), ch 1, [GS-CL in next corner ch-2 sp, ch 2, GS-CL in same corner sp, ch 1] 3 times, join with sl st to top of beg ch. Fasten off CC3. (8 clusters total, 4 corner ch-2 sps, 4 side ch-1 sps)
Round 3 (RS): Join MC in any corner ch-2 sp. Ch 3 (counts as first dc of GS-CL), complete GS-CL in same sp, ch 2, GS-CL in same sp (corner made), ch 1, GS-CL in next ch-1 side sp, ch 1, [GS-CL in next corner ch-2 sp, ch 2, GS-CL in same sp, ch 1, GS-CL in next ch-1 side sp, ch 1] 3 times, join with sl st to top of beg ch. Fasten off MC. (12 clusters total, 4 corner ch-2 sps, 8 ch-1 sps on sides)
Checkpoint: One finished granny square should measure 2.75 inches (7 cm) square after a light press with a damp cloth. If larger, go down a hook size. If smaller, go up a hook size.
Pinafore Dress Instructions
Yoke Granny Square Strip
Seam 6 granny squares in a horizontal row using the sl st seaming method. Alternate the center colors: squares 1, 3, 5 have CC1 centers; squares 2, 4, 6 have CC2 centers. After seaming, the strip measures approximately 16.5 inches (42 cm) wide x 2.75 inches (7 cm) tall.
Bodice (Worked Upward from Yoke Strip in Single Crochet)
The bodice is worked on the top edge of the yoke square strip, in MC, in rows, turning.
Foundation row: With RS facing and MC, join yarn at right end of top edge of yoke strip. Work 1 sc into each available stitch and space evenly across the top edge of the 6-square strip to achieve 72 sc evenly spaced. Turn. (72 sc)
Distribute approximately 12 sc per square across the top edge. Adjust slightly at seams to keep count exact.
Row 1 (WS): Ch 1, sc in each st across. Turn. (72 sc)
Row 2 (RS): Ch 1, sc in each st across. Turn. (72 sc)
Row 3 (WS): Ch 1, sc in each st across. Turn. (72 sc)
Row 4 (RS): Ch 1, sc in each st across. Turn. (72 sc)
Row 5 (WS): Ch 1, sc in each st across. Turn. (72 sc)
Row 6 (RS): Ch 1, sc in each st across. Turn. (72 sc)
Armhole and Neck Shaping
After Row 6, divide into three sections: left front bib (18 sc), center neck gap (36 sc skipped), right front bib (18 sc).
Right Front Bib:
Row 7 (WS): Ch 1, sc in first 18 sts, leave remaining sts unworked. Turn. (18 sc)
Rows 8 to 12: Ch 1, sc in each st across. Turn. (18 sc each row)
Fasten off after Row 12.
Left Front Bib:
With WS facing, skip center 36 sts, join MC in next st.
Row 7 (WS): Ch 1, sc in each of next 18 sts. Turn. (18 sc)
Rows 8 to 12: Ch 1, sc in each st across. Turn. (18 sc each row)
Fasten off after Row 12.
Checkpoint: Each bib panel should measure approximately 18 sc wide x 6 rows tall (about 3.25 inches/8.3 cm wide and 1 inch/2.5 cm tall).
Straps (Make 2)
Foundation: With MC, ch 52.
Row 1: Sc in 2nd ch from hook and in each ch across. Turn. (51 sc)
Row 2: Ch 1, sc in each st across. Turn. (51 sc)
Row 3: Ch 1, sc in each st across. Turn. (51 sc)
Fasten off, leaving a 12-inch (30 cm) tail for seaming.
Edging: With RS facing, work 1 row of sl st along both long edges for a clean finish.
Buttonhole: On Row 3, at the last 4 sts: sc 2, ch 2, skip 2 sts. On the following row, work 2 sc into the ch-2 sp to complete the buttonhole. Each strap has 1 buttonhole at the back end.
Sew the front end of each strap firmly to the top corners of the right and left front bibs. Thread the back end to the back of the garment and sew buttons to the back bib top corners. Button straps to secure.
Skirt (Worked Downward from Yoke Strip in Half Double Crochet)
The skirt is worked from the bottom edge of the yoke square strip, in MC, in rows, turning. It is worked flat and seamed at one side after completion.
Foundation row: With RS facing and MC, join yarn at right end of bottom edge of yoke strip. Work 1 sc into each available stitch and space across to achieve 72 sts. Turn. (72 sc)
This row is sc to create a neat transition before beginning hdc.
Row 1 (WS): Ch 2 (does not count as st), hdc in each st across. Turn. (72 hdc)
Row 2 (RS): Ch 2, hdc in first st, inc in next st, hdc in 7 sts, inc in next st; rep from to last 6 sts, hdc in last 6 sts. Turn. (81 hdc)
Row 3: Ch 2, hdc in each st across. Turn. (81 hdc)
Row 4: Ch 2, hdc in each st across. Turn. (81 hdc)
Row 5 (increase row): Ch 2, hdc in first 4 sts, inc, hdc in 8 sts, inc; rep from 8 times, hdc in remaining sts. Turn. (90 hdc)
Row 6: Ch 2, hdc in each st across. Turn. (90 hdc)
Row 7: Ch 2, hdc in each st across. Turn. (90 hdc)
Row 8 (increase row): Ch 2, hdc in first 4 sts, inc, hdc in 8 sts, inc; rep from 9 times, hdc to end. Turn. (100 hdc)
Row 9: Ch 2, hdc in each st across. Turn. (100 hdc)
Row 10: Ch 2, hdc in each st across. Turn. (100 hdc)
Row 11 (increase row): Ch 2, hdc in first 4 sts, inc, hdc in 9 sts, inc; rep from 9 times, hdc to end. Turn. (110 hdc)
Row 12: Ch 2, hdc in each st across. Turn. (110 hdc)
Row 13: Ch 2, hdc in each st across. Turn. (110 hdc)
Row 14 (increase row): Ch 2, hdc in first 4 sts, inc, hdc in 10 sts, inc; rep from 9 times, hdc to end. Turn. (120 hdc)
Rows 15 to 20: Ch 2, hdc in each st across. Turn. (120 hdc each row)
Do not fasten off. Proceed to hem attachment.
Hem Granny Square Strip
Make 12 granny squares, alternating CC1 and CC2 centers. Seam into a horizontal strip. The strip measures approximately 33 inches (83.8 cm) wide x 2.75 inches (7 cm) tall.
The hem strip is wider than the skirt bottom to create the flounce at the hemline. The excess width creates natural gathers.
Attachment: With RS of skirt facing RS of hem strip, pin hem strip along bottom edge of Row 20, distributing fullness evenly. With MC, sl st or sc the hem strip to the skirt bottom edge, working through both layers and easing in the fullness. Fasten off.
Side Seam
Fold skirt flat, wrong sides together. Seam the side edge of the skirt only (not the yoke strip or bodice bibs) using sl st seam with MC, from hem strip top edge through hem strip. The bodice and yoke area remain open at sides for a relaxed fit.
Button Attachment
Sew 2 wooden buttons to the back top edge of the bodice bib area, positioned to align with the buttonholes on each strap. Sew 2 additional buttons to the front top corners of the front bib for decorative purposes.
Pinafore dress complete. Total dress length from strap top to hem: approximately 16 inches (40.5 cm).
Cardigan Instructions
Granny Squares for Cardigan
Make 20 granny squares total, following the same pattern, alternating CC1 and CC2 centers.
Cardigan Layout
Joining the Cardigan Panels
Seam back panel squares (4 x 2 arrangement) using sl st seam with MC on WS.
Seam each front panel (2 x 2 arrangement).
Seam one front panel to each side of back panel at shoulder/side, leaving armhole opening of approximately 2.75 inches (7 cm) at the top of each side.
Sleeve Construction
Each sleeve starts with a 2-square strip seamed side by side. These 2 squares are seamed into a ring to form the sleeve cap.
Sleeve pickup row: With RS facing and MC, join yarn at seam of sleeve ring. Work 56 sc evenly around the lower circumference of the 2-square sleeve ring. Join. Do not turn. (56 sc)
Sleeve body (worked in rounds in hdc):
Round 1: Ch 2, hdc in each st around, join. (56 hdc)
Rounds 2 to 3: Ch 2, hdc in each st around, join. (56 hdc)
Round 4 (decrease): Ch 2, hdc2tog, hdc in next 26 sts, hdc2tog, hdc to end, join. (54 hdc)
Rounds 5 to 6: Ch 2, hdc in each st around, join. (54 hdc)
Round 7 (decrease): Ch 2, hdc2tog, hdc in next 25 sts, hdc2tog, hdc to end, join. (52 hdc)
Rounds 8 to 9: Ch 2, hdc in each st around, join. (52 hdc)
Round 10 (decrease): Ch 2, hdc2tog, hdc in next 24 sts, hdc2tog, hdc to end, join. (50 hdc)
Rounds 11 to 12: Ch 2, hdc in each st around, join. (50 hdc)
Fasten off.
Sew the sleeve cap ring into the armhole opening, matching seams and easing as needed.
Button Band and Front Edging
With RS facing and MC, join yarn at bottom right corner of right front panel.
Work sc evenly up the right front edge, across the neckline top, and down the left front edge. Approximately 120 sc total.
Button band row 1: Sc in each st around the three front edges. Turn at bottom left. (120 sc)
Button band row 2 (buttonholes): Ch 1, sc in first 4 sts, [ch 2, sk 2 sts, sc in next 8 sts] once, sc to end. Turn. (2 buttonhole openings)
Button band row 3: Ch 1, sc in each st and 2 sc in each ch-2 sp across. (120 sc)
Fasten off.
Cardigan Scallop Edging
Work scallop edging along the bottom hem and each cuff.
Bottom hem: With RS facing, join MC at bottom right corner. Work 1 sc in each available st across the bottom hem (approximately 88 sc). Then work scallop edging: sc in first st, skip 2 sts, 5 dc in next st, skip 2 sts; rep from across. Fasten off.
Repeat scallop edging around each sleeve cuff.
Bucket Hat Instructions
Waffle Crown (Worked Top-Down in Rounds)
Use 4 granny squares for the hat band. The crown uses waffle stitch in MC.
Foundation: With MC, make a magic ring.
Round 1: Ch 2, work 8 hdc into ring, join. (8 hdc)
Round 2: Ch 2, 2 hdc in each st around, join. (16 hdc)
Round 3: Ch 2, hdc in next st, 2 hdc in next st; rep from around, join. (24 hdc)
Round 4: Ch 2, hdc in next 2 sts, 2 hdc in next st; rep from around, join. (32 hdc)
Continue increasing evenly every round until circumference measures 17 inches (43 cm). Then work even in waffle stitch pattern (alternating Rounds A and B as described in Special Stitches) until crown measures approximately 4 inches (10 cm) from center.
Granny Square Band
Seam 4 granny squares into a strip. Join into a ring. Attach to the base of the crown by sl st seaming with MC.
Brim Edging
Work 2 rounds of sc evenly around the bottom edge of the granny square band. Add one round of scallop edging. Fasten off.
Hat complete. Total height approximately 6 inches (15 cm).
Finishing All Pieces
Block all pieces lightly with a damp cloth or on blocking mats. This evens out the granny squares and helps the garments hang beautifully. Weave in all remaining ends. Sew on buttons securely.
Size Customization Tips
To adjust sizing, add or remove granny squares from strips. Each square adds approximately 2.75 inches (7 cm) to width or length. For the skirt, add or subtract rows between increase rows to lengthen or shorten. For sleeves, add or subtract rounds before the cuff.
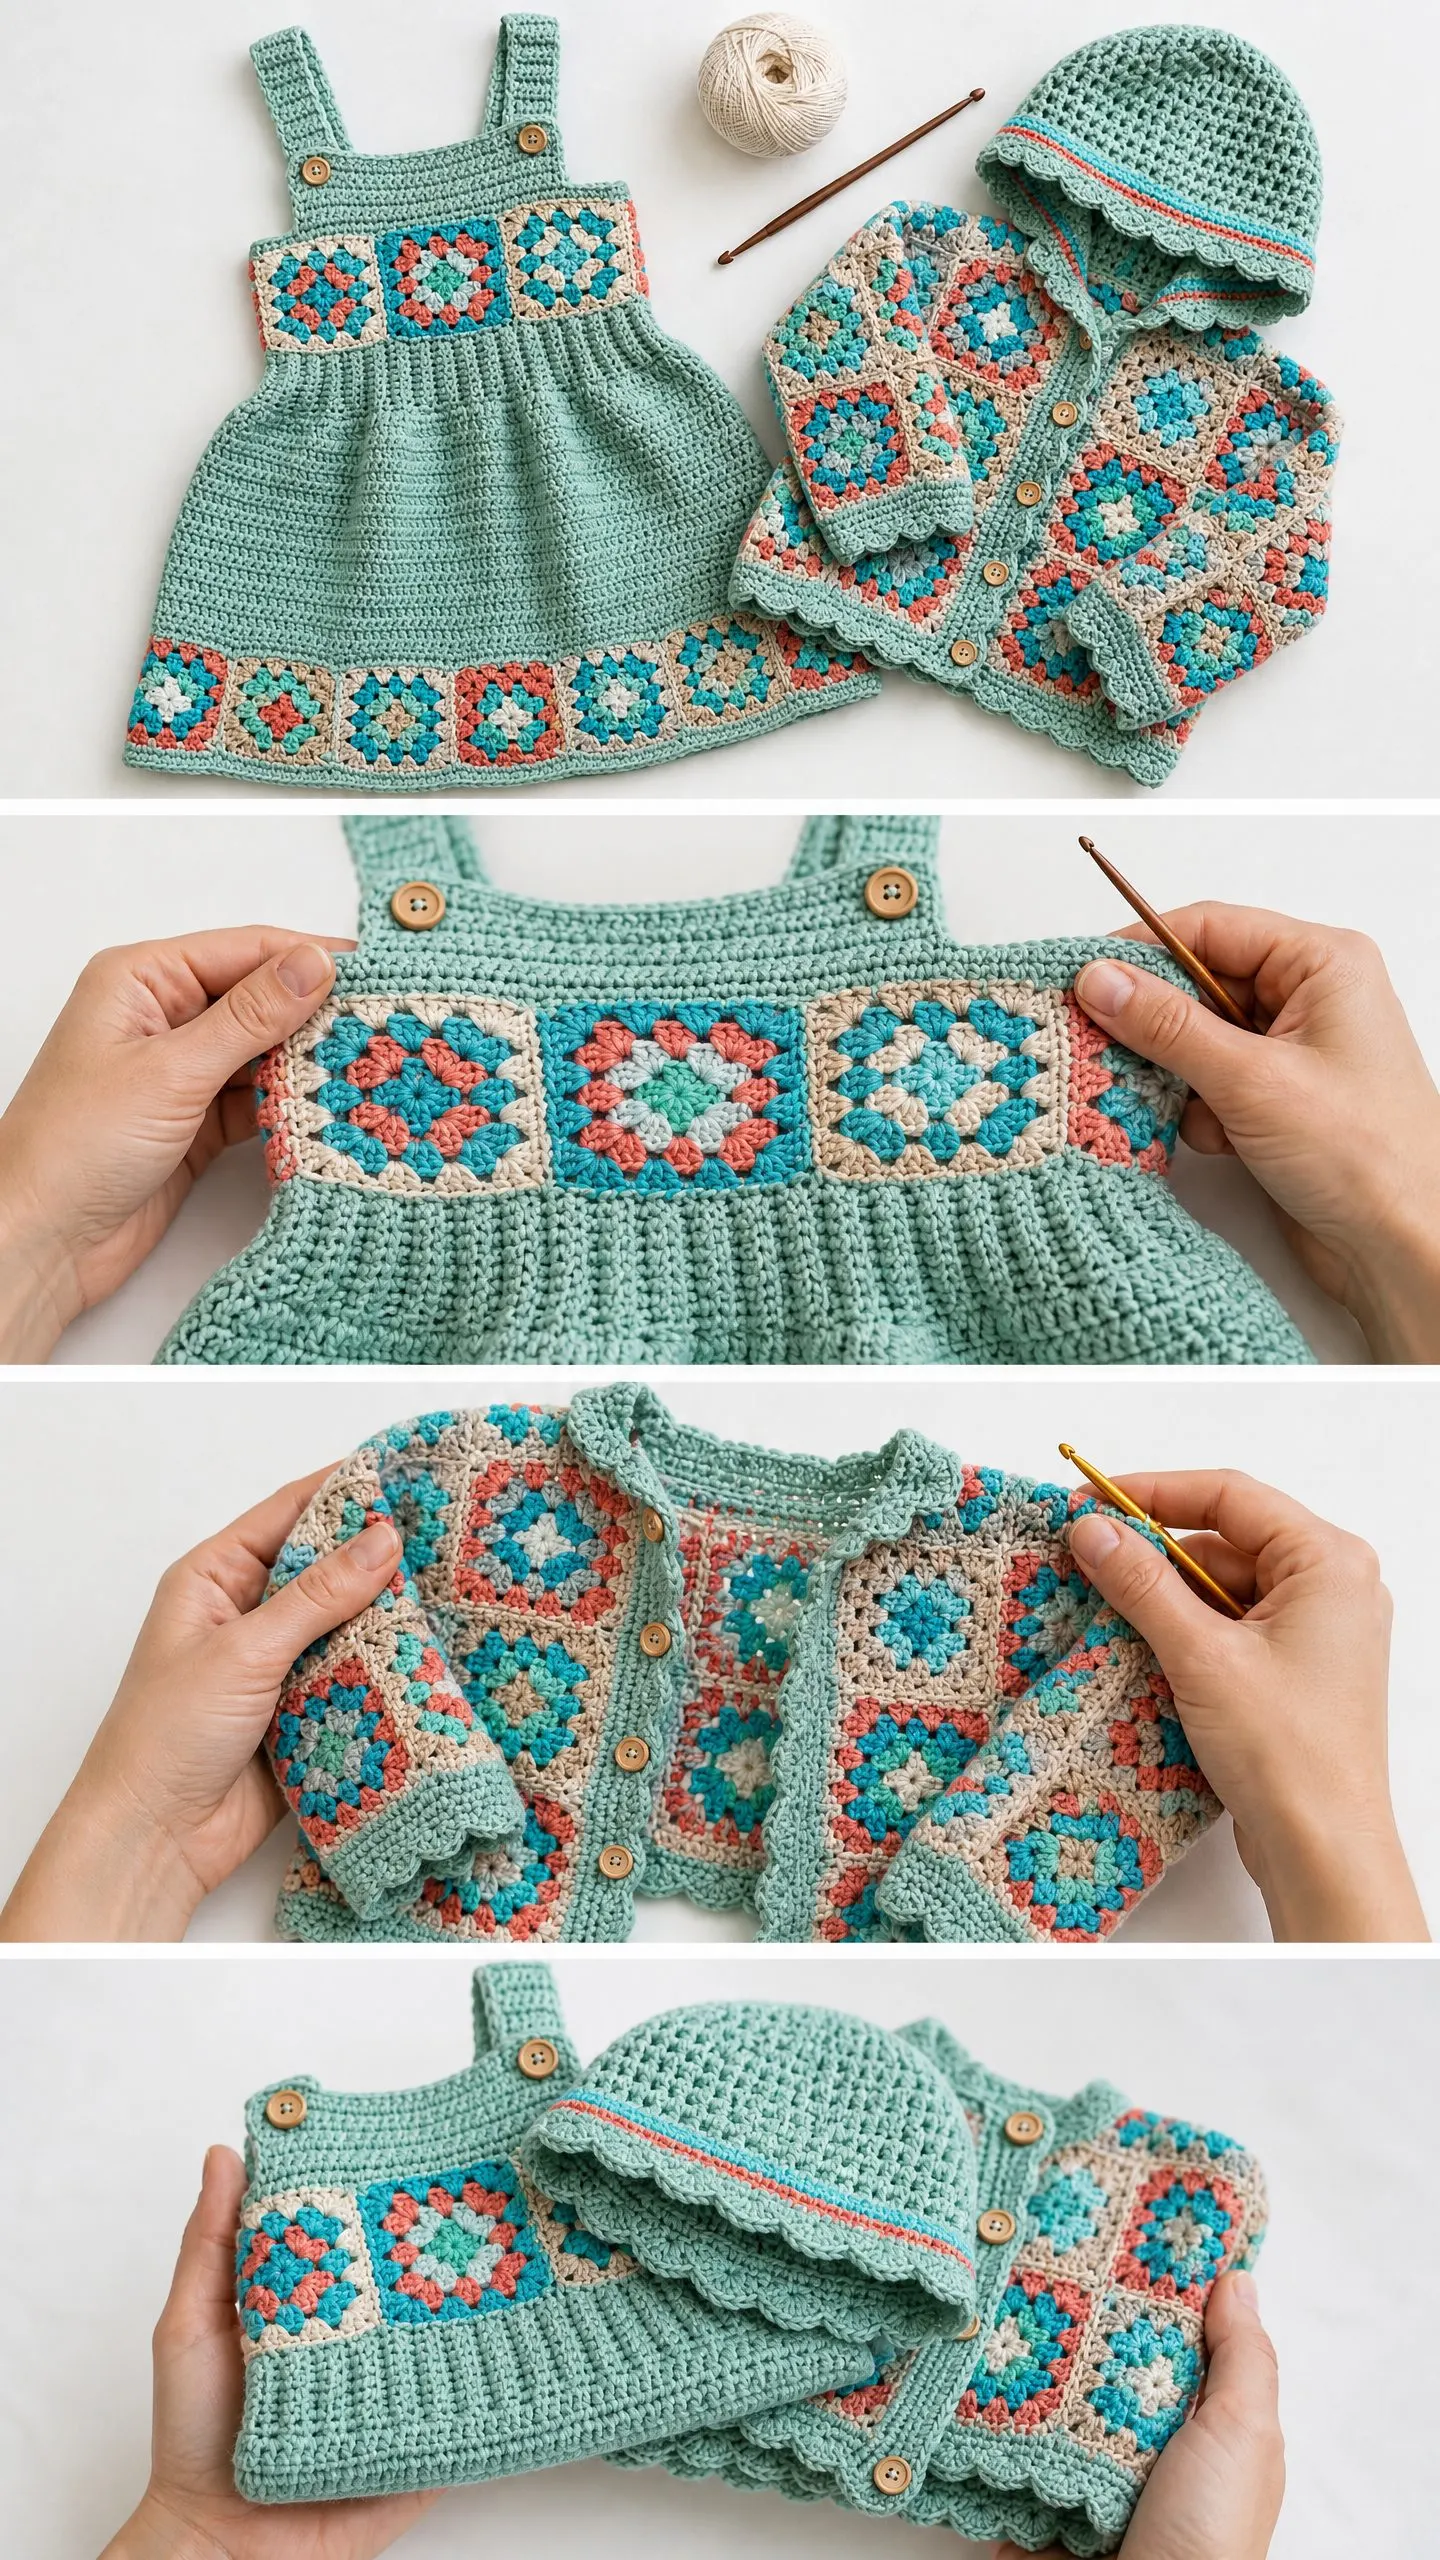
You Did It!
Thank you so much for choosing this pattern for your little one’s wardrobe. I hope you enjoyed bringing the Ocean Breeze set to life as much as I enjoyed designing it. If you make this set, I would absolutely love to see your finished pieces. Tag me on Instagram or share in my Facebook group. Seeing your color choices and styling ideas is honestly the best part of sharing patterns.
If this pattern is calling to you, go ahead and save it to your Pinterest boards so you can find it when you are ready to start. And please drop a comment below if you make it. I read every single one, and your feedback helps other crocheters decide if this project is right for them. Happy hooking!
