
This pattern is ADORABLE and I am so excited to share it with you! If you have been looking for a baby dress that looks intricate but comes together in a logical, manageable way, you just found it. The mint and white color combination is absolutely stunning, and those little dragonfly appliques add the sweetest finishing touch.
Get the Ad-Free PDF Pattern
You can find the free pattern below, or you can purchase the ad-free printable PDF from my shop.
Get the Printable PDF →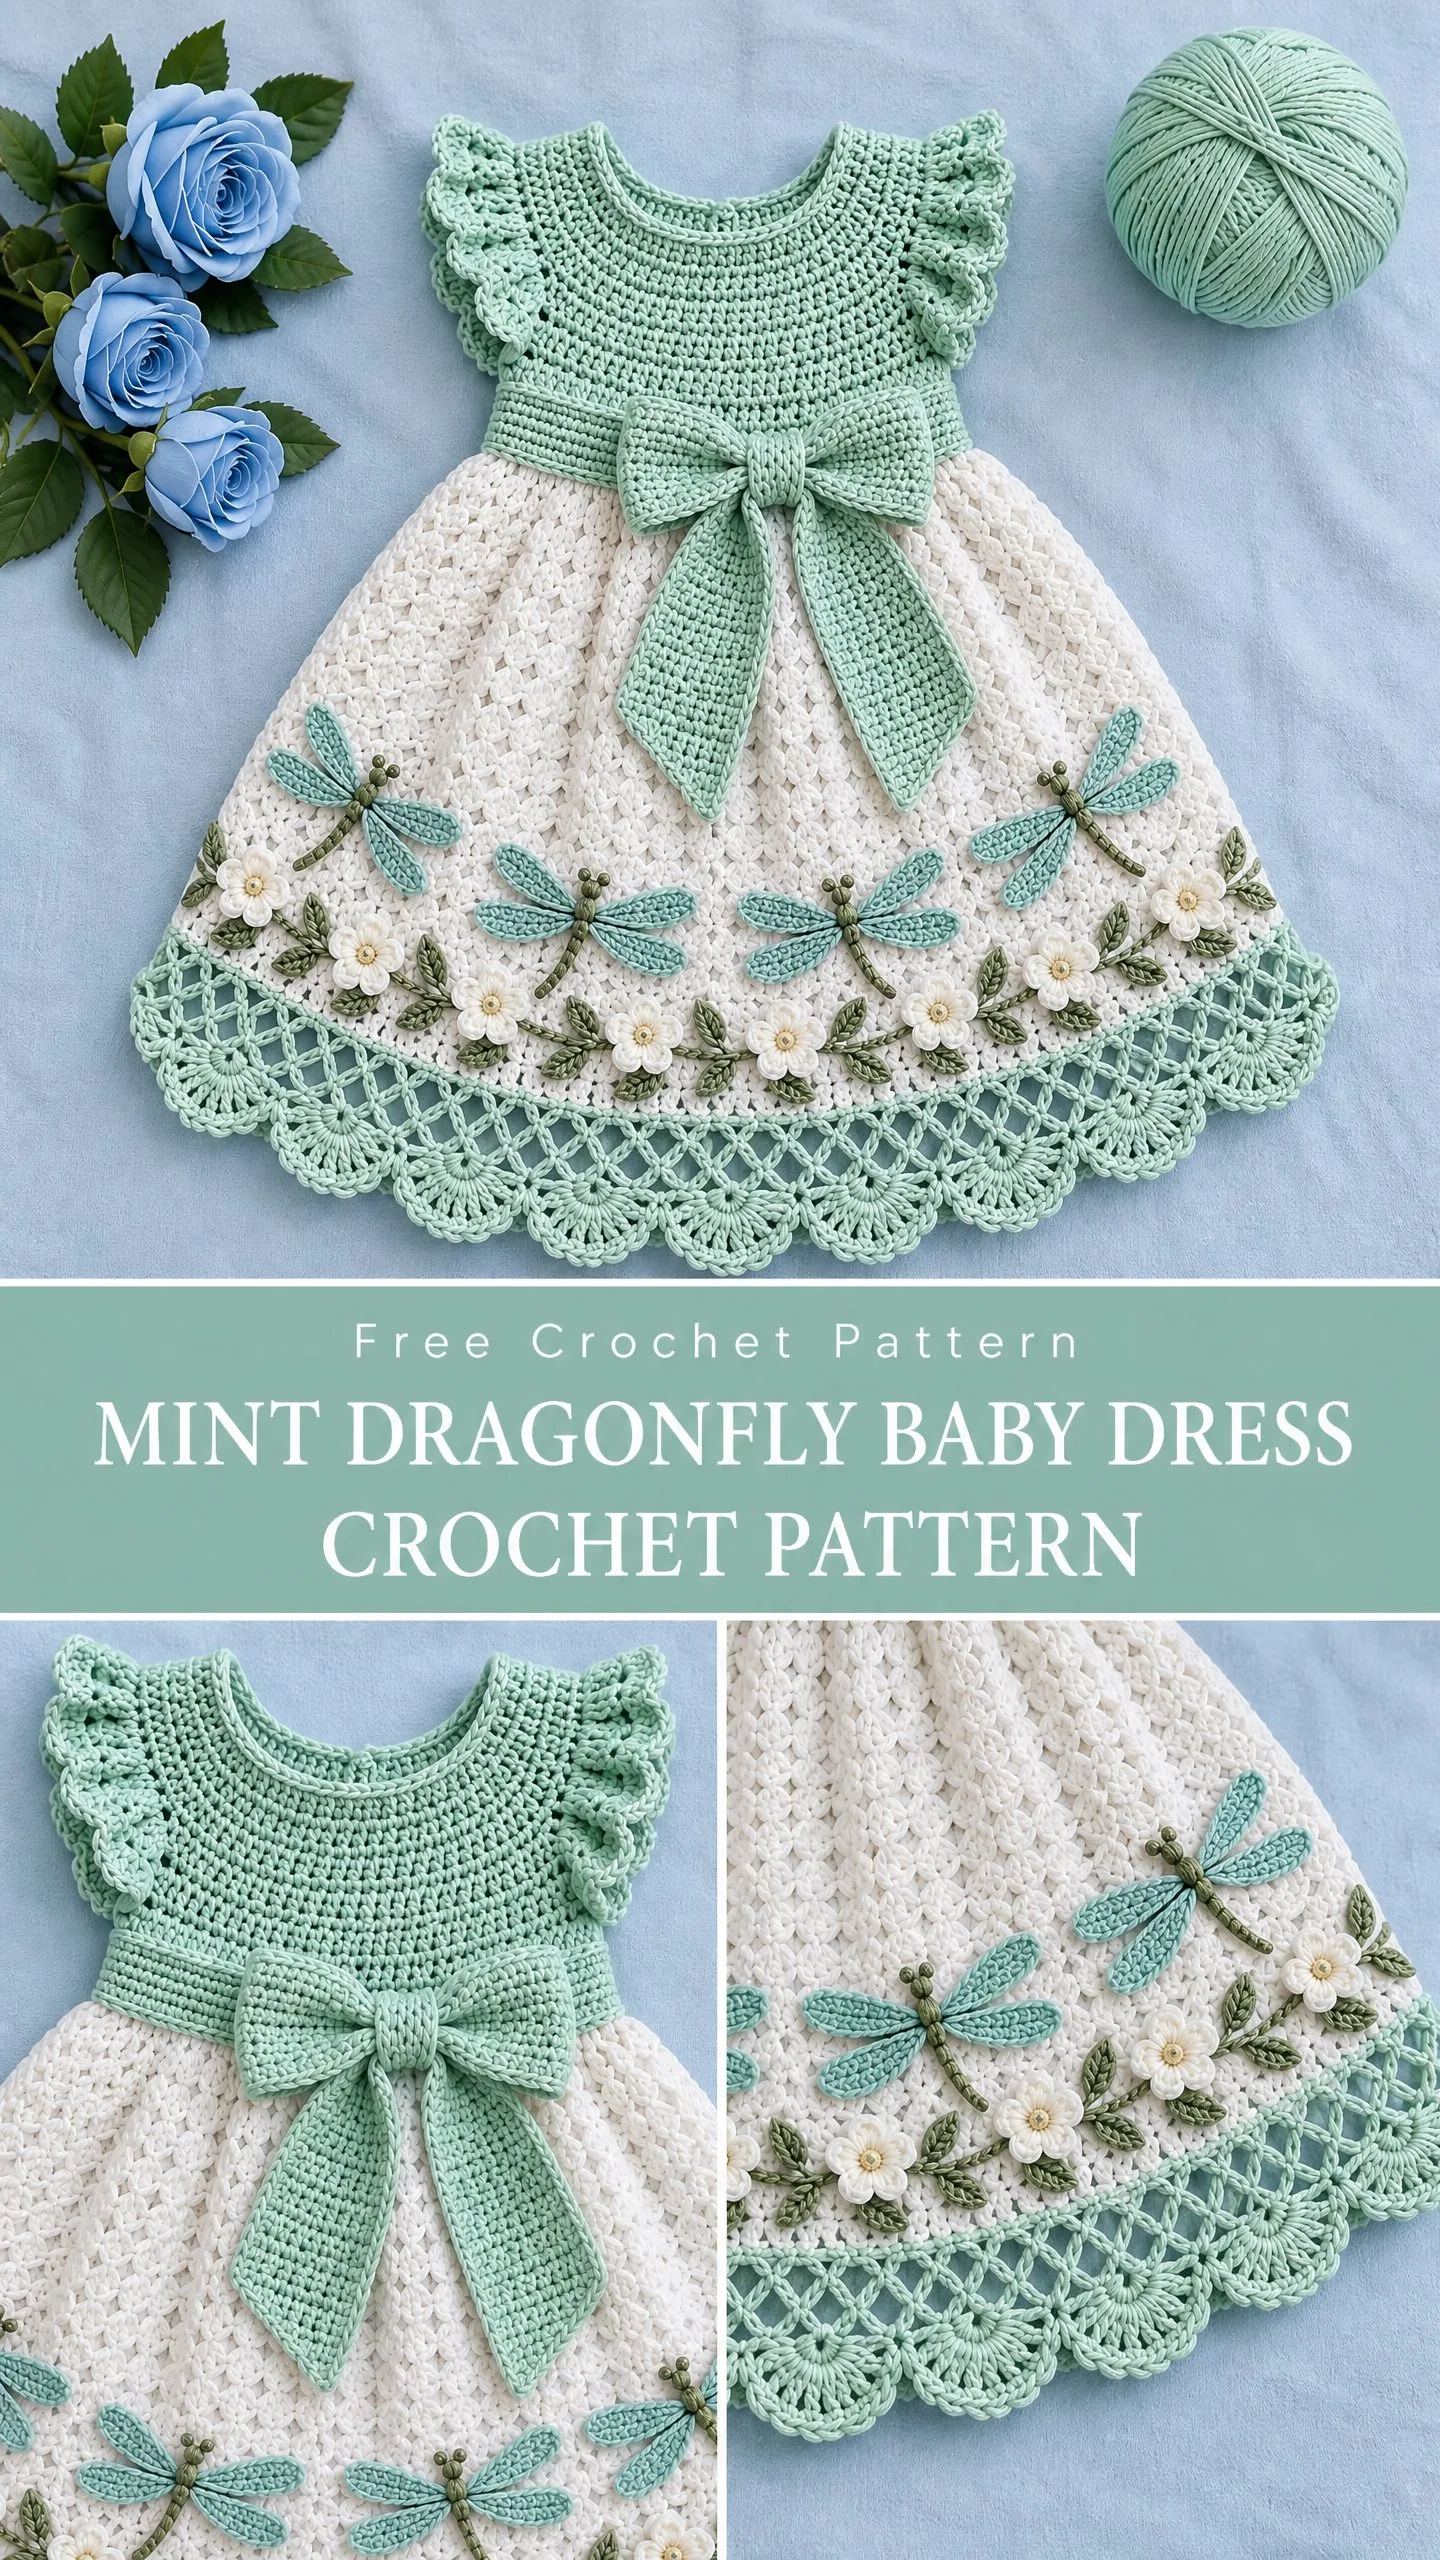
I am not exaggerating when I say this dress gets compliments before you even finish it. The gathered shell skirt creates beautiful drape and movement, while the solid double crochet bodice keeps everything structured where it needs to be. Whether you are making this for a baby shower gift, a special occasion, or just because you found the perfect mint green yarn, this project delivers.
Fair warning though. This is a development draft pattern that has not been sample tested yet. The stitch counts have been checked arithmetically, but you will want to make a complete sample and verify measurements before gifting or selling. That said, the instructions are thorough and the construction is straightforward once you understand the flow.
About This Baby Dress Pattern
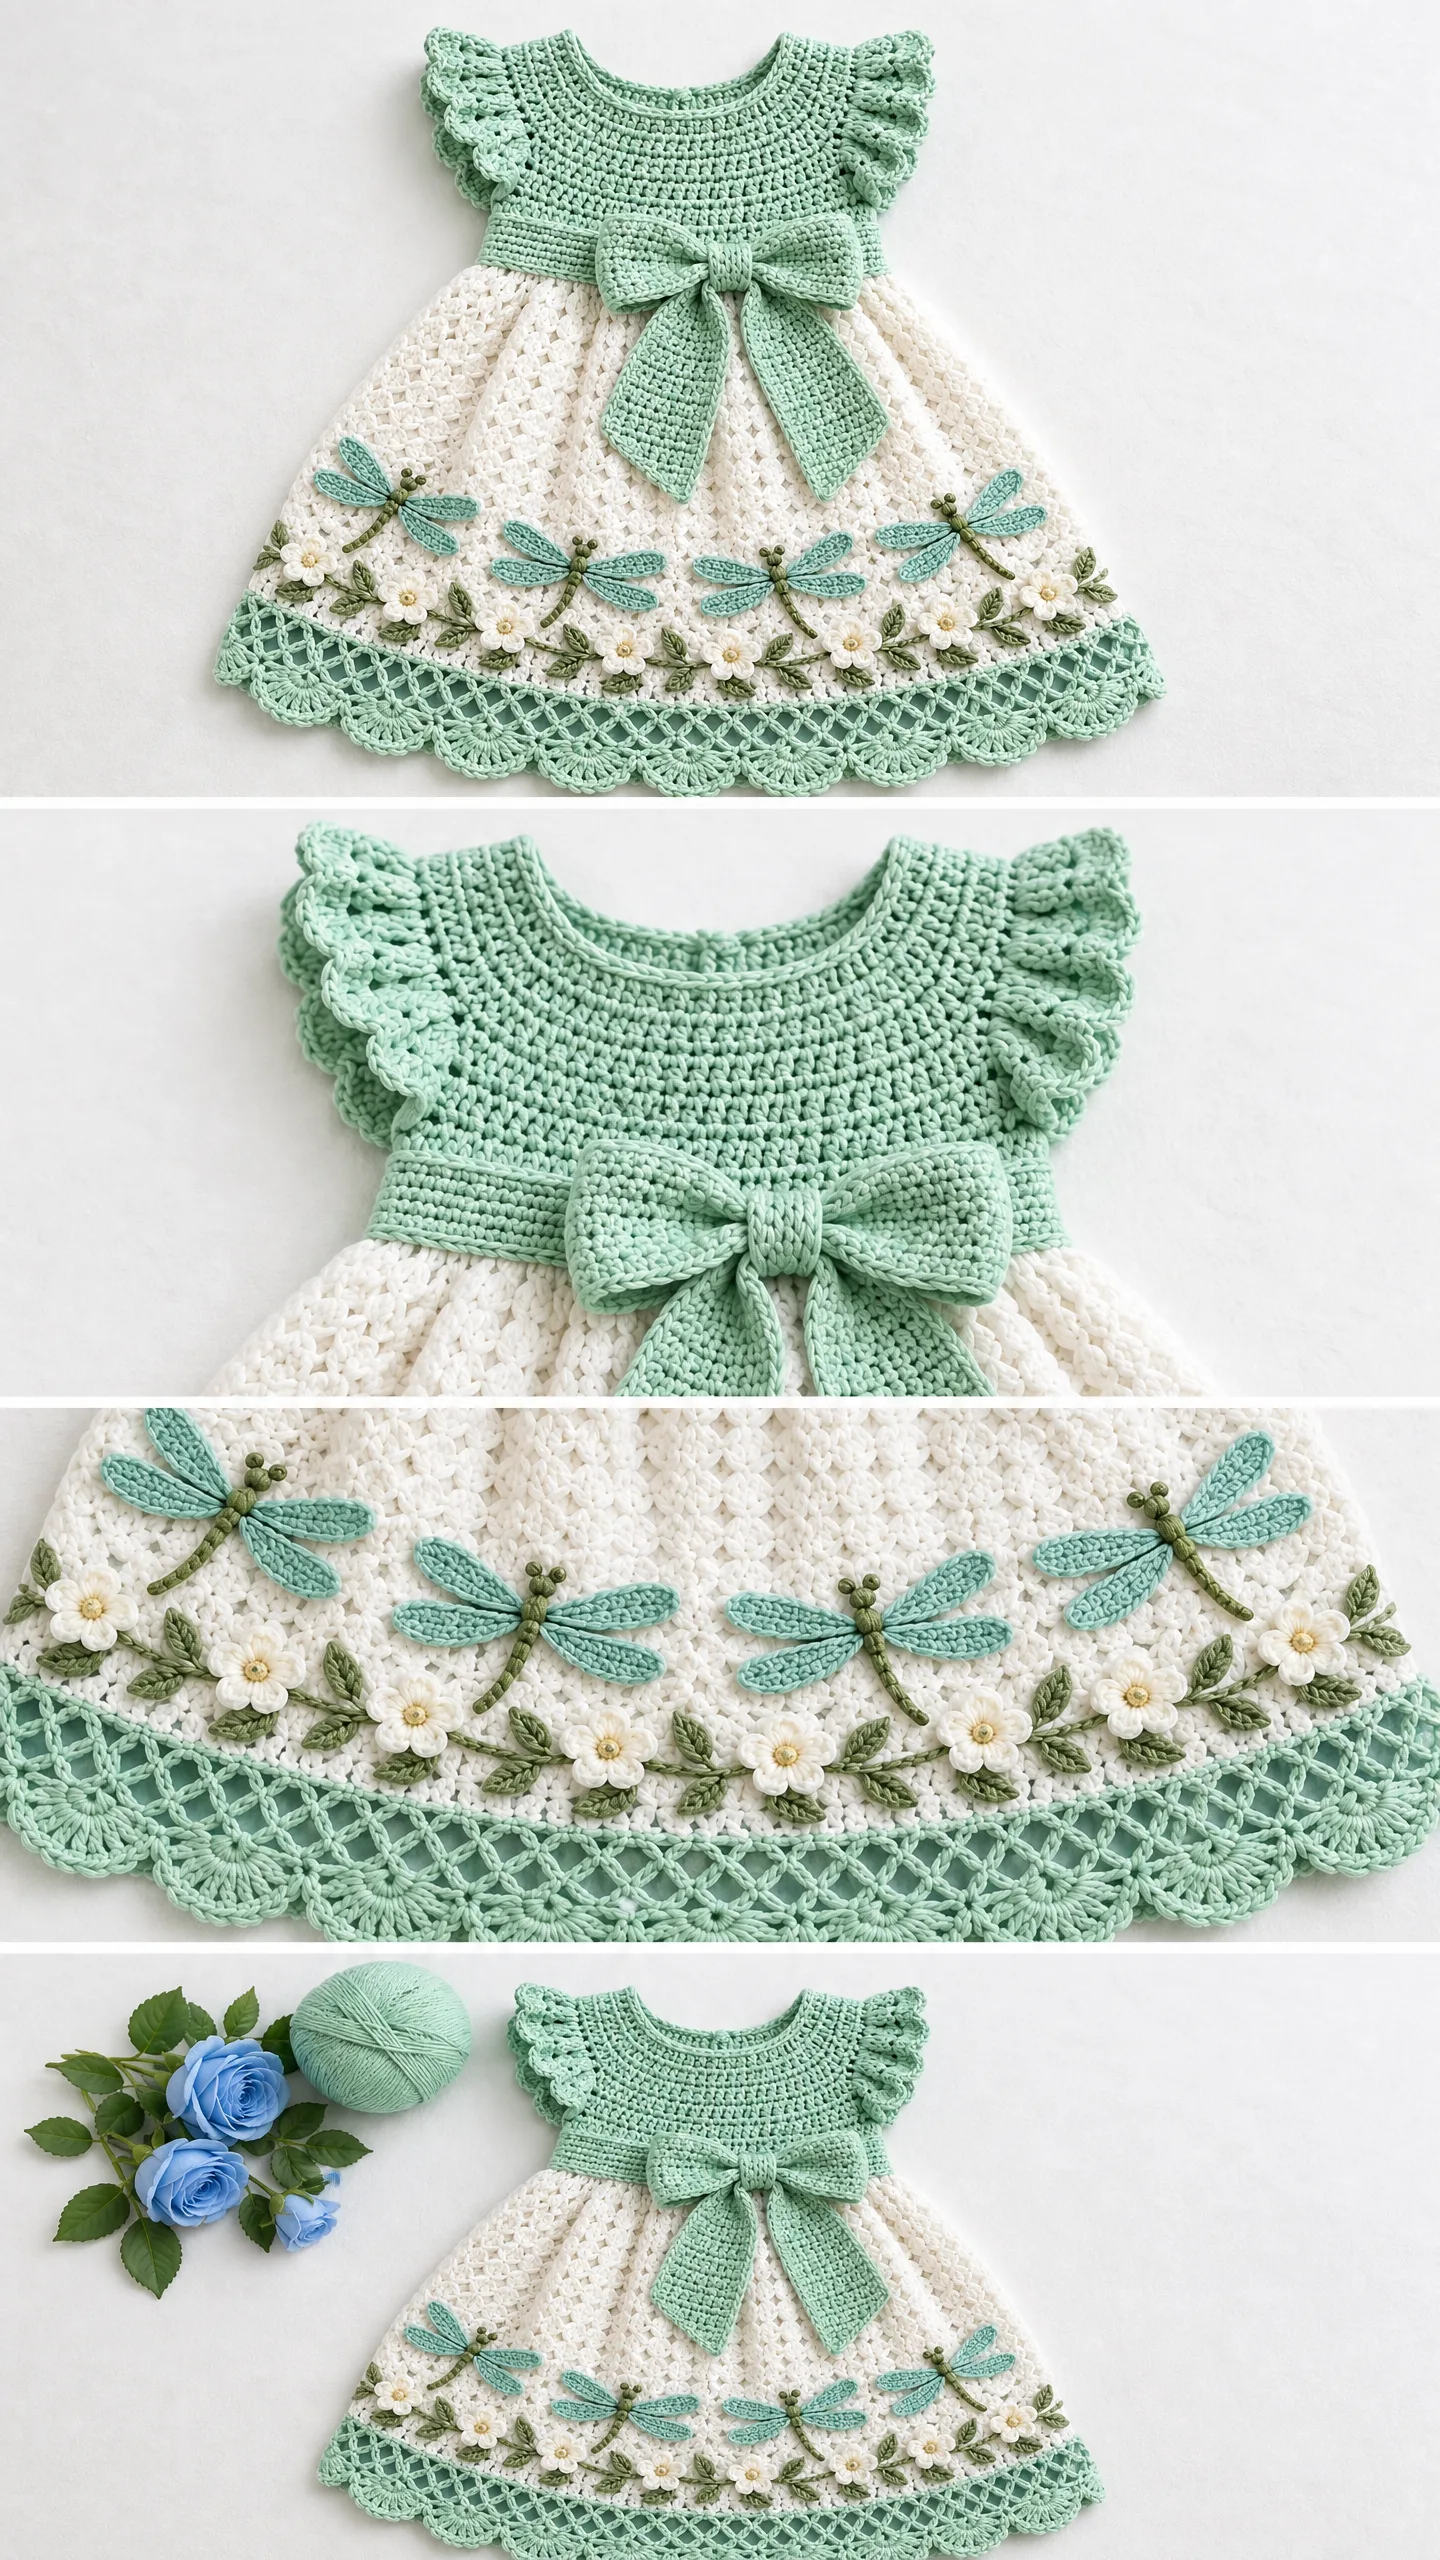
This precious baby dress features a fitted bodice worked from the waist up, flutter sleeves at the armholes, and a flowing gathered shell skirt worked downward in joined rounds. The design includes a center back opening with snap closures for easy dressing, plus hand sewn dragonfly, flower, and leaf appliques along the hem.
The finished dress fits approximately 3 to 6 month proportions with a finished chest measurement of about 48 cm (19 inches), shoulder to waist length of about 16 cm (6.3 inches), and skirt length of about 22 cm (8.7 inches). The overall length from shoulder to hem measures approximately 38 cm (15 inches).
Important sizing note: Select the size by measured chest with 4 to 6 cm of ease, not by age. Baby sizes vary tremendously, so always measure the actual baby or compare to a garment that fits well.
Materials You Will Need
Yarn: Smooth sport weight cotton, approximately 250 meters per 100 grams. You will need:
These quantities are estimates. Weigh your sample to confirm actual usage.
Hooks:
Notions:
Gauge
Target bodice gauge after gentle blocking: 20 stitches and 10 double crochet rows equals 10 x 10 cm.
Make a 26 stitch swatch at least 14 rows tall using the actual bodice stitch (solid double crochet). Measure the center of your swatch. If your swatch is too wide, use a smaller hook. If it is too narrow, use a larger hook.
Row gauge affects armhole depth and overall length, so take the time to check both stitch and row gauge before starting.
Abbreviations and Special Stitches
Let me walk you through every abbreviation you will encounter. I am defining each one so there is no confusion as you work through the pattern.
ch = chain. The foundation loops you create at the beginning of most crochet projects.
sl st = slip stitch. Insert hook, yarn over, pull through both the stitch and the loop on your hook in one motion. Used for joining and moving across stitches without adding height.
sc = single crochet. Insert hook, yarn over, pull up a loop (2 loops on hook), yarn over, pull through both loops.
hdc = half double crochet. Yarn over, insert hook, yarn over, pull up a loop (3 loops on hook), yarn over, pull through all 3 loops.
dc = double crochet. Yarn over, insert hook, yarn over, pull up a loop (3 loops on hook), yarn over, pull through 2 loops, yarn over, pull through remaining 2 loops.
tr = treble crochet. Yarn over twice, insert hook, yarn over, pull up a loop (4 loops on hook), then yarn over and pull through 2 loops three times.
st = stitch
sp = space
sc2tog = single crochet two stitches together. A decrease that joins two stitches into one.
V stitch = Work (dc, ch 1, dc) all in one stitch. This creates a V shape with a chain space in the center.
Small shell = Work (2 dc, ch 1, 2 dc) all in one space.
Large shell = Work (3 dc, ch 1, 3 dc) all in one space.
Important note about turning chains: Unless explicitly stated, turning chains do NOT count as stitches in this pattern. In joined rounds, begin with ch 2 and end with sl st into the first actual dc. Do not turn at the end of rounds.
Color Placement
The palette for this dress is simple and elegant:
Section 01: Front Bodice
With mint green, chain 49.
Row 1: Single crochet in second chain from hook and across. (48 sc)
Row 2: Chain 2, turn. Double crochet in each stitch across. (48 dc)
Keep every bodice row in solid double crochet to create a close textured fabric. Chain 2 and turn at the start of each double crochet row. Remember, the chain does not count as a stitch.
Rows 3 through 6: Work across 48 positions using solid double crochet. Fasten off at the end of Row 6. Mark the first and last 3 stitches for the underarm steps.
Row 7: Join yarn in the fourth stitch. Chain 2, double crochet in that stitch and the next 41 stitches. Leave the last 3 stitches unworked. (42 dc)
Rows 8 through 10: Work straight across 42 positions in solid double crochet.
Row 11, First Shoulder: Chain 2, turn. Double crochet in first 11 stitches, leaving the remaining stitches unworked. (11 dc)
Rows 12 through 16: Chain 2, turn. Double crochet across 11 stitches. Fasten off after Row 16.
Second Shoulder: With the front facing you, identify the 11 stitches at the opposite outer edge of Row 10. Join yarn at the edge nearest the neck and work those 11 stitches toward the armhole. Work five more rows of 11 double crochet to match the first shoulder. The center 20 stitches stay unworked for the neckline.
Checkpoint: You should have 48 positions at the waist, 42 across the chest above underarm steps, and two shoulders of 11 stitches each. Lay the piece flat and verify both shoulders have equal height. Do not add a decorative drawstring around the neck.
Section 02: Back Bodice and Assembly
With mint green, work back Rows 1 through 6 exactly as for the front.
At Row 7, reduce by leaving 3 stitches unworked at each end, giving you 42 positions. Keep the upper back in solid double crochet.
Divide Upper Back: Work only the first 21 stitches for Row 7. Chain 2 and turn. Work 21 double crochet for Rows 8 through 12. Mark the armhole edge so it stays identifiable.
Rows 13 through 16: Work only the outer 11 stitches nearest that armhole, leaving the inner 10 stitches unworked for the back neckline. Join yarn again at the outer edge if needed so no yarn is carried across the neck. Fasten off.
Join yarn to the remaining 21 stitches of Row 6, omitting the outermost 3 stitches as on the first half. Work Rows 7 through 12 over these 21 stitches. Shape the other shoulder over its outer 11 stitches for Rows 13 through 16. This leaves a center back opening above the waist panel.
Assembly: Place front and back with right sides together. Sew each 11 stitch shoulder seam using mattress stitch. Sew side seams from waist through the end of Row 6 only. Leave the stepped armholes open. Turn right side out.
Back Bands: With bodice color, work single crochet evenly down one slit edge and up the other, approximately 2 single crochet per double crochet row end. Add a second single crochet row to each band. Sew three snaps to the bands: one near top, one at middle, and one near bottom. Secure each snap through several stitches and check that the opening allows dressing without stretching the neck.
Section 03: Gathered Shell Skirt
With right side facing, join white at the center back waist.
Round 1: Chain 1, single crochet in each unused foundation loop across both panels, 48 per panel. (96 sc) Join to first single crochet. Place a marker at the join.
Round 2: Chain 2. Work [V stitch in next single crochet, skip next 2 single crochet] 32 times. Join. (32 V stitches) The final two skipped stitches lead back to the first V stitch.
Round 3: Slip stitch into first V center. Chain 2. Work small shell in that space, then small shell in each remaining V center. Join. (32 small shells)
Rounds 4 and 5: Slip stitch to first shell center and work one small shell into each shell center. (32 shells each round) Do not work between shells.
Round 6: Work one large shell into each shell center. (32 large shells)
Rounds 7 through 18: Repeat Round 6. Check length instead of pulling the fabric to fit a row count. The target before border is approximately 18 cm below waist.
Rounds 19 through 21: Change to mint green. Continue one large shell in each shell center. If needed, add or remove full shell rounds before this color change so the final skirt reaches about 22 cm.
Final Scallop Round: Work 7 double crochet into each shell center. Between adjacent shells, work 1 single crochet into the gap. Join and fasten off. (32 scallops)
This is a simplified shell border. It does not reproduce every ornamental mesh detail in the concept image.
Checkpoint: All skirt rounds have 32 repeats. If the join develops a hole, use the tail to close it gently. Block the skirt into an even flare without stretching the waist.
Section 04: Neckline, Sleeves, and Bow
Neckline Edging
With mint green, work single crochet around the full neckline, using approximately 2 single crochet per double crochet row end and 1 single crochet per horizontal stitch. At each inner corner, work sc2tog across the corner to soften the stepped shape. Add a second single crochet round if needed. Stop if the edge begins to pucker.
Flutter Sleeves
Join mint green at underarm. Work single crochet evenly around armhole, approximately 2 single crochet per double crochet row end and 1 per horizontal stitch. Count and adjust by at most 2 stitches to obtain a multiple of 6. Mark the upper half of the opening, centered on the shoulder seam.
Over the marked upper half only, work [skip 2 single crochet, 5 double crochet in next single crochet, skip 2 single crochet, slip stitch in next single crochet]. Repeat in groups of 6 to the end marker, then fasten off. Leave lower armhole in single crochet. Repeat identically on the other side.
Large Waist Bow
With Color A (mint green), chain 31.
Row 1: Single crochet in second chain and across. (30 sc)
Rows 2 through 10: Chain 1, turn, single crochet across.
Fold the rectangle lengthwise into two shallow pleats and bind the center.
Center Wrap: Chain 5, work 4 single crochet for 10 rows. Wrap around pleats and sew ends behind. Sew the whole back of bow firmly to center front waist.
Bow Tails (Make 2)
With Color A, chain 9.
Work 8 single crochet for 14 rows.
Row 15: Sc2tog, single crochet in next 4, sc2tog. (6 sts)
Row 16: Sc2tog, single crochet in next 2, sc2tog. (4 sts)
Row 17: Sc2tog twice. (2 sts)
Row 18: Sc2tog. (1 st)
Fasten off. Sew each tail beneath the center wrap, angled outward. Tack its lower end to the skirt so it cannot hang loose.
Section 05: Decorative Motifs
Use the 2.5 mm hook for all appliques. Leave long sewing tails, weave ends through several stitches, and attach the entire motif edge to the garment so loops and points do not lift.
Dragonfly (Make 4)
Chain 10. Slip stitch in second chain and next 8 chains for a slim body. Fasten off.
At the fourth body stitch, join wing color and work [chain 8, slip stitch in same body stitch] twice.
At the next body stitch, work [chain 6, slip stitch in same body stitch] twice.
Sew the long and short wing loops flat on opposite sides of the body and embroider two short antennae into the fabric.
Six Petal Flower
Chain 4, slip stitch in first chain to form a ring.
Into ring work [chain 2, 2 double crochet, chain 2, slip stitch] six times. Fasten off with a 20 cm sewing tail.
Stitch a small satin stitch circle over the center with contrasting yarn. For a layered flower, make a second flower with a hook 0.5 mm smaller and sew the centers together.
Leaf
Chain 8.
Starting in second chain, work single crochet, half double crochet, double crochet, 2 double crochet in next chain, double crochet, half double crochet, 3 single crochet in last chain.
Rotate. Along unused loops work half double crochet, double crochet, 2 double crochet in next chain, double crochet, half double crochet, single crochet.
Join with slip stitch. Fasten off.
Sew a contrasting line of stem stitch along its center.
Section 06: Placement and Finishing
Make four dragonflies. Place across the front lower skirt about 3 cm above the color change border. Space evenly from one side seam to the other.
For the dragonfly version shown, add six small flowers and eight sage leaves between the main appliques. Tack motifs without closing the skirt openings.
Color details for appliques:
Finishing Steps
Weave every yarn end in two directions for at least 5 cm.
Gently soak according to the yarn label, press water out in a towel, pin the garment to the target dimensions and let it dry flat. Do not stretch the neck or armholes.
Safety note for infant wear: Omit beads, buttons used only as decoration, loose cords, detachable ornaments, and wire. Embroider centers and sew appliques securely. Use with supervision over suitable clothing. This decorative dress is not sleepwear.
Care instructions: Follow the yarn label. A gentle cool hand wash and flat drying are the conservative default. Recheck seams, appliques, and snaps after washing.
Final Thoughts on This Baby Dress Crochet Pattern
This Mint Dragonfly Baby Dress is truly a showstopper project. The combination of the structured bodice, flowing shell skirt, and delicate appliques creates something special that looks far more complex than it actually is to construct. Once you understand the rhythm of the shell rounds, the skirt practically works itself.
Remember that this is a development draft, so do make a complete sample before gifting or selling. Take notes on your actual gauge, yarn usage, and any adjustments you make. Your feedback as a maker is valuable for refining patterns like this one.
Thank you so much for choosing this pattern for your next project! I really hope you love making it as much as I loved putting these instructions together. If you make this dress, I would absolutely love to see it. Tag me on Instagram or share a photo in my Facebook group so I can celebrate your finished project with you.
If you loved this pattern, go ahead and save it to your Pinterest boards so you can find it again when you are ready to start. And please leave a comment below if you make this sweet little dress. I read every single one and your photos absolutely make my day!
Want a Quick & Easy Printable Version?
Get a clean, beautifully formatted PDF of this pattern — easy to follow step by step, ready to print or save on any device. No scrolling, no distractions, just the pattern.
Get the Printable PDF →