
I don’t know about you, but I’ve always wanted a showstopper dress that I could proudly say I made myself. Something that looks like it belongs on a runway but feels like a cozy afternoon project multiplied by sixty.
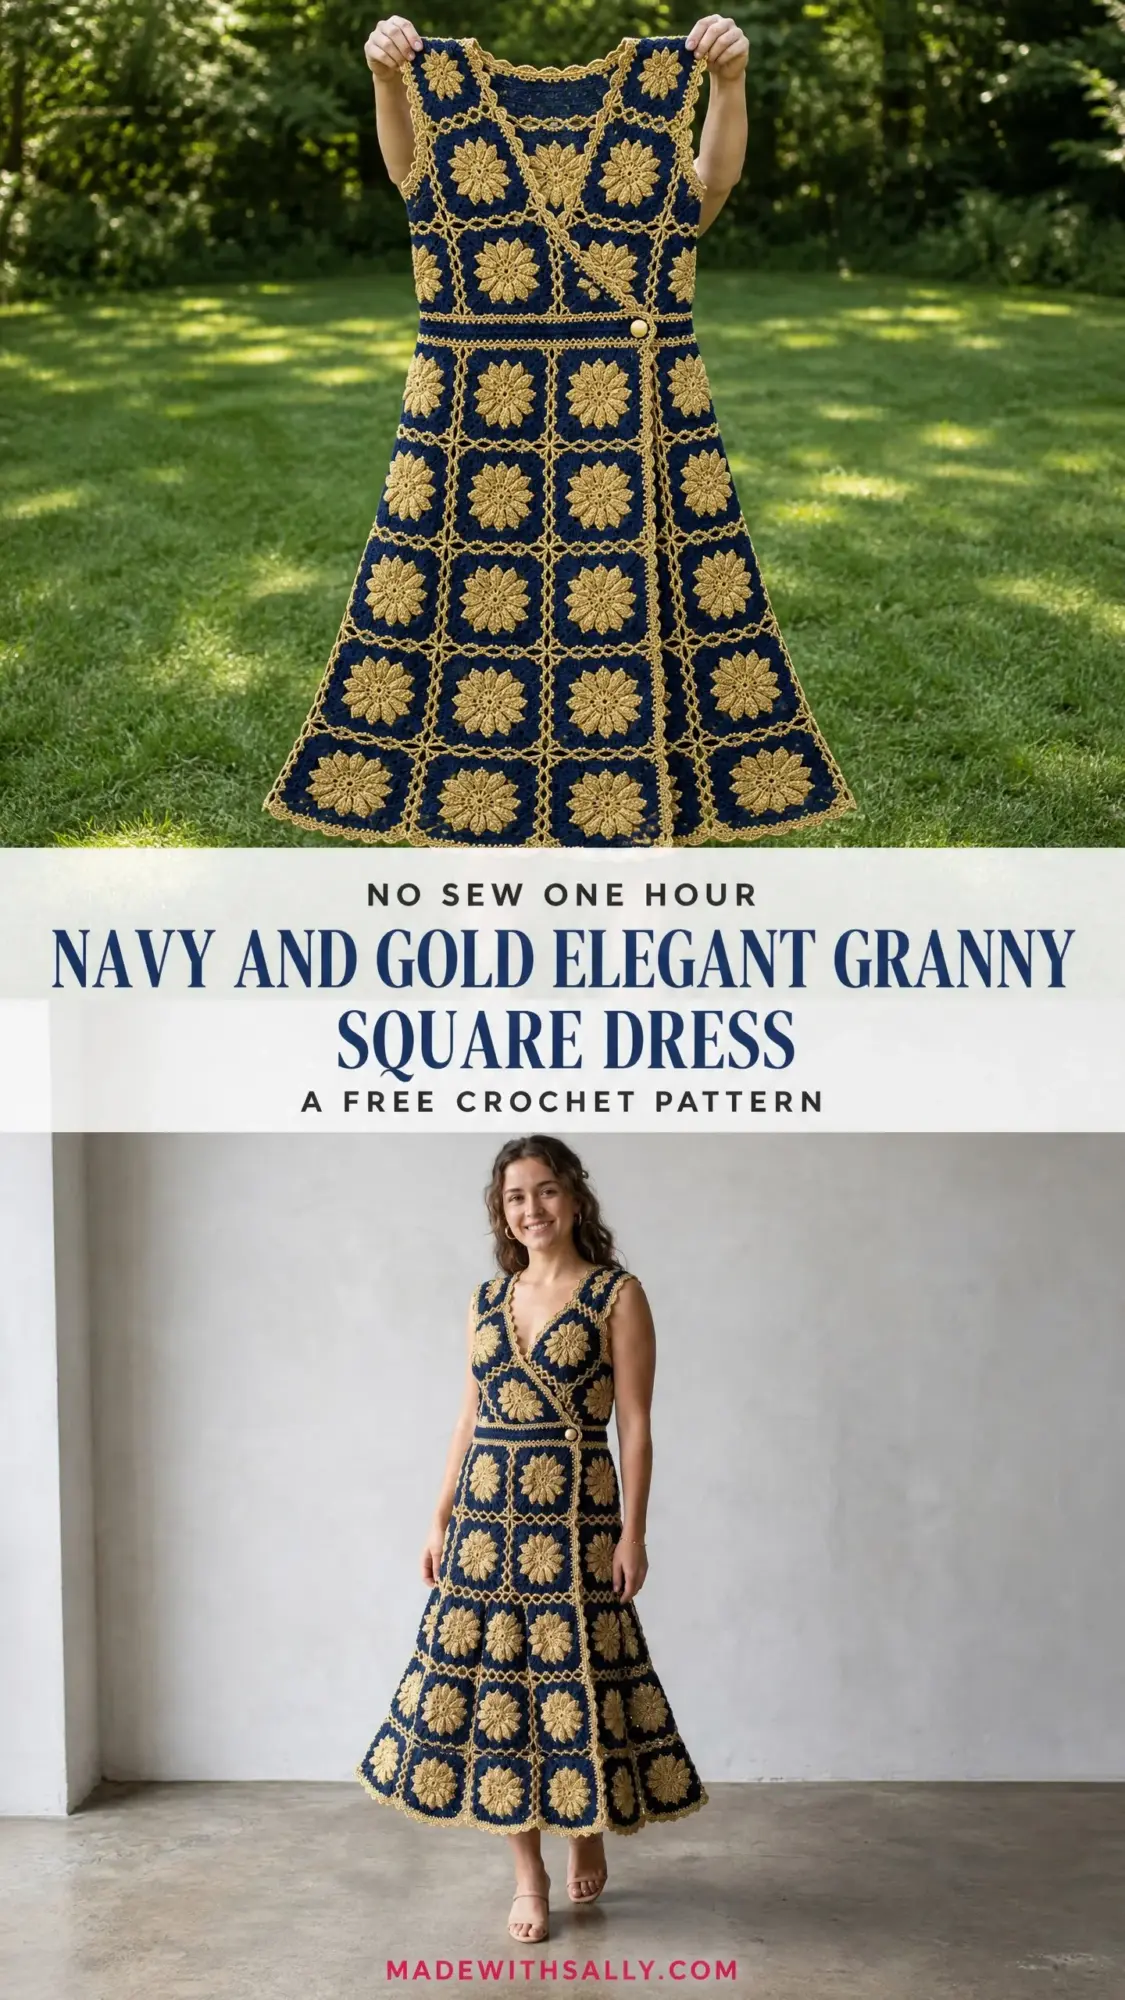
This navy and gold elegant granny square dress is exactly that kind of piece. It’s the dress that makes people stop and ask where you bought it, and you get to smile and say you crocheted it with your own two hands.
Yes, it takes time. Yes, you’ll be making 68 individual squares. But each one is a small victory, and watching them come together into this stunning A-line silhouette is absolutely worth every stitch.
Why This Granny Square Dress Pattern Works So Well
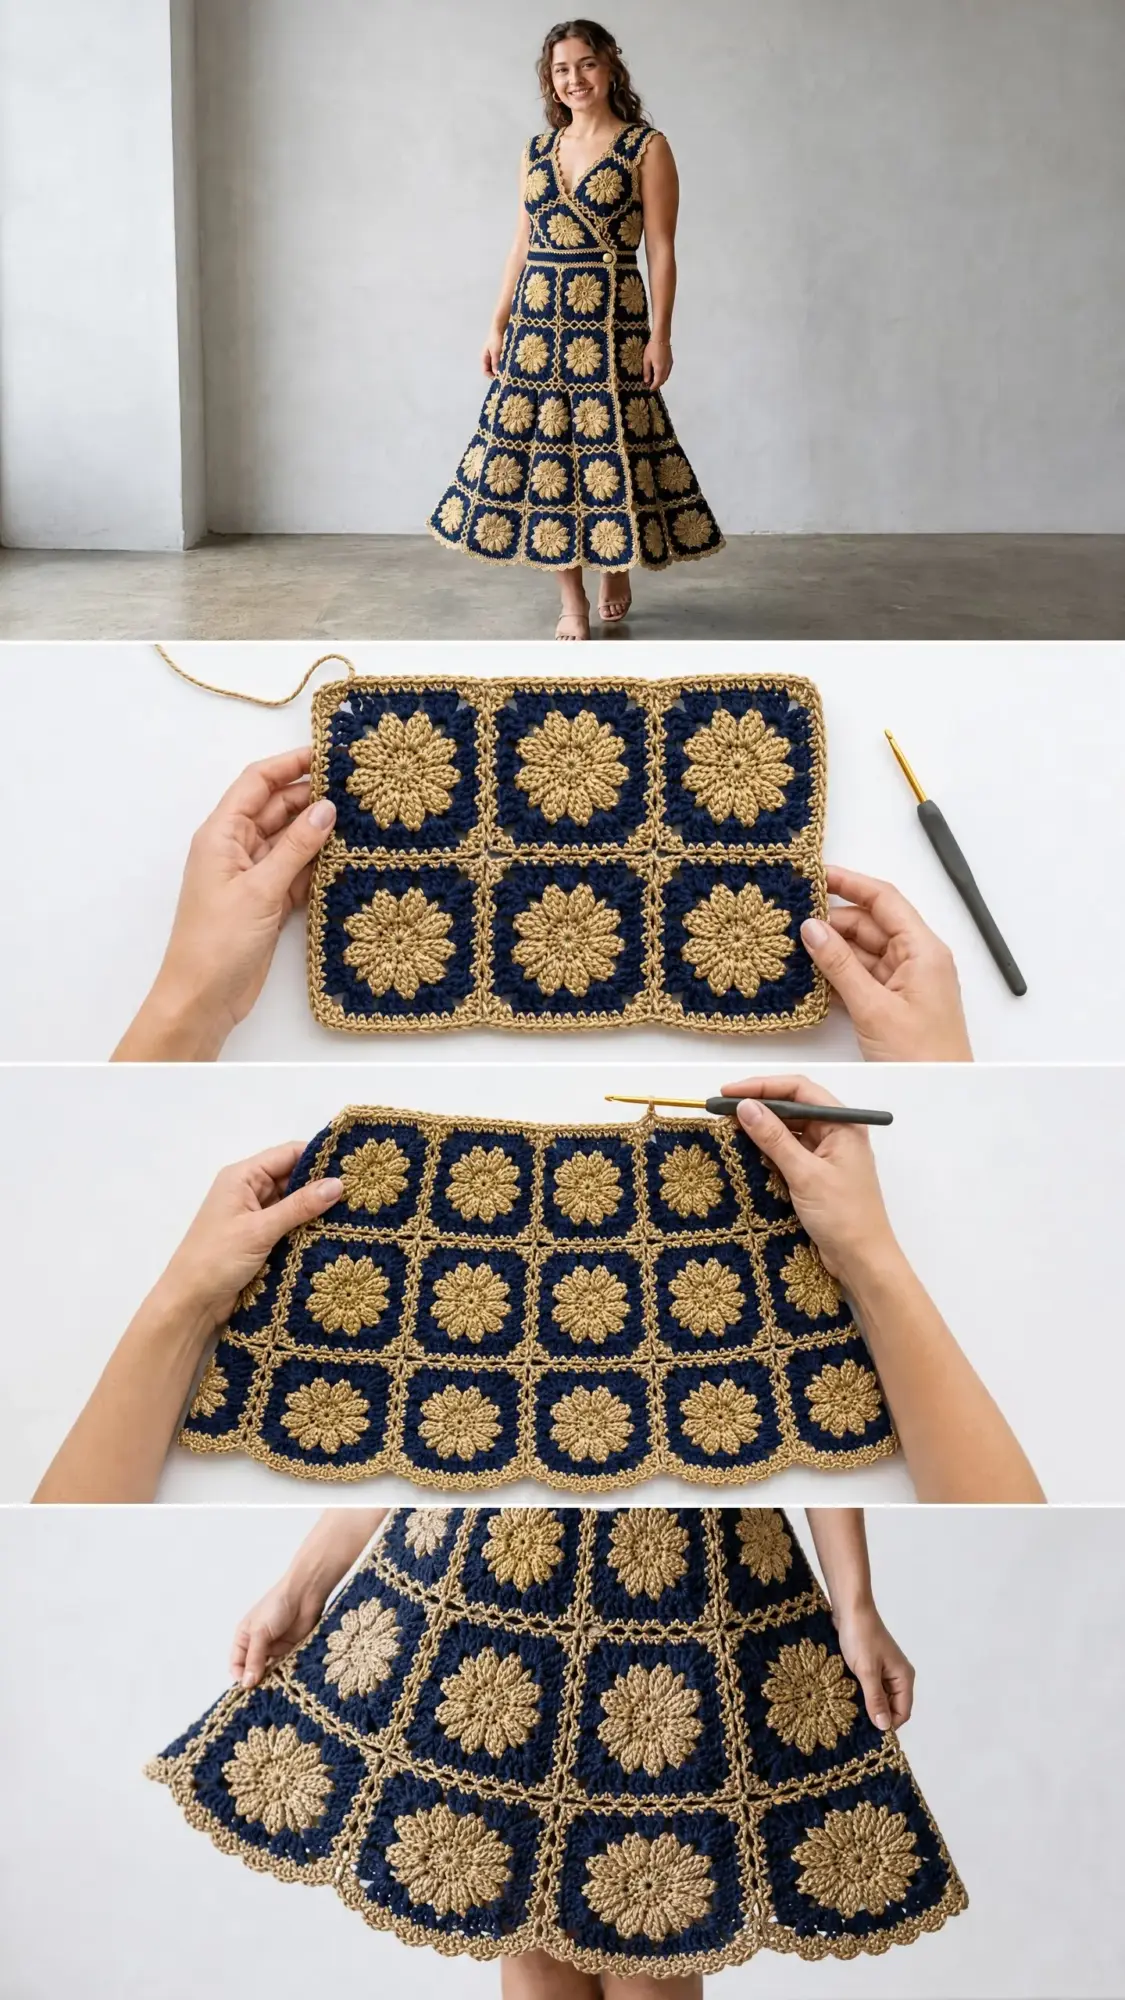
The genius of this crochet dress pattern lies in its modular construction. Instead of wrestling with complicated shaping or confusing increase sequences, you’re simply making beautiful floral squares and joining them together. The wrap-style bodice creates that flattering V-neckline everyone loves, while the A-line skirt adds gentle movement and coverage.
The color combination does serious heavy lifting here. That rich navy background makes the antique gold floral centers pop like little sunbursts. Every square becomes a tiny work of art before you even start joining.
Skill level: Advanced intermediate. You should be comfortable working in the round, joining motifs, and following a construction diagram in your head. Nothing here is technically difficult, but managing 68 squares and keeping your gauge consistent requires some experience.
Time estimate: Plan for 60 to 90 hours for a size Medium. Each square takes about 20 to 25 minutes once you get into a rhythm. Put on a good audiobook series and settle in for the long haul.
Finished Measurements
This pattern is written for size Small/Medium, which fits US sizes 6 through 8.
Each completed square measures 5.5 inches (14 cm) after blocking. This is your key measurement for customizing the fit.
Materials Needed for This Crochet Tutorial
Yarn
You’ll need two colors in DK weight (also called light worsted) yarn. Cotton or cotton-acrylic blends work best for drape and stitch definition.
Color A (Navy): approximately 1,800 yards (1,645 meters)
Color B (Antique Gold): approximately 1,200 yards (1,097 meters)
Recommended yarn options:
1. Lion Brand 24/7 Cotton in Navy and Goldenrod. You’ll need about 10 skeins of Color A and 7 skeins of Color B.
2. Paintbox Yarns Simply DK in Sailor Blue and Mustard Yellow. You’ll need about 7 skeins of Color A and 5 skeins of Color B.
3. We Are Knitters The Petite Wool in Navy and Mustard. You’ll need about 12 skeins of Color A and 8 skeins of Color B. Note that wool requires gentler care and hand washing.
Choose a yarn with good stitch definition. Avoid fuzzy or textured yarns because you want those petal details to really show. Mercerized cotton gives the crispest results.
Hooks
Notions
Gauge for This Step by Step Pattern
With your G-6 hook and DK weight yarn, one completed square after all 8 rounds measures 5.5 inches by 5.5 inches (14 cm by 14 cm) after blocking.
Gauge is critical for this project. Make one complete test square, weave in the ends, wet block it, pin it to size, and let it dry completely before measuring. If your square is larger, go down one hook size. If it’s smaller, go up one hook size.
Don’t skip this step. With 68 squares, even a small gauge difference will dramatically change your finished measurements.
Abbreviations Used in This Crochet Pattern
Let me walk you through every abbreviation you’ll encounter. I’ll give you the full name, the shorthand, and what it actually means.
Special Stitches
Petal Cluster (PC)
This creates those gorgeous raised petal shapes in the center of each square.
Step 1: Yarn over twice, insert hook into the designated space.
Step 2: Yarn over, pull up a loop. You now have 4 loops on your hook.
Step 3: Yarn over, pull through 2 loops. You now have 3 loops.
Step 4: Yarn over, pull through 2 loops. You now have 2 loops. Do not complete this treble.
Step 5: Repeat steps 1 through 4 three more times into the same space. You’ll have 5 loops on your hook after 4 partial trebles.
Step 6: Yarn over, pull through all 5 loops. Chain 1 to close.
That’s one petal cluster complete. It looks complicated written out, but after a few practice rounds, your hands will remember the rhythm.
Picot-3
Used in the edgings for that scalloped finish.
Step 1: Work 1 sc into the designated stitch.
Step 2: Chain 3.
Step 3: Slip stitch into the first chain (back at the base of the chain-3).
JAYG Single Crochet Join
When attaching squares together, you’ll replace the normal edge stitches with single crochets that connect to the adjacent square. Insert your hook through the corresponding stitch of the already-completed square, yarn over, pull up a loop, yarn over, pull through both loops. This creates a neat visible seam on the wrong side.
Construction Layout and Square Count
Before you start joining, you need to know exactly how many squares go where.
Bodice Back Panel: 4 squares wide by 3 squares tall. Total: 12 squares.
Bodice Left Front Panel: 2 squares wide by 3 squares tall. Total: 6 squares.
Bodice Right Front Panel: 2 squares wide by 3 squares tall. Total: 6 squares.
Skirt Front Panel: 4 squares wide by 4 squares tall, plus one additional row of 6 squares at the hem for flare. Total: 22 squares.
Skirt Back Panel: Same as front. Total: 22 squares.
Grand Total: 68 squares.
Make all your squares and block them before you start any joining. Trust me on this one.
How to Crochet the Individual Granny Square
Each square uses Color B for Rounds 1 through 5, Color A for Rounds 6 and 7, and Color B for Round 8. Always work with the right side facing you.
Round 1 (Color B)
Make a magic ring. Ch 4 (this counts as your first dc and ch-1). Work 11 more dc into the ring, with ch 1 between each dc. Sl st to the 3rd ch of your beginning ch-4 to join. (12 dc, 12 ch-1 spaces)
Round 2 (Color B)
Sl st into the first ch-1 sp. Ch 1. Work 2 sc into each ch-1 sp around. Sl st to the first sc to join. (24 sc)
Round 3 (Color B)
Sl st to the space between any two sc pairs (between the 2-sc groups, not between individual sc within a pair). Ch 1. Work 1 PC into the same space, ch 2. Work 1 PC into the next space between 2-sc groups, ch 2. Continue around all 12 spaces. Sl st to the top of the first PC to join. (12 PC, 12 ch-2 spaces)
Round 4 (Color B)
Sl st into the first ch-2 sp. Ch 1. Work (1 sc, 1 hdc, 3 dc, 1 hdc, 1 sc) into each ch-2 sp around. Sl st to the first sc to join. This creates 12 petal shapes. (12 petals, 84 stitches total)
Round 5 (Color B)
Working behind the petals of Round 4, sl st into the top of any PC from Round 3. Ch 5 (counts as dc and ch-2). Work 1 dc into the next PC top, ch 2. Repeat around all 12 PC tops. Sl st to the 3rd ch of the beginning ch-5 to join. (12 dc, 12 ch-2 spaces)
To work behind the petals, hold them forward toward you and insert your hook from front to back into the PC tops.
Round 6 (Color A)
Fasten off Color B. Join Color A with a standing dc into any ch-2 sp of Round 5.
The 12 ch-2 spaces will be divided into 4 corner groups of 3 spaces each. Into each group of 3 consecutive spaces:
Repeat this corner cluster sequence 4 times. Sl st to the top of the first standing dc to join. (72 dc total, 4 ch-3 corner spaces, 8 ch-1 spaces)
Round 7 (Color A)
Sl st to the first corner ch-3 sp. Ch 3 (counts as first dc). Work (2 dc, ch 3, 3 dc) into the same corner sp. Ch 1. Work 3 dc into each ch-1 sp along the side (2 ch-1 spaces per side). Ch 1. Work (3 dc, ch 3, 3 dc) into the next corner. Repeat around all 4 corners. Sl st to the top of the beginning ch-3 to join. (72 dc, 4 ch-3 corner spaces, 8 ch-1 spaces)
Round 8 / Border (Color B)
Fasten off Color A. Join Color B with sl st to any corner ch-3 sp. Ch 1. Work (2 sc, ch 2, 2 sc) into the corner sp.
Along each side edge: work 2 sc into each ch-1 sp, and 1 sc into each dc. At each corner, work (2 sc, ch 2, 2 sc) into the corner ch-3 sp. Sl st to the first sc to join.
(80 sc plus 4 ch-2 corner spaces)
Fasten off. Weave in all ends. Block the square to 5.5 by 5.5 inches. Make all 68 squares before beginning any joining.
Joining Squares into Panels
All joins use the JAYG single crochet method in Color B with the F-5 hook.
Lay out your blocked squares and photograph each panel arrangement before you start. You’ll thank yourself later.
Horizontal joins (within a row): Hold two adjacent squares with right sides facing. Work 16 sc joins along the side stitches, plus 1 sc at each corner. Total: 18 sc per seam.
Vertical joins (between rows): Join full rows together along their width. At corner intersections where 4 squares meet, insert your hook through all 4 corner spaces and slip stitch to flatten the join.
Join the Bodice Panels
Bodice Back: Join 4 squares across for Row 1, then Row 2, then Row 3. Join rows vertically.
Left Front: Join 2 squares across for each of 3 rows. Join rows vertically.
Right Front: Same as left front.
Join the Skirt Panels
Skirt Front: Join 4 squares across for Rows 1 through 4. Then add Row 5 with 6 squares. The two extra squares (one on each side) create the hem flare by joining only partially to the row above.
Skirt Back: Mirror the front panel.
Assembling the Dress
Shoulder Seams
Lay the Bodice Back right side up. Place the Right Front Panel right side down on top, aligning the top row of the front with columns 3 and 4 of the back. Work JAYG sc joins along the shared edge. Total: 36 sc for the 2-square span.
Repeat for the Left Front Panel with columns 1 and 2 of the back.
Side Seams
Fold the bodice so front and back align at the sides. Join each side seam with JAYG sc. Total: 54 sc per bodice side seam.
Join the skirt side seams similarly. Total: 72 sc per skirt side seam. Leave the hem flare squares unjoined.
Attaching Skirt to Bodice
Align the top of the skirt panels with the bottom of the bodice panels. Work a slip stitch seam along the inside, inserting your hook through both layers alternately.
Waist Band
Switch to the F-5 hook and Color A.
Setup Round: With RS facing, join Color A at the left side seam. Ch 1. Working in BLO along the waist seam, work 1 sc into every sc stitch around. Approximately 128 sc. Do not join. Work back and forth in rows.
Rows 1 through 8: Sc in BLO across. Turn at each end. (128 sc per row)
Buttonhole Row: Sc across first 4 sc. Ch 4, skip 4 sc. Sc across remaining stitches.
Next Row: Sc across, working 4 sc into the ch-4 buttonhole space. (128 sc)
Fasten off and weave in ends.
Edgings
All edgings use Color B and the G-6 hook.
Neckline Edging
Join Color B at the right shoulder seam. Work sc evenly around the neckline, about 16 sc per square edge. At the center V point, work 3 sc into the corner. Approximately 80 to 88 sc.
Edging Round 2 (Picot Scallop): Ch 1. Work (1 sc, skip 1, 5 dc into next sc, skip 1, 1 sc) across. Repeat around. Sl st to join. Fasten off.
Armhole Edgings
Join Color B at the underarm. Work 1 sc into each border stitch around the opening. Approximately 64 sc.
Edging Round 2: Work Picot Scallop as for neckline. Fasten off.
Hem Edging
Join Color B at the right side seam. Work 1 sc into each border stitch around the entire hem. Approximately 160 sc.
Edging Round 2: Work Picot Scallop around. Fasten off.
Waist Band Edging
With Color B, work Picot-3 along both the top and bottom edges of the waist band. Work 3 sc into corners and 1 sc along each row end at the button opening.
Button Attachment
Using a sewing needle and thread matching Color B, sew the decorative button to the right side of the waist band. Position it about 1 inch from the right edge, centered vertically. Secure firmly with multiple passes.
Final Blocking
Fill a bathtub with cool water and submerge the entire dress. Gently press the water through without wringing. Roll in a dry towel to remove excess moisture. Lay flat on blocking mats, smoothing the skirt into an even A-line shape. Allow to dry completely.
Size Customization Tips
Each square adds or removes approximately 5.5 inches to any measurement. For US sizes 10/12, add one square to each side column in both bodice and skirt panels. For US sizes 2/4, remove one square per side column. Always recalculate your total square count and adjust the waist band accordingly.
Thank you so much for choosing this pattern for your next big project. I know 68 squares feels like a lot, but every single one brings you closer to a dress you’ll treasure forever.
If you make this navy and gold elegant granny square dress, I would absolutely love to see it. Tag me on Instagram or share a photo on Facebook. Seeing your finished projects genuinely makes my day.
Don’t forget to save this crochet pattern to your Pinterest boards so you can find it when you’re ready to start. And if you have any questions or just want to share your progress, drop a comment below. I’m always happy to help, and I love hearing from fellow makers working on their own versions of this beautiful dress.
