
I have been dreaming about designing the perfect granny square tote for ages. Something with that classic lace-like texture but structured enough to actually use every day. I wanted bold berry colors, a dimensional bottom border that would make people stop and stare, and handles sturdy enough to carry a full farmer’s market haul.
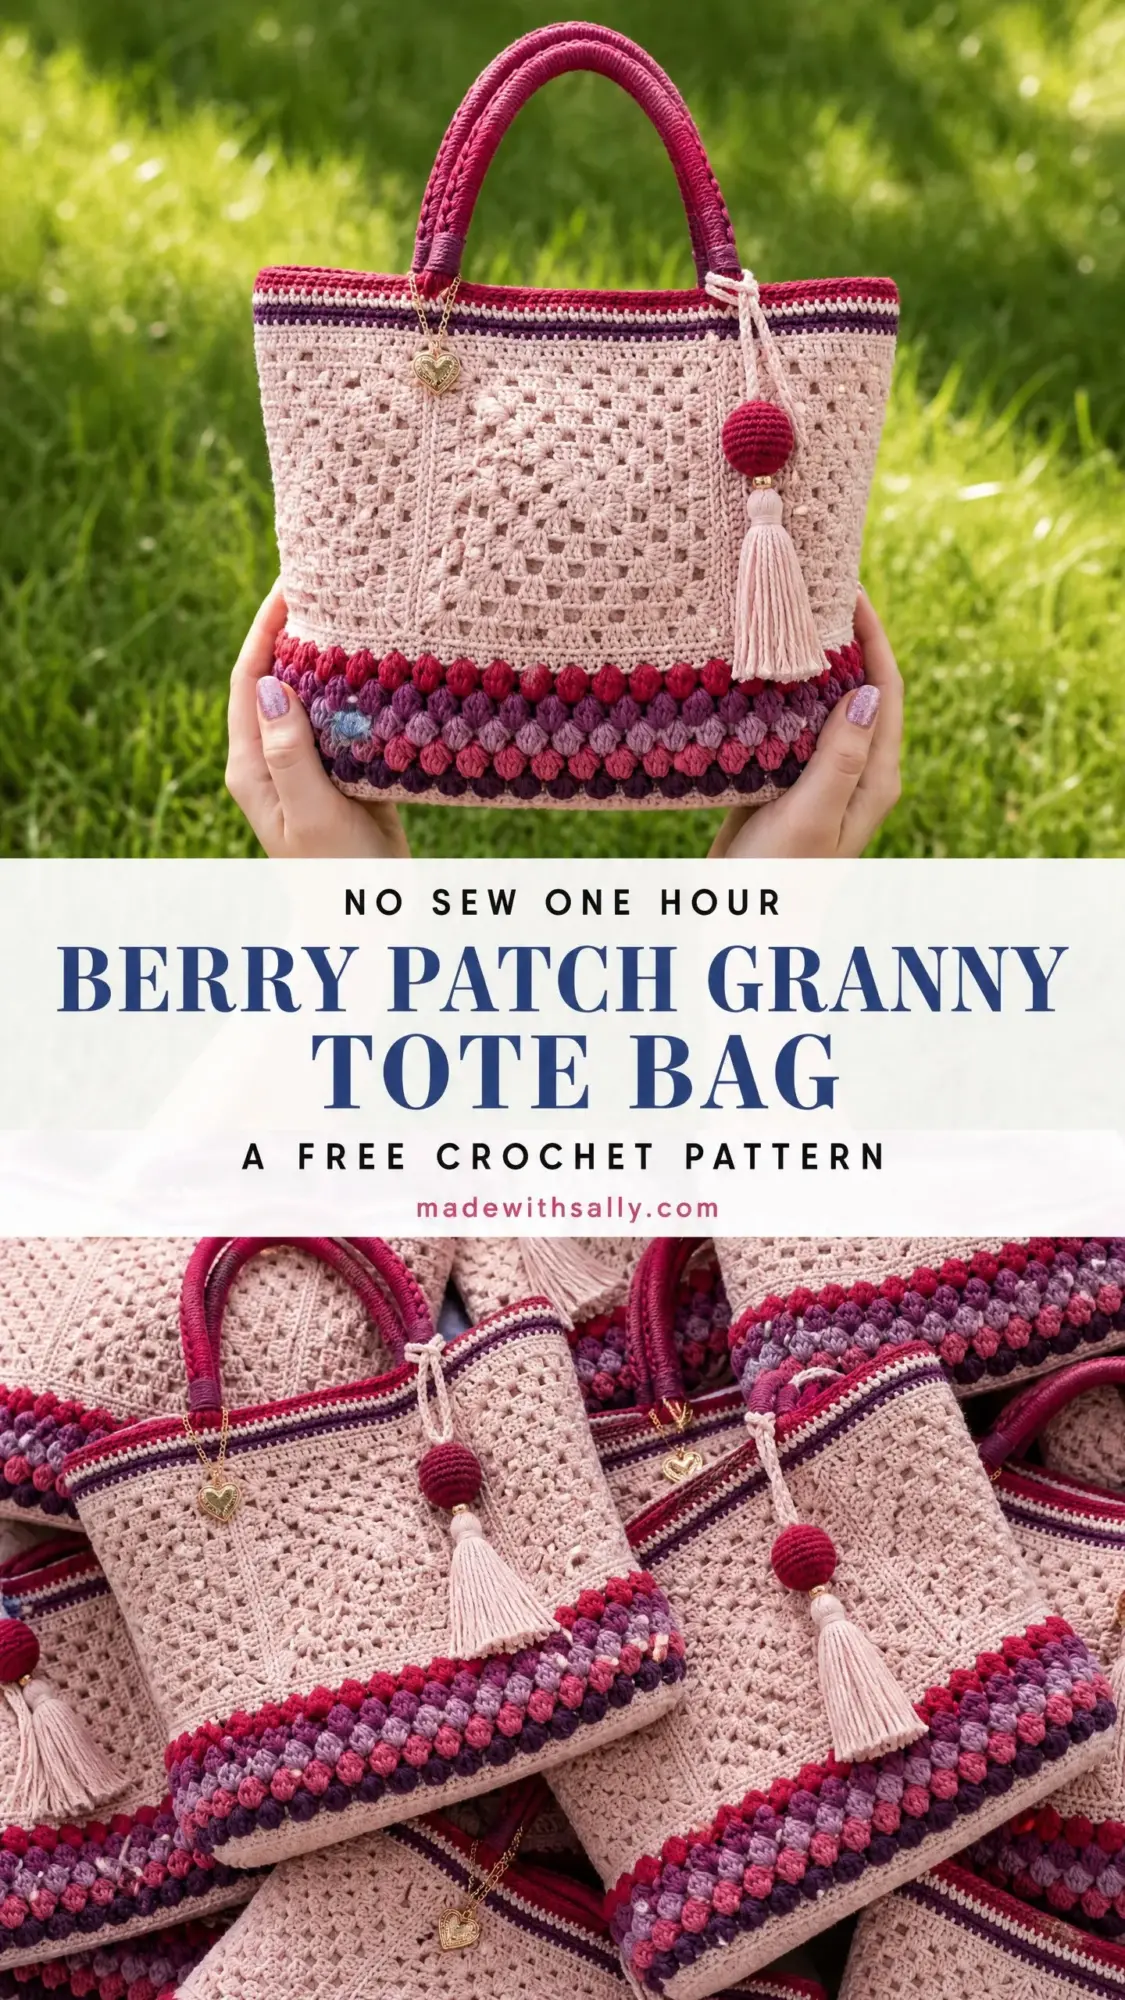
When I finally sat down to work out the details, I knew the bag needed three distinct zones. A blush pink granny square body for that timeless open-lattice look. A chunky puff stitch border in graduating berry shades for serious visual impact. And a crisp striped band at the top to tie everything together.
I am SO pleased with how this turned out. The finished bag is substantial, beautiful, and absolutely functional. Let me walk you through every single step.
Why You Will Love This Crochet Tote Bag Pattern
This bag hits that sweet spot between decorative and practical. The granny square construction creates a beautiful lattice texture that looks intricate but works up using basic stitches you already know. The puff stitch border at the bottom adds incredible dimension and showcases four gorgeous berry tones.
The finished tote measures approximately 14 inches wide, 12 inches tall (before handles), and 5 inches deep. That is plenty of room for books, craft supplies, groceries, or beach essentials. The flat rectangular base means it sits upright without flopping over.
Skill level: Intermediate. You should be comfortable with granny squares, working in the round, color changes, and basic seaming. Nothing here is difficult, but there are multiple techniques combined into one project.
Time estimate: About 18 to 24 hours for an experienced crocheter, spread across several sessions.
Materials You Will Need
Having everything ready before you start makes this project so much more enjoyable. Here is your complete supply list.
Yarn (all worsted weight cotton or cotton blend):
Recommended yarns: Lion Brand 24/7 Cotton works beautifully for this project. It is 100 percent mercerized cotton with excellent stitch definition and holds its shape well for bags. Try Rose for Yarn A, Cranberry for Yarn B, Magenta for Yarn C, Dusty Pink for Yarn D, Grape for Yarn E, and Ecru for Yarn F.
Hooks:
Notions:
Optional:
Gauge
Getting gauge right matters for a bag this size. With your G-6 / 4.0 mm hook and worsted weight cotton:
One granny square (4 rounds) = 4.5 inches x 4.5 inches / 11.5 cm x 11.5 cm blocked
16 single crochet (sc) x 18 rows = 4 inches x 4 inches / 10 cm x 10 cm
If your square comes out smaller than 4.5 inches, go up one hook size. If larger, go down one hook size. Always block your gauge square before measuring.
Abbreviations and Stitch Definitions
Let me break down every stitch abbreviation you will encounter. I define each one on first use throughout the pattern, but here is your quick reference.
Special Stitches
Puff Stitch (ps)
This stitch creates those gorgeous dimensional bubbles in the border. It looks fancy but is just a series of yarn overs pulled through together.
Step 1: Yarn over, insert hook into indicated stitch or space.
Step 2: Yarn over and pull up a loop to approximately 0.5 inch tall (the height of a half double crochet). You now have 3 loops on hook.
Step 3: Yarn over again, insert hook into the same stitch or space, yarn over and pull up another tall loop. You now have 5 loops on hook.
Step 4: Yarn over again, insert hook into the same stitch or space, yarn over and pull up another tall loop. You now have 7 loops on hook.
Step 5: Yarn over and draw through all 7 loops on hook.
Step 6: Chain 1 to close and secure the puff. This closing chain 1 does NOT count as a stitch.
The completed puff stitch counts as 1 stitch. Take your time with the first few. Once you get the rhythm, they work up quickly.
Pattern Instructions
Section 1: Granny Squares
You will make 24 granny squares total in Yarn A (blush pink). Each finished square measures 4.5 inches x 4.5 inches after blocking.
Square breakdown:
Making One Granny Square:
With Yarn A and G-6 / 4.0 mm hook:
Round 1: Magic ring. Ch 3 (counts as dc), 2 dc in ring, ch 2, [3 dc in ring, ch 2] 3 times, sl st to top of beg ch-3, pull ring closed. (12 dc, 4 ch-2 corner sp)
Round 2: Sl st into nearest ch-2 corner sp. Ch 3 (counts as dc), 2 dc in same sp, ch 1, 3 dc in same sp, ch 1, [(3 dc, ch 1, 3 dc) in next ch-2 corner sp, ch 1] 3 times, sl st to top of beg ch-3. (8 groups of 3 dc, 4 ch-1 corner sp, 4 ch-1 side sp)
Round 3: Sl st into nearest corner ch-1 sp. Ch 3, 2 dc in same sp, ch 1, 3 dc in same sp, [ch 1, 3 dc in next ch-1 sp, ch 1, (3 dc, ch 1, 3 dc) in next corner ch-1 sp] 3 times, ch 1, 3 dc in last ch-1 sp, ch 1, sl st to top of beg ch-3. (12 groups of 3 dc, 4 ch-1 corner sp, 8 ch-1 sp along sides)
Round 4 (seaming border): Sl st into corner ch-1 sp. Ch 1, sc in same sp, 2 more sc in same sp (3 sc total in corner), [sc in each of next 3 dc, sc in ch-1 sp, sc in each of next 3 dc, sc in ch-1 sp, sc in each of next 3 dc, sc in ch-1 sp, 3 sc in corner ch-1 sp] 3 times, sc in each of next 3 dc, sc in ch-1 sp, sc in each of next 3 dc, sc in ch-1 sp, sc in each of next 3 dc, sc in ch-1 sp, sl st to first sc. (72 sc)
Fasten off, leaving a 12-inch tail for seaming.
Make 24 squares total.
Section 2: Seaming the Bag Panels
Lay out your squares according to this arrangement:
Front panel layout (3 columns x 3 rows):
Back panel: Same arrangement with Squares 10 through 18.
Left side panel: Squares 19, 20, 21 stacked vertically.
Right side panel: Squares 22, 23, 24 stacked vertically.
Seaming within panels: Using Yarn A and your tapestry needle, hold two squares with wrong sides together. Insert the needle under both back loops of corresponding sc stitches, working along the edge. Pull snugly but not so tight that it puckers. Seam horizontal rows first, then join rows together.
Assembling the bag body:
1. Join front panel to left side panel along their shared vertical edge
2. Join front panel to right side panel along their shared vertical edge
3. Join back panel to right side panel along its left edge
4. Join back panel to left side panel along its right edge
5. Seam the bottom edges together to close the base
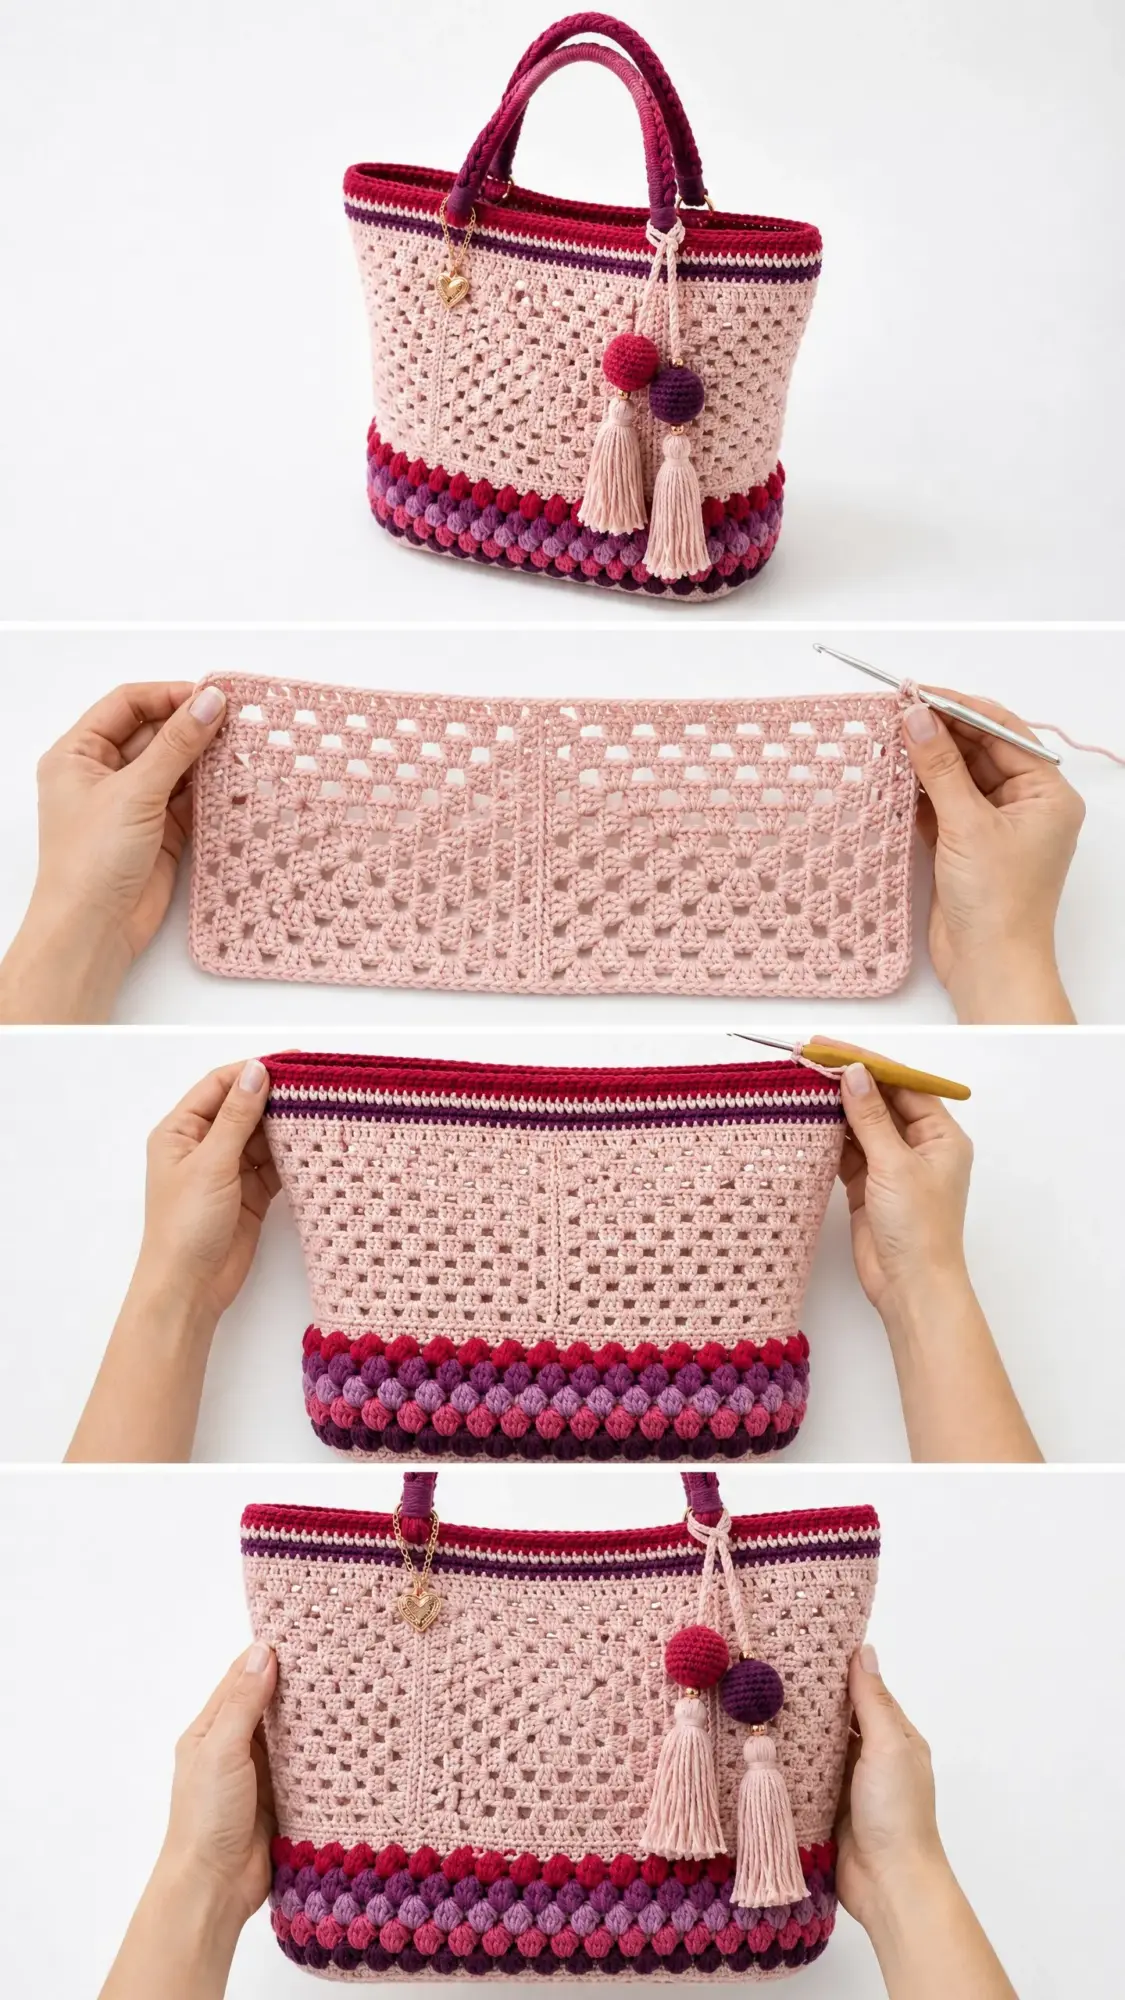
You now have a 3D tote shape, open at the top.
Section 3: Puff Stitch Border
This is where the magic happens. The border is worked in the round along the bottom exterior edge of the bag.
Join Yarn B (deep red) with sl st to any bottom corner st with RS facing.
Setup Round: With Yarn B and H-8 / 5.0 mm hook, ch 1. Work sc evenly around the entire bottom edge of the bag. Target stitch count: 152 sc. Work 38 sc along front bottom edge, 19 sc along right side bottom edge, 38 sc along back bottom edge, 19 sc along left side bottom edge. Pm at each of the 4 corners. Sl st to first sc to join. Do NOT turn. (152 sc)
Puff Border Round 1 (Yarn B, deep red): Sl st to first sc. Ch 2 (does not count as st). [Ps in next st, ch 1, sk 1 st] around, sl st to top of first ps to join. (76 ps, 76 ch-1 sp)
Puff Border Round 2 (Yarn C, magenta): Join Yarn C with sl st to any ch-1 sp of previous round. Ch 2. [Ps in ch-1 sp, ch 1] around. Sl st to top of first ps. (76 ps, 76 ch-1 sp)
Puff Border Round 3 (Yarn D, mauve): Join Yarn D with sl st to any ch-1 sp. Ch 2. [Ps in ch-1 sp, ch 1] around. Sl st to top of first ps. (76 ps, 76 ch-1 sp)
Puff Border Round 4 (Yarn E, deep purple): Join Yarn E with sl st to any ch-1 sp. Ch 2. [Ps in ch-1 sp, ch 1] around. Sl st to top of first ps. (76 ps, 76 ch-1 sp)
Fasten off all colors. Weave in ends.
Section 4: Top Edge Striped Band
Join Yarn B (deep red) with sl st to any top edge st with RS facing. Use G-6 / 4.0 mm hook.
Setup: Work sc evenly around the top edge. Target count: 152 sc, distributed as 38 sc along front, 19 sc along each side, 38 sc along back. Sl st to first sc to join. (152 sc)
Band Round 1 (Yarn B): Ch 1. Sc in each sc around. Sl st to first sc. (152 sc)
Band Round 2 (Yarn B): Ch 1. Sl st in each sc around. Sl st to first sl st. (152 sl st)
Band Round 3 (Yarn F, cream): Join Yarn F. Ch 1. Sc in each st around. Sl st to first sc. (152 sc)
Band Round 4 (Yarn F): Ch 1. Sl st in each sc around. Sl st to first sl st. (152 sl st)
Band Round 5 (Yarn E, purple): Join Yarn E. Ch 1. Sc in each st around. Sl st to first sc. (152 sc)
Band Round 6 (Yarn E): Ch 1. Sl st in each sc around. Sl st to first sl st. (152 sl st)
Band Round 7 (Yarn B): Join Yarn B. Ch 1. Sc in each st around. Sl st to first sc. (152 sc)
Band Round 8 (Yarn B): Ch 1. Sl st in each sc around. Sl st to first sl st. (152 sl st)
Fasten off. Weave in ends.
Section 5: Handles
Make 4 identical cords (2 per handle).
With Yarn B (deep red) or Yarn C (magenta) and H-8 / 5.0 mm hook:
Foundation: Ch 5.
Row 1: Sc in 2nd ch from hook, sc in each ch across. Turn. (4 sc)
Row 2: Ch 1. Sc in each sc across. Turn. (4 sc)
Repeat Row 2 until cord measures 26 inches. Fasten off.
Make 2 cords in Yarn B and 2 cords in Yarn C.
Braiding: Take 1 Yarn B cord and 1 Yarn C cord. Align them at one end and secure with a stitch marker. Braid or twist the two cords around each other tightly. Secure the other end.
Attaching handles: Position handles on the bag with each end placed approximately 3.5 inches from the side edges. Fold the last 1.5 inches of each handle end down against the inside of the top band. Use Yarn B and tapestry needle to whipstitch securely through the top band stitches. Stitch back and forth at least 4 times for strength.
Section 6: Embellishments
Pom-Pom 1 (Deep Red): Cut a 3-inch piece of cardboard. Wrap Yarn B around it 40 times. Slide off, tie tightly in the center. Cut all loops. Trim into a 1-inch diameter pom-pom.
Pom-Pom 2 (Deep Purple): Repeat using Yarn E.
Tassel (Blush): Cut 30 lengths of Yarn A, each 8 inches long. Fold in half. Tie tightly around the folded tops. Thread through a 12 mm bead and secure. Trim ends to 3.5 inches below the bead.
Assembling the charm: Thread thin gold chain through both pom-poms, spacing them about 0.75 inch apart. Add the tassel below. Attach the gold heart pendant with a jump ring. Secure everything to the right handle base.
Tips for Success
Blocking matters: Lightly steam or wet block your granny squares before seaming. They will be more uniform and the seaming will go much smoother.
Tension for structure: Keep your tension consistent and on the firmer side. A floppy bag is disappointing. Cotton yarn helps because it does not stretch like acrylic.
Seaming neatly: Take your time with the seams. Neat, even seaming makes the difference between a homemade-looking bag and a professional one.
Reinforcing handles: These handles carry weight. Do not skimp on the whipstitching. A few extra minutes here prevents heartbreak later when your bag is full of produce.
You Did It!
This Berry Patch Granny Tote Bag pattern brings together so many beautiful techniques in one stunning project. The granny square lattice, the dimensional puff stitches, the crisp striped band, those satisfying braided handles. Every element works together to create something truly special.
Thank you so much for making this pattern with me. I would absolutely love to see your finished bags! Share your photos on Instagram or Facebook and tag me so I can admire your work.
If this pattern is calling to you for later, save it to your Pinterest boards so you can find it when you are ready. And please drop a comment below if you make one. I love hearing which color combinations you choose!
