
I’ve been looking for the perfect romantic summer dress pattern for ages, and this one has become my absolute favourite. The Sage Lily Tiered Dress combines everything I love about crochet garments: a fitted bodice that flatters, delicate lace that catches the light, and flowing tiers that move beautifully when you walk.
Get the Ad-Free PDF Pattern
You can find the free pattern below, or you can purchase the ad-free printable PDF from my shop.
Get the Printable PDF →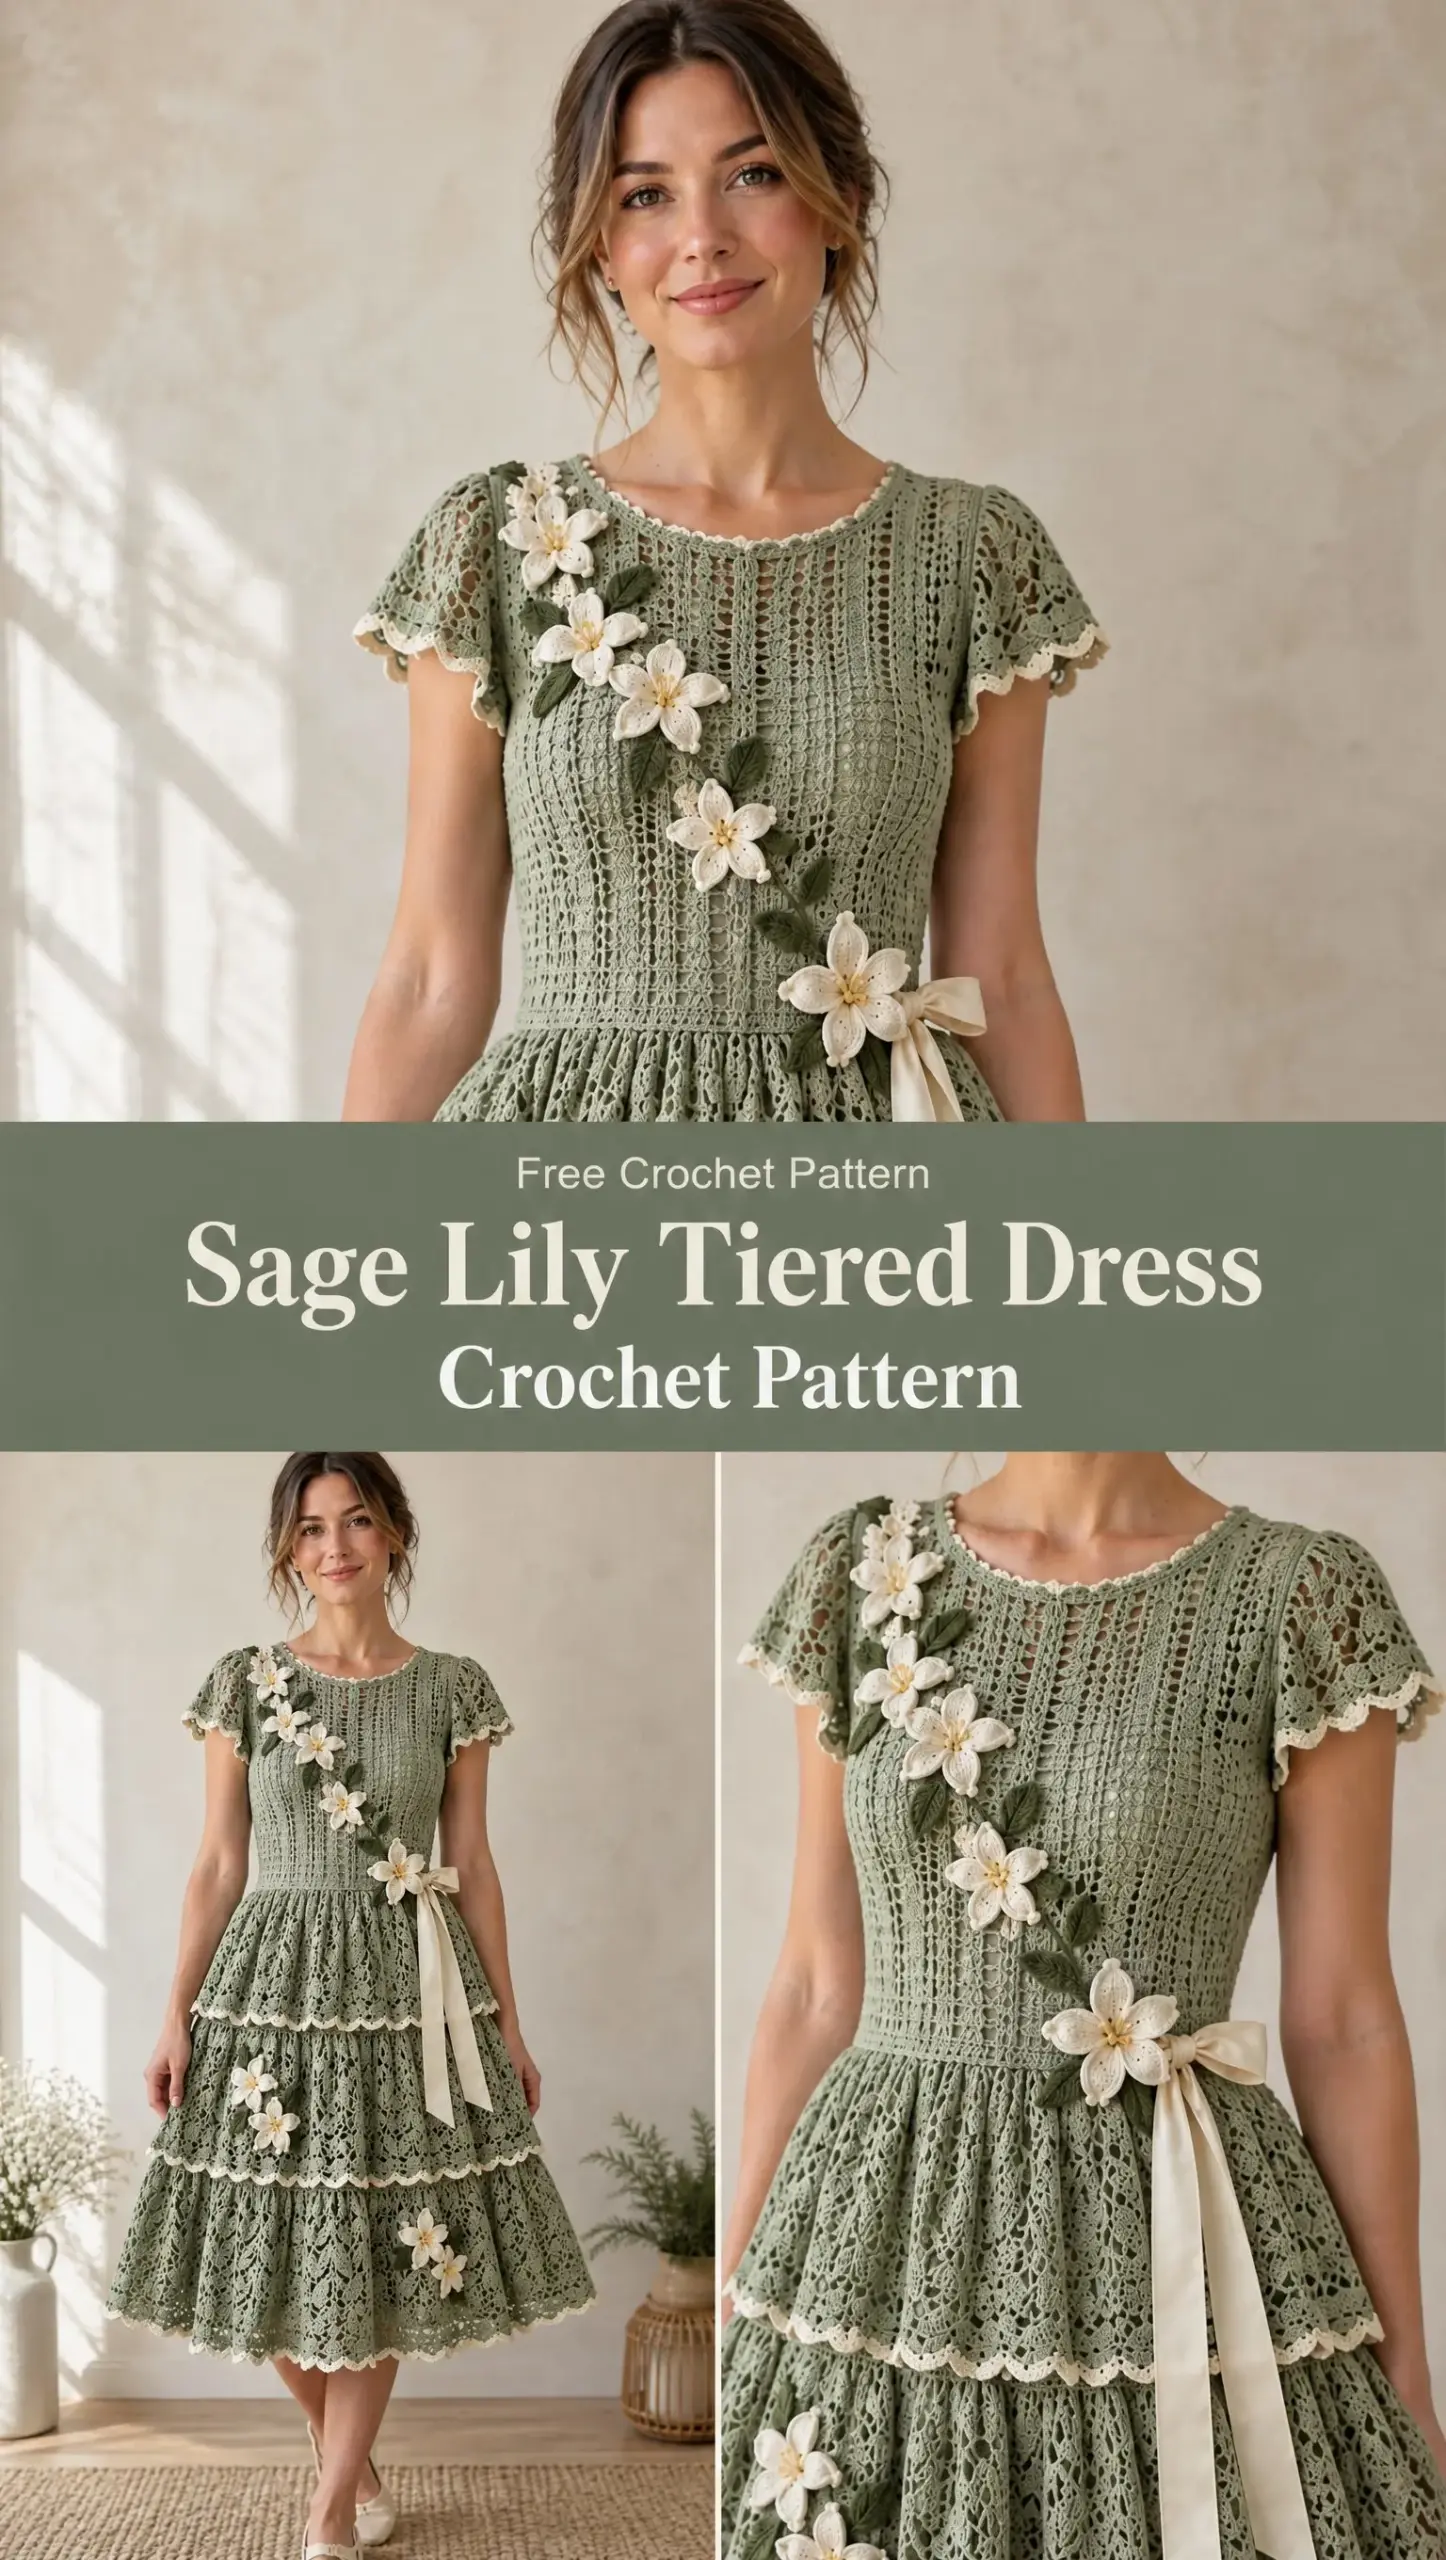
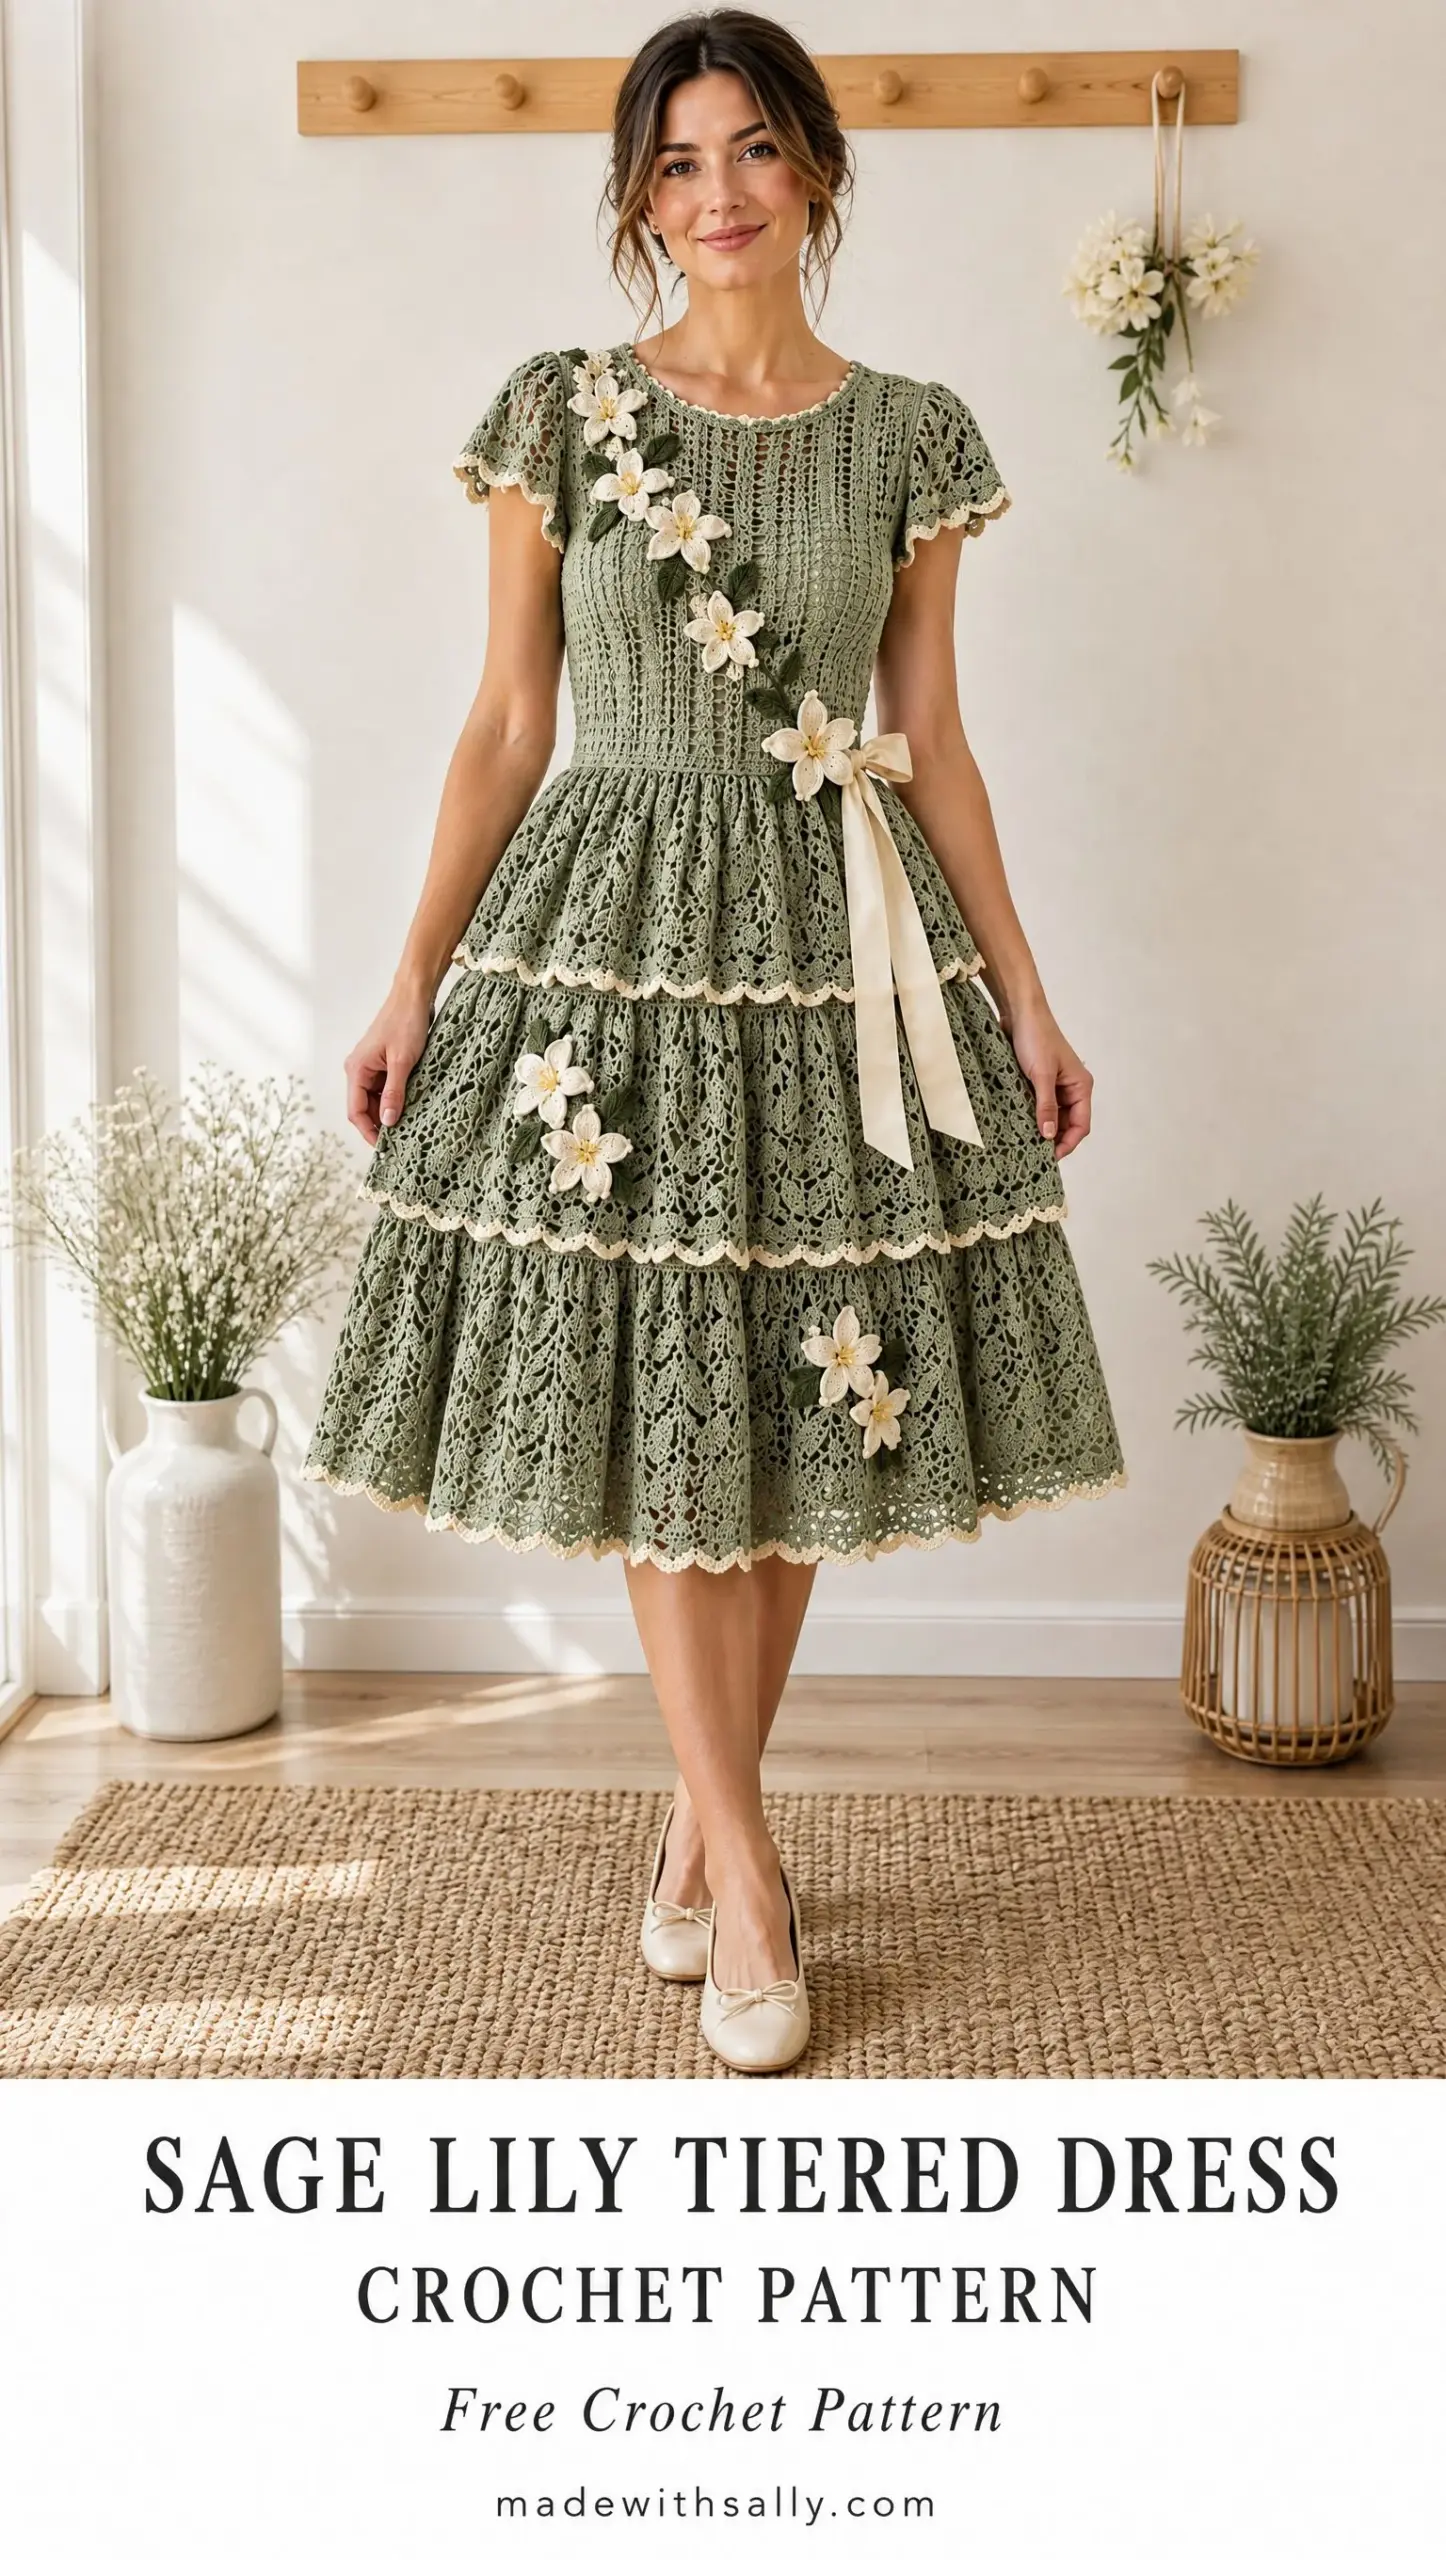
This pattern creates a stunning sage green dress with lily-inspired lace panels, flutter sleeves, and three gorgeous tiered skirt sections. It’s the kind of piece that looks like it belongs in a garden party or a bohemian wedding.
Whether you’re making this for yourself or as an incredibly special gift, I’ve put together everything you need to bring this dress to life. Let’s work through it together.
About This Crochet Dress Pattern
This romantic adult crochet dress features a fitted sage green bodice, delicate lily-inspired lace panels, flutter sleeves, and three flowing tiered skirt sections. The design uses lightweight yarn to create an airy but wearable garment that’s perfect for warm weather occasions.
The dress is constructed from the top down. You’ll start with the bodice, adding shaping at the bust and waist for a flattering fit. Then the skirt attaches at the waist and expands into three beautiful lace tiers. The sleeves and edging come last, giving you a polished finish.
Skill Level: Intermediate
Skills used: foundation chains, increases and decreases, working in the round, lace stitch repeats, shell stitches, joining panels, and garment finishing.
If you’ve made a few garments before and feel comfortable with lace stitches, you’ll do wonderfully with this pattern. The techniques build on each other, so by the time you reach the third tier, you’ll feel like a pro.
Finished Size
This pattern covers Women’s XS through XL and is adjustable.
Approximate finished bust: 34 to 46 inches (86 to 117 cm)
Length: 34 to 38 inches (86 to 97 cm), adjustable by adding or removing skirt repeats
The beauty of this design is how customizable it is. You can easily adjust the length to suit your preference, whether you want a midi length or something that hits just above the knee.
Materials Needed
Gather these supplies before you begin:
A quick note on yarn choice: mercerized cotton will give you the most polished, slightly shiny finish that photographs beautifully. Bamboo blends drape like a dream and feel incredibly soft against your skin. Either will create a gorgeous dress, so choose based on the look and feel you prefer.
Gauge
20 double crochet (dc) x 10 rows = 4 x 4 inches (10 x 10 cm) after blocking
Please, please take the time to make a gauge swatch. I know it feels tedious when you’re excited to start, but with a garment this fitted, gauge matters enormously. Block your swatch before measuring since cotton and bamboo yarns often relax quite a bit after blocking.
If your swatch is too large, try going down a hook size. If it’s too small, go up a hook size.
Abbreviations
Let me walk you through all the stitches you’ll need:
ch: chain – Yarn over, pull through loop on hook. This is your foundation.
sc: single crochet – Insert hook into stitch, yarn over and pull up a loop (2 loops on hook), yarn over and pull through both loops.
hdc: half double crochet – Yarn over, insert hook into stitch, yarn over and pull up a loop (3 loops on hook), yarn over and pull through all 3 loops.
dc: double crochet – Yarn over, insert hook into stitch, yarn over and pull up a loop (3 loops on hook), yarn over and pull through 2 loops, yarn over and pull through remaining 2 loops.
tr: treble crochet – Yarn over twice, insert hook into stitch, yarn over and pull up a loop (4 loops on hook), yarn over and pull through 2 loops three times.
sl st: slip stitch – Insert hook into stitch, yarn over and pull through both the stitch and the loop on your hook in one motion.
sk: skip – Pass over the indicated stitch without working into it.
sp: space – The gap created by chain stitches in a previous row.
rep: repeat – Work the indicated sequence again.
Bodice Instructions
The bodice forms the foundation of your dress. Take your time here since proper fit at this stage means everything will flow beautifully below.
Foundation
Chain 120 (adjust to your bust measurement), join with slip stitch to form a ring without twisting.
Important: Before joining, lay your chain flat and make sure it’s not twisted. A twisted foundation will create a Möbius strip instead of a tube, and you’d have to start over.
Round 1
Chain 2, work double crochet around, join with slip stitch.
Rounds 2 through 12
Continue working double crochet rounds. Add waist shaping by decreasing 4 stitches evenly every 3 rounds until the bodice fits comfortably.
To decrease evenly, divide your total stitch count by 4 to find where to place each decrease. A dc2tog (double crochet two together) works well here: yarn over, insert hook into next stitch and pull up a loop, yarn over and pull through 2 loops, yarn over, insert hook into the next stitch and pull up a loop, yarn over and pull through 2 loops, yarn over and pull through all 3 remaining loops.
Lily Lace Panel
This is where the dress gets its romantic character. The lily lace panel creates those beautiful openwork sections you see running down the bodice.
Work a repeating motif:
Row 1: Chain 3, double crochet, chain 2, skip 2 stitches, double crochet across.
Row 2: Work shell stitches into each chain 2 space.
A shell stitch is simply multiple stitches worked into the same stitch or space. For this pattern, you’ll typically work 5 double crochet into one space to create the shell’s fan shape.
Repeat until the panel reaches your desired height.
Flutter Sleeves
The flutter sleeves add such a feminine touch to this dress. They’re worked directly onto the armhole openings.
Join yarn at armholes.
Round 1: Work single crochet evenly around armhole.
Rounds 2 through 8: Alternate shell stitches and chain spaces to create flutter sleeves.
Finish with a picot edge. A picot is a tiny decorative loop: chain 3, slip stitch into the first chain, then continue with your next stitch. This creates those delicate points along the sleeve edge.
The flutter effect comes from the shells, which create more fabric than a straight edge, causing the natural ruffling you see in the finished piece.
Skirt Tier 1
Now for the fun part! The tiered skirt creates that gorgeous flowing silhouette.
Attach yarn at waist.
Round 1: Increase evenly around by working 2 double crochet into every fourth stitch.
This increase round is crucial. It gives the skirt the extra width it needs to flow away from your body rather than clinging.
Rounds 2 through 12: Work fan lace as follows:
5 double crochet in one stitch, skip 2 stitches, single crochet, skip 2 stitches, repeat around.
This creates the beautiful scalloped lace pattern visible in the finished dress. The fans stack on top of each other as you work subsequent rounds, creating depth and movement.
Skirt Tier 2
Attach yarn to the bottom edge of tier 1.
Increase every fan section by adding extra double crochet stitches. Where you previously worked 5 dc fans, try working 6 or 7 dc to widen each fan slightly.
Continue lace repeats for 10 to 14 rounds.
This tier should be visibly wider than the first, creating that romantic tiered effect. If you’re between sizes or want extra fullness, lean toward 14 rounds.
Skirt Tier 3
Repeat the tier construction from Tier 2.
Make the final tier slightly wider with additional fan repeats for a flowing silhouette. You can add an extra double crochet to each fan, or add an extra repeat or two around the circumference.
This bottom tier should have the most volume since it creates that beautiful swish when you move.
Lily Flower Accent Border
These sweet little lily motifs are the finishing touch that makes this dress truly special.
Create small flat lily motifs:
Center: Work a magic ring with 8 single crochet. Pull the ring tight.
Petals: Work double crochet clusters around the center.
A cluster is similar to a decrease but creates a decorative bump. For each petal, yarn over, insert hook and pull up a loop, yarn over and pull through 2 loops, then repeat this in the same stitch 2 or 3 more times before yarning over and pulling through all loops on hook.
Sew or crochet motifs along the waistline and lower border. The reference image shows the flowers cascading diagonally across the bodice as well, which adds beautiful visual interest.
Finishing Your Sage Lily Tiered Dress
You’re almost there! These final steps make all the difference.
Weave in all ends. Take your time here. Use a yarn needle to weave each tail through several stitches on the wrong side, then double back in the opposite direction. Trim close to the fabric.
Wet block the dress carefully to open lace stitches. Fill a basin with cool water and a tiny bit of wool wash or gentle detergent. Submerge your dress and let it soak for about 20 minutes. Gently squeeze out excess water (never wring!) and roll in a clean towel to remove more moisture.
Allow to dry flat. Pin out the skirt tiers to open up the lace pattern and even out the hem. Pin the bodice to your measurements. This step transforms your dress from "nice handmade item" to "wow, did you really make that?"
Add lining if desired for opacity. Cotton and bamboo lace can be quite sheer. A simple slip dress underneath works beautifully, or you can sew in a lining if you’re comfortable with basic sewing.
Care Instructions
Your beautiful new dress deserves gentle care to keep it looking gorgeous for years.
Avoid hanging your dress for storage since the weight of the skirt can stretch out the bodice over time.
Troubleshooting Tips
If the skirt feels too tight: Add extra increase rounds before beginning the next tier. You can always add more width, but you can’t easily take it away.
If lace openings are too large: Reduce hook size for the lace sections only. This creates tighter stitches while maintaining the same stitch count.
Always block before final fitting. I cannot stress this enough. Cotton and bamboo yarns can change dramatically with blocking, and you won’t know the true fit until after this step.
Pattern License
This pattern is for personal use only. Do not resell, redistribute, or reproduce the pattern.
Finished handmade items may be sold in small quantities with designer credit. If you’re selling pieces made from this pattern, a simple "Pattern by [designer name]" in your listing is the respectful way to credit the original design work.
I really hope you love making this dress as much as I loved putting together this pattern breakdown. It’s a project that rewards your time and attention with something truly wearable and beautiful. If you make one, please save this pattern to your Pinterest boards so you can find it again, and I would absolutely love to see your finished dress in the comments below!
Want a Quick & Easy Printable Version?
Get a clean, beautifully formatted PDF of this pattern — easy to follow step by step, ready to print or save on any device. No scrolling, no distractions, just the pattern.
Get the Printable PDF →